This guide will try to help you with setting up Plastic SCM and start using it within our team's guidelines.
First of all, please create an account at https://www.plasticscm.com/account/register with your company email (@twentythree.com.tr).
After creating and verifying your account, ask your Plastic SCM administrator for an invite to your team's organization by providing your email.
When your account is ready, you can download Plastic SCM Client from https://www.plasticscm.com/download .
Run the installer.
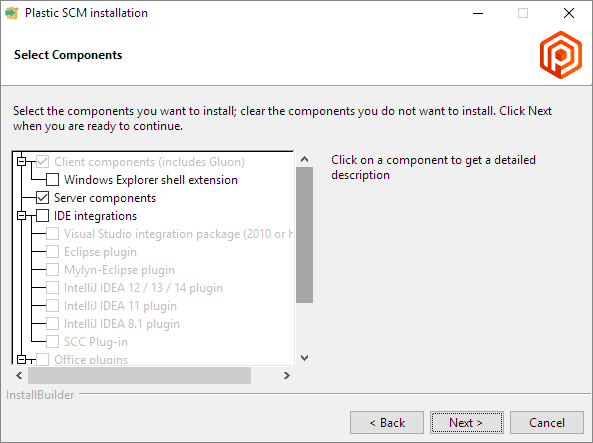
In component selection screen, you can unselect Server components. For integrations, you can select your IDEs and Office softwares as you wish. It is recommended to leave IntelliJ integrations unchecked, since they seem to affect your IDE's performance significantly still as of 16/04/21
After you are done installing, the first time you launch Plastic SCM, Plastic's Client Configuration Wizard will run. Login with your email and password. After logging in, you are asked to select an organization. If your administrator successfully added you to your team's organization, you should see your organization in this list. Select it and click Join.
Client Configuration Wizard will as for if you want to use Gluon or classic version. We will first run classic version so we can Gluon is a simplified version of Plastic SCM client for non-technical folks (those artsy types) in your team. Pick your poison. It's not permanent, you can change versions whenever you like. Both versions can be found in Plastic SCM installation folder.
After selecting your version of Plastic client, Configuration Wizard will ask you for the repository you want to create a workspace out of. Repository list should be already populated with your team's projects. Select the one you want to start working on. You can name your workspace as you like, but please try to avoid spaces and stick to English letters as good practice. While selecting workspace path on disk, be sure to give a path for all workspace files to be stored. For example, in the following image, if my path was e:\Repos, Plastic will not create a separate folder named WorkspaceName and put files in it, but it will put all files under e:\Repos folder.

Classic Client Setup
Jira Integration (Classic Client Only)
Go to Preferences > Issue trackers in your classic client. Select "Bind to this issue tracking system" and select "Atlassian JIRA" from the dropdown menu to the right.
Apply binding to setting should be set to "Repositories". This will allow you to list Jira issues for all your repositories, since Jira project issues might be about more than one repository and you might want to have access to them from all repositories.
Host should be https://ORGANIZATIONNAME.atlassian.net as it can be seen in the two images below.


Username is your Jira account email address.
Password is NOT your Jira password though. You will need an API token as password. Go to Atlassian account settings, which can be accessed from the settings menu on upper right corner of your Jira page. In account settings, go to Security menu from left, and click "Create and manage API tokens" under API tokens section. You can create your token from the blue "Create API token" button on top. Give it a label of your choice. After creating the token, click the Eye icon on the right to uncover it and copy/paste it to Password field in Plastic SCM preferences.
Branch prefix should be asked to your team lead. It will be used to name every branch you create for a task, feature or bug fix. It should be in line with your team's branch naming conventions.
Project Key is the one in paranthesis next to your project name in Jira projects list as it can be seen in the example below.

"Resolved issue states" field should be set to your completed tasks column name. By default it should stay "Done" unless you are using a custom column name for completed tasks in Jira.
"Issue types" field is for the type of issues you want to get from your Jira. By default it should have "Task" and "Bug", you can include other issue types by just typing their names separated by commas.
There should be a "Test connection" button in this panel, you can check if you were able to set Jira integration successfully by testing your connection. If you are getting an error, please check every step of Jira Integration section again. If you are still getting an error after checking, contact your team lead about the problem.
Gluon Setup