A repository for the Aegis, a 7" Raspberry Pi CM4 handheld device.
NOTE: This is still a work in progress. The design has been finalized but I'm still working on the instructions, therefore there might be steps that are missing at this moment.
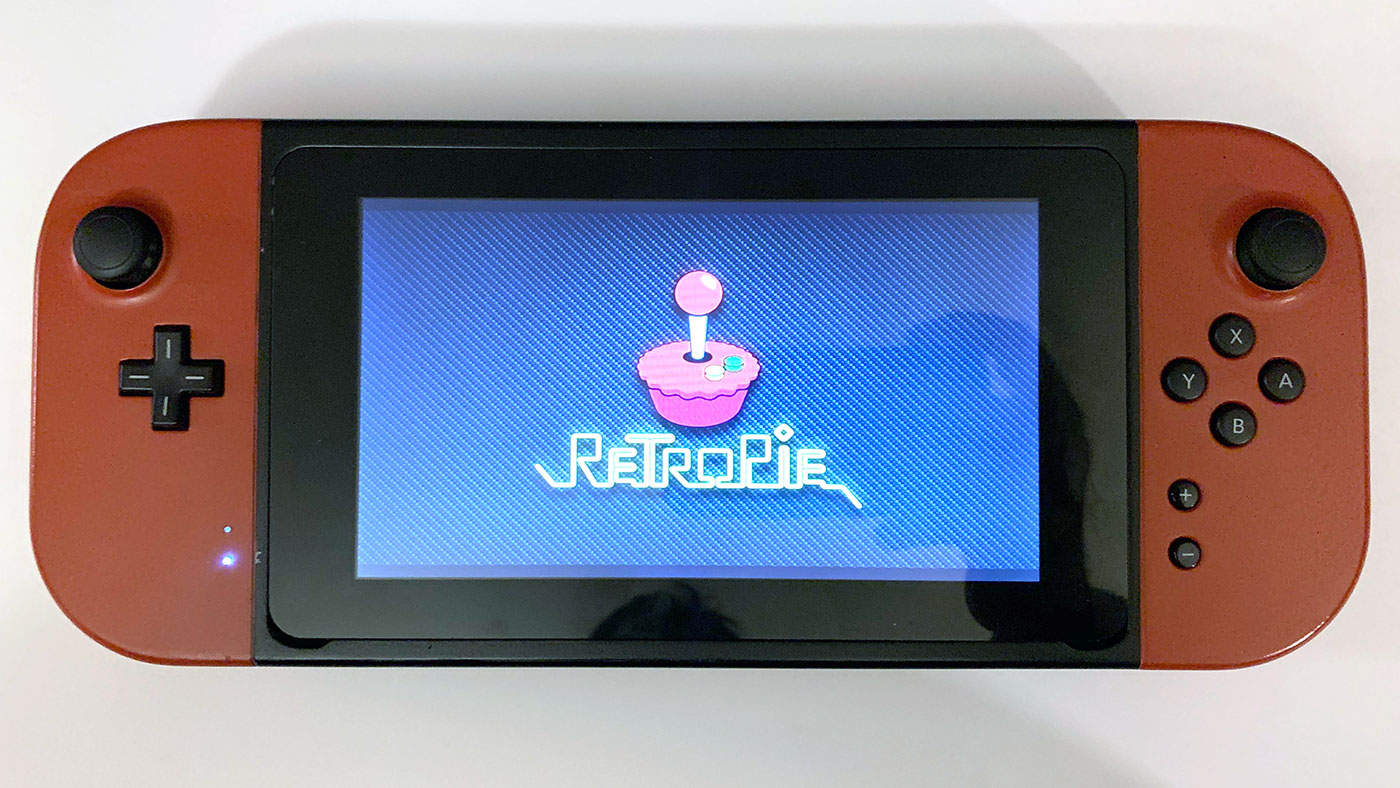
The Aegis is a DIY handheld that uses a 3D printed case with a Raspberry Pi CM4 and the official Raspberry Pi 7" screen. The official Raspberry Pi screen was chosen because it uses the DSI port on the Raspberry Pi and the CM4 could fit on either side of the display board. While a Raspberry Pi 4 might have fit inside the case, that was eventually designed, a custom carrier board was used to place the ports in the desired locations. To facilitate the controller portion of the device, the Wii U buttons and joysticks were used. This made it easy to use the button sub-assemblies so that the same tactile feel of the buttons could be maintained. The 3D printed case was based on the Wii U Gamepad but still designed from the ground up to fit the 7" screen and the custom circuit board. Finally, the whole thing was assembled with speakers and rumble motors to complete the handheld.
To build the handheld you will need the items listed as required in the Bill of Materials along with the following tools:
Reflow Station or Reflow Oven
Solding Iron
Solder Paste
Tweezers
Small Philips Screw Driver
Small Flathead Screw Driver
Super Glue (preferrably CA glue with Accelerator)
There are items in the Bill of Materials that are listed as optional (such as the Wifi chip). These items are not required to get a working device but can be used if desired. At this time I will not provide directions on how to use the optional components so use at your discretion.
The custom circuit boards are provided as eagle files in this repository. This includes the schematic, board layout, and the gerber files.
To get the boards printed, a manufacturing facility is required. The website jlcpcb.com was used to print the 2 circuit board prototypes for the design. The larger of the two boards uses 4 layers, and the smaller one uses only 2 layers. It is recommended to also get the stencils with the boards so that applying the solder paste becomes much easier.
Once the boards have been received you will need to assemble the circuitry on the boards. This is done by getting all of the components provided in the bill of materials in the "PCB Components" sheet. Each item has a provided Link to where the item can be acquired along with the price at the time of the assembly of the prototype. After acquiring all of the components, use the stencil to apply solder paste to the circuit boards and then use tweezers to place each component. A reflow oven or reflow station should then be used to melt the solder paste and adhere the components. Lastly, any through hole components were then added on the using a soldering iron. While anyone who has experience with circuit boards will have their own method for assembling these boards I used the following steps and it is what I recommend for anyone without experience and a reflow oven (but a reflow station is required):
- Using the stencil, put solder paste on the larger of the two boards on the side with a majority of the components
- Place all of the surface mount components on that side of the board
- Use a reflow station and heat the underside of the board until the solder paste on the top side melts to adhere the components. A tool to prop up the PCB comes in handy here. In my opinion this part is essential as some of the components are plastic and the hot air coming out of a reflow station can melt them.
- Use a soldering iron to clean up an connections that didn't connect completely (You can watch youtube videos on how to do this, just search for solding iron and surface mount components)
- Flip the board over and redo steps 1-4 for the underside of the board. Since these components are larger I just used the a soldering iron for all of the components, but the same procedure with the reflow station can be used. Just be careful with the hot air hitting components you have already put down, as they can fall off if the solder paste melts again.
- Perform 1-5 for the second board and the few surface mount components that are on that board
- Add all of the through hole items to both boards with a soldering iron (again youtube is your friend)
The files provided here and on Thingiverse are STL files for the case. They are printed in sections so that a printer with a standard bed size of 220mm x 220mm can be used print the case (I also provided the pieces combined for larger printers). Once they are printed they will have to be cleaned up and then glued together. Depending on which angle you choose to print the parts the cleanup step could be more or less cumbersome for the remove of support and getting good glue joints. I choose to print everything with flat surfaces on the bed to keep the post processing steps as easy as possible.
Once everything is glued together then no post processing is technically required to assemble the device. However, I chose to use filler, sand paper, and paint to get a really clean looking finish. The level of detail you desire on your handheld will be up to you based on how much effort you want to devote. Refer to youtube for how to sand and paint a 3D printed piece. However, try to keep the inside of the device as paint free as possible as the internal structure is already at the correct dimensions for the internal components.
Thingiverse link: https://www.thingiverse.com/thing:4789405
Once the case and the PCB have been built and are ready to go the handheld can be assembled.
TODO: step by step instructions for assembling the handheld
TODO: step by step on loading the teensy with the controller code
The carrier board was designed with the option of either using the CM4 lite or the CM4 with onboard memory. If the lite is used then a micro SD card is required. Follow the instructions on the official Raspberry Pi website or the RetroPie website to get the desired OS installed on the micro SD card. If the lite is not used then the internal memory can be loaded by removing the panel on the back of the handheld held and flipping the switch to the "ON" position. You can then use the micro USB port to load the CM4. Please refer to the official Raspberry Pi website on these steps. Once the OS is loaded then unplug the cable and flip the switch back to the off position.
Regardless of which CM4 you use and which method is used to load the OS, you will need to add the following lines to the /boot/config.txt file. These are also listed in the /Config/boot/config.txt file in this repository:
dtoverlay=dwc2,dr_mode=host
gpu_mem_256=128
gpu_mem_512=256
gpu_mem_1024=256
force_turbo=1
h264_freq=333
The lines above will optimize the graphics for Moonlight (if you choose to use it to stream PC games) and will enable USB 2.0 on the device to get the Teensy and external USB ports working.
For the first boot you will need to plug in a HDMI cord into the HDMI mini port. This is required since the screen won't work yet. Once it boots you need to connect to Wifi or Ethernet through whatever OS you have installed and run the following commands (also listed in the Config folder):
sudo apt install python3-gpiozero
sudo apt install python3-smbus
sudo wget https://goo.gl/iiVxuA -O /boot/dt-blob.bin
These will install required packages for a system monitor script and will also install the dt-blob.bin file to get the screen working. Once this is complete reboot the handheld and unplug the HDMI cord. The device will automatically switch to the screen on the reboot.
After the first boot and subsequent reboot you can either use git to download the items from the Config folder in this repository or you can copy the files to a USB stick and load them through the USB ports. Once on your Raspberry Pi, navigate to wherever you have loaded the files and run the setup.sh script as follows:
sudo bash ./setup.sh
This script will install files onto your Raspberry Pi to handle a series of things including:
Provide a startup script to detect when the HDMI cord is plugged in and switch to that output
Enable the buttons on the device to work
Enable sound through the speakers
Generating an overlay on the screen to give battery life, wifi status, bluetooth status, etc...
Provide a safe shut down proceedure for when the power button is pressed
Once the setup script is run the files you downloaded may be deleted.
At this point the device should be fully up and running on whatever OS you decided to use. I suggest you start playing games and have fun :)
Images of the prototype are included if you want to see what a final version can look like and here is a list of youtube links for demoes on the device in operation:
Raspberry Pi CM4 Handheld - PC Games Demo https://youtu.be/qqAcT7MvEfQ
Raspberry Pi CM4 Handheld - Pixel Desktop Logout https://youtu.be/YUHz1qglbvk
Raspberry Pi CM4 Handheld - Touchscreen Demo https://youtu.be/fQMbkvToMkI
Raspberry Pi CM4 Handheld - Youtube Video Showing Sound Quality https://youtu.be/o1zs3FDNwGw
Raspberry Pi CM4 Handheld - Donkey Kong Country 2 https://youtu.be/sit6ItH9wHg
Raspberry Pi CM4 Handheld - Prototype Test https://youtu.be/XAPKUmwa3sU
To get the script and overlay down I took parts of the following work and adapted it to what I needed. But these projects deserve most of the credit for what they already did.
GBZ_Overlay https://github.com/d-rez/gbz_overlay
Pngview https://github.com/AndrewFromMelbourne/raspidmx/tree/master/pngview
Safe shutdown script https://github.com/crcerror/ES-generic-shutdown/blob/master/multi_switch.sh