Eclipse demo project with the orchestration engine Apache ODE and WS-BPEL.
- Windows 10 x64 Education
- Eclipse Java EE IDE for Web Developers
- Neon.3 Release (4.6.3)
- Addon: BPEL Designer 1.0.5
- Java
- jdk1.8.0
- jre1.8.0
- Apache Tomcat 9.0.13
- Apache ODE 1.3.6
I have tried several times to install it and this is the only method that has worked for me.
- Download Java 1.8
- Add Java to environment variables
- Windows > Search > Edit environmental variables for your account
- System variables > New
JAVA_HOME: C:\Program Files\Java\jdk1.8.0_xJAVA_JRE: C:\Program Files\Java\jre1.8.0_x
- Download Eclipse Neon and perform a fresh installation.
- In Eclipse, go to Help > Install new softwre > Add...
Name: BPEL DesignerLocation: http://download.eclipse.org/bpel/site/1.0.5/
- OK > Accept licenses > Install and restart Eclipse
- Download Tomcat 9
- Go to https://tomcat.apache.org/download-90.cgi
- Select 9.0.13 > Binary distribution > Core > 64-bit Windows.zip
- Unzip on C:\ and rename to tomcat9 so you have
C:\tomcat9 - Install the service
- Move to
C:\tomcat9\bin - Execute
.\service.bat install
- Move to
- Change the port to be 9090
- Edit the file
C:\tomcat9\conf\server.xmland change the line<Connector port="8080"...to be<Connector port="9090"...
- Edit the file
- Download Apache ODE 1.3.6 from its website, unzip and get the
ode.warfile. You can remove the rest of the files.- Alternatively, you can download that file directly from this repository.
- Move the file to the webapps/ Tomcat directory,
C:\tomcat9\webapps. - Launch Tomcat
- Move to
C:\tomcat9\bin - Execute
.\startup.bat
- Move to
- A file called
odewill be created onC:\tomcat9\webapps\ode - Close the tomcat console
- On Eclipse, go to Window > Preferences > Server > Runtime environments > Add > and select
Apache Ode 1.x Runtime- Configuration of the Runtime
JRE: jre1.8.0_xODE's home directory: C:\tomcat9\webapps\odeTomcat's home directory: C:\tomcat9\Server address: localhostPort: 9090VM arguments: -Xms128m -Xmx512m -XX:MaxPermSize=256m
- Configuration of the Runtime
- Add the
tomcat-juli.jarlibrary to the server classpath- Go to the Server tab and double click on Ode 1.x Server
- Click on Open launch configuration > Classpath > User entries
- Click on Add external JARs
- Go to
C:\tomcat9\binand selecttomcat-juli.jar
- Change the port to be 9090
- Go to the Server tab and double click on Ode 1.x Server
- Click on Runtime environment and change the port to
9090
- Create a BPEL project on Eclipe menu > New > Other... > BPEL 2.0 > BPEL project.
Project name: ODE_PrubaTarjet runtime: Apache Ode 1.x RuntimeConfiguration: Default configuration for Apache ODE 1.x- Finish
- Go to the project/bpelContent/, and right click, New > Other... > BPEL 2.0 > BPEL process file > Next and configure it
Creation mode: Create BPEL process from a templateProcess name: HolaMundoNamespace: http://holamundoAbstract processunchecked- Next
Template: Synchronous BPEL ProcessService name: HolaMundoServiceService adress: http://localhost:8080/ode/processes/HolaMundoBinding protocol: SOAP- Finish
- Select the file that has been created (
Holamundo.bpel), double click and select Design - Remove the Action
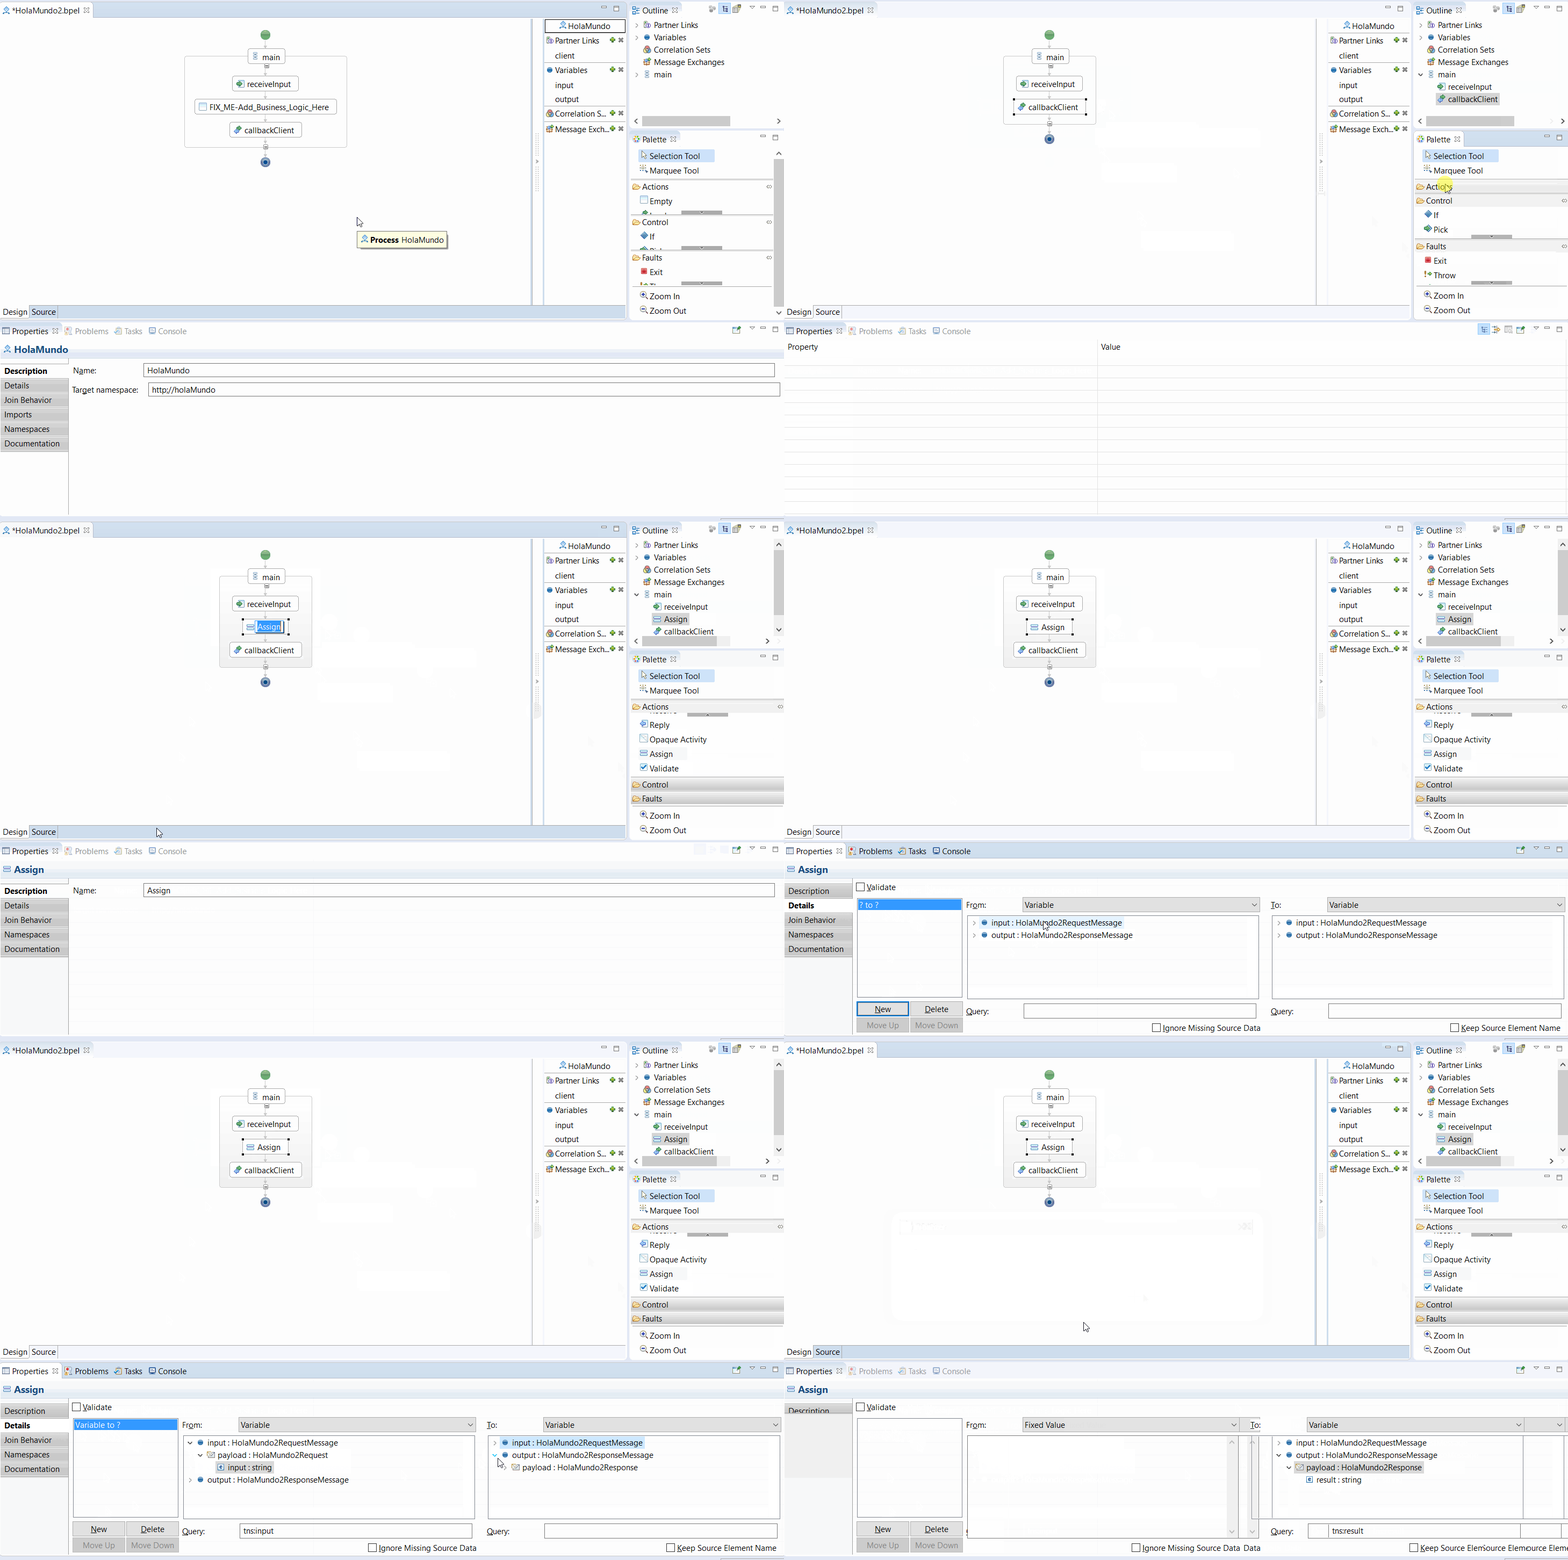
FIX_ME-Add_Business_Logic_Hereand drop-and-drag from Action > Assign - On Assign, right click Show on properties
- Go to Details and click on New
- On From, select Variable and
input : HolaMundoRequestMessage > payload : HolaMundoRequestMessage > input : String - On To, select Variable and
output : HolaMundoRequestMessage > payload : HolaMundoRequestMessage > result : String
- On From, select Variable and
- Click ouside and a message will pop up asking to generate a variable, say
Yes.
- Save the file
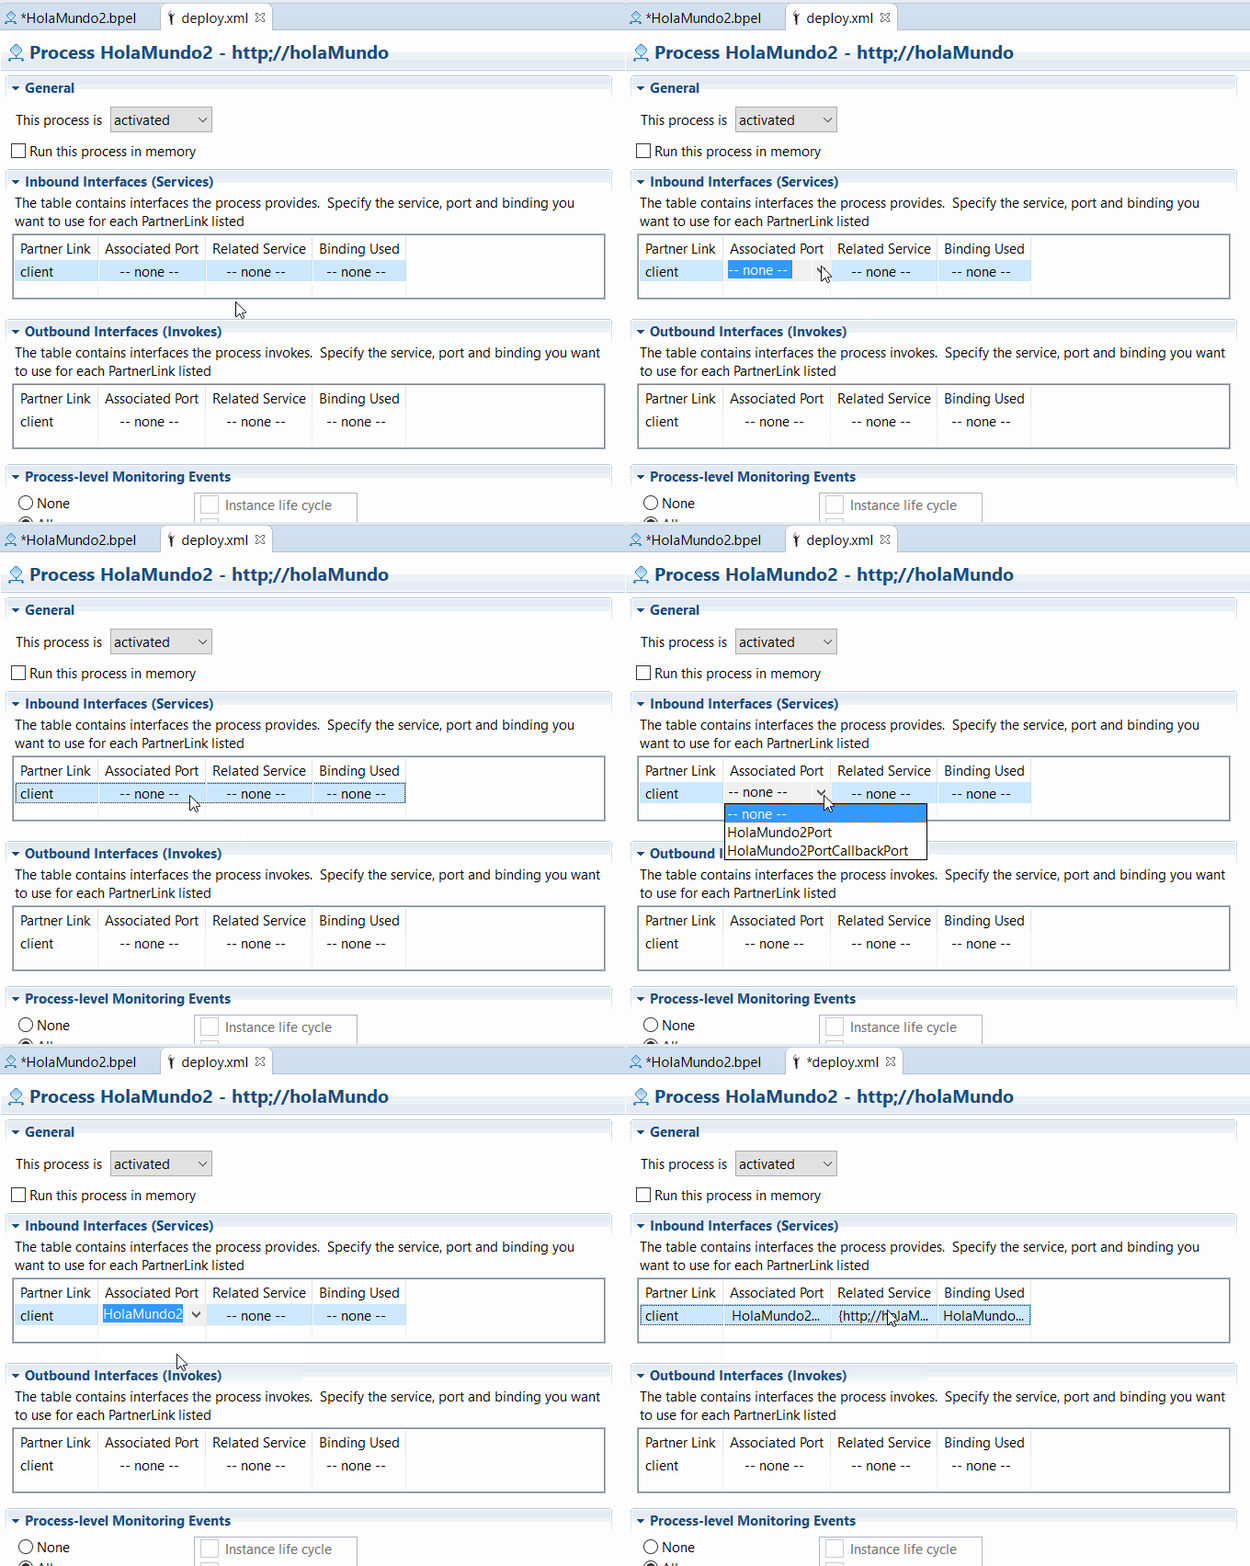
- Go to the project/bpelContent/, and right click, New > Other... > BPEL 2.0 > BPEL deployment descriptor > Finish
- Open it and go to Inbound interfaces (services) > Associated port> and select HolaMundoPort.
- Just click on Related service and everything will autocomplete automatically.

- Save the file
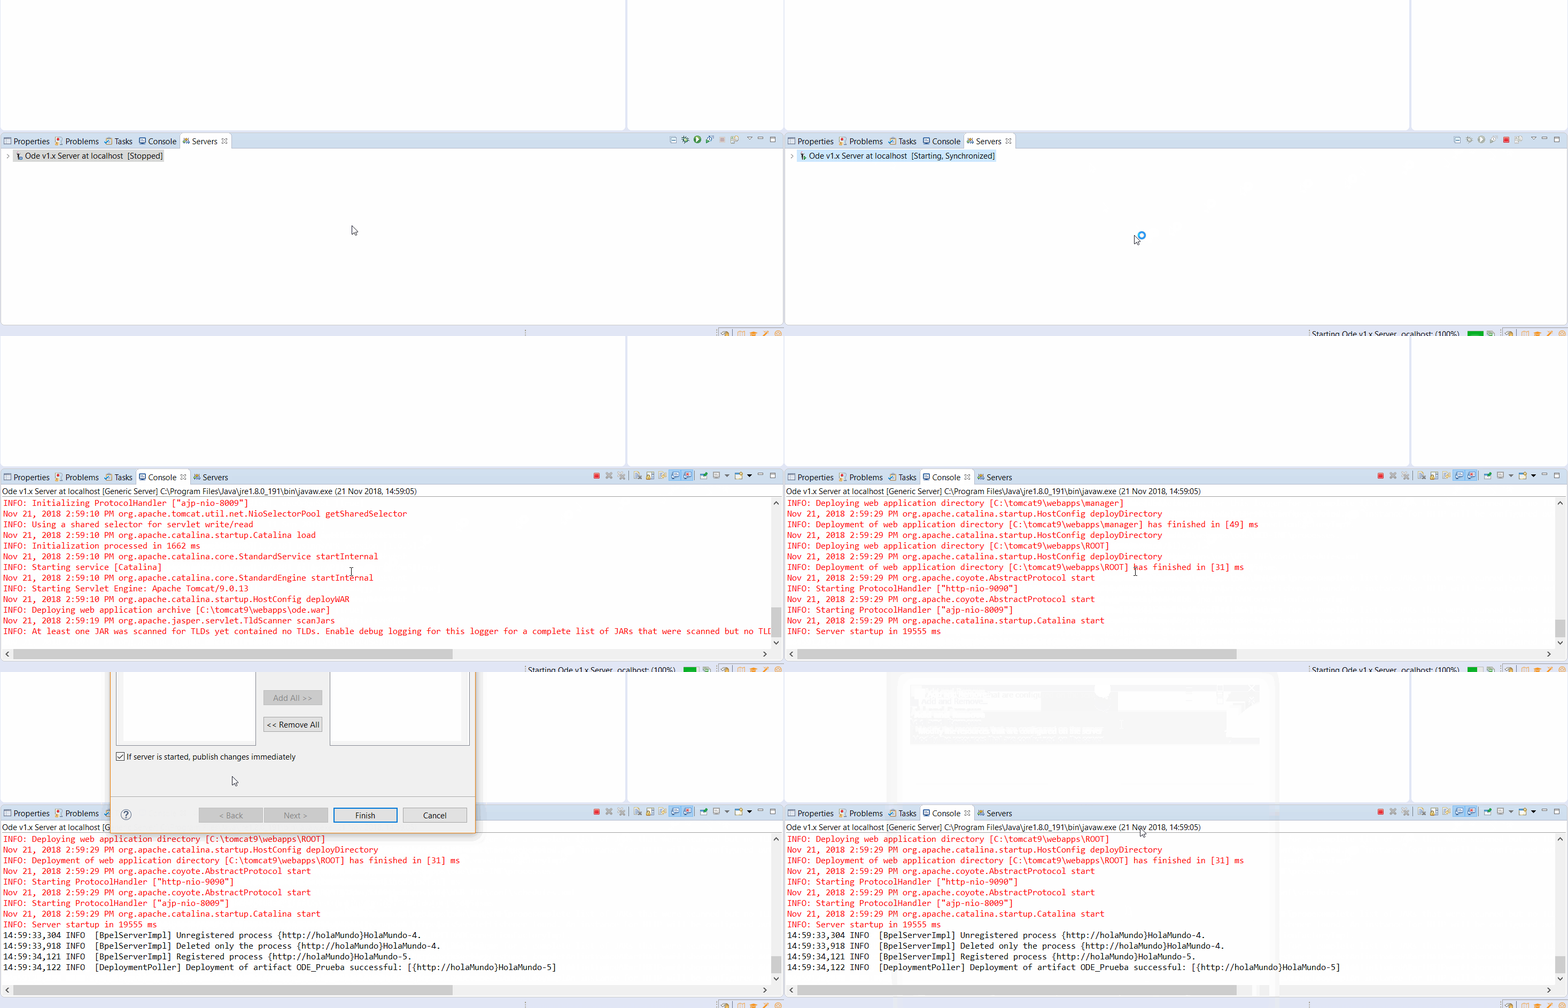
- Select the server, right click and Add or remove..., add the ODE_Pruba project and click on Finish

- Go to
http://localhost:9090/ode/deployment/services/and make sure theHolaMundoprocess is deployed
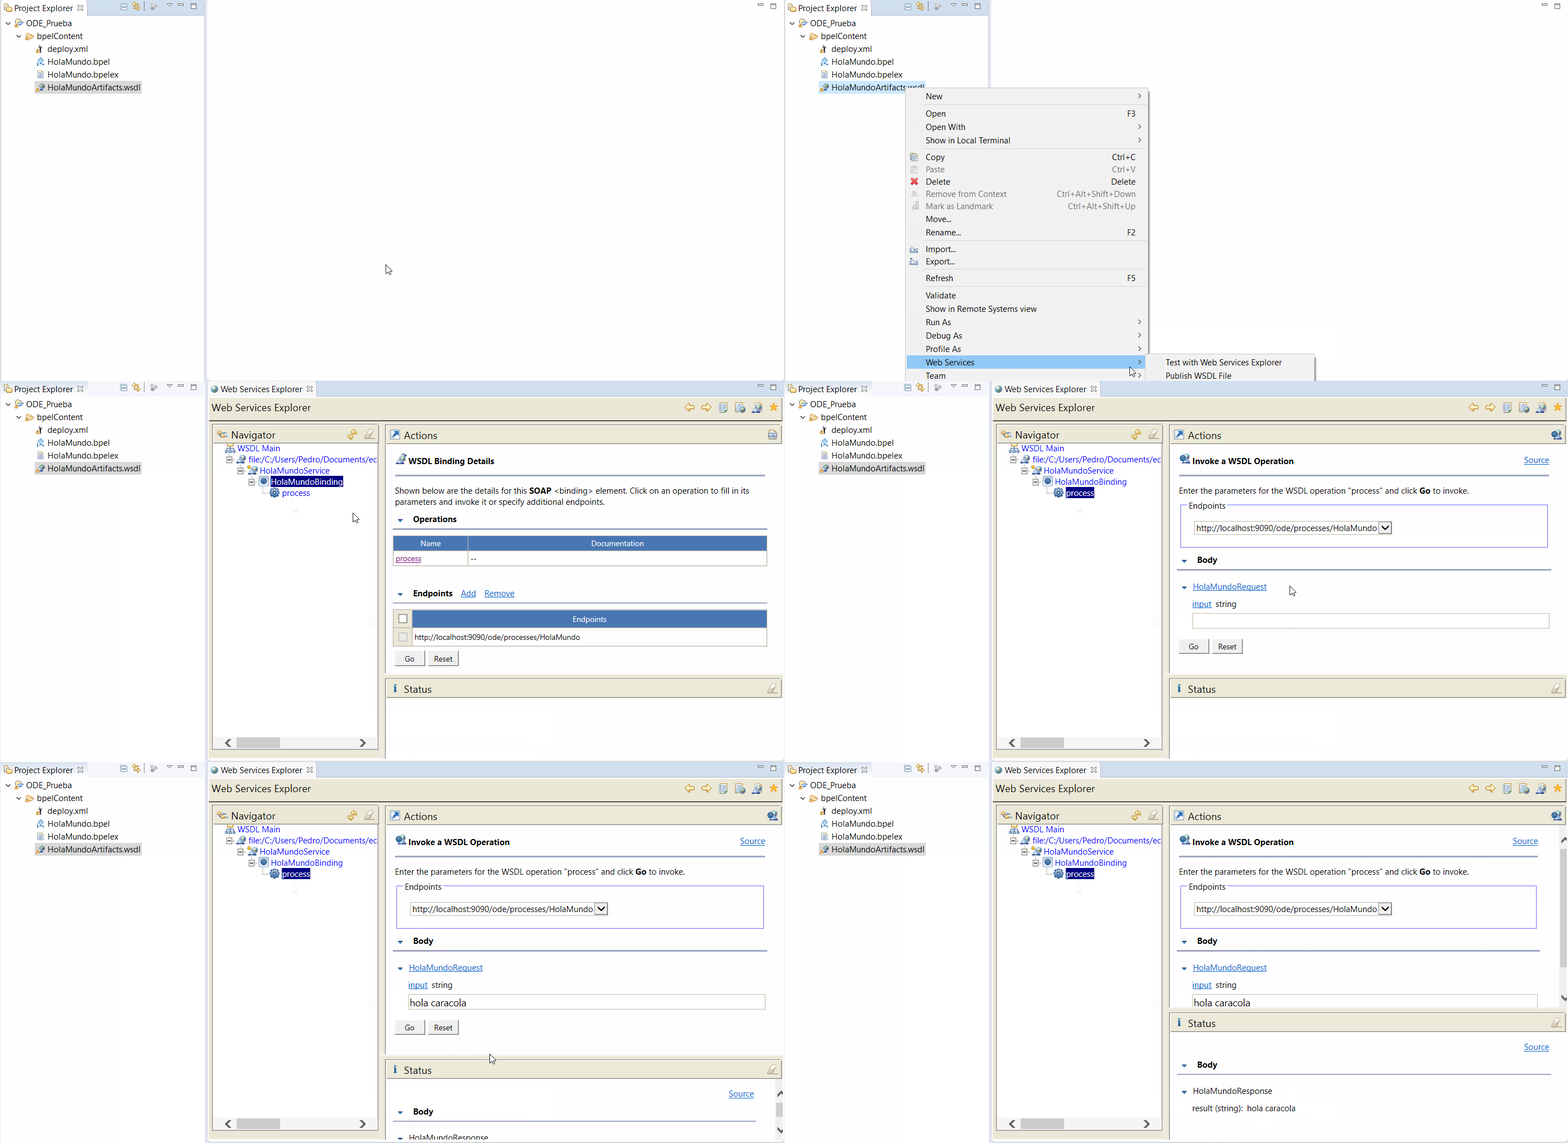
- Go to HolaMundoArtifact.wsdl, right click, Web Services > Test with Web Services explorer
- Click in Operations > process
- If nothing appears, press F5 to refresh the browser
- Input a message on the input textbox and press Go
- Can you even believe what you are gazing at?
