在学习iOS中遇见的问题及解决方案。
目录
[TOC]
#设置UILabel的内边距
###问题说明
默认Label的显示效果如下
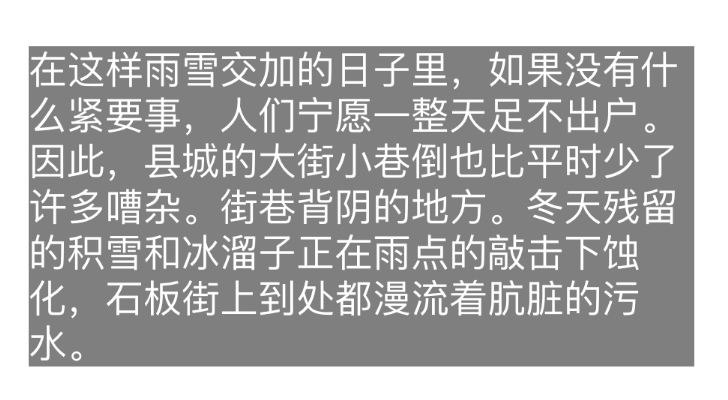
很多情况下,需要如下有内边距的效果(注意第一行与最后一行文字与label的上下边距)
为了解决这个问题,设计SFLabel如下,继承自UILabel
#import "SFLabel.h"
#import <UIKit/UIKit.h>

@interface SFLabel ()
// 用来决定上下左右内边距,也可以提供一个借口供外部修改,在这里就先固定写死
@property (assign, nonatomic) UIEdgeInsets edgeInsets;
@end

@implementation SFLabel


//下面三个方法用来初始化edgeInsets
- (instancetype)initWithFrame:(CGRect)frame
{
    if(self = [super initWithFrame:frame])
    {
        self.edgeInsets = UIEdgeInsetsMake(25, 0, 25, 0);
    }
    return self;
}

- (instancetype)initWithCoder:(NSCoder *)aDecoder
{
    if (self = [super initWithCoder:aDecoder]) {
        self.edgeInsets = UIEdgeInsetsMake(25, 0, 25, 0);
    }
    return self;
}

- (void)awakeFromNib
{
    [super awakeFromNib];
    self.edgeInsets = UIEdgeInsetsMake(25, 0, 25, 0);
}

// 修改绘制文字的区域,edgeInsets增加bounds
-(CGRect)textRectForBounds:(CGRect)bounds
    limitedToNumberOfLines:(NSInteger)numberOfLines
{

    /*
    调用父类该方法
    注意传入的UIEdgeInsetsInsetRect(bounds, self.edgeInsets),bounds是真正的绘图区域
    */
    CGRect rect = [super textRectForBounds:UIEdgeInsetsInsetRect(bounds,
     self.edgeInsets) limitedToNumberOfLines:numberOfLines];
    //根据edgeInsets,修改绘制文字的bounds
    rect.origin.x -= self.edgeInsets.left;
    rect.origin.y -= self.edgeInsets.top;
    rect.size.width += self.edgeInsets.left + self.edgeInsets.right;
    rect.size.height += self.edgeInsets.top + self.edgeInsets.bottom;
    return rect;
}

//绘制文字
- (void)drawTextInRect:(CGRect)rect
{
    //令绘制区域为原始区域,增加的内边距区域不绘制
    [super drawTextInRect:UIEdgeInsetsInsetRect(rect, self.edgeInsets)];
}

@end
将UIlabel的类型改为SFLabel,看看现在效果是否如第二幅图😊。
- 通过SFLabel中的方法修改UILabel的内边距最好只修改上下内边距,通过系统NSMutableParagraphStyle是可以修改左边内边距的;
- 通过
boundingRectWithSize:options:attributes:context:计算SFLabel内容计算出的区域仍然是与直接使用UILabel的结果一样,因此需要小心使用,可以在boundingRectWithSize:options:attributes:context:基础上根据edgeInsets进行修正。
#UITextField右对齐无法输入空格解决方案
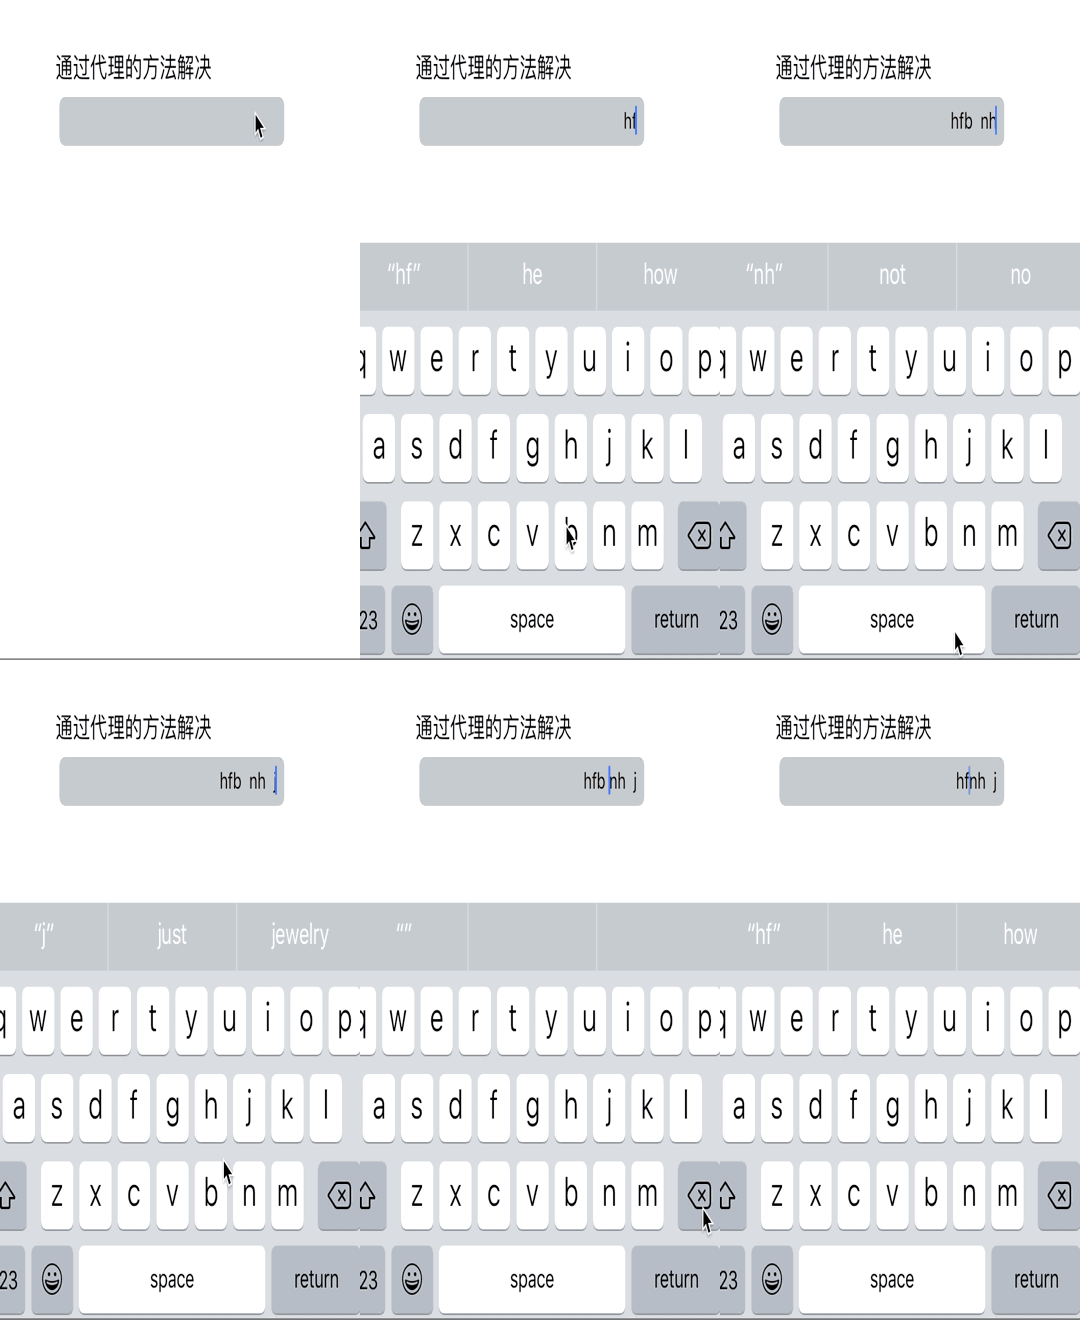
今天使用UITextfield需要右对齐输入,但是当设置右对齐第一个字符输入空格后,神奇的一幕发生了,如下图,如果第一个字符输入的是空格,那么光标会跳到左侧;如果输入其它字符,然后输入空格,此时输入的空格不会立即显示,直到再次输入其它字符时该空格会与输入的字符同时显示出来。
解决思路很简单,就是将我们输入的普通空格使用Non-breaking space代替。
1.首先设置控制器作为textfield的代理,
self.textField.delegate = self;
2.监听文本的输入,做如下处理
- (BOOL)textField:(UITextField *)textField
        shouldChangeCharactersInRange:(NSRange)range
        replacementString:(NSString *)string
{
    /* 如果不是右对齐,直接返回YES,不做处理 */
    if (textField.textAlignment != NSTextAlignmentRight) {
        return YES;
    }

    /* 在右对齐的情况下*/
    // 如果string是@"",说明是删除字符(剪切删除操作),则直接返回YES,不做处理
    // 如果把这段删除,在删除字符时光标位置会出现错误
    if ([string isEqualToString:@""]) {
        return YES;
    }

    /* 在输入单个字符或者粘贴内容时做如下处理,已确定光标应该停留的正确位置,
    没有下段从字符中间插入或者粘贴光标位置会出错 */
    // 首先使用 non-breaking space 代替默认输入的@“ ”空格
    string = [string stringByReplacingOccurrencesOfString:@" "
                     withString:@"\u00a0"];
    textField.text = [textField.text stringByReplacingCharactersInRange:range
                                     withString:string];
    //确定输入或者粘贴字符后光标位置
    UITextPosition *beginning = textField.beginningOfDocument;
    UITextPosition *cursorLoc = [textField positionFromPosition:beginning
                                 offset:range.location+string.length];
    // 选中文本起使位置和结束为止设置同一位置
    UITextRange *textRange = [textField textRangeFromPosition:cursorLoc
                                        toPosition:cursorLoc];
    // 选中字符范围(由于textRange范围的起始结束位置一样所以并没有选中字符)
    [textField setSelectedTextRange:textRange];

    return NO;
}
3.如果需要拿到textfield中的text使用,在使用前记得将 non-breaking space替换回来
[self.textField.text stringByReplacingOccurrencesOfString:@"\u00a0"
                     withString:@" "];
**弊端分析:**上面代理方法textField: shouldChangeCharactersInRange: replacementString:对于很多输入字符返回的是NO,因此不能很好的监听UITextFieldTextDidChangeNotification,因此不推荐使用。
效果演示
在此,自定义了一个textField,code如下:
- (instancetype)initWithCoder:(NSCoder *)aDecoder
{
    self = [super initWithCoder:aDecoder];
    if (self) {

    // 给textfield添加响应事件
        [self addTarget:self
        action:@selector(replaceNormalSpaceUsingNonbreakingSpace)
        forControlEvents:UIControlEventEditingChanged];
        }
    return self;
}

// 在响应事件中将@" "替换为non-breaking space
- (void)replaceNormalSpaceUsingNonbreakingSpace
{
    UITextRange *textRange = self.selectedTextRange;
    self.text = [self.text stringByReplacingOccurrencesOfString:@" "
                           withString:@"\u00a0"];
    [self setSelectedTextRange:textRange];
}
**说明:**如果需要拿到textfield中的text使用,同样需要将 non-breaking space替换回来。
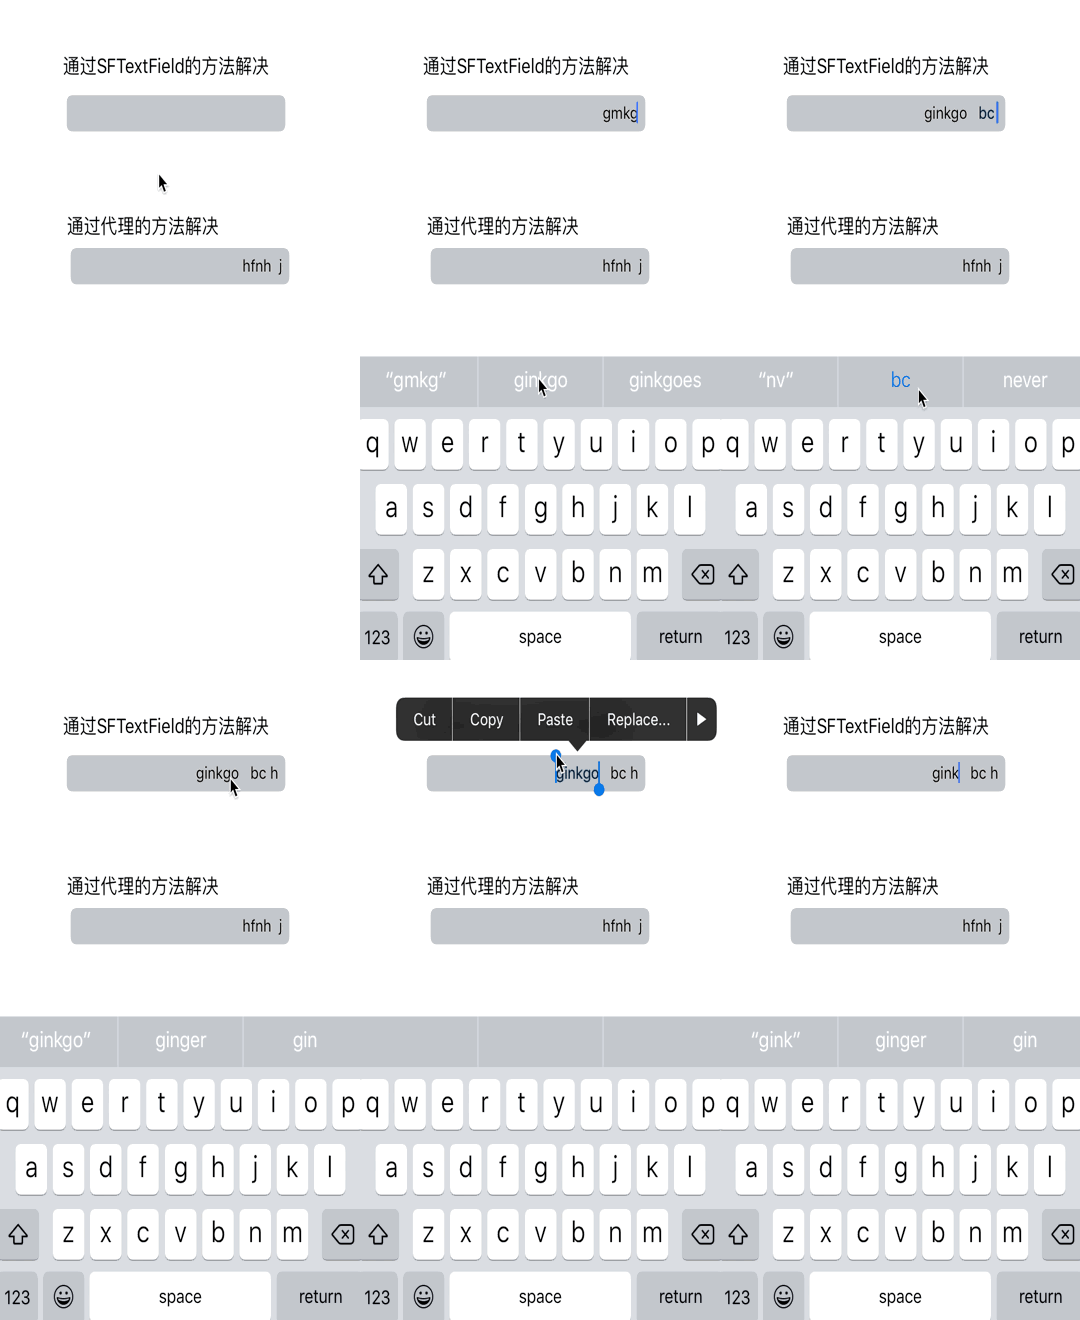
该方法可以有效的解决问题,还能监听UITextFieldTextDidChangeNotification,推荐使用。
效果演示
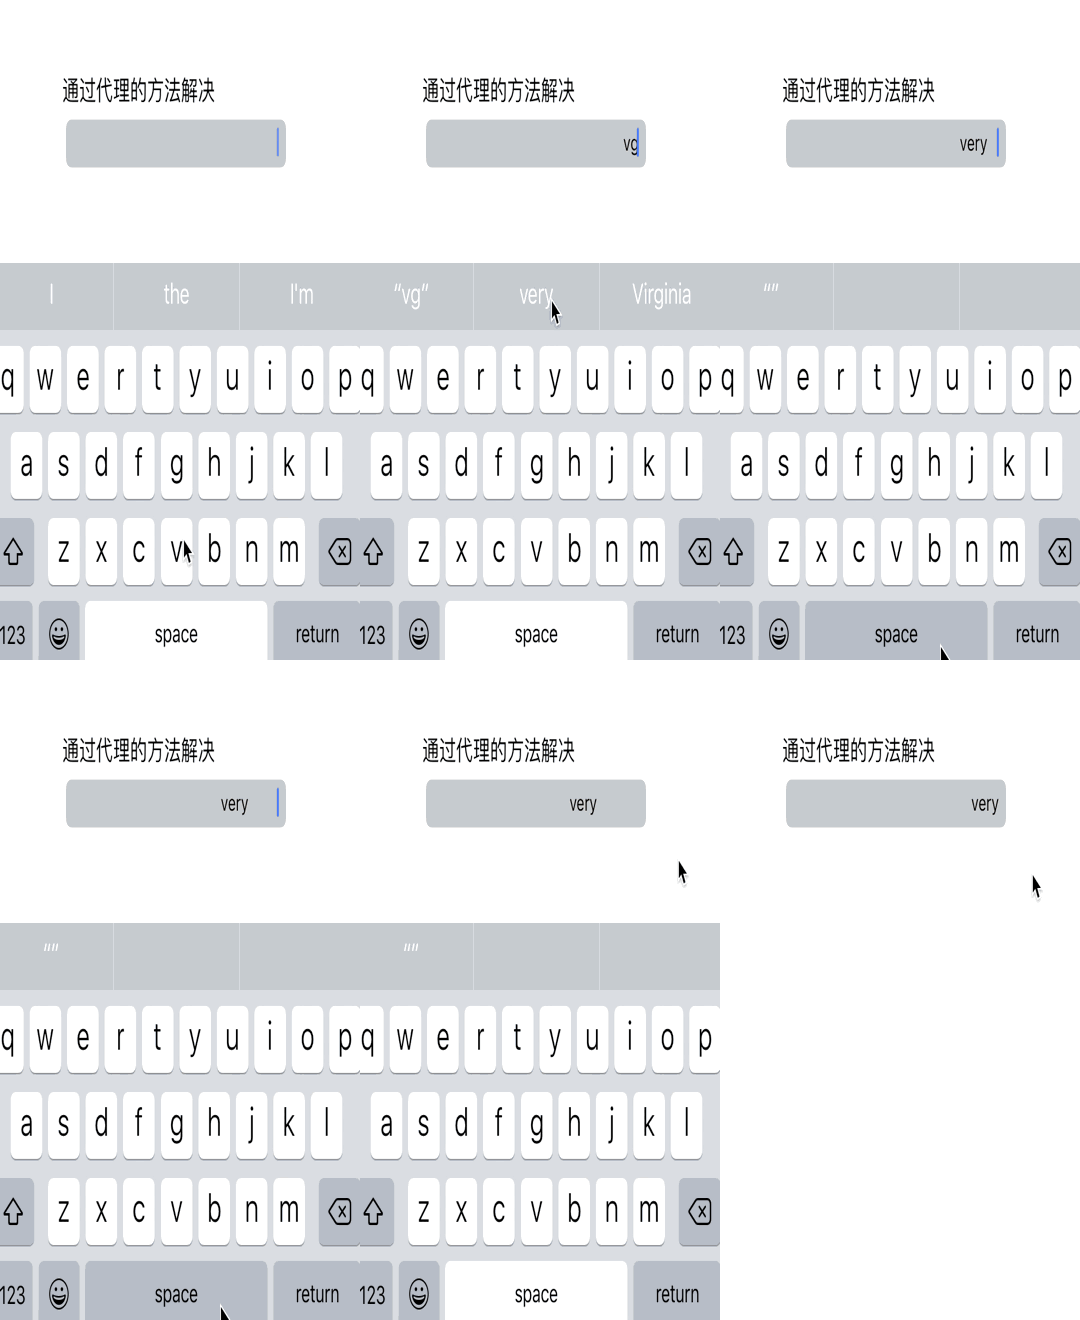
当我们最后输入的是空格的时候,那么当textfield不是第一响应者的时候,那么最后的空格依然不可见。如下所示:
解决思路:可以在textfield右侧放一个view,当输入结束时,计算输入内容最后面空格的宽度,然后作为view的宽度,当textfield成为第一响应者时,令view的宽度为0。
PS:谁有更好的方法@一下哦。
###参考 基本是下面解决方案的汇总,下面有的回答也存在一些其他小问题。 clickme
源码示例SFUITextFieldInputSpaceFromRight
#使用UITextView设置超链接 ###遇到的坑坑坑 下面说下在使用UITextView设置超链接时遇到的坑。 UITextView可以通过设置富文本的方式进行超链接的设置。但是,UITextView默认有诸多手势,在长按时会出现菜单,放大镜,选中文本几种状态,但是并不想要这三种状态啊。 为了取消菜单状态可以这么做:
- (BOOL)canPerformAction:(SEL)action withSender:(id)sender
{
    return NO;
}
为了取消算中状态可以通过textView的代理来实现,一直将设置范围重置为0,如下:
- (void)textViewDidChangeSelection:(UITextView *)textView
{
    _textView.selectedRange = NSMakeRange(0, 0);
}
为了取消放大镜状态尝试了各种方法,比如不同时机注销第一响应等,但是都没用。(如果有请麻烦告诉我,谢谢),但是这三种状态肯定都是通过去手势完成的,所以想到了最终方法,找到对应手势,将手势删除。 大概可以这么做:
NSArray *textViewGestureRecognizers = self.textView.gestureRecognizers;
    NSMutableArray *mutableArrayOfGestureRecognizers = [[NSMutableArray alloc] init];
    for (UIGestureRecognizer *gestureRecognizer in textViewGestureRecognizers) {
        if (![gestureRecognizer isKindOfClass:[UILongPressGestureRecognizer class]]) {
            [mutableArrayOfGestureRecognizers addObject:gestureRecognizer];
        } else {
            UILongPressGestureRecognizer *longPressGestureRecognizer = (UILongPressGestureRecognizer *)gestureRecognizer;
            if (longPressGestureRecognizer.minimumPressDuration < 0.5) {
                [mutableArrayOfGestureRecognizers addObject:gestureRecognizer];
            }
        }
    }
    self.textView.gestureRecognizers = mutableArrayOfGestureRecognizers;
但是手势太多了,可能会误移除,将来谁知道苹果会怎么变,所以哪天手势稍有改动万一上线了出了问题,不得被老大骂死啊。 然后决定使用TTTAttributedLabel来做这个需求,但是TTTAttributedLabel这玩意在我这布局总不对,通过debug发现绘制也是从0,0开始绘制的,实际出来却不是从0,0绘制,要偏上一些,github主页发现也有人碰到了类似问题,最后决定放弃使用TTTAttributedLabel了,还是使用UITextView自己通过计算链接区域来搞吧,也顺便将来应对图文混排需求;
###解决方案 下面大概说下思路,具体可见demo;
- 首先需要设置下面两个属性为NO
textView.editable = NO;
textView.selectable = NO;
2.然后需要根据超链接的点击范围计算点击矩形区域,由于可能换行,所以返回数组,假设点击区域保存在self.respondRects
- (NSArray *)respondRectsFromRange:(NSRange)range
{
    UITextPosition *beginning = _textView.beginningOfDocument;
    UITextPosition *rangeStart = [_textView positionFromPosition:beginning offset:range.location];
    UITextPosition *rangeEnd = [_textView positionFromPosition:rangeStart offset:range.length];
    UITextRange *textRange = [_textView textRangeFromPosition:rangeStart toPosition:rangeEnd];
    NSArray *ranges = [_textView selectionRectsForRange:textRange];
    NSMutableArray *respondRects = [NSMutableArray array];
    for (UITextSelectionRect *selectionRect in ranges) {
        CGRect rect = selectionRect.rect;
        if (rect.size.width > 0 && rect.size.height > 0) {
            [respondRects addObject:NSStringFromCGRect([_textView convertRect:rect toView:_textView.superview])];
        }
    }
    return respondRects;
}
- 添加longPress手势,并设置minimumPressDuration = 0.01f; 设置0.01s是为了在模拟tap手势,在快速点击链接时也会做出响应;
- 在LongPress.state == UIGestureRecognizerStateEnded时判断点击的点是否在respondRects区域,是则进行相应;
通常subview的bounds会大于superview的bounds,这样超过superview的区域在subview是无法点击的,通常可以重载view的pointInside:withEvent:的方法。同样,通过hook该方法可以简化流程,具体如下。
首先创建UIView+PointInside分类。
UIView+PointInside.h头文件中声明一个属性,
//需要扩大的点击区域,使用货注意置为nil
@property(nonatomic, assign, nullable) NSArray *hitTestExpandRects;
UIView+PointInside.m文件如下,
//hook hook_pointInside:withEvent:方法
+(void)load{
    Method hitTestMethod = class_getInstanceMethod([UIView class], @selector(pointInside:withEvent:));
    Method hook_hitTestMethod= class_getInstanceMethod([UIView class], @selector(hook_pointInside:withEvent:));
    method_exchangeImplementations(hitTestMethod, hook_hitTestMethod);
}

//运行时设置属性值
- (void)setHitTestExpandRects:(NSArray *)hitTestExpandRects{
     objc_setAssociatedObject(self, &bbaPointInsideExpandEdgeInsets, hitTestExpandRects, OBJC_ASSOCIATION_RETAIN_NONATOMIC);
}

- (NSArray *)hitTestExpandRects{
    return objc_getAssociatedObject(self, &bbaPointInsideExpandEdgeInsets);
}

//被hook后的方法
- (BOOL)hook_pointInside:(CGPoint)point withEvent:(UIEvent *)event {
    //如果点击了原始view的bounds区域,直接返回
    BOOL defaultHit = [self hook_pointInside:point withEvent:event];
    if (defaultHit) {
        return YES;
    }

    //计算是否点击了扩大后的区域
    NSArray *expandRects = self.hitTestExpandRects;
    if (!expandRects) {
        return NO;
    }
    for (NSString *rectStr in expandRects) {
        if (![rectStr isKindOfClass:[NSString class]]) {
            continue;
        }
        if (CGRectContainsPoint(CGRectFromString(rectStr), point)) {
            return YES;
        }
    }

    return NO;
}
同样,可以声明一个CGPath属性,这样可以创建不规则点击区域。
使用时只要view.hitTestExpandRects = @[NSStringFromCGRect(CGRectMake(x, y, width, height))];。

