Managing AWS services with 'serverless framework'
Table of Contents
- Managing AWS services with 'serverless framework'
- Overview
- HandsOn
Presentation
Flowchart

References
- Introducing serverless framework (2019.06.17 webinar)
- Serverless Framework: AWS Quick Start
- AWS ARN & NAMESPACE
Overview
install Serverless Framework and Create project
Serverless framework 설치
$ npm install -g serverless
프로젝트 생성
$ serverless create --template aws-nodejs --path {projectName}
AWS Credential 확인하기
- 만약 자신의 PC에 AWS 계정이 여러 개 설정이 되어 있는 경우, 해당 프로젝트를 AWS 에 실제 배포할 때 어떤 AWS 프로필에 배포할 지 프로필명을 알아둔다.
- 기본적으로는
default의 프로필을 사용한다. - 경로 (AWS Documetation: 구성 및 자격 증명 파일)
- macOS :
/Users/${사용자아이디}/.aws/credentials - Windows :
%UserProfile%\.aws/credentials
- macOS :
- Example (.aws/credentials, 참고-AWS Documetation: 명명된 프로필)
[geoseong] # <- serverless cli의 --aws-profile 플래그의 이름
aws_access_key_id = #########
aws_secret_access_key = #########

[default] # <- serverless cli의 --aws-profile 플래그를 입력 안 하면 이 프로필을 사용하게 된다.
aws_access_key_id = #########
aws_secret_access_key = #########
Variable mgmt
Recursively reference properties
-
참고
-
Configuration
## serverless.yml
provider:
  name: aws
  stage: ${opt:stage, 'dev'}
  environment:
    MY_SECRET: ${file(../config.${self:provider.stage}.json):CREDS}
$ sls deploy --stage qastageis set toqafrom the option supplied to the sls deploy --stage qa command${self:provider.stage}resolves toqaand is used in${file(../config.${self:provider.stage}.json):CREDS}${file(../config.qa.json):CREDS}is found & the CREDS value is read- MY_SECRET value is set
Environment variable mgmt
-
참고
-
Configuration
## serverless.yml
provider:
  name: aws
  runtime: nodejs8.10
  environment:   # <- 해당 프로젝트 전역 환경변수
    EMAIL_SERVICE_API_KEY: ${file(./env.yml)

functions:
  createUser:
    handler: handler.createUser
    environment:   # <- 해당 Lambda Function에서만 쓰이는 지역 환경변수
      PASSWORD_ITERATIONS: 4096
      PASSWORD_DERIVED_KEY_LENGTH: 256
// handler.js
module.exports.createUser = (event, context, callback) => {
  // logs `4096`
  console.log('PASSWORD_ITERATIONS: ', process.env.PASSWORD_ITERATIONS);
  // logs `256`
  console.log('PASSWORD_DERIVED_KEY_LENGTH: ', process.env.PASSWORD_DERIVED_KEY_LENGTH);
  // logs `KEYEXAMPLE1234`
  console.log('EMAIL_SERVICE_API_KEY: ', process.env.EMAIL_SERVICE_API_KEY);
  const response = {
    statusCode: 200,
    body: JSON.stringify({
      message: 'User created',
    }),
  };

  callback(null, response);
};
Functions with Events
-
참고
-
yml 옵션
functions:Lambda Functionsevents:Serverless AWS Lambda Events- API Gateway
- Websocket
- Kinesis & DynamoDB
- S3
- Schedule
- SNS
- SQS
- Application Load Balancer
- Alexa Skill
- Alexa Smart Home
- IoT
- CloudWatch Event
- CloudWatch Log
- Cognito User Pool
-
Configuration
## serverless.yml
functions:  # <- Lambda Functions
  hello:
    handler: handler.hello
    events:
      - schedule: rate(10 minutes)  # <- CloudWatch Event: 10분마다 반복실행하겠다
      - http: # <- API Gateway Event
          path: hello
          method: get
-
## serverless.yml
provider:
  name: aws
  runtime: nodejs8.10
  stage: ${opt:stage, 'dev'}
  region: ap-northeast-2
  tracing:  # <- X-Ray configuration: 모든 API Gateway와 Lambda functions에 X-ray tracing을 하는 옵션
    apiGateway: true
    lambda: true
  functions:  # <- Lambda Functions
    hello:
      handler: handler.hello
      events:
        - schedule: rate(10 minutes)  # <- CloudWatch Event: 10분마다 반복실행하겠다
        - http: # <- API Gateway Event
            path: hello
            method: get
      cors: true # <- CORS Configuration Default
      # cors: # <- CORS Configuration Advanced
      #   origin: '*'
      #   headers:
      #     - Content-Type
      #     - X-Amz-Date
      #     - Authorization
      #     - X-Api-Key
      #     - X-Amz-Security-Token
      #     - X-Amz-User-Agent
      #   allowCredentials: false
-
# serverless.yml
service: service-name
provider: aws

functions:
  hello:
    handler: handler.hello
    vpc:
      securityGroupIds:
        - securityGroupId1
        - securityGroupId2
      subnetIds:
        - subnetId1
        - subnetId2
X-Ray Tracing
- 참고
- Configuration
- 모든 lambda 혹은 apiGateway에 전역으로 설정도 가능하고,
- 전역설정에 덮어쓰기로 특정 Function에 옵션을 넣는 것도 가능하다
or
provider:  # <- X-Ray configuration: 모든 API Gateway와 Lambda functions에 X-ray tracing을 하는 옵션
  tracing:
    apiGateway: true
    lambda: true
functions:
  hello:
    handler: handler.hello
    tracing: Active   # <- X-Ray configuration: 특정 Function에 X-ray tracing 옵션 적용 가능
  goodbye:
    handler: handler.goodbye
    tracing: PassThrough  # <- X-Ray configuration: 특정 Function에 X-ray tracing 옵션 적용 가능
Plugins
Serverless-offline plugin
-
참고
-
Installation
$ sls plugin install -n serverless-offline -
Configuration
## serverless.yml
custom:
  serverless-offline:
    httpsProtocol: "dev-certs"
    port: 4000

...

plugins:
  - serverless-offline  # <- Plugin install 이후 자동으로 생성되어 있음
-
Running
$ sls offline start -
Tip
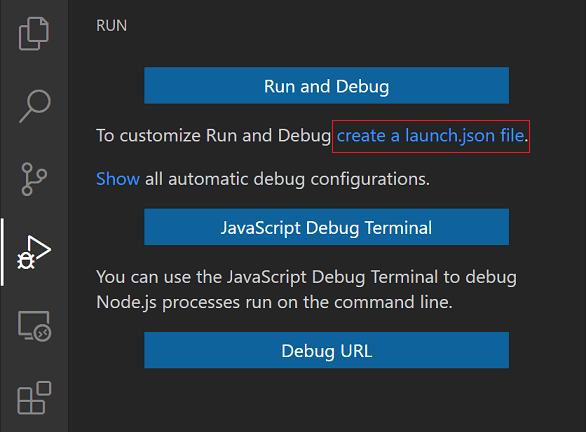
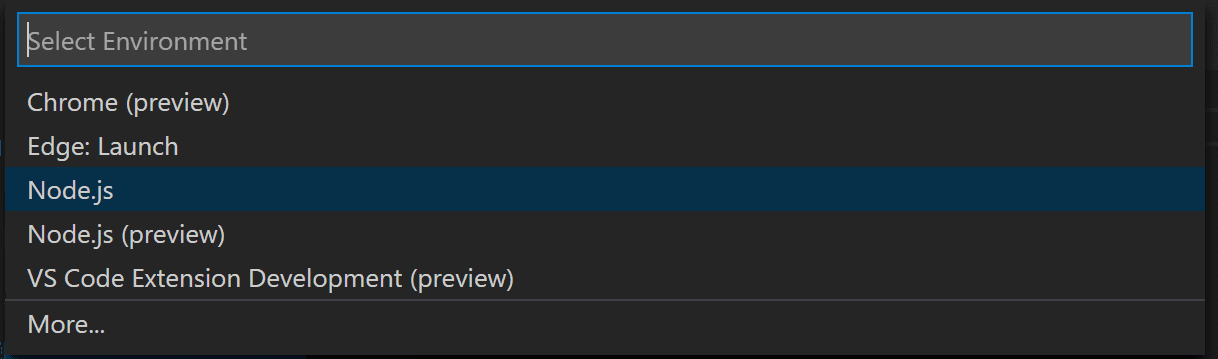
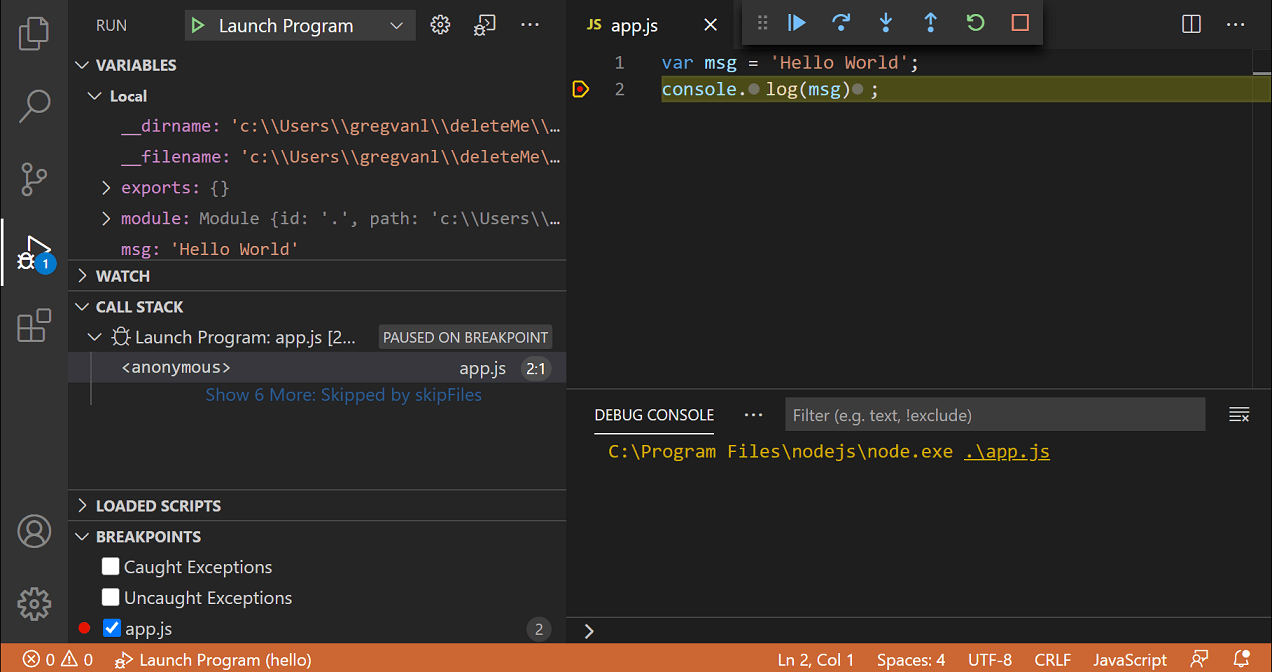
- VSCode에서 디버그 탭을 들어가서
launch.json을 만들어서 디버깅 설정을 한 후 - 디버깅하고자 하는 js파일에 breakpoint를 찍고,
- 좌측 상단 DEBUG버튼 옆
재생버튼을 누르면 하단의DEBUG CONSOLE에서 디버깅 상태를 모니터링 할 수 있으며, - Function 실행 시 breakpoint가 걸리는 것을 확인 할 수 있다.
-
launch.jsonprogram:$ which serverless에서 리턴되는 경로 (macOS기준.),$ DEBUG=true sls offline start와 같다.
cwd:- 해당 스크립트를 실행하는 폴더경로를 지정할 수 있는 옵션이다.
- serverless offline plugin이 설치되어 있는 경로는 ./backend폴더 뿐이므로 backend폴더에서 시작하게 했다. */
{
  "version": "0.2.0",
  "configurations": [
    {
      "type": "node",
      "request": "launch",
      "name": "sls offline(local)",
      "program": "/Users/${username}/.npm-packages/bin/sls",
      "args": [
        "offline",
        "start",
      ],
      "env": {
        "DEBUG": "true"
      },
      "cwd": "${workspaceFolder}/backend"
    },
  ]
}
- VSCode에서 디버그 탭을 들어가서

tracing plugin: X-Ray
- 참고
- 기본적인 x-ray적용은 serverless.yml의
tracing옵션에서 먹이면 되어서 필요가 없을 것 같다
Dynamodb offline plugin
pseudo-parameters plugin: CloudFormation Syntax
- 참고
- Fn과 Join 등의 CloudFormation 문법을 쓰는 대신 간단하게 구문을 완성할 수 있게 도와주는 플러그인
$ npm install --save-dev serverless-pseudo-parametersserverless.yml"arn:aws:lambda:#{AWS::Region}:#{AWS::AccountId}:function:${self:service}-${opt:stage}-foobar-baz"
serverless-vpc-plugin
# add in your serverless.yml

plugins:
  - serverless-vpc-plugin

provider:
  # you do not need to provide the "vpc" section as this plugin will populate it automatically
  vpc:
    securityGroupIds:
      -  # plugin will add LambdaExecutionSecurityGroup to this list
    subnetIds:
      -  # plugin will add the "Application" subnets to this list

custom:
  vpcConfig:
    cidrBlock: '10.0.0.0/16'

    # if createNatGateway is a boolean "true", a NAT Gateway and EIP will be provisioned in each zone
    # if createNatGateway is a number, that number of NAT Gateways will be provisioned
    createNatGateway: 2

    # When enabled, the DB subnet will only be accessible from the Application subnet
    # Both the Public and Application subnets will be accessible from 0.0.0.0/0
    createNetworkAcl: false

    # Whether to create the DB subnet
    createDbSubnet: true

    # Whether to enable VPC flow logging to an S3 bucket
    createFlowLogs: false

    # Whether to create a bastion host
    createBastionHost: false
    bastionHostKeyName: MyKey # required if creating a bastion host

    # Whether to create a NAT instance
    createNatInstance: false

    # Optionally specify AZs (defaults to auto-discover all availabile AZs)
    zones:
      - us-east-1a
      - us-east-1b
      - us-east-1c

    # By default, S3 and DynamoDB endpoints will be available within the VPC
    # see https://docs.aws.amazon.com/vpc/latest/userguide/vpc-endpoints.html
    # for a list of available service endpoints to provision within the VPC
    # (varies per region)
    services:
      - kms
      - secretsmanager

    # Optionally specify subnet groups to create. If not provided, subnet groups
    # for RDS, Redshift, ElasticCache and DAX will be provisioned.
    subnetGroups:
      - rds
Resource mgmt
-
참고
-
최상위 계층의
resources:구문으로 시작한다. 그 밑으로는 계층이 높은 순서대로Resources,{리소스명},Type/Properties등으로 옵션을 채워나간다.resources: # CloudFormation template syntax Resources: usersTable: # resource name Type: AWS::DynamoDB::Table # AWS CloudFormation Resource Reference Properties: TableName: usersTable WriteDashPostLogGroup: # resource name Type: AWS::Logs::LogGroup # AWS CloudFormation Resource Reference Properties: RetentionInDays: "30"
DynamoDB mgmt
- 참고
resources:
  Resources:
    TodosDynamoDbTable:
      Type: 'AWS::DynamoDB::Table'
      DeletionPolicy: Retain
      Properties:
        AttributeDefinitions:
          -
            AttributeName: id
            AttributeType: S
        KeySchema:
          -
            AttributeName: id
            KeyType: HASH
        ProvisionedThroughput:
          ReadCapacityUnits: 1
          WriteCapacityUnits: 1
        TableName: ${self:provider.environment.DYNAMODB_TABLE}
S3 bucket mgmt
- 참고
resources:
  Resources:
    Uploads:
      Type: AWS::S3::Bucket
      Properties:
        BucketName: ${self:custom.bucketName}
        CorsConfiguration:
          CorsRules:
            - AllowedHeaders:
                - "Authorization"
              AllowedMethods:
                - GET
              AllowedOrigins:
                - "*"
            - AllowedHeaders:
                - "*"
              AllowedMethods:
                - PUT
              AllowedOrigins:
                - "*"
resources:
  Resources:
    WildRydesBucket:
      Type: AWS::S3::Bucket
      Properties:
        BucketName: wildrydes-andrei-maksimov
        WebsiteConfiguration:
          IndexDocument: index.html
    WildRydesBucketPolicy:
      Type: AWS::S3::BucketPolicy
      Properties:
        Bucket:
          Ref: "WildRydesBucket"
        PolicyDocument:
          Statement:
            -
              Effect: "Allow"
              Principal: "*"
              Action:
                - "s3:GetObject"
              Resource:
                Fn::Join:
                  - ""
                  -
                    - "arn:aws:s3:::"
                    -
                      Ref: "WildRydesBucket"
                    - "/*"
Cognito mgmt
- 참고
- Serverless AWS Cognito Custom User Pool Example
- Aws Lambda, Amazon Api Gateway, S3, Dynamodb And Cognito Example
resources:
  Resources:
    WildRydesCognitoUserPool:
      Type: AWS::Cognito::UserPool
      Properties:
        UserPoolName: WildRydes
    WildRydesCognitoUserPoolClient:
      Type: AWS::Cognito::UserPoolClient
      Properties:
        ClientName: WildRydesWebApp
        GenerateSecret: false
        UserPoolId:
          Ref: "WildRydesCognitoUserPool"
IAM mgmt
The Default IAM Role
- 기본적으로, 하나의 IAM Role로 모든 Lambda Function에 적용된다.
- Lambda Function들은 CloudWatch logs을 생성하고 작성할 권한을 가진다.
- VPC 구성이 제공되면 기본 AWS
AWSLambdaVPCAccessExecutionRole이 VPC 리소스와 통신하기 위해 연결된다.
Custom IAM
role속성- provider레벨에
role속성을 주어서 customize한 IAM Role을 전역으로 설정하거나, function마다 개별적으로role속성을 줄 수도 있다
- provider레벨에
- 주의
- IAM을 Customize하면 serverless.yml 안 provider레벨의
iamRoleStatements들은 더이상 적용되지 않는다. - 그 말은 Lambda에 대한 CloudWatch Logs 및 Stream Events 관련 권한을 직접 정의 해 주어야 한다는 것이다.
- IAM을 Customize하면 serverless.yml 안 provider레벨의
- 예제: One Custom IAM Role For All Functions
- 예제: Custom IAM Roles For Each Function
- 예제: A Custom Default Role & Custom Function Roles
Lambda Packaging
CLI command
AWS Lambda function에 배포될 파일구조를 미리 볼 수 있다.
$ serverless package
.serverless폴더 안에 배포될 파일들이 저장된다
$ serverless package --package done -> `done`폴더 안에 배포 파일들 저장
$ serverless package --package done/isaid -> `done/isaid`폴더 안에 배포 파일들 저장
--package플래그를 붙이면 사용자가 직접 경로를 지정할 수 있다.
yml Configuration
include/exclude- 배포 시 포함되어야 할 것과 포함되어야 하지 말아야 할 것을 지정할 수 있다.
- exclude 안 해도 기본적으로 제외되는 파일 리스트들
- .git/**
- .gitignore
- .DS_Store
- npm-debug.log
- .serverless/**
- .serverless_plugins/**
package:
  exclude:  # node_modules 하위폴더를 제외하지만 node_modules/node-fetch/ 는 다시 포함시킨다
    - node_modules/**
    - '!node_modules/node-fetch/**'
package:  # src 하위폴더를 제외하고 src/function/handler.js은 포함시킨다.
  exclude:
    - src/**
  include:
    - src/function/handler.js
individually- 기본적으로는 yml파일에 구성되어 있는 function 전체가 통으로 옵션이 먹지만,
individually: true옵션으로 function 개별 설정도 가능하다.- 가장 상위에 두면 모든 function들이 개별설정하도록 적용
- functions 안에 두면
package:
  individually: true
  exclude:
    - functions/**

functions:
  hello:
    handler: functions/hello.index
    package:
      include:
        - functions/hello.js
  bye:
    handler: functions/bye.index
    package:
      include:
        - functions/bye.js
functions:
  hello:
    handler: functions/hello.
  bye:
    handler: functions/bye.index
    package:
      individually: true
excludeDevDependencies- devDependency가 제외 되는것을 원치 않을 때 사용
package:
  excludeDevDependencies: false
artifact- 이미 packaging이 되어 있는 다른 package를 사용하고자 할 때 사용
- 이 옵션이 설정되어 있으면 배포 시 별도로 packaging단계를 거치지 않는다
- AWS S3의 경로도 지정 가능함
- 그러나 실패하고 있음
- 실습을 위해
$ cd backend && sls package --package done을 해서done/hello.zip압축파일을 만든다. - 전역으로 설정하는 방법
package:
  artifact: done/hello.zip
- 개별 설정하는 방법
package:
  individually: true

functions:
  hello:
    handler: functions/hello.index  # hello.zip안의 functions폴더 안에 있는 hello.js
  package:
    artifact: done/hello.zip
  events:
    - http:
        path: hello
        method: get
- 참고
- Lambda의 코드 파일들은
/var/task폴더 안에 저장되어 있음.
- Lambda의 코드 파일들은
Lambda Layers
- 참고
layers옵션을serverless.yml안에 추가한다.functions에서 정의된layers를 참고해서 사용 가능하다.layer옵션 참고 시 (serverless.yml 안에서 정의된 layer 이름(맨앞에 대문자)+LambdaLayer) 룰을 지켜야 한다.functions: mkgif: handler: handler.mkgif events: - s3: ${self:custom.bucket} layers: - {Ref: FfmpegLambdaLayer} layers: ffmpeg: path: layer
Deploying
- 참고
- 작동원리
- CloudFormation 스택이 생성되지 않았다면, S3 버킷을 새로 생성해서 그 안에 소스코드들이 압축된 zip파일을 넣는다.
- 배포 시 기존에 배포되어있는 내용과 로컬의 배포될 내용이 같다면 배포절차를 중단한다.
- Zip files of your Functions' code are uploaded to your Code S3 Bucket.
- 정의된 IAM Roles, Functions, Events and Resources들이 AWS CloudFormation template으로 추가된다
- The CloudFormation Stack 동명의 새로운 template으로 업데이트된다.
- function들은 배포될때마다 새로운 버전이 생긴다.
serverless.yml에 설정된 것 모두 배포하기$ serverless deploy--verbose: 배포 시 CloudFormation Stack에서 출력하는 이벤트를 확인하고 싶다면..$ serverless deploy --verbose--stage,--region플래그로 stage명과 region변경 가능$ serverless deploy --stage production --region eu-central-1function --function: 특정 function만 지정해서 개별배포 가능$ serverless deploy function --function myFunction--aws-profile: 내 로컬에 복수개의 AWS profile이 있다면,.aws/credentials에 있는 profile 이름을 지정하여 배포하고자 하는 계정 지정 가능$ serverless deploy deploy --aws-profile myProfile--package- 배포 대상을
$ serverless package를 통해 packaging된 폴더 경로를 지정해서 배포
$ serverless deploy --package path-to-package- 배포 대상을
View Logging
sls logs -f {functionName} --stage {stageName} --aws-profile {profileName}
Clearing
- 참고
$ serverless remove -v
Tips
CloudFormation: UPDATE_ROLLBACK_FAILED
문제가 되는 리소스의 Logical ID를 입력해서 무시하자
- 문제발견
$ serverless deploy중에UPDATE_ROLLBACK_FAILEDStatus가 나오는 경우 발견
- 공지
- 현재 에러 재현할 시간이 없어서 구글링에서 나오는 적절한 상황의 캡쳐만 해 놓았습니다.
- Lambda Layer관련 실제 시연된 캡쳐는 추후에 올리겠습니다 (.)
- 원인
-
존재하지 않는 Lambda Layer 버전을 Lambda에서 참고하려고 해서 에러가 뜨는 문제였는데
- 실패하고 있는 Stack에서
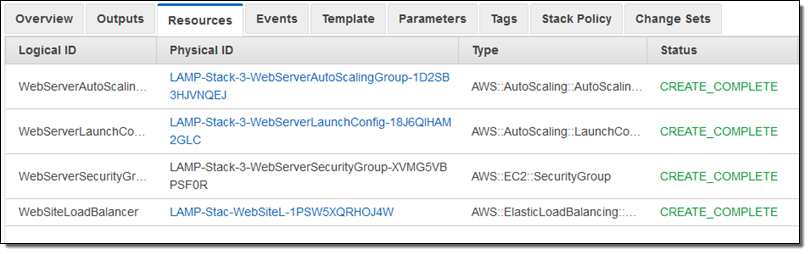
Resources탭을 누르면, 표가 나온다.
- 실패하고 있는 Stack에서
-
나오는 표에서
Logical ID라고 되어 있는 부분을 유심히 본다. -
-
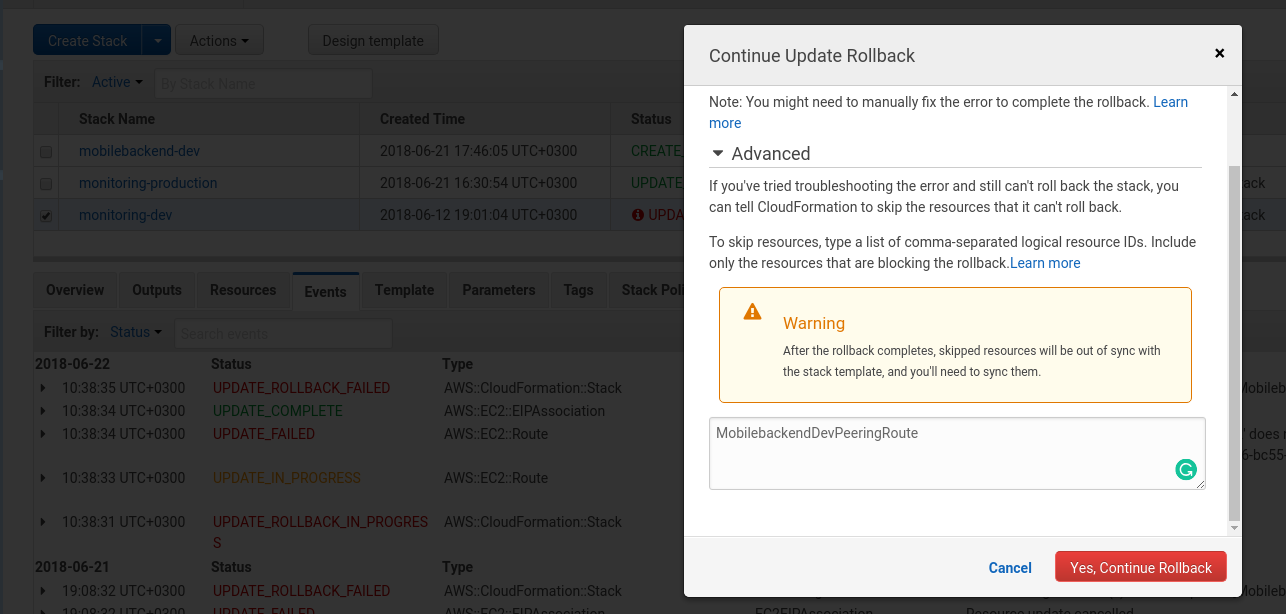
그래서 잘못된 Lambda Layer를 바라보는 Lambda Function에 해당되는
Logical ID혹은 다수개의 Logical ID들을 모아서콤마(,)를 중간에 붙여 리스트를 완성했다. - Ex) FrontendRootLambdaFunction,FrontendAdminLambdaFunction- 이제 상단의
Actions메뉴를 펼친 뒤Coutinue Update Rollback을 누른다. -
- 이제 상단의
-
그럼 모달창이 뜨는데, 거기서
Advanced를 눌러서 펼쳐본다. -
-
펼쳐서 나오는 텍스트입력란에
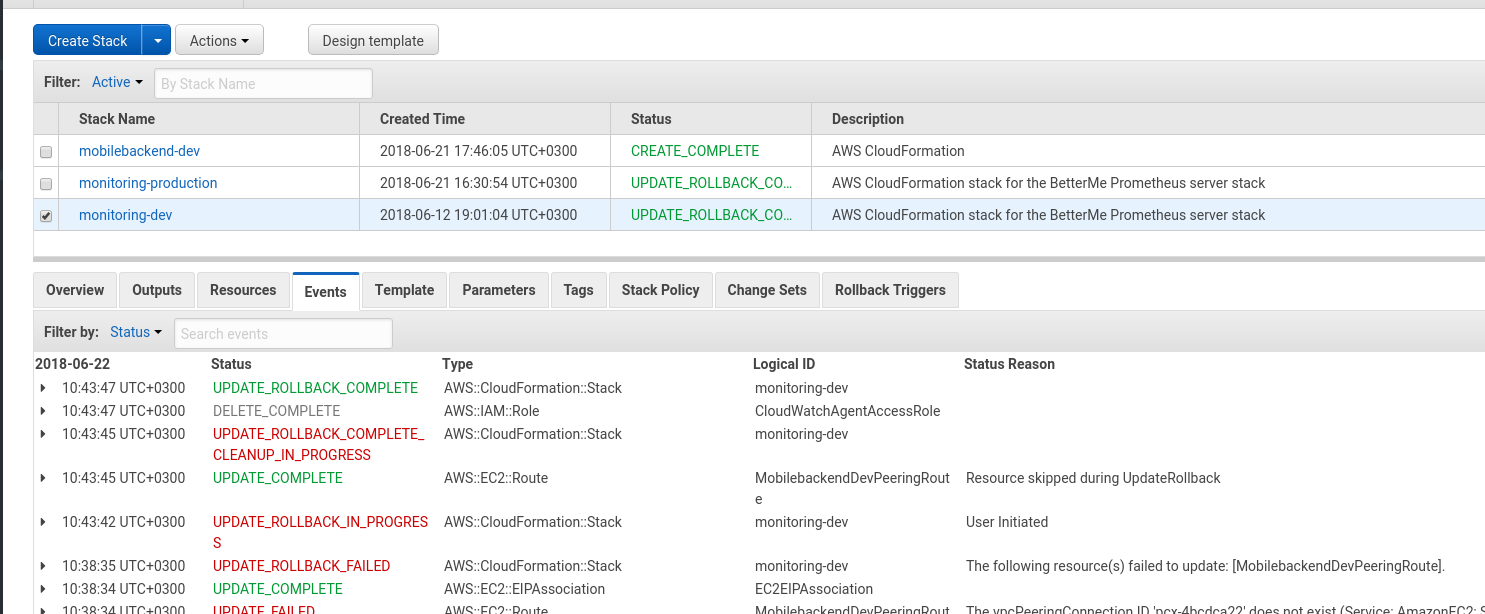
Logical ID들을 콤마로 붙인 리스트를 붙여넣고Yes, Continue Rollback버튼을 누르면 그에 해당하는 리소스들은 update rollback 리스트에서 제거되면서UPDATE_ROLLBACK_COMPLETE가 뜬 것을 확인 할 수 있었다. -
-