This repository contains the necessary configuration files and DAGs (Directed Acyclic Graphs) for setting up a robust data engineering environment using Kubernetes and Apache Airflow. It includes the setup for the Kubernetes Dashboard, which provides a user-friendly web interface for managing Kubernetes clusters, and Apache Airflow, a platform to programmatically author, schedule, and monitor workflows.
hello.py: A simple example DAG to demonstrate basic Airflow concepts.
dashboard-adminuser.yaml: YAML file for setting up an admin user for the Kubernetes Dashboard.dashboard-clusterrole.yaml: YAML file defining the cluster role for the Kubernetes Dashboard.dashboard-secret.yaml: YAML file for managing secrets used by the Kubernetes Dashboard.recommended-dashboard.yaml: YAML file for deploying the recommended Kubernetes Dashboard setup.values.yaml: YAML file containing values for customizing the Kubernetes setup.
- A Kubernetes cluster
kubectlinstalled and configured- Helm (optional, but recommended for managing Kubernetes applications)
-
Deploy the Kubernetes Dashboard:
To deploy the Kubernetes Dashboard, apply the YAML files in the
k8sdirectory:kubectl apply -f k8s/ --validate=false
This will set up the Kubernetes Dashboard with the necessary roles and permissions.
-
Accessing the Kubernetes Dashboard:
To access the Dashboard, you may need to start a proxy server:
kubectl proxy
Then, access the Dashboard at
http://localhost:8001/api/v1/namespaces/kubernetes-dashboard/services/https:kubernetes-dashboard:/proxy/.Use the token generated for the admin user to log in (see
dashboard-secret.yaml). -
Retrieve Dashboard Token using kubectl:
If you need to access the Kubernetes dashboard and require a token for authentication, you can retrieve it using
kubectl. Use the following command:kubectl get secret admin-user -n kubernetes-dashboard -o jsonpath="{.data.token}" | base64 --decode > output.txt
After running this command, you'll find the token required for dashboard login in the
output.txtfile. -
Deploy Apache Airflow:
You can deploy Apache Airflow using Helm or by applying custom YAML files. For Helm:
helm repo add apache-airflow https://airflow.apache.org
helm install airflow apache-airflow/airflow -f k8s/values.yaml --namespace airflow --create-namespace --debug
This will deploy Airflow with the settings defined in
values.yaml. -
Access Airflow Webserver via Port Forwarding:
To access the Apache Airflow webserver interface from your local machine, you can use
kubectlto set up port forwarding. Execute the following command:kubectl port-forward svc/airflow-webserver 8080:8080 --namespace airflow
Once you run this command, you can access the Airflow web UI by navigating to
http://localhost:8080in your web browser. This will route the traffic from your local machine's port 8080 to the Airflow webserver's port 8080 in the Kubernetes cluster. -
Accessing Airflow:
- Login Credentials: Go to
http://localhost:8080and type the Usernameadminand passwordadmin. - Dashboard Overview: After logging in, you will see the main page displaying a DAG:
hello_world.- Activating
hello_worldDAG: Toggle the start button forhello_worldand click on it to view DAG details.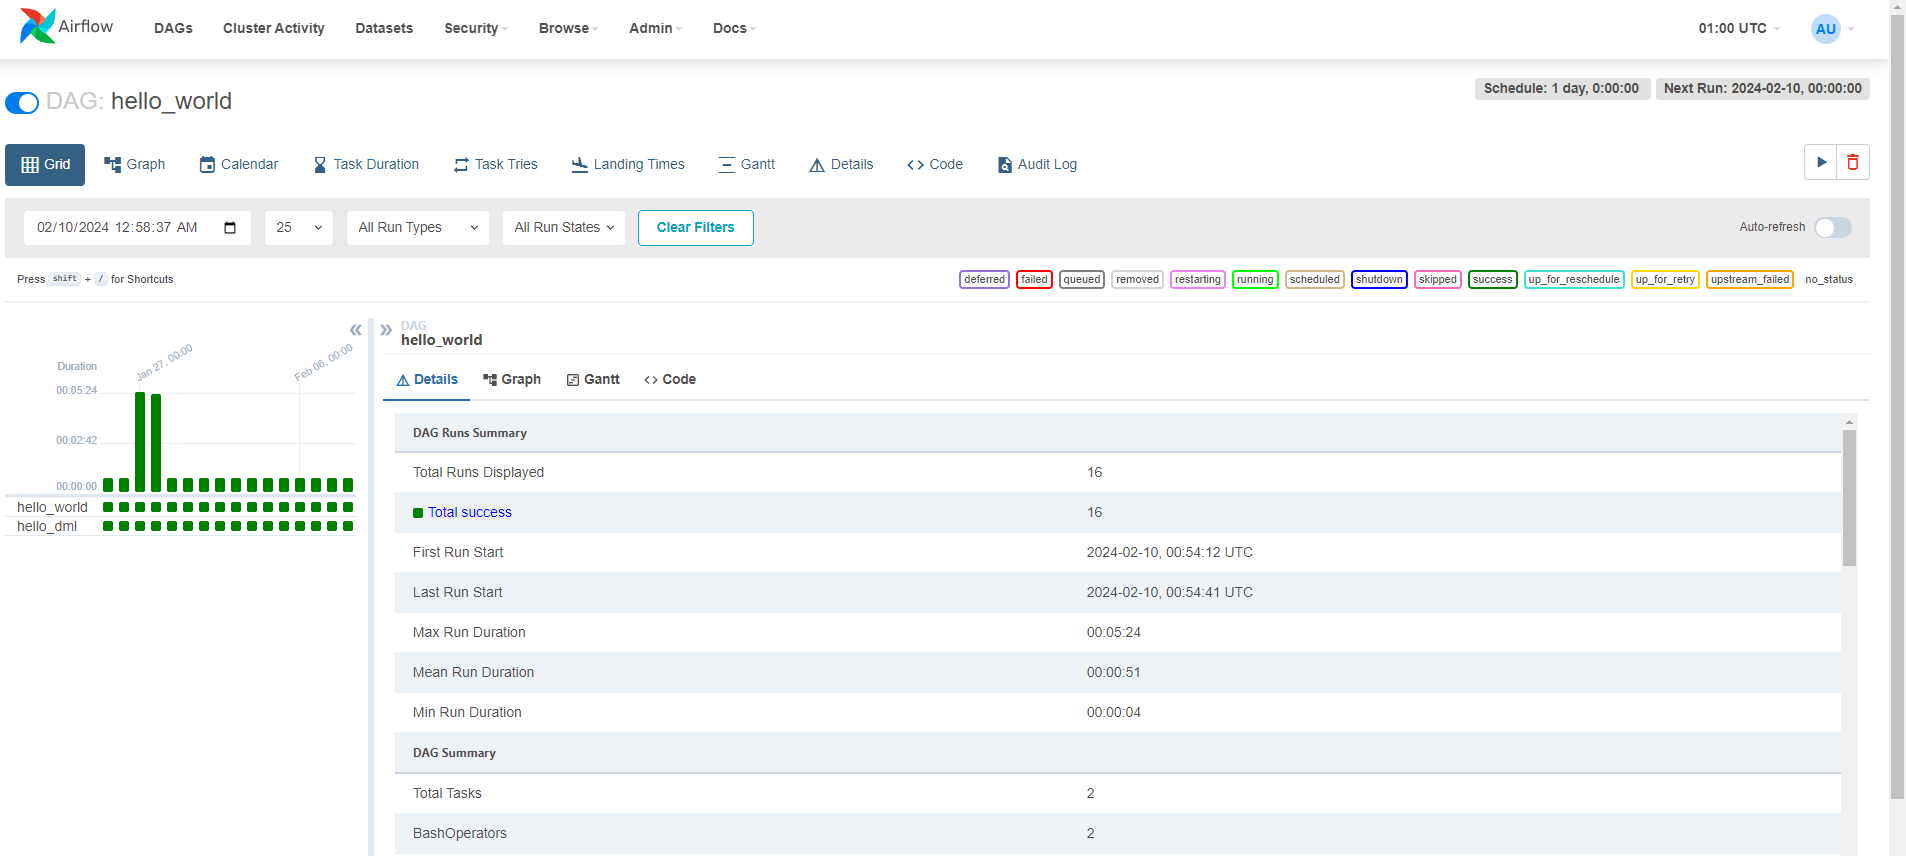
- Activating
- Login Credentials: Go to
-
Uninstall Apache Airflow:
If you need to uninstall Apache Airflow, you can do so using Helm with the following command:
helm uninstall airflow -n airflow
This command removes the Airflow deployment from the specified namespace (
airflowin this case).

- Kubernetes Dashboard: Use the Dashboard to monitor and manage the Kubernetes cluster.
- Apache Airflow: Access the Airflow web UI to manage, schedule, and monitor workflows.