This project is currently in beta and APIs are subject to change.


Accept Payments with Apple Pay and Android Pay using the Payment Request API.
Features
- Simple. No more checkout forms.
- Effective. Faster checkouts that increase conversion.
- Future-proof. Use a W3C Standards API, supported by companies like Google, Firefox and others.
- Cross-platform. Share payments code between your iOS, Android, and web apps.
- Add-ons. Easily enable support for Stripe or Braintree via add-ons.
You can run the demo by cloning the project and running:
$ yarn run:demoIn a rush? Check out the browser version of the demo.
Note that you'll need to run it from a browser with Payment Request support.
First, download the package:
$ yarn add react-native-paymentsSecond, link the native dependencies:
$ react-native link react-native-payments- Setting up Apple Pay/Android Pay
- Importing the Library
- Initializing the Payment Request
- Displaying the Payment Request
- Aborting the Payment Request
- Requesting Contact Information
- Requesting a Shipping Address
- Processing Payments
- Dismissing the Payment Request
Before you can start accepting payments in your App, you'll need to setup Apple Pay and/or Android Pay.
- Register as an Apple Developer
- Obtain a merchant ID
- Enable Apple Pay in your app
Apple has a documentation on how to do this in their Configuring your Environment guide.
- Add Android Pay and Google Play Services to your dependencies
- Enable Android Pay in your Manifest
Google has documentation on how to do this in their Setup Android Pay guide.
Once Apple Pay/Android Pay is enabled in your app, jump into your app's entrypoint and make the PaymentRequest globally available to your app.
// index.ios.js
global.PaymentRequest = require('react-native-payments').PaymentRequest;To initialize a Payment Request, you'll need to provide PaymentMethodData and PaymentDetails.
The Payment Method Data is where you defined the forms of payment that you accept. To enable Apple Pay, we'll define a supportedMethod of apple-pay. We're also required to pass a data object to configures Apple Pay. This is where we provide our merchant id, define the supported card types and the currency we'll be operating in.
const METHOD_DATA = [{
  supportedMethods: ['apple-pay'],
  data: {
    merchantIdentifier: 'merchant.com.your-app.namespace',
    supportedNetworks: ['visa', 'mastercard', 'amex'],
    countryCode: 'US',
    currencyCode: 'USD'
  }
}];
See Android Pay Example
const METHOD_DATA = [{
  supportedMethods: ['android-pay'],
  data: {
    supportedNetworks: ['visa', 'mastercard', 'amex'],
    currencyCode: 'USD',
    environment: 'TEST', // defaults to production
    paymentMethodTokenizationParameters: {
      tokenizationType: 'NETWORK_TOKEN',
      parameters: {
        publicKey: 'your-pubic-key'
      }
    }
  }
}];
Payment Details is where define transaction details like display items, a total and optionally shipping options.
Google has excellent documentation for Defining Payment Details.
const DETAILS = {
  id: 'basic-example',
  displayItems: [
    {
      label: 'Movie Ticket',
      amount: { currency: 'USD', value: '15.00' }
    }
  ],
  total: {
    label: 'Merchant Name',
    amount: { currency: 'USD', value: '15.00' }
  }
};
Once you've defined your methodData and details, you're ready to initialize your Payment Request.
const paymentRequest = new PaymentRequest(METHOD_DATA, DETAILS);🚨 Note: On Android, display items are not displayed within the Android Pay view. Instead, the User Flows documentation suggests showing users a confirmation view where you list the display items. When using React Native Payments, show this view after receiving the PaymentResponse.
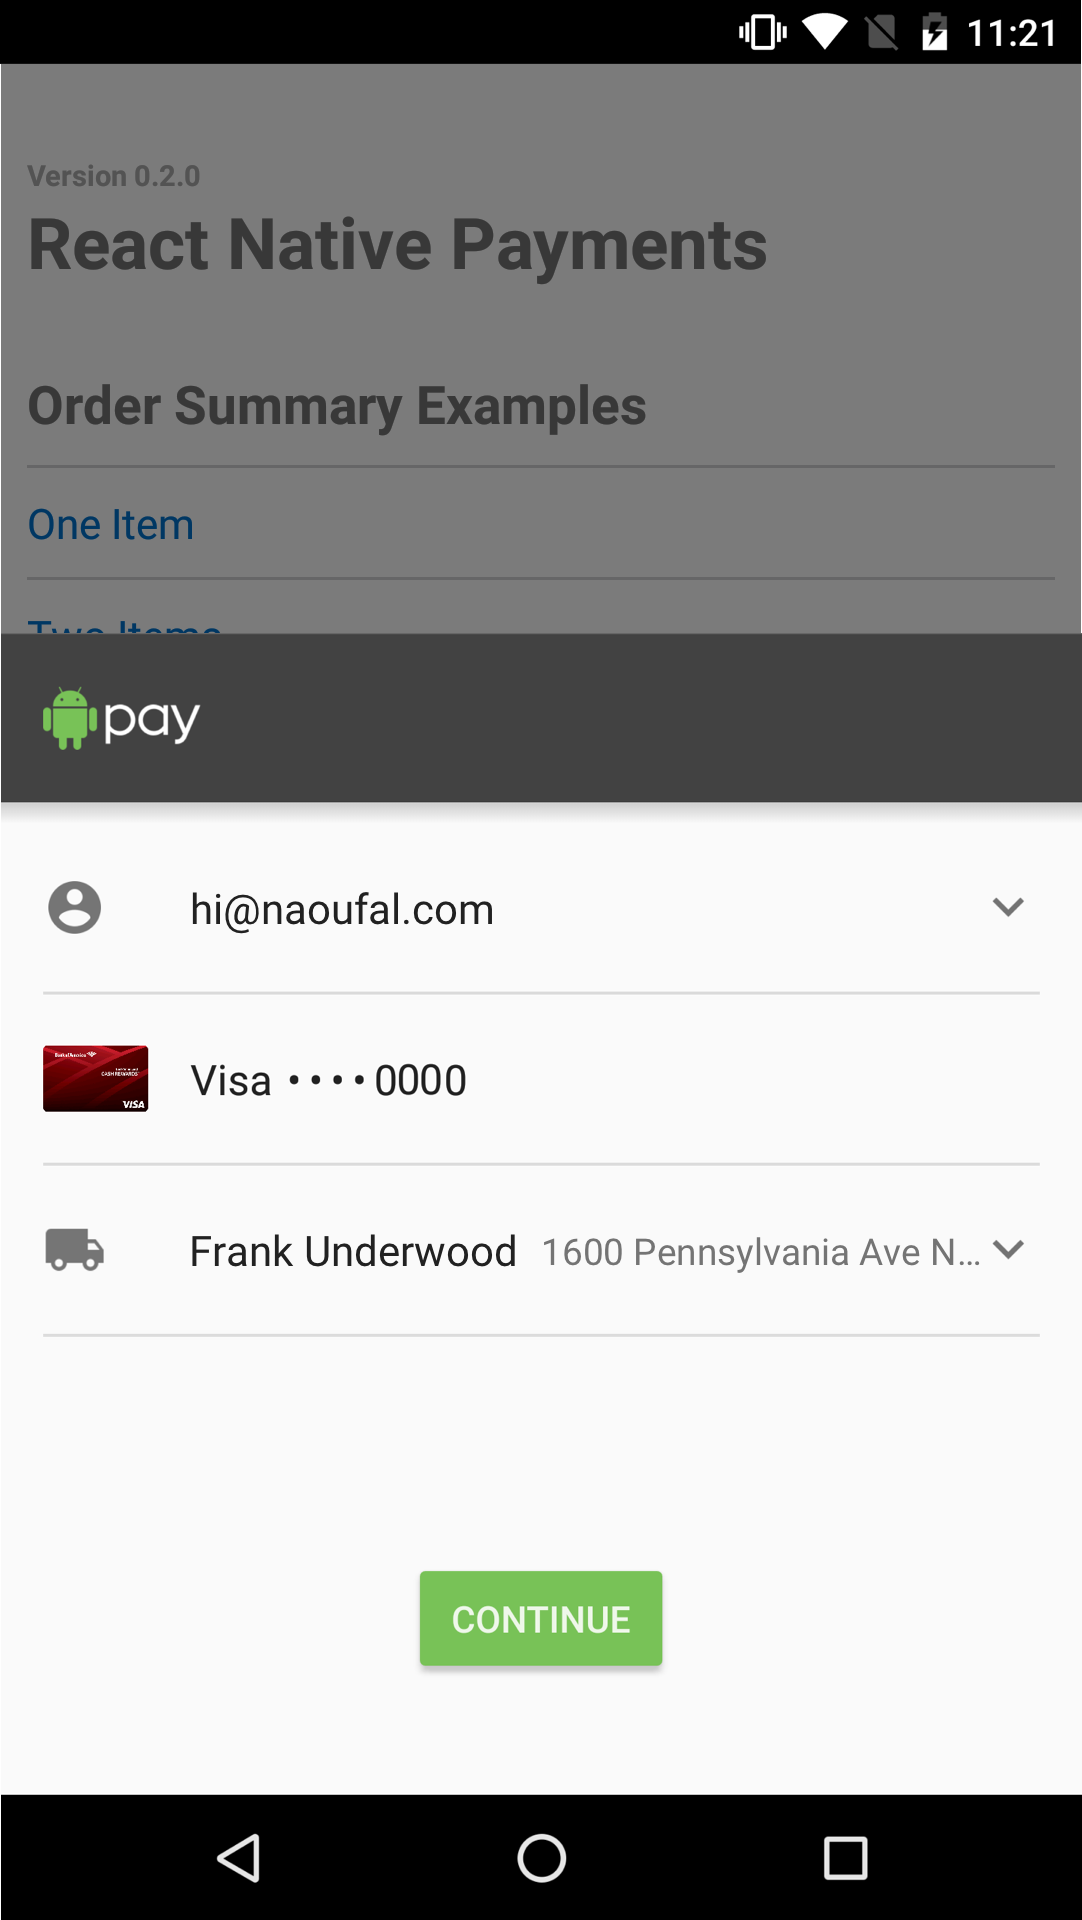
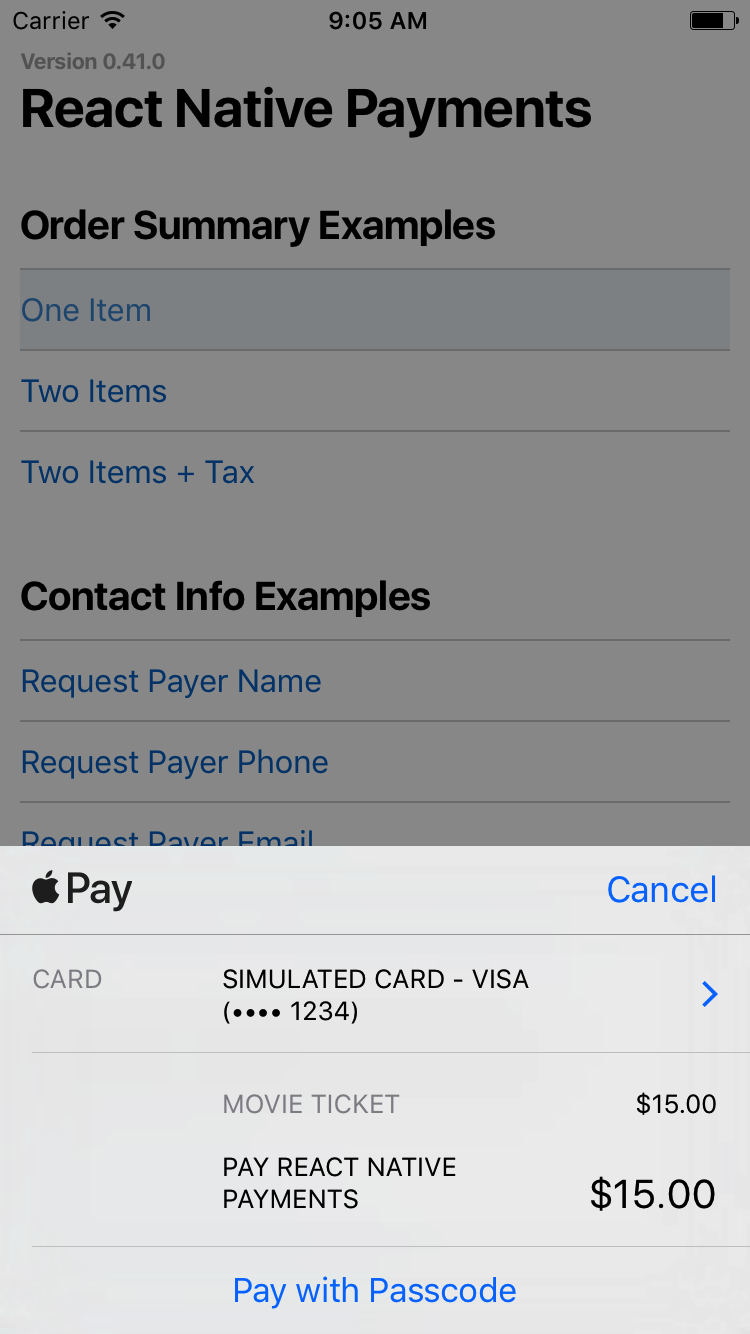
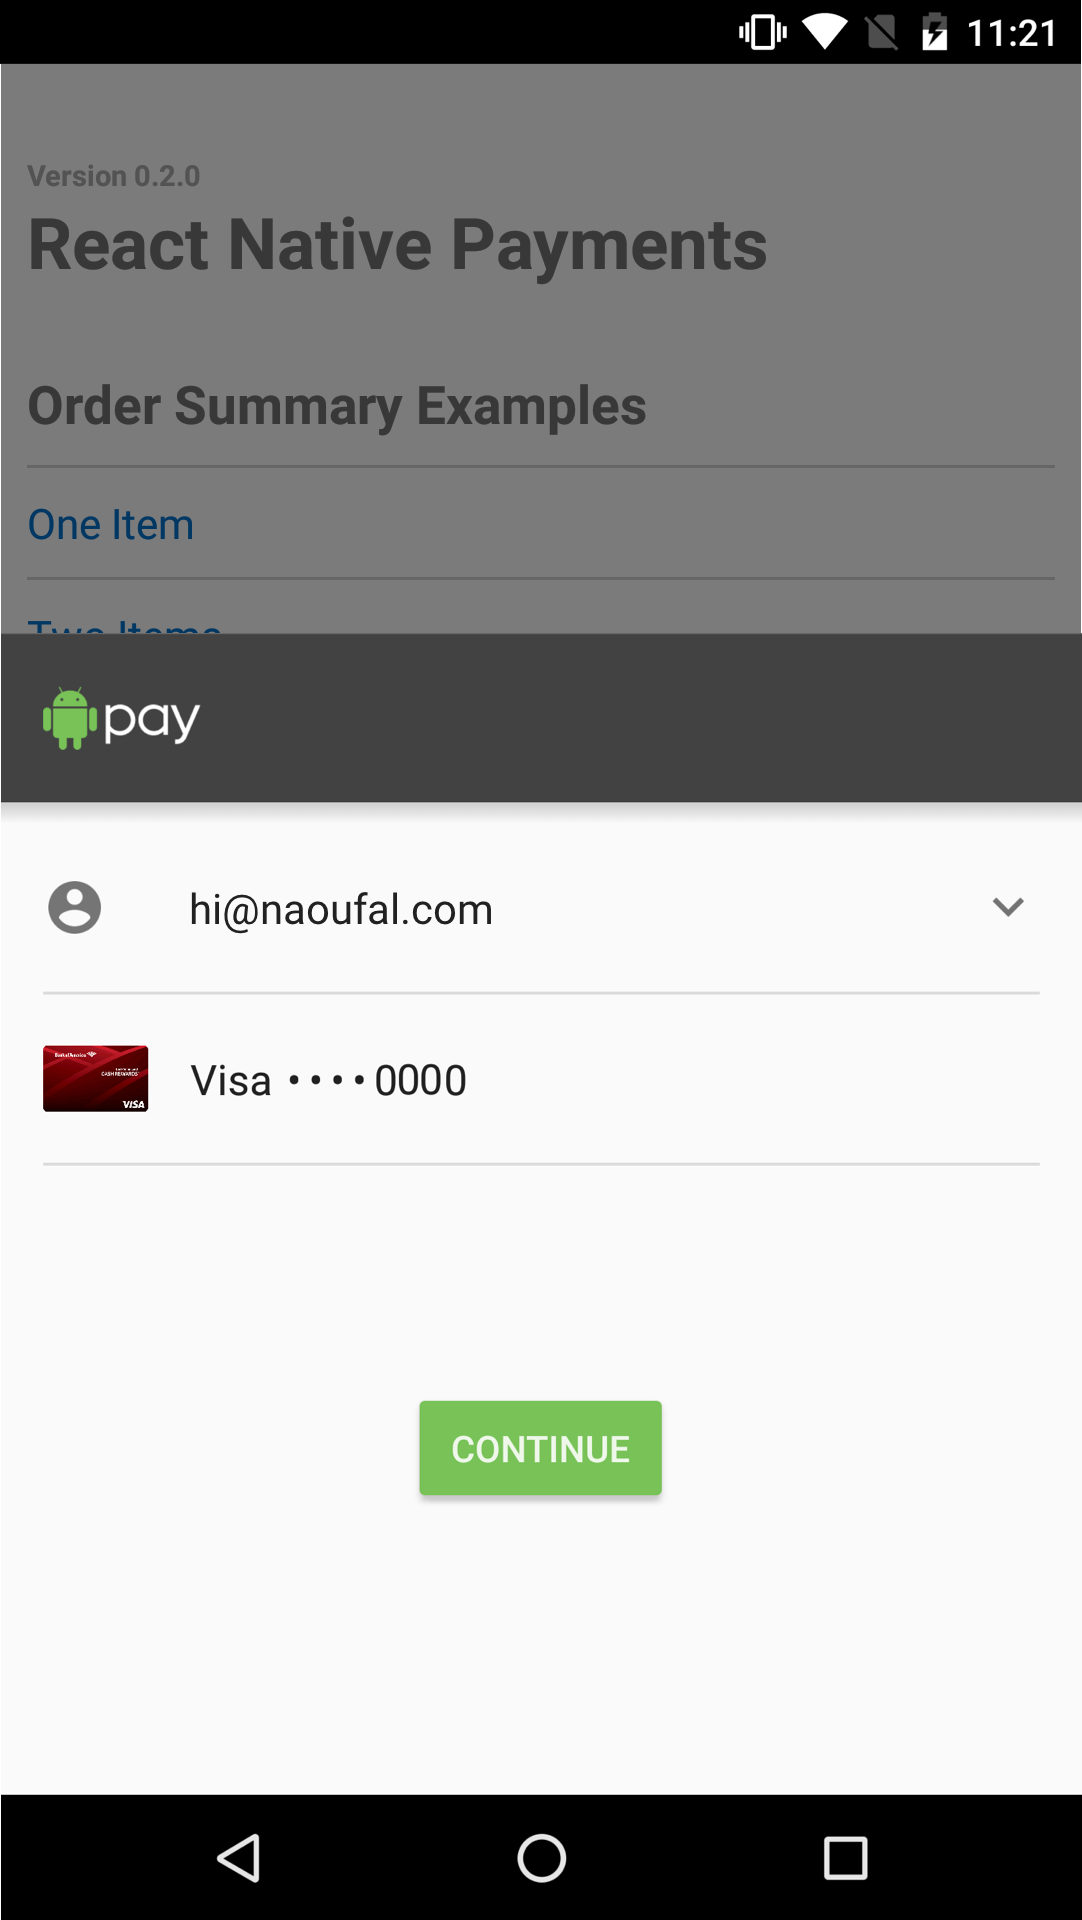
Now that you've setup your Payment Request, displaying it is as simple as calling the show method.
paymentRequest.show();See Screenshots
You can abort the Payment Request at any point by calling the abort method.
paymentRequest.abort();🚨 Note: Not yet implemented on Android Pay
Some apps may require contact information from a user. You can do so by providing a PaymentOptions as a third argument when initializing a Payment Request. Using Payment Options, you can request a contact name, phone number and/or email.
Set requestPayerName to true to request a contact name.
const OPTIONS = {
  requestPayerName: true
};
See Screenshots

🚨 Note: On Android, requesting a contact name will present the user with a shipping address selector. If you're not shipping anything to the user, consider capturing the contact name outside of Android Pay.
Set requestPayerPhone to true to request a phone number.
const OPTIONS = {
  requestPayerPhone: true
};
See Screenshots
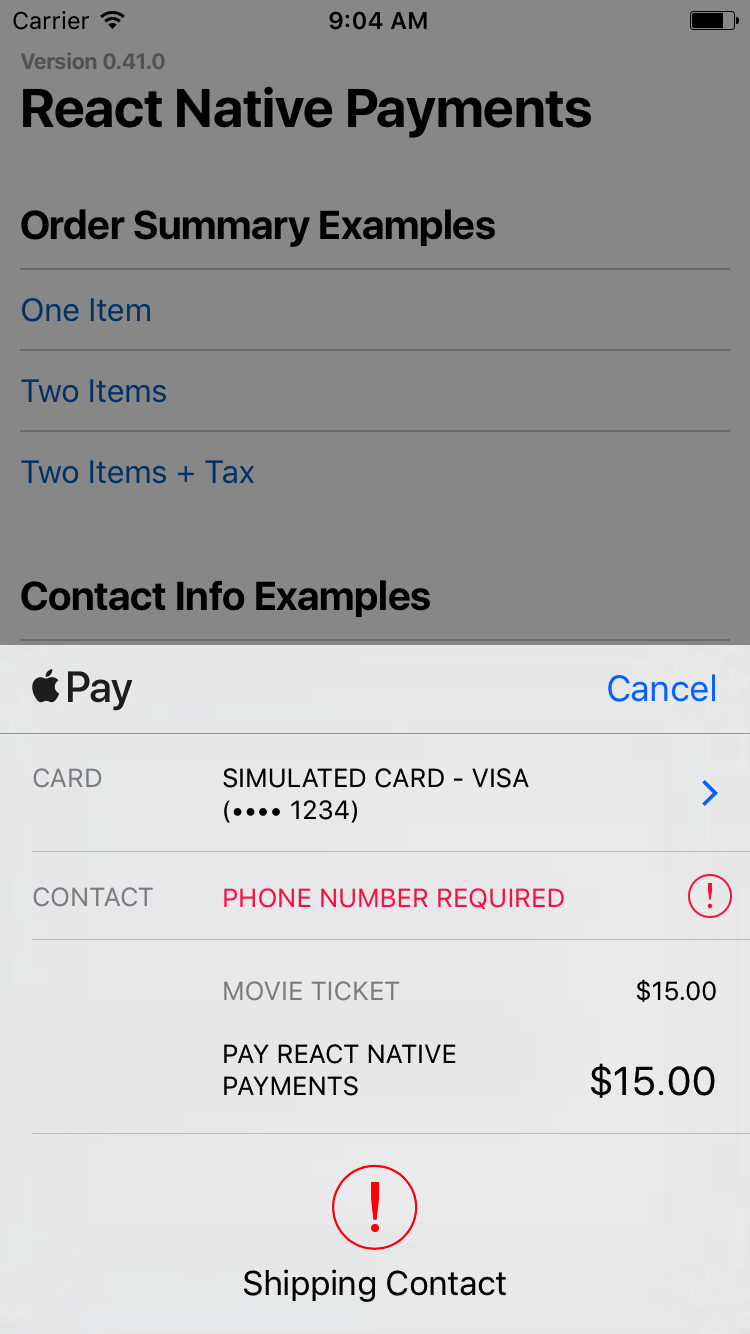
🚨 Note: On Android, requesting a phone number will present the user with a shipping address selector. If you're not shipping anything to the user, consider capturing the phone number outside of Android Pay.
Set requestPayerEmail to true to request an email address.
const OPTIONS = {
  requestPayerEmail: true
};
See Screenshots

You can also request all three by setting them all to true.
const OPTIONS = {
  requestPayerName: true,
  requestPayerPhone: true,
  requestPayerEmail: true
};
Requesting a shipping address is done in three steps.
First, you'll need to set requestShipping to true within PaymentOptions.
const OPTIONS = {
  requestShipping: true
};
Second, you'll need to include shippingOptions in your Payment Details.
const DETAILS = {
  id: 'basic-example',
  displayItems: [
    {
      label: 'Movie Ticket',
      amount: { currency: 'USD', value: '15.00' }
    }
  ],
+ shippingOptions: [{
+   id: 'economy',
+   label: 'Economy Shipping',
+   amount: { currency: 'USD', value: '0.00' },
+   detail: 'Arrives in 3-5 days' // `detail` is specific to React Native Payments
+ }],
  total: {
    label: 'Merchant Name',
    amount: { currency: 'USD', value: '15.00' }
  }
};
Lastly, you'll need to register event listeners for when a user selects a shippingAddress and/or a shippingOption. In the callback each event, you'll need to provide new PaymentDetails that will update your PaymentRequest.
paymentRequest.addEventListener('shippingaddresschange', e => {
  const updatedDetails = getUpdatedDetailsForShippingAddress(paymentRequest.shippingAddress;

  e.updateWith(updatedDetails);
});

paymentRequest.addEventListener('shippingoptionchange', e => {
  const updatedDetails = getUpdatedDetailsForShippingOption(paymentRequest.shippingOption);

  e.updateWith(updatedDetails);
});
For a deeper dive on handling shipping in Payment Request, checkout Google's Shipping in Payment Request.
🚨 Note: On Android, there are no shippingaddresschange and shippingoptionchange events. To allow users to update their shipping address, you'll need to trigger a new PaymentRequest. Updating shipping options typically happens after the receiving the PaymentResponse and before calling its getPaymentToken method.
Now that we know how to initialize, display, and dismiss a Payment Request, let's take a look at how to process payments.
When a user accepts to pay, PaymentRequest.show will resolve to a Payment Response.
paymentRequest.show()
  .then(paymentResponse => {
    // Your payment processing code goes here

    return processPayment(paymentResponse);
  });
There are two ways to process Apple Pay/Android Pay payments -- on your server or using a payment processor.
If you're equipped to process Apple Pay/Android Pay payments on your server, all you have to do is send the Payment Response data to your server.
⚠️ Note: When running Apple Pay on simulator,paymentDataequals tonull.
import { NativeModules } from 'react-native';

paymentRequest.show()
  .then(paymentResponse => {
    const { transactionIdentifier, paymentData } = paymentResponse.details;

    return fetch('...', {
      method: 'POST',
      body: {
        transactionIdentifier,
        paymentData
      }
    })
    .then(res => res.json())
    .then(successHandler)
    .catch(errorHandler)
  });
See Android Pay Example
paymentRequest.show()
  .then(paymentResponse => {
    const { getPaymentToken } = paymentResponse.details;

    return getPaymentToken()
      .then(paymentToken => {
        const { ephemeralPublicKey, encryptedMessage, tag } = paymentResponse.details;

        return fetch('...', {
          method: 'POST',
          body: {
            ephemeralPublicKey,
            encryptedMessage,
            tag
          }
        })
        .then(res => res.json())
        .then(successHandler)
        .catch(errorHandler)
      });
  });
You can learn more about server-side decrypting of Payment Tokens on Apple's Payment Token Format Reference documentation.
When using a payment processor, you'll receive a paymentToken field within the details of the PaymentResponse. Use this token to charge customers with your payment processor.
paymentRequest.show()
  .then(paymentResponse => {
    const { paymentToken } = paymentResponse.details; // On Android, you need to invoke the `getPaymentToken` method to receive the `paymentToken`.

    return fetch('...', {
      method: 'POST',
      body: {
        paymentToken
      }
    })
    .then(res => res.json())
    .then(successHandler)
    .catch(errorHandler);
  });
See Android Pay Example
paymentRequest.show()
  .then(paymentResponse => {
    const { getPaymentToken } = paymentResponse.details;

    return getPaymentToken()
      .then(paymentToken => fetch('...', {
        method: 'POST',
        body: {
          paymentToken
        }
      })
      .then(res => res.json())
      .then(successHandler)
      .catch(errorHandler);
    });
  });
For a list of supported payment processors and how to enable them, see the Add-ons section.
Dismissing the Payment Request is as simple as calling the complete method on of the PaymentResponse.
paymentResponse.complete('success'); // Alternatively, you can call it with `fail` or `unknown`🚨 Note: On Android, there is no need to call paymentResponse.complete -- the PaymentRequest dismisses itself.
The sandbox environment is a great way to test offline implementation of Apple Pay for apps, websites, and point of sale systems. Apple offers detailed guide for setting up sandbox environment.
⚠️ Note: It is also important to test Apple Pay in your production environment. Real cards must be used in the production environment. Test cards will not work.
⚠️ Note: There are known differences when running Apple Pay on simulator and real device. Make sure you test Apple Pay on real device before going into production.
Provides a button that is used either to trigger payments through Apple Pay or to prompt the user to set up a card. Detailed docs and examples
Here's a list of Payment Processors that you can enable via add-ons:
🚨 Note: On Android, Payment Processors are enabled by default.
- Introducing the Payment Request API
- Deep Dive into the Payment Request API
- W3C API Working Draft
- Web Payments
- The Future of Web Payments
- Getting Started with Apple Pay
- Configuring your Environment
- Processing Payments
- Payment Token Format Reference
Licensed under the MIT License, Copyright © 2017, Naoufal Kadhom.
See LICENSE for more information.