

--{{0}}--
With Lia, we try to implement an extended Markdown format that should enable everyone to create, share, adapt, translate or correct and extend online courses without the need of being a web-developer.
See the online rendered version at: https://liascript.github.io/course/?https://raw.githubusercontent.com/liaScript/docs/master/README.md
--{{0}}--
Click on the (ear) button at the navigation bar to switch between spoken and plain text mode format. And use the arrows-buttons at the top for navigating.
Lia-Script is an extended Markdown format for writing interactive online courses. Imagine all schoolbooks, technical or scientific literature could become open-source projects and more interactive ... with collaborating teachers and students ...
-
easy to share adapt and translate
-
no additional software required, everything is implemented in JavaScirpt/Elm and runs directly within the browser (online)
-
automatic conversion to epub, pdf, ...
--{{1}}--
Everything that is required is simple text-editor and a web-browser. Or you start directly to create and share your course on github. The entire parsing and transformation of Lia-Markdown to any other format is done within the browser at client-side.
--{{0}}--
There are currently 2 Plugins for the Atom Editor available, which are intended to ease and simplify the development of online course with LiaScript.
liascript-preview: Is a tiny previewer that, if it was toggled, updates the view on your course each time you save your document.
liascript-snippets: If you start typing "lia" in your document you switch on a fuzzy search, that contains a lot of LiaScript help, examples, and snippets.

--{{0}}--
This section is intended to give a brief overview on the basic Markdown formatting elements. The only difference to common Markdown at this point is, that every course has to start with a comment, which defines authors, a language and a narrator voice, see https://responsivevoice.org for all supported voices.
Initial LIA-comment-tag for basic definitions:
<!--

author:   Andre Dietrich

email:    LiaScript@web.de

version:  0.0.1

language: en

narrator: US English Female

script:   javascript resourse url

script:   another javascript resourse url

link:     some css stuff
          and some more css

--> --{{0}}--
A course is structured as any other Markdown document with starting hash-tags, whereby the number of hash-tags is used to define the hierarchy.
# Main Title

 ...

## Section Title 1

 ...

### Subsection Title

 ...
## Section Title 2 --{{0}}--
We tried to use the github flavored Markdown style for simple formatting with some additional elements.
*italic* -> italic
**bold** -> bold
***bold and italic *** -> ***bold and italic ***
_also italic_ -> also italic
__also bold__ -> also bold
___also bold and italic___ -> also bold and italic
~strike~ -> strike
--{{1}}--
These exceptions are for example underline and its combination with strike through or the application of superscript. If you, for example, superscript superscript you can get even smaller.
{{1}}
~~underline~~ -> underline
~~~strike and underline~~~ -> ~~~strike and underline~~~
^superscript^ -> ^superscript^ ^^superscript^^ ^^^superscript^^^
--{{0}}--
As you can see from the examples, you can combine all elements freely.
**bold _bold italic_** -> bold italic
**~bold strike~ ~~bold underline~~** -> bold strike bold underline
*~italic strike~ ~~italic underline~~* -> italic strike italic underline
*, ~, _, #, {, }, [, ], |, `, $
--{{0}}--
If you want to use multiple stars, hash-tags, or other syntax elements within your script without applying their functionality, then you can escape them with a starting backslash.
--{{0}}--
One thing that we missed in standard Markdown, was an implementation for arrows. The parenthesis shows, how arrows are defined in our Markdown implementation with their result on the right (these symbols are generated automatically for you).
(->) ->, (->>) ->>, (>->) >->, (<-) <-, (<-<) <-<,
(<<-) <<-, (<->) <->, (=>) =>, (<=) <=, (<=>) <=>
(-->) -->, (<--) <--, (<-->) <-->, (==>) ==>, (<==) <==, (<==>) <==>
(~>) >, (<~) <
--{{1}}--
But you can also use some basic smileys. We will try to extend this partial support in the future.
{{1}}
:-) :-), ;-) ;-), :-D :-D, :-O :-O, :-( :-(, :-| :-|,
:-/ :-/, :-P :-P, :-* :-*, :') :'), :'( :'(
The next section shows how external resources can be integrated.
--{{0}}--
There are two ways of adding links to a Markdown document, either by inlining the url directly or you can name it, as shown in listing 2, by applying the typical brackets and parenthesis notation, the optional info is put in double quotes at the end of the url.
-
example of an url-link -> http://goo.gl/fGXNvu
text-formatting can be applied also (
*** http://goo.gl/fGXNvu ***) -> *** http://goo.gl/fGXNvu *** -
naming the link (
[title](http://goo.gl/fGXNvu "optional info")) -> title -
For internal navigation you can refer to the slide number or to title with with a starting
#[next slide](#11)-> next slide[next slide](#images-and-movies)-> next slide
--{{0}}--
Images are marked with a starting exclamation mark before the link, audio by a
starting question mark and movies are made of images and sound, that is why you
combine both marks !?. Defining ressources this way shows at least the links
correctly in other Markdown parsers or on github. There is baked-in support for
YouTube, Soundcloud,
Vimeo and TeacherTube, which
means that you only have to include the link and the resource will be embedded
appropriately.
Image-notation: 
- url:
 - relative path:
 

Audio-notation: ?[alt-text](audio-url "some info")
?[a horse](https://www.w3schools.com/html/horse.mp3 "hear a horse")- ?a horse
?[soundcloud](https://soundcloud.com/glennmorrison/beethoven-moonlight-sonata "just add the link")- ?a horse
Movie-notation: !?[alt-text](movie-url)
- YouTube:
!?[movie](https://www.youtube.com/watch?v=8pTEmbeENF4) - !?movie
- See also http://www.google.com/support/youtube/bin/answer.py?hl=en&answer=56107 to get an overview on how a YouTube link has to be formatted to add a starting and/or end point, autoplay, subtitles, and other options.
- relative path:
!?[movie](vid/math.mp4) - !?movie
--{{0}}--
Adding CSS elements or classes or any other HTML setting to an image or to any other Markdown element is implemented via a trailing comment-tag, everything within this comment is treated as a HTML attribute, so that it can also be used to apply graphical filters of for positioning.
<!--
style = "width: 100px;
border: 10px solid;
filter: grayscale(100%);"
class = "animated infinite bounce"
-->
class = "animated infinite bounce"
-->
--{{1}}--
The same technique can also be applied to style and format movies and other inline elements, such as links, words, symbols, or code...
{{1}}
!?movie !?movie !?movie !?movie !?movie
:-) <!-- class = "animated infinite bounce" --> ==> :-)
[google](www.google.de) <!-- style = "color: red;" --> ==> google
--{{0}}--
Settings for entire blocks can be set with a starting comment that includes all required HTML-attributes and can even contain animation settings. These can be used to highlight specific elements of your slides.
<!-- class = "animated rollIn" style = "animation-delay: 3s; color: purple" -->
The whole text-block should appear in purple color and with a wobbling effect.
Which is a **bad** example, please use it with causion ...
~~ ;-) ~~ <!-- class = "animated infinite bounce" style = "color: red;" -->
The whole text-block should appear in purple color and with a wobbling effect. Which is a bad example, please use it with causion ... ~~ ;-) ~~
Within the following part enumerations, itemizations and tables are presented, actually with no difference to basic Markdown, so you can skip this section, if you are already familiar with it.
--{{0}}--
To define unordered list, starting stars, pluses, and minuses can be used and mixed. If one point has more than one line, you can also use newlines, but with spaces at the beginning. Paragraphs can be included in the same way, by using two newlines.
Markdown-format:
* alpha
+ *beta*
- gamma
  and delta

  new Paragraph
Result:
- alpha
- beta
-
gamma and delta
new Paragraph
--{{0}}--
Ordered list start with a number and a dot. As you can see from the example, the numbering is important, n contrast to the github flavored Markdown. This way you can separate lists, add something in between, make use of animations and effects. And it is also possible to mix lists with other lists and elements freely.
Markdown-format:
0. alpha
2. **beta**
1. * gamma
   * delta
   * and epsilon
3. probably zeta
Result:
- alpha
- beta
-
- gamma
- delta
- and epsilon
- probably zeta
Note: Checkout section Fun With Tables to see what is even possible with tables. The follow section provides only a small overview...
--{{0}}--
Tables, we hope, are self-explanatory. The second line is used to define a table header as well as the alignment of the column, which is indicated by the colon. The default is left alignment.
Markdown-format:
| Tables            | Are           | Cool  |
| ----------------- |:-------------:| -----:|
| *** col 3 is ***  | right-aligned | $1600 |
| ** col 2 is **    | centered      |   $12 |
| * zebra stripes * | are neat      |    $1 |
Result:
| Tables | Are | Cool |
|---|---|---|
| *** col 3 is *** | right-aligned | $1600 |
| ** col 2 is ** | centered | $12 |
| * zebra stripes * | are neat | $1 |
--{{1}}--
As you can see in the LiaScript interpreted version, tables can be sorted according to a column, either ascending or descending. But why stopping here? Every table also defines a dataset, right. So why not simply using it to directly plot graphs, scatter-plots, or bar-charts.
--{{2}}--
If the first column of a table contains only numbers, and the other columns contain some numbers, then these values can be directly plotted. The first column thus describes always the x values and the rest is up to you. Use the small icon above the table to switch between table view and plotted version.
{{2}}
| x's |  some y's  |    dist |
| --- |:----------:| -------:|
| 1   |    1 \$    | 16 $km$ |
| 2.2 |    2 \$    | 12 $km$ |
| 3.3 |    5 \$    |  1 $km$ |
| 4   | -12.333 \$ |         |
{{2}}
| x's | some y's | dist |
|---|---|---|
| 1 | 1 $ | 16 |
| 2.2 | 2 $ | 12 |
| 3.3 | 5 $ | 1 |
| 4 | -12.333 $ |
--{{3}}--
A function cannot turn an x value into different y values, thus, if you have at least one x value twice, the resulting plot will be a scatter plot. By the way, only the first word in a cell (separated by spaces) gets interpreted as a number. If you don't want this to happen for a certain cell, then simply attach something directly to the number, add a character in front of it or use the math notation.
{{3}}
| x's |  some y's  |                              dist |
| --- |:----------:| ---------------------------------:|
| 1   |    1 \$    |                           16 $km$ |
| 2.2 |    2 \$    |                           12 $km$ |
| 3.3 |    5 \$    |                            1 $km$ |
| 4   | -12.333 \$ | -555$km$ <-- this will be ignored |
| 4   |            |                                 1 |
{{3}}
| x's | some y's | dist |
|---|---|---|
| 1 | 1 $ | 16 |
| 2.2 | 2 $ | 12 |
| 3.3 | 5 $ | 1 |
| 4 | -12.333 $ | -555$km$ <-- this will be ignored |
| 4 | 1 |
--{{4}}--
Last but not least bar-charts. If the first column contains at least one cell, that cannot be parsed as a number, while the other columns still have numbers, then this table gets interpreted as a bar-chart. The first column thus defines your set of groups. It is now also possible to sort your table according to different columns and see this ordering also within the bar-chart representation.
{{4}}
| Animal          | weight in kg | Lifespan years | Mitogen |
| --------------- | ------------:| --------------:| -------:|
| Mouse           |        0.028 |             02 |      95 |
| Flying squirrel |        0.085 |             15 |      50 |
| Brown bat       |        0.020 |             30 |      10 |
| Sheep           |           90 |             12 |      95 |
| Human           |           68 |             70 |      10 |
{{4}}
| Animal | weight in kg | Lifespan years | Mitogen |
|---|---|---|---|
| Mouse | 0.028 | 02 | 95 |
| Flying squirrel | 0.085 | 15 | 50 |
| Brown bat | 0.020 | 30 | 10 |
| Sheep | 90 | 12 | 95 |
| Human | 68 | 70 | 10 |
Markdown-format:
<!--
style="font-size: 18px; font-style: italic; width: 500px; margin: 0.25em 0;"
-->
> Blockquotes are very handy in email to emulate reply text.
> This line is part of the same quote.

Quote break.

> This is a very long line that will still be quoted properly when it wraps...
Result:
Blockquotes are very handy in email to emulate reply text. This line is part of the same quote.
Quote break.
This is a very long line that will still be quoted properly when it wraps. Oh boy let's keep writing to make sure this is long enough to actually wrap for everyone. Oh, you can put Markdown into a blockquote.
--{{1}}--
Next to simple paragraphs also any other block element can be included ...
{{1}}
> <!-- style="font-size: 18px; font-style: italic; width: 500px; margin: 5.25em 0;" -->
> | Tables            | Are           | Cool  |
> | ----------------- |:-------------:| -----:|
> | *** col 3 is ***  | right-aligned | $1600 |
> | ** col 2 is **    | centered      |   $12 |
> | * zebra stripes * | are neat      |    $1 |
Result:
Tables Are Cool *** col 3 is *** right-aligned $1600 ** col 2 is ** centered $12 * zebra stripes * are neat $1
You can also use raw HTML in your Markdown, and it'll mostly work pretty well. Mixing HTML with Markdown is also possible, but it should be used with caution, since it is mixing two different styles of parsing.
Test **bold** and <b> HTML bold</b> works also inline

<details>

<summary>$ f(a,b,c) = (a^2+b^2+c^2)^3 $</summary>

<p>
Here is the source data that is discussed in the article ...
</p>

<dl>
  <dt style="color: red">Definition list</dt>
  <dd>Is something people use sometimes.</dd>

  <dt><b>Markdown in HTML</b></dt>
  <dd>Does _work_ **very** well. Use HTML <em>tags</em>.</dd>
</dl>

</details>
Test bold and HTML bold works also inline
$ f(a,b,c) = (a^2+b^2+c^2)^3 $
Here is the source data that is discussed in the article ...
- Definition list
- Is something people use sometimes.
- Markdown in HTML
- Does _work_ **very** well. Use HTML tags.
!?alt-text
--{{0}}--
In contrast to common Markdown-Parsers it is also possible to include and execute javascript code. If you combine it with your HTML elements, you are free to integrate whatever you want.
<div class="ct-chart ct-golden-section" id="chart"></div>
<script>
    // Initialize a Line chart in the container with the ID chart
    new Chartist.Line('#chart', {
        labels: [1, 2, 3, 4],
        series: [[100, 120, 180, 200]]
    });
</script>
{{0-1}}
{{1}}
--{{2}}--
Note, you have to include all required JavaScirpt-resourses in the initial comment after the script definition. And by combining this feature with LiaScript effects, you can build even more sophisticated courses.
There might be use cases where you either want to show some parts only within the HTML world and others only withing the LiaScript world. As it was shortly introduced in the section about styling, you can add comments to the start of every block to add additional attributes. These attributes can be used a trigger to hide or show content.
<!-- style="display:block" -->
<div style="display:none">

only visible in LiaScript

</div>

-----------------------------------------------

<!-- style="display:none" -->
<div style="display:block" width="200px">

Not visible in LiaScript, but everywhere else

</div>
The attributes within the comment overwrite the attributes within the block,
thus, if there would be more stuff within style, this will be overwritten, but
other attributes like width wont...
--{{0}}--
There are two types of footnotes, either inline or divided ones (into two parts). The the footnotbody is only showed in textbook mode, or if you click on the marker.
-
Inline Footnote[^1](explanation in one line) =>
[^1](explanation in one line) -
Divided into a marker1 =>
[^2], that can appeare every where and an explanation at the bottom of a section.[^2]: This is an explanation, than can consist of multiple blocks.
{{0}} via KaTex http://katex.org
{{1}} Inline math-mode $ \frac{a}{\sum{b+i}} $ -> $ \frac{a}{\sum{b+i}} $
{{2}}
Multi-line math-mode can be applied by double dollars $$ formula $$
$$
\frac{a}{\sum{b+i}}
$$
--{{0}}--
We apply KaTeX for math-formatting, see the documentation at www.katex.org.
--{{1}}--
A formula can be either inline with single dollars.
--{{2}}--
Or multi-line by using the double dollar notation.
The following section shows a three types of code blocks, simple inline and block-code as well as interactive block-code, as an extension to common Markdown.
Inline code via ` enter some code in here 1###$& ` -> enter some code in here 1###$&
--{{0}}--
Syntax highlighting is enabled with highlight.js. Blocks of code are either by lines with three back-ticks ``` and an identifier for the language. See a complete list of examples and how to write language names at the highlight.js demo page.
```language <- (python, c, javascript, ...)  +OptionalTitle

code ...

```
C example:
#include "test.h"

int main () {
    printf("this is an example\n");
    return 0;
}
Python example:
import math

def lia_sqrt(val):
return math.sqrt(val) + 22 --{{0}}--
Why should code examples not be interactive and editable, especially if it is
JavaScript or any other language that has been ported to it? Simply add the
required resources to the initial comment with keyword script.
-
Add resource to main-comment:
script: url.js -
Add a trailing script-tag to your code:
<script>@input</script> -
A project with multiple files can be realized with
@input(0),@input(1), ...,@input(n).--{{1}}--
And add an additional script tag to the end of your language definition with an
@input macro. This element is afterwards substituted with your code and
executed. We provide some basic examples within the following section.
--{{2}}--
Use the @input macro as a parameterized function in projects. The number
defines the the file, starting from 0.
--{{0}}--
Click on the run-button to execute the script or double-click on the code to edit it and to change the output ...
Double-click on the code to switch to edit mode and double-click to get out:
var i=0;
var j=0;
var result = 0;

for(i = 0; i<1000; i++) {
    for(j = 0; j<i; j++) {
        result += j;
    }
}
// the last statement defines the return statement
result; --{{0}}--
Multiple different code snippets can be combined to form a larger project. It
requires to write them in a row. You can give them names, if you add a second
parameter after the highlighting definition. Add a + or - to the front of
your filename, in order to indicate, if it should be visible by default or not.
--{{1}}--
As mentioned earlier the @input macro gets substituted by the input of the
editor and you can pass a number to indicate which macro should be substituted
by which code block (@input(0) is equivalent to @input).
``` js     -EvalScript.js
let who = data.first_name + " " + data.last_name;

if(data.online) {
  who + " is online"; }
else {
  who + " is NOT online"; }
```
``` json    +Data.json
{
  "first_name" :  "Sammy",
  "last_name"  :  "Shark",
  "online"     :  true
}
```
<script>
  // insert the JSON dataset into the local variable data
  let data = @input(1);

  // eval the script that uses this dataset
  eval(`@input(0)`);
</script>
let who = data.first_name + " " + data.last_name;

if(data.online) {
  who + " is online"; }
else {
  who + " is NOT online"; }
{
"first_name" : "Sammy",
"last_name" : "Shark",
"online" : true
}If you want to write Markdown, you can skip this section, if you want to learn more about creating editable code for various different languages and purposes you will have to read this.
Check out https://github.com/LiaTemplates to see more sophisticated examples.
The easiest way to execute some code, is simply to add a script-tag to the end of your code-block. But, sometimes an execution takes longer or requires to execute some asynchronous code. For this purpose, LiaScript offers a simple event system that will be explained in more detail. For simplicity the entire code block will contain all JavaScript code that can be edited and executed. This can be placed afterwards below the code block.
To every executed peace of code a send module is associated, that is intended
to handle all required communication with that specific code-block or project
and the outer world. Thus, every send module is module does only exists in
this particular scope.
To start with, there is a log method, which can be used to send different
types of outputs directly to the console. But, you can of course also use the
console.log functions that do quite the same. Nevertheless, send.log gives
you a little more power when you start to create your own LiaScript libraries
and you have to handle multiple outputs.
/* send.log(type, sep, content)
*
* params:
*  - type: one of the follow strings "debug", "info", "warn", "error"
*  - sep: a string like separator, mostly for newlines "\n"...
*  - content : represents a list of list
*/

console.debug("these are short hands for send.log('debug' ... ")
console.warn("warn")
console.log("info")
console.error("and red for errors")

"fin"As you may have noticed, the last statement of an executed code-block does also
define the return statement. However, there are some results that are treated
differently. These are strings that start with "LIA: ". The string
"LIA: stop" for example, is used to tell the system to simply stop the
execution, without any further output.
33*33

"LIA: stop" // if you remove this string the result of the
// calculation will be visible in the shellIf the execution of your code may take longer, include some asynchronous calls
or you need to call an external service, you can tell this by finishing with the
statement "LIA: wait", which will show arrows that loop forever or until they
receive a "LIA: stop" signal.
setTimeout(function(){
  console.warn("end of execution")

  send.lia("some other ouput")

  send.lia("LIA: stop") // this stops the execution
}, 3000)


"LIA: wait" // wait until you you send a stopYou might probably wonder, why there is a need for send.lia, if you could also
pipe output to the console by using send.log or the shorthand console.log.
As it will be described in the section about error handling, send.lia gives
you more control, not only over the shell but also over the editor, see section
Error Handling.
The code example below, depicts how the terminal can be exposed, following the
previous logic, we only have to define "LIA: terminal" as the last statement
in order to switch on the terminal mode, that will be active until the user
clicks on the stop button, formerly known as the execute button, or a
"LIA: stop" is send from the script, or the browser gets refreshed.
In order to handle the input and the stop events from the terminal in the
JavaScript world, we have to define handles, as it is done in the code below.
Simply add a function, that evaluates or sends your terminal inputs to a foreign
server or a websocket, or ... whatever you want ... And use the stop handle to
close a connection or do some other stuff, if the user clicks onto the stop
button.
send.handle("input", input => {
  try{
    console.log(eval(input))
  } catch (e) {
    console.error(e);
  }
})

send.handle("stop", e => { alert("execution stopped") })

function close(){
  send.lia("LIA: stop")
}

"LIA: terminal" // execute the code andA little side note, there is also a function called console.clear, that does
what it says it clears the console, but it is not a realized by send.log,
instead this is a shortcut for send.lia("LIA: clear"). These were all
"LIA: ..." commands, the next section you will learn how to use the custom
built in event system to get even more stuff done.
All previous functions were executed only within the scope of a single
code-block, but sometimes it is necessary to connect with other external events.
For this purpose, the send object also contains two further generic functions,
these are register and dispatch. Simply use a unique identifier to name an
event, which is followed by a callback-function that does whatever you want.
Both callbacks are defined in local scope, but by using register and
dispatch you can send messages to any code-block. The example below also
delivers the messages successfully, if both code-blocks would be defined on
different slides.
send.register("ping", function(e){
  console.warn("ping", e)
})

send.handle("input", input => {
  send.dispatch("pong", input)
})

"LIA: terminal" // execute the code andsend.register("pong", function(e){
console.warn("pong", e)
})
send.handle("input", input => {
send.dispatch("ping", input)
})
"LIA: terminal" // execute the code andAdding such script-tags to the end of every code-block can be very tedious and cumbersome. Your Markdown will contain a lot of not necessary copy & paste code. To reduce this, LiaScript offers the possibility to define custom macros, and even more, you can directly import macros from other courses. Section Macros is used to describe this issue in more.
As mentioned earlier, send.lia can do more then just passing messages to the
terminal output. The editor that is currently used by LiaScript is ace,
which allows to mark lines with warnings and errors. Since there is no name
associated to a file (like with the @input(0) macro). You have to use a list
of lists, which contain all necessary information that you want to pass to the
editor. The list element is associated with the code-block, starting from top to
bottom.
send.lia( "ups, something went wrong",
  [[{ row : 1,
      column : 1,
      text : "insert your error info here",
      type : "error"
    },
    {
      row : 2,
      column : 1,
      text : "some general warnings about this line",
      type : "warning"
    }
  ]],
  false); // use true if the output should appear in "info" mode

"LIA: stop";If this seems to complicated, you can also throw and error by using LiaError.
The second parameter is used to define the number of code-blocks you use and
then the only thing you require, is to add as much detailed information, which
is similar to the previous example.
// create a new error with an error message that is
// connected to only one code-block, if you have more,
// increase the number ...
var error = new LiaError("ups something went wrong", 1);

error.add_detail(0, // <- associated code-block
  "insert your error info here",
  "error", 1, 1);

error.add_detail(0, // <- associated code-block
  "some general warnings about this line",
  "warning", 2, 1);


throw(error);As for Tables, it is also possible to apply some basic styling attributes to the editor. At default code-snippets that ar not executable will not show line numbers in order to be used also for pseudo-code, while executeable blocks will show line numbers, while the later ones can be edited and not the others. However, you can apply the follow attributes to make some definitions explicit. We tried to apply the common ACE notation. Attributes have to be applied per code-block, as it is shown in the example:
<!-- data-showGutter="false" -->
```cpp
// some C++ code without line numbers
...
```
<!-- data-readOnly="true" -->
```hpp
// some header-file with lineNumbers,
// that cannot be edited
```
<script>
...// your execution code
</script>
Attributes:
-
data-firstLineNumber: change the initial line number to any number you prefer (default:data-firstLineNumber="0"). -
data-fontSize: change the default font-size, which has to be defined withpt(defaultdata-fontSize="12pt"). -
data-readOnly: whether it is an executable snippet or not, there are different default values, you can either set onlydata-readOnlyto make it read-only or pass it a boolean value (data-readOnly="false") -
data-showGutter: same as with read-only -
data-tabSize: this takes an integer to represent the default tab-size replacement (defaultdata-tabSize="2") -
data-theme: your default theme as in your settings is applied, but you can change this to any of the ace-themes, eg:Chaos,Eclipse,Soliarized Light, ... -
data-marker: use this to highlight aspects of your code, you have to apply the following patterndata-marker="y1 x1 y2 x2 color type;". You start with a row and column and end with a row and a column. Then you can apply one of the predefined colors, forerror,log,warn,debugorinfo, or you can set your own color with the css rgba function, do not use spaces in this function!The type is optional, but you can choose between one of the following ace-marker types:
text, (defaultfullLine),screenLineIf you want more than one marker, then simply separate different marker definitions with a colon ...
this will be red

this is blue ...
until the next
line

and this is rgba(55,255,100,0.5)
A drawing example, for demonstrating that any javascript library can be used, also for drawing.
// Initialize a Line chart in the container with the ID chart1
new Chartist.Line('#chart1', {
  labels: [1, 2, 3, 4],
  series: [[100, 120, 180, 200]]
});

// Initialize a Line chart in the container with the ID chart2
new Chartist.Bar('#chart2', {
  labels: [1, 2, 3, 4],
  series: [[5, 2, 8, 3]]
});An example of a Computer-Algebra-System (Algebrit), see http://algebrite.org for more examples:
x + xf=sin(t)^4-2*cos(t/2)^3*sin(t)
f=circexp(f)
defint(f,t,0,2*pi)-- Read more about this program in the official Elm guide:
-- https://guide.elm-lang.org/architecture/user_input/buttons.html
import Html exposing (beginnerProgram, div, button, text)
import Html.Events exposing (onClick)
main =
beginnerProgram { model = 0, view = view, update = update }
view model =
div []
[ button [ onClick Decrement ] [ text "-" ]
, div [] [ text (toString model) ]
, button [ onClick Increment ] [ text "+" ]
]
type Msg = Increment | Decrement
update msg model =
case msg of
Increment ->
model + 1
Decrement ->
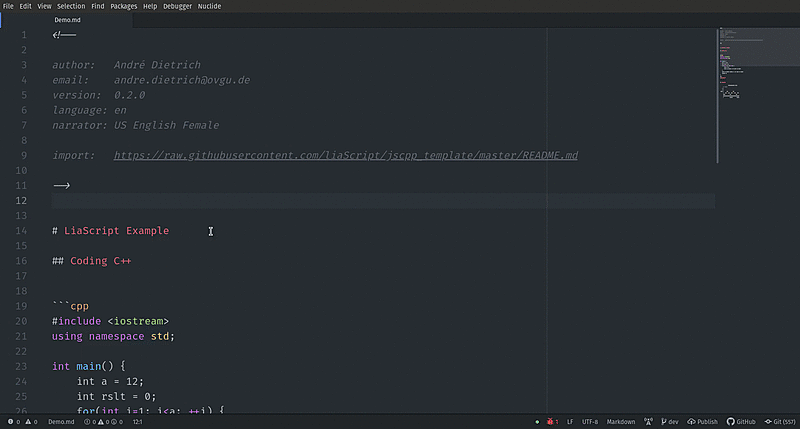
model - 1Teaching other language-basics is also possible, for this example we applied JSCPP to run simple C++ programs:
#include <iostream>
using namespace std;

int main() {
    int a = 120;
    int rslt = 0;
    for(int i=1; i<a; ++i) {
        rslt += i;
        cout << "rslt: " << rslt << endl;
    }
    cout << "final result = " << rslt << endl;
    return 0;
}See the implementation details at: https://curiosity-driven.org/prolog-interpreter
** Load Database and Rules: **
exists(A, list(A, _, _, _, _)).
exists(A, list(_, A, _, _, _)).
exists(A, list(_, _, A, _, _)).
exists(A, list(_, _, _, A, _)).
exists(A, list(_, _, _, _, A)).

rightOf(R, L, list(L, R, _, _, _)).
rightOf(R, L, list(_, L, R, _, _)).
rightOf(R, L, list(_, _, L, R, _)).
rightOf(R, L, list(_, _, _, L, R)).

middle(A, list(_, _, A, _, _)).

first(A, list(A, _, _, _, _)).

nextTo(A, B, list(B, A, _, _, _)).
nextTo(A, B, list(_, B, A, _, _)).
nextTo(A, B, list(_, _, B, A, _)).
nextTo(A, B, list(_, _, _, B, A)).
nextTo(A, B, list(A, B, _, _, _)).
nextTo(A, B, list(_, A, B, _, _)).
nextTo(A, B, list(_, _, A, B, _)).
nextTo(A, B, list(_, _, _, A, B)).

puzzle(Houses) :-
  exists(house(red, english, _, _, _), Houses),
  exists(house(_, spaniard, _, _, dog), Houses),
  exists(house(green, _, coffee, _, _), Houses),
  exists(house(_, ukrainian, tea, _, _), Houses),
  rightOf(house(green, _, _, _, _), house(ivory, _, _, _, _), Houses),
  exists(house(_, _, _, oldgold, snails), Houses),
  exists(house(yellow, _, _, kools, _), Houses),
  middle(house(_, _, milk, _, _), Houses),
  first(house(_, norwegian, _, _, _), Houses),
  nextTo(house(_, _, _, chesterfield, _), house(_, _, _, _, fox), Houses),
  nextTo(house(_, _, _, kools, _),house(_, _, _, _, horse), Houses),
  exists(house(_, _, orangejuice, luckystike, _), Houses),
  exists(house(_, japanese, _, parliament, _), Houses),
  nextTo(house(_, norwegian, _, _, _), house(blue, _, _, _, _), Houses),
  exists(house(_, _, water, _, _), Houses),
  exists(house(_, _, _, _, zebra), Houses).

solution(WaterDrinker, ZebraOwner) :-
  puzzle(Houses),
  exists(house(_, WaterDrinker, water, _, _), Houses),
exists(house(_, ZebraOwner, _, _, zebra), Houses).** Query: ( it may take some time ;-) ) **
solution(WaterDrinker, ZebraOwner)We provide a list of templates with more examples that can be used to start developing your own courses. See:
Quizzes are an essential element of every online course for students to reflect and test their knowledge. Lia currently supports three different types of quizzes which can be tweaked, if required.
--{{0}}--
A text input field is defined simply by a newline and two brackets around the solution word, value or sentence. In the depicted example, the word solution is the solution. If you enter something else, the check will fail.
Markdown-format: [[solution]]
Please enter the word * "solution" * into the text-field!
[[solution]]
--{{0}}--
A single choice quiz can be defined with parenthesis within brackets and an X, which marks the only correct answer option. The additional text is Lia-Markdown again.
Markdown-format:
[( )] Wrong
[(X)] This is the **correct** answer
[( )] This is ~~wrong~~ too!
Only one element can be selected, but if you want to, you can also have multiple correct answers!
[( )] Wrong
[(X)] This is the **correct** answer
[( )] This is ~~wrong~~ too!
--{{0}}--
A multiple choice quiz can be defined with brackets within brackets and an X, which are used to mark the correct answer option. In contrast to single choice quizzes, there can be multiple selected choices or no one, which is also allowed.
[[ ]] Do not touch!
[[X]] Select this one ...
[[X]] ... and this one too!
[[ ]] also not correct ...
Multiple of them can be selected, or all, or none of them ...
[[ ]] Do not touch!
[[X]] Select this one ...
[[X]] ... and this one too!
[[ ]] also not correct ...
If you want to, you can combine single-choice and multiple-choice quizzes within one larger matrix. A header is required and different elements have to be separated by using parentheses or brackets.
[[:-)] (:-]) [$a^2$]]
[ [X]   [ ]    [X]  ]       a multiple-choice row
[ [ ]   [X]    [ ]  ]       a second one
[ ( )   ( )    (X)  ]       now it is single-choice
[ ( )   (X)    ( )   (X) ]  more or less options are fine too
The rest is self-explaining...
[[:-)] (:-]) [$a^2$]]
[ [X]   [ ]    [X]  ]       a multiple-choice row
[ [ ]   [X]    [ ]  ]       a second one
[ ( )   ( )    (X)  ]       now it is single-choice
[ ( )   (X)    ( )   (X) ]  more or less options are fine too
--{{0}}--
To any type of quiz you can add as many hints as you want, which are revealed in order by clicking onto the question mark.
Markdown-format:
[[super]]
[[?]] another word for awesome
[[?]] not great or mega
[[?]] hopefully not that bad
[[?]] there are no hints left
A text input with additional hints:
[[super]]
[[?]] another word for awesome
[[?]] not great or mega
[[?]] hopefully not that bad
[[?]] there are no hints left
--{{0}}--
And finally, some quizzes might require some more explanations, if they are solved or not. That is why, with additional three opening and three closing brackets you mark the beginning and the end of your solution, which can contain multiple paragraphs, formulas, program code, videos, etc as well as effects (see therefor the next section).
Markdown-format:
[[super]]
[[?]] hint 1
[[?]] hint 2
***********************************************************************

                                {{1}}
You are right, super was the correct answer again
* {2}{super} as an effect
* $\sum x + 3$
* terra

***********************************************************************A quiz with hints and a revealed result.
[[super]]
[[?]] hint 1
[[?]] hint 2
***********************************************************************
{{1}}
You are right, super was the correct answer again
- {2}{super} as an effect
$\sum x + 3$ - terra
***********************************************************************
There are currently four types of effects, that are supported by liaScript:
- Inline effects
- Block effects
- a narrator
- and Playback functions
Every effect is defined by two braces around one or two numbers {{1-2}}, which
marks the order of their appearance. The second and optional number defines, at
which step the element becomes invisible again.
--{{0}}--
Inline effects can be used in nearly all liaScript elements, as already mentioned, the first number within curly braces defines the number of appearance while the second part defines those Markdown elements that should be revealed step wise. If you use 0, then the effect will be revealed immediately.
Use this to highlight important facts and to structure your slides (multiple effects can be combined, due to the usage of equal numbers):
* no effect here
* but in this line {1}{show *** first ***}
* as well as this one {1-2}{show *** first ***}, which contains two effects
{2}{}- no effect here
- but in this line {1}{show *** first ***}
- as well as this one {1-2}{show *** first ***}, which contains two effects
{2}{
}
--{{0}}--
To define animations and transitions, you can use the animate.css notation, simply place an animation definition within the comment tag after the effects, as it is done within the examples.
See https://daneden.github.io/animate.css for more animation effects.
* {0}{ *bounce* } <!-- class = "animated infinite bounce" style = "animation-delay: 5s;" -->
* {1-2}{zoomIn} <!-- class = "animated zoomIn" -->
* {2-3}{zoomOut} <!-- class = "animated zoomOut" -->
* {3}{} <!-- class = "animated rubberBand" -->- {0}{ bounce }
- {1-2}{zoomIn}
- {2-3}{zoomOut}
- {3}{
--{{0}}--
Block effects as animations are defined similarly to inline effects, just with one additional newline after the effect definition. The following Markdown block is then entirely associated with this effect.
--{{1}}--
You can combine blocks by enclosing them into two lines of equality signs, as you can see from the examples below, an effect can also contain further effects.
                               {{1-3}}
This is an example for a *single* block effect.

                               {{2-4}}
********************************************************************************

This is an example for a ... wait a second {3 rubberBand}{**multi**} ...
block effect.

* alpha
* beta
* gamma

********************************************************************************
{{1-3}}
This is an example for a single block effect.
{{2-4}}
This is an example for a ... wait a second {3}{multi} ... block effect.
- alpha
- beta
- gamma
--{{4}}--
You can put spaces before the definition of a block effect, to prevent github and others from adding the definition to a Markdown paragraph, and thus, to render the script properly.
- we are using the text-to-speech engine of https://responsivevoice.org
- the narrator voice must be defined within the initial comment of a script
- use
--{{number}}--to indicate what is spoken and when - use
--{{number voice}}--to change the voice for this particular comment - you can have multiple comments with the same number, those will be combined, but only the voice of the first one is used
                                --{{1}}--
The entire ***Markdown*** paragraph right below the effect definition in double
minus notation is sent to responsivevoice to speak the text out loud. If you
click on the ear button at the navigation panel, then this paragraph gets
rendered at the place where it is defined.

                               --{{3 Deutsch Female}}--
Markdown ist eine vereinfachte Auszeichnungssprache, die von John Gruber und
Aaron Swartz entworfen und im Dezember 2004 mit Version 1.0.1 spezifiziert ...

                               --{{4 @Tanja}}--
Первоначально создан в 2004 году Джоном Грубером (англ. John Gruber) и Аароном
Шварцем. Многие идеи языка были позаимствованы из существующих соглашений ...
--{{1}}--
The entire Markdown paragraph right below the effect definition in double minus notation is sent to responsivevoice to speak the text out loud. If you click on the ear button at the navigation panel, then this paragraph gets rendered at the place where it is defined.
--{{2}}--
The narrator voice is defined within the initial comment, but you can reset this for the entire section, by adding such a definition directly after the title tag, or you can add a voice directly after the comment number to let your script talk in different languages. Proceed and listen ;-)
--{{3 Deutsch Female}}--
Markdown ist eine vereinfachte Auszeichnungssprache, die von John Gruber und Aaron Swartz entworfen und im Dezember 2004 mit Version 1.0.1 spezifiziert wurde. Ein Ziel von Markdown ist, dass schon die Ausgangsform ohne weitere Konvertierung leicht lesbar ist.
--{{4 @Tanja}}--
Первоначально создан в 2004 году Джоном Грубером (англ. John Gruber) и Аароном Шварцем. Многие идеи языка были позаимствованы из существующих соглашений по разметке текста в электронных письмах. Реализации языка Markdown преобразуют текст в формате Markdown в валидный, правильно построенный XHTML и заменяют левые угловые скобки («<») и амперсанды («&») на соответствующие коды сущностей.
Hidden TTS
Sometimes it might be necessary to add a comment or to read a part aloud to underline a certain point, which might be necessary in the narrated mode, but not in the Textbook. Therefor it is possible to put your TTS output into simple HTML comments. This wont be shown to anyone and also not visible on most other Markdown parsers and renderer.
<!-- --{{1}}--
Speak this out, but do not show it to anyone.
-->Since Text2Speech output is baked into the LiaScript notation, why not using it
on purpose for language learners. Thus, you can use {{|>}} or {{!>}} to
indicate, what should be spoken out loud. You can of course also use different
voices.
    {{|>}}
This entire paragraph will be spoken out __LOUD__.

    {{!> Australian Female}}
* But in this case, this can also be combined
* with a couple of
* - different
  - Markdown elements
  - whether it makes sense or not.
{{|>}}
This entire paragraph will be spoken out LOUD.
{{!> Australian Female}}
- But in this case, this can also be combined
- with a couple of
-
- different
- Markdown elements
- whether it makes sense or not.
And of course, it is also possible to combine various elements by using the LiaScript block notation. Simply add as many Markdown-blocks between two lines of stars and they will be interpreted as one larger block.
                  {{|>}}
**************************************************
This entire paragraph will be spoken out __LOUD__.

* But in this case, this can also be combined
* with a couple of
* - different
  - Markdown elements
  - whether it makes sense or not.

**************************************************
{{|>}}
This entire paragraph will be spoken out LOUD.
- But in this case, this can also be combined
- with a couple of
-
- different
- Markdown elements
- whether it makes sense or not.
Since we are using the double braces notation for playback elements, this can also be used in combination with animation effects, simply by adding an a appearance number or an appearance and dissappearance number. Depending o the current state of the animation, this will result in different sentences.
    {{1 |>}}
This is an example where {|> 1-2}{I go} _{|> 2}{I am going}_ to work.
{{1 |>}}
This is an example where {|> 1-2}{I go} {|> 2}{I am going} to work.
And as presented before, you can also use inlining for Playback elements, as it
was used for animations by simply using two pairs of braces
{|>}{text to speak} or {!>}{text to speak}. While the first looks familiar,
the second type of writing can be used in tables, so it does not interfear with
other Markdown interpreters.
| English              | German                            | Russian                                 | Arabic male               | Arabic female               |
| -------------------- |:--------------------------------- |:--------------------------------------- |:------------------------- | --------------------------- |
| {!>}{I go}           | {!> Deutsch Male}{ich gehe}       | {!> Russian Male}{я хожу}               | {!> Arabic Male}{أذْهبُ}  |                             |
| {!>}{you go}         | {!> Deutsch Male}{du gehst}       | {!> Russian Male}{ты ходишь}            | {!> Arabic Male}{تذْهبُ}  | {!> Arabic Female}{تذْهبين} |
| {!>}{he/she/it goes} | {!> Deutsch Male}{er/sie/es geht} | {!> Russian Male}{он / она / оно ходит} | {!> Arabic Male}{يذْهبُ}  | {!> Arabic Female}{تذْهبُ}  |
| {!>}{we go}          | {!> Deutsch Male}{wir gehen}      | {!> Russian Male}{мы ходим}             | {!> Arabic Male}{نذْهبُ}  |                             |
| {!>}{you go}         | {!> Deutsch Male}{ihr geht}       | {!> Russian Male}{вы ходите}            | {!> Arabic Male}{تذْهبون} | {!> Arabic Female}{تذْهبْن} |
| {!>}{they go} | {!> Deutsch Male}{sie gehen} | {!> Russian Male}{они ходят} | {!> Arabic Male}{يذْهبون} | {!> Arabic Female}{يذْهبْن} || English | German | Russian | Arabic male | Arabic female |
|---|---|---|---|---|
| {!>}{I go} | {!> Deutsch Male}{ich gehe} | {!> Russian Male}{я хожу} | {!> Arabic Male}{أذْهبُ} | |
| {!>}{you go} | {!> Deutsch Male}{du gehst} | {!> Russian Male}{ты ходишь} | {!> Arabic Male}{تذْهبُ} | {!> Arabic Female}{تذْهبين} |
| {!>}{he/she/it goes} | {!> Deutsch Male}{er/sie/es geht} | {!> Russian Male}{он / она / оно ходит} | {!> Arabic Male}{يذْهبُ} | {!> Arabic Female}{تذْهبُ} |
| {!>}{we go} | {!> Deutsch Male}{wir gehen} | {!> Russian Male}{мы ходим} | {!> Arabic Male}{نذْهبُ} | |
| {!>}{you go} | {!> Deutsch Male}{ihr geht} | {!> Russian Male}{вы ходите} | {!> Arabic Male}{تذْهبون} | {!> Arabic Female}{تذْهبْن} |
| {!>}{they go} | {!> Deutsch Male}{sie gehen} | {!> Russian Male}{они ходят} | {!> Arabic Male}{يذْهبون} | {!> Arabic Female}{يذْهبْن} |
If you only want to show only the play buttons but not the text, it is possible
to use some HTML tricks. The easiest way is to put your text into an HTML
element like <span style="display: none">Text to read</span> and make it
invisible by using the attribute display: none.
But, since it is possible to define custom Macros, you can use also a
more elegant way. Simply add the following comment directly after your Markdown
heading. The @play macro has two parameters one for the voice and the other
for the text, the other macros simply define the voice and pass the text as a
second parameter. Within the Arabic macro it is also possible to set the gender
of the narrator.
#### Hiding Text
<!--
@play: {!> @0}{<span style="display: none">@1</span>}
@en: @play(UK English Male,@0)
@de: @play(Deutsch Male,@0)
@ru: @play(Russian Female,@0)
@ar: @play(Arabic @0,@1)
-->

| go        |         EN          |         DE          |            RU             |      AR male      |      AR female      |
| --------- |:-------------------:|:-------------------:|:-------------------------:|:-----------------:|:-------------------:|
| I         |      @en(I go)      |    @de(ich gehe)    |        @ru(я хожу)        | @ar(Male,أذْهبُ)   |                     |
| you       |     @en(you go)     |    @de(du gehst)    |      @ru(ты ходишь)       | @ar(Male,تذْهبُ)   | @ar(Female,تذْهبين) |
| he/she/it | @en(he/she/it goes) | @de(er/sie/es geht) | @ru(он / она / оно ходит) | @ar(Male,يذْهبُ)   | @ar(Female,تذْهبُ)   |
| we        |     @en(we go)      |   @de(wir gehen)    |       @ru(мы ходим)       | @ar(Male,نذْهبُ)   |                     |
| you       |     @en(you go)     |    @de(ihr geht)    |      @ru(вы ходите)       | @ar(Male,تذْهبون) | @ar(Female,تذْهبْن)  |
| they      |    @en(they go)     |   @de(sie gehen)    |      @ru(они ходят)       | @ar(Male,يذْهبون) | @ar(Female,يذْهبْن)  |
The result is a table with playback buttons only:
| go | EN | DE | RU | AR male | AR female |
|---|---|---|---|---|---|
| I | @en(I go) | @de(ich gehe) | @ru(я хожу) | @ar(Male,أذْهبُ) | |
| you | @en(you go) | @de(du gehst) | @ru(ты ходишь) | @ar(Male,تذْهبُ) | @ar(Female,تذْهبين) |
| he/she/it | @en(he/she/it goes) | @de(er/sie/es geht) | @ru(он / она / оно ходит) | @ar(Male,يذْهبُ) | @ar(Female,تذْهبُ) |
| we | @en(we go) | @de(wir gehen) | @ru(мы ходим) | @ar(Male,نذْهبُ) | |
| you | @en(you go) | @de(ihr geht) | @ru(вы ходите) | @ar(Male,تذْهبون) | @ar(Female,تذْهبْن) |
| they | @en(they go) | @de(sie gehen) | @ru(они ходят) | @ar(Male,يذْهبون) | @ar(Female,يذْهبْن) |
In many cases, a diagram is only used to present some kind of signal paths, some primitive functions, some clusters or point clouds.
You can still generate images, but why not applying some basic kind of ASCII-art to solve the most common tasks.
Markdown-format:
                                  diagram title
1.5 |           *
    |                                 (* stars)
  y |        *      *
  - |      *          *
  a |     *             *       *
  x |    *                 *
  i |   *
  s |  *
    | *                              *        *
  0 +------------------------------------------
     2.0              x-axis                100
Result:
                        diagram title
1.5 |           *                     (* stars)
    |
  y |        *      *
  - |      *          *
  a |     *             *       *
  x |    *                 *
  i |   *
  s |  *
    | *                              *        *
  0 +------------------------------------------
     2.0              x-axis                100
--{{0}}--
All diagram titles, labels, limits are optional, and if you do not define limits, then the min max values 0 and 1 are used by default.
Markdown-format:
     1 |                   *                       *
       |               *       *               *       *
       |*             *         *             *         *
y-axis | *           *           *           *           *
       |  *         *             *         *             *
       |   *       *               *       *               *
       |       *                       *                      *
    -1 +--------------------------------------------------------
--{{0}}--
Next to stars, you can also use any kind of character to define another line, where the character defines the color. For example an r marks the color red and a b the color blue.
Markdown-format:
| r          *                               (* stars)
|    r                                       (r imaginary course)
|       r *      *       B  B  B  B  B  B  B (B big dots)
|        * r       *
|       *      r      *       *
|      *            r    *
|     *                 r
|   *                          r
| *                              *    r    *
+-------------------------------------------
| r * (* stars)
| r (r imaginary course)
| r * * B B B B B B B (B big dots)
| * r *
| * r * *
| * r *
| * r
| * r
| * * r *
+-------------------------------------------
--{{0}}--
If the there are more point with the same character for one x-value, then only dots are plotted. And by using upper and lower case characters you can also define the size of the dots.
Markdown-format:
    10 |        rrrrrrrrrrrr    x
       |    rrrrrrrrrrrrrrrr
       |  rrrrrrrrrrrrrrrrr  BBBBB
       | rrrrrrrrrrrrrrrr  BBBBBBBB
       |rrrrrrrrrrrrrrr  BBBBBBBBBBB
       |rrrrrrrrrrrrr  BBBBBBBBBBBBB
       |rrrrrrrrrrr  BBBBBBBBBBBBBBB
       | rrrrrrrr  BBBBBBBBBBBBBBBB
       |  rrrrr  BBBBBBBBBBBBBBBBB
       |        BBBBBBBBBBBBBBBB
       |   x    BBBBBBBBBBBBB
       +-----------------------------
         0                           2
10 | rrrrrrrrrrrr x
| rrrrrrrrrrrrrrrr
| rrrrrrrrrrrrrrrrr BBBBB
| rrrrrrrrrrrrrrrr BBBBBBBB
|rrrrrrrrrrrrrrr BBBBBBBBBBB
|rrrrrrrrrrrrr BBBBBBBBBBBBB
|rrrrrrrrrrr BBBBBBBBBBBBBBB
| rrrrrrrr BBBBBBBBBBBBBBBB
| rrrrr BBBBBBBBBBBBBBBBB
| BBBBBBBBBBBBBBBB
| x BBBBBBBBBBBBB
+-----------------------------
0 2
The color codes are somehow defined by the character itself, see the list.
| char | color | hex |
|---|---|---|
a |
Amber | #FFBF00 |
b |
Blue | #0000FF |
c |
Cyan | #00FFFF |
d |
Dark red | #8B0000 |
e |
Ebony | #555D50 |
f |
Forest green | #014421 |
g |
Green | #008000 |
h |
Heliotrope | #DF73FF |
i |
Indigo | #4B0082 |
j |
Jade | #00A86B |
k |
Kaki | #C3B091 |
l |
Lime | #00FF00 |
m |
Mint | #3EB489 |
n |
browN | #88540B |
o |
Orange | #FF7F00 |
p |
Pink | #FFC0CB |
q |
Queen blue | #436B95 |
r |
Red | #FF0000 |
s |
Silver | #C0C0C0 |
t |
Teal | #008080 |
u |
Ultramarine | #3F00FF |
v |
#EE82EE |
|
w |
#FFFFFF |
|
y |
#FFFF00 |
|
z |
Zomp | #39A78E |
The shape of the dot is also defined by the character, see the example below.
6 | + * #           A a B b
  | C c D d E e F f G g H h
  | I i J j K k L l M m N n
  | o O P p Q q R r S s T t
  | U u V v W w X x Y y Z z
1 +------------------------
  0                      24
6 | + * #           A a B b
  | C c D d E e F f G g H h
  | I i J j K k L l M m N n
  | o O P p Q q R r S s T t
  | U u V v W w X x Y y Z z
1 +------------------------
   0                     24
As depicted in the line diagrams below, next to different colors, lines and dots can have different shapes, whether they are dashed, dotted, smoothed or not.
|                 * *    +  +    #  #
|                *   *  +    +  #    #
| N   O   P   Q   R   S   T   U   V   W   X   Y   Z
|NA NOB OPC PQD QRE RSF STG TUH UVI VWJ WXK XYL YZM Z
|An ABo BCp CDq DEr EFs FGt GHu HIv IJw JKx KLy LMz M
|na nob opc pqd qre rsf stg tuh uvi vwj wxk xyl yzm z
|a  ab  bc  cd  de  ef  fg  gh  hi  ij  jk  kl  lm  m
+----------------------------------------------------
As already mentioned, tables cannot only be interpreted as structural elements within a Markdown document, but also as datasets. In fact, there is little difference between a diagram and collection of values.
  9 |                                       (* dots)
    |
  y |                              *
  - |
  a |                    *
  x |
  i |          *
  s |
    |*
  0 +------------------------------------
    0            x-axis                 36
The same values collected within a list. If you click onto the little icon above this list, you will get the same plot as depicted above.
| x | dots |
|---|---|
| 0 | 0 |
| 10 | 2 |
| 20 | 4 |
| 30 | 6 |
One of the biggest problems in science is the lack of primary data. Projects such as the Open-Science-Framework (http://osf.io) try to leverage this, by offering a plattform, where scientists can store and document vast amounts of data. But why not directly add and visulaize the data, so that they could be used and inspected by others, instead of using external tools to create visualizations.
Everyone who is creating some kind of data or putting it into a Markdown already performs some kind of configuration. Based on that table's/data's structural settings, we can visualize data automatically. Actually it is quite surprising, why there has never been an attempt to treat Markdown tables as datasets. The following sections are intended to give a brief overview on different visualization options and how the systems determines, which one gets applied. And of course, you can also enforce your visualization style.
The following dataset was taken from https://ourworldindata.org and it shows the government expenditure on education in percentage to the GDP. Thus the first column defines the x-values while the later ones define the categories.
If you click on the image icon again, you will see a more elaborate representation with title and labels.
| Year | Finland | USA | Germany | China |
|---|---|---|---|---|
| 1995 | 6.80942 | 4.42079 | 1.84192 | |
| 1996 | 6.86052 | 4.48319 | 1.85338 | |
| 1997 | ||||
| 1998 | 4.45345 | 1.84432 | ||
| 1999 | 5.86960 | 1.88803 | ||
| 2000 | 5.71687 | |||
| 2001 | 5.84797 | |||
| 2002 | 6.02477 | |||
| 2003 | 6.17476 | |||
| 2004 | 6.16849 | |||
| 2005 | 6.03605 | |||
| 2006 | 5.93809 | 4.27930 | ||
| 2007 | 5.68608 | 4.34302 | ||
| 2008 | 5.84676 | 4.40954 | ||
| 2009 | 6.48517 | 4.88047 | ||
| 2010 | 6.54070 | 5.42001 | 4.91368 | |
| 2011 | 6.48200 | 5.22389 | 4.80779 | |
| 2012 | 7.19254 | 5.19485 | 4.93331 | |
| 2013 | 7.15848 | 4.94378 | 4.93496 | |
| 2014 | 7.15155 | 4.98948 | 4.93112 |
https://ourworldindata.org/financing-education#all-charts-preview
The reason for this is, you can actually add additional settings as it was done
to style different Markdown elements, simply by attaching an HTML-comment to the
front of this table. The type of representation is still automatically
determined based on the table structure, but it is still possible to add
attributes like data-title, data-xlabel, data-ylabel to tweak the
graphical representation. See section Attributes for more
information.
<!--
data-title="Government expenditure on education"
data-xlabel="year"
data-ylabel="% of GDP"
-->
| Year | Finland | USA | Germany |   China |
| ---- | -------:| ---:| -------:| -------:|
| 1995 | 6.80942 |     | 4.42079 | 1.84192 |
| 1996 | 6.86052 |     | 4.48319 | 1.85338 |
| ... | ... | ... | ... | ... |If your table is similar to the one in a LinePlot, but the first column contains numbers which appear twice or more times, than this data cannot be interpreted as a "function" in a mathematical sense. This data is then simply visualized as a scatter plot only showing the dots.
| Random | I | II |
|---|---|---|
| 5.0 | 1.0 | 5 |
| 6.0 | 1.0 | 4 |
| 7.0 | 1.0 | 5 |
| 8.0 | 1.0 | 5 |
| 9.0 | 1.0 | 4 |
| 10.0 | 1.0 | 5 |
| 5.0 | 10.0 | 7 |
| 6.0 | 10.0 | 8 |
| 7.0 | 10.0 | 7 |
| 8.0 | 10.0 | 7 |
| 9.0 | 10.0 | 8 |
| 10.0 | 10.0 | 7 |
If you have a ScatterPlot like representation, but actually want to use this data as primary data for your BoxPlot, you can manually change the type of visualization to BoxPlot, simply by adding the follwing attribute to the head of your table, as it is shown in the snippet below. Columns are then treated as datasets and get visualized accordingly.
<!-- data-type="boxplot" -->
| Random |    I |  II |
| ------:| ----:| ---:|
|    5.0 |  1.0 |   5 |
| ... | ... | .. || Random | I | II |
|---|---|---|
| 5.0 | 1.0 | 5 |
| 6.0 | 1.0 | 4 |
| 7.0 | 1.0 | 5 |
| 8.0 | 1.0 | 5 |
| 9.0 | 1.0 | 4 |
| 10.0 | 1.0 | 5 |
| 5.0 | 10.0 | 7 |
| 6.0 | 10.0 | 8 |
| 7.0 | 10.0 | 7 |
| 8.0 | 10.0 | 7 |
| 9.0 | 10.0 | 8 |
| 10.0 | 10.0 | 7 |
| 1 |
In contrast to a line or a scatter plot, if the first colum contains at least one entry thant cannot be parsed as a number, this might be represented also as BarChart. Which works perfectly with the following example. If the maximum values of the columns do not differ to much, then this dataset it represented as a BarChart, otherwise you might end up seeing only one huge bar, while the other bars are indistiguishable from each other. In this case other visualization are chosen.
| Animal | weight in kg | Lifespan years | Mitogen |
|---|---|---|---|
| Mouse | 0.028 | 2 | 95 |
| Flying squirrel | 0.085 | 15 | 50 |
| Brown bat | 0.020 | 30 | 10 |
| Sheep | 90 | 12 | 95 |
| Human | 68 | 70 | 10 |
If for example humans and sheeps are removed from the dataset, then wheight in kg would not be visible in a BarChart at all. In this case a Radar is selected, that allows to analyze data visually with different "y"-axis.
| Animal | weight in kg | Lifespan years | Mitogen |
|---|---|---|---|
| Mouse | 0.028 | 02 | 95 |
| Flying squirrel | 0.085 | 15 | 50 |
| Brown bat | 0.020 | 30 | 10 |
If you have a table with only one row full of numbers, this will be automatically presented as an pie chart. The head represents the categories and the body the quatities.
| Classic | Country | Reggae | Hip-Hop | Hard-Rock | Samba |
|---|---|---|---|---|---|
| 50 | 50 | 100 | 200 | 350 | 250 |
You can use the first column to give some more information about your data. If the first element of the list body contains a text, that cannot be directly interpreted as a number, then these two text snippets are used to the define the main title and the subtitle of your chart.
| Music-Style 1994 | Classic | Country | Reggae | Hip-Hop | Hard-Rock | Samba |
|---|---|---|---|---|---|---|
| Student rating | 50 | 50 | 100 | 200 | 350 | 250 |
The default behavior for the Table below, would be to represent it as a bar-chart.
But, you can enforce the usage of pie charts, simply by adding the attribute
piechart into the HTML comment, directly above the table:
<!-- data-type="PieChart" -->
| Music-Style | Classic | Country | Reggae | Hip-Hop | Hard-Rock | Samba |
|:----------- | -------:| -------:| ------:| -------:| ---------:| -----:|
| 1994        |      50 |      50 |    100 |     200 |       350 |   250 |
| ...         |     ... |     ... |    ... |     ... |       ... |   ... |
The result looks as follows:
| Music-Style | Classic | Country | Reggae | Hip-Hop | Hard-Rock | Samba |
|---|---|---|---|---|---|---|
| 1994 | 50 | 50 | 100 | 200 | 350 | 250 |
| 2014 | 20 | 30 | 100 | 220 | 400 | 230 |
| demo 2034 | 5 | 12 | 98 | 293 | 345 | 32 |
Since data is parsed at runtime, you can also use animations to change the values of chart, while go on in your slide or move back. But keep in mind, that this might lead to negative effects, if your audience preferes the textbook mode:
| Music-Style {0-1}{1994} {1}{2014} | Classic | Country | Reggae | Hip-Hop | Hard-Rock | Samba |
|---|---|---|---|---|---|---|
| Student rating | {0-1}{50} {1}{20} | {0-1}{50} {1}{30} | 100 | {0-1}{200} {1}{220} | {0-1}{350} {1}{400} | {0-1}{250} {1}{230} |
If the upper table might be too long and you prefer to use only two columns and
grow your data vertically, then you can use the attribute data-transpose,
which flips mirrows your data along an imaginary vertical axis.
<!-- data-transpose -->
| Music-Style {0-1}{1994} {1}{2014} |    Student rating |
|:--------------------------------- | -----------------:|
| Classic                           | {0-1}{50} {1}{20} |
| Country                           | {0-1}{50} {1}{30} |
| ...                               |               ... |
The result is the same as above, but it might be easier to handle your data.
| Music-Style {0-1}{1994} {1}{2014} | Student rating |
|---|---|
| Classic | {0-1}{50} {1}{20} |
| Country | {0-1}{50} {1}{30} |
| Reggae | 100 |
| Hip-Hop | {0-1}{200} {1}{220} |
| Hard-Rock | {0-1}{350} {1}{400} |
| Samba | {0-1}{250} {1}{230} |
A map is similar to a BarChart from the table structure, but if you want to depict your data on a real map, you will have to add a geojson-file, that contains all relevant data about the form of your countries, states, cities, etc. The first column has to match the names of your objects in your geojson data, that is attached to your table in the following way:
<!-- data-type="map" data-src="https://code.highcharts.com/mapdata/custom/europe.geo.json" -->
| Country                | percent |
| ---------------------- | ------- |
| Albania                | 73.5    |
| Andorra | 98.9 || Country | percent |
|---|---|
| Albania | 73.5 |
| Andorra | 98.9 |
| Armenia | 72.4 |
| Austria | 87.9 |
| Azerbaijan | 79.8 |
| Belarus | 79.7 |
| Belgium | 93.9 |
| Bosnia and Herzegovina | 80.8 |
| Bulgaria | 66.7 |
| Croatia | 91.5 |
| Cyprus | 84.4 |
| Czech Republic | 87.7 |
| Denmark | 97.8 |
| Estonia | 97.9 |
| Finland | 94.0 |
| France | 92.3 |
| Georgia | 68.1 |
| Germany | 96.0 |
| Greece | 72.9 |
| Hungary | 89.0 |
| Iceland | 99.0 |
| Ireland | 91.9 |
| Italy | 92.5 |
| Latvia | 87.1 |
| Liechtenstein | 98.1 |
| Lithuania | 90.9 |
| Luxembourg | 97.8 |
| Macedonia | 79.2 |
| Malta | 83.1 |
| Moldova | 76.1 |
| Monaco | 97.5 |
| Montenegro | 71.5 |
| Netherlands | 95.6 |
| Norway | 98.4 |
| Poland | 78.2 |
| Portugal | 78.2 |
| Republic of Serbia | 73.4 |
| Romania | 73.8 |
| Russia | 80.9 |
| San Marino | 60.2 |
| Slovakia | 84.9 |
| Slovenia | 79.9 |
| Spain | 92.5 |
| Sweden | 96.4 |
| Switzerland | 93.7 |
| Turkey | 83.3 |
| Ukraine | 93.4 |
| United Kingdom | 94.9 |
| Vatican City | 60.1 |
Currently there is only support to visualize one column, but this will be fixed in the future ...
Another type of visualization is a HeatMap, which is used, if the table head and the first column do only contain numbers, in other words coordinates. If you want to use categories instead of coordinate numbers, you can enforce the usage of a heatmap, with the comment shown below:
<!--
data-type="heatmap"
data-title="Seattle mean temperature in Fahrenheit"
data-show
-->
| Seattle |  Jan |  Feb |  Mar |  Apr |  May |  ... |
| -------:| ----:| ----:| ----:| ----:| ----:| ----:|
|       0 | 40.7 | 41.5 | 43.6 | 46.6 | 51.4 |  ... |
|       2 |  ... |  ... |  ... |  ... |  ... |  ... |
The attribute data-show simply shows the diagram at default, instead of using
the table.
| Seattle | Jan | Feb | Mar | Apr | May | Jun | Jul | Aug | Sep | Oct | Nov | Dec |
|---|---|---|---|---|---|---|---|---|---|---|---|---|
| 0 | 40.7 | 41.5 | 43.6 | 46.6 | 51.4 | 56.0 | 60.5 | 61.2 | 57.0 | 50.1 | 44.1 | 39.6 |
| 2 | 40.2 | 40.7 | 42.7 | 45.3 | 50.0 | 54.4 | 58.5 | 59.2 | 55.4 | 49.2 | 43.5 | 39.3 |
| 4 | 39.7 | 40.0 | 41.9 | 44.4 | 48.9 | 53.2 | 57.0 | 57.7 | 54.2 | 48.6 | 43.1 | 38.9 |
| 6 | 39.6 | 39.5 | 41.3 | 44.2 | 49.5 | 54.2 | 57.8 | 57.4 | 53.6 | 48.2 | 42.8 | 38.7 |
| 8 | 39.6 | 39.9 | 42.9 | 47.1 | 52.7 | 57.3 | 61.3 | 61.1 | 56.7 | 49.5 | 43.1 | 38.7 |
| 10 | 41.3 | 42.7 | 46.4 | 50.7 | 56.4 | 60.9 | 65.2 | 65.4 | 60.9 | 52.8 | 45.5 | 40.4 |
| 12 | 43.8 | 46.0 | 49.5 | 53.8 | 59.6 | 64.3 | 69.4 | 69.8 | 65.1 | 56.0 | 47.8 | 42.6 |
| 14 | 45.1 | 47.7 | 51.3 | 55.9 | 61.9 | 66.9 | 72.6 | 73.2 | 67.7 | 57.8 | 48.8 | 43.6 |
| 16 | 44.5 | 47.5 | 51.4 | 55.9 | 62.3 | 67.5 | 73.9 | 74.3 | 68.2 | 57.4 | 47.8 | 42.6 |
| 18 | 42.6 | 44.7 | 48.7 | 53.8 | 60.3 | 65.9 | 72.3 | 72.2 | 64.6 | 53.9 | 46.0 | 41.2 |
| 20 | 42.0 | 43.3 | 46.4 | 50.2 | 56.0 | 61.4 | 66.9 | 66.6 | 60.7 | 52.3 | 45.2 | 40.7 |
| 22 | 41.4 | 42.5 | 45.0 | 48.3 | 53.5 | 58.2 | 63.2 | 63.5 | 58.7 | 51.1 | 44.5 | 40.1 |
https://datavizpyr.com/heatmaps-with-seaborn-in-python/
A Parallel representation jumps in, if there are simply too many categories, so that your BarChart would contain only thin lines.
| Country | GDP growth (%) | Births per woman | Life expectancy at birth (years) | Population ages >= 65 (%) | Pop. ages 15-64 (%) | Pop ages 0-14 (%) | Pop (total) |
|---|---|---|---|---|---|---|---|
| Albania | 7.5 | 1.858 | 76.6337073170732 | 9.3330694913874 | 66.4522208535245 | 24.2147096550882 | 3143291 |
| Andorra | 3.57073718591123 | 1.260 | NaN | NaN | NaN | NaN | 83810.5 |
| Austria | 2.17880778069679 | 1.414 | 80.4475609756098 | 17.0078802490015 | 67.7942859199021 | 15.1978338310964 | 8336926 |
| Byelarus | 11.29603925282670 | 1.420 | 70.6328780487805 | 13.8161084682917 | 71.3440867491758 | 14.8398047825325 | 9680850 |
| Belgium | 1.00416891576425 | 1.820 | 80.1095609756098 | 17.2425951179457 | 65.9073170003941 | 16.8500878816601 | 10708433 |
| Bosnia and Herzegovina | 5.41999999999929 | 1.209 | 75.1063170731708 | 13.7875788575916 | 70.5586044787057 | 15.6538166637027 | 3773100 |
| Bulgaria | 6.21712220063873 | 1.478 | 73.3165853658537 | 17.3328904412356 | 69.2610054713067 | 13.4061040874577 | 7623395 |
| Channel Islands | NaN | NaN | NaN | NaN | NaN | NaN | NaN |
| Croatia | 2.35925308110710 | 1.470 | 75.9121951219512 | 17.1754953634927 | 67.5174504975681 | 15.3070541389392 | 4434000 |
| Czech Republic | 2.46366103329814 | 1.497 | 77.2112195121951 | 14.6644147081870 | 71.1889763214880 | 14.1466089703250 | 10424336 |
| Denmark | -0.86969912719333 | 1.892 | 78.7004878048781 | 15.9364325701275 | 65.6692750948847 | 18.3942923349878 | 5493621 |
| Estonia | -5.12891873578752 | 1.661 | 73.9731707317073 | 16.9573479430650 | 68.0747344729978 | 14.9679175839372 | 1340675 |
| Faroe Islands | NaN | NaN | NaN | NaN | NaN | NaN | 48511 |
| Finland | 0.92209645431238 | 1.846 | 79.7919512195122 | 16.5283868561977 | 66.6427434111131 | 16.8288697326892 | 5313399 |
| France | 0.21695181782435 | 1.998 | 81.5204878048781 | 16.6134150592142 | 64.9880225189894 | 18.3985624217964 | 62277432 |
| Germany | 0.98801573506542 | 1.376 | 80.0885365853659 | 19.9652972040776 | 66.3351760329956 | 13.6995267629268 | 82110097 |
| Greece | 2.01498162894308 | 1.506 | 79.9631707317073 | 18.1870521529388 | 67.5883962990861 | 14.2245515479751 | 11237094 |
| Hungary | 0.59999999999994 | 1.352 | 74.0090243902439 | 16.0592099507043 | 68.9813743902960 | 14.9594156589996 | 10038188 |
| Iceland | 0.95512219949856 | 2.140 | 81.5751219512195 | 11.6851788453979 | 67.3938402627208 | 20.9209808918813 | 317414 |
| Ireland | -3.03575424255612 | 2.100 | 79.8568292682927 | 11.1093456408398 | 68.3358023622894 | 20.5548519968708 | 4425675 |
| Isle of Man | NaN | NaN | NaN | NaN | NaN | NaN | NaN |
| Italy | -1.31844836660481 | 1.414 | 81.9452097560976 | 20.0909973618083 | 65.7289363852644 | 14.1800662529273 | 59832179 |
| Kosovo | NaN | NaN | NaN | NaN | NaN | NaN | NaN |
| Latvia | -4.55213597961080 | 1.453 | 72.2382926829268 | 17.1863911389844 | 69.0425815911418 | 13.7710272698738 | 2266094 |
| Liechtenstein | 1.79808929851180 | 1.400 | 82.6341463414634 | NaN | NaN | NaN | 35629 |
| Lithuania | 2.76144078921502 | 1.470 | 71.8217073170732 | 15.9677094440150 | 68.7509466357882 | 15.2813439201968 | 3358115 |
| Luxembourg | 0.03220273485962 | 1.605 | 80.5246341463415 | 14.0365040657173 | 67.9773784654310 | 17.9861174688517 | 488650 |
| Macedonia | 4.80000000000011 | 1.438 | 74.2113170731707 | 11.5845850425847 | 69.9825898844976 | 18.4328250729177 | 2041342 |
| Malta | NaN | NaN | NaN | NaN | NaN | NaN | NaN |
| Moldova | 7.76484641287229 | 1.495 | 68.4371463414634 | 11.1369548727738 | 71.6754849214449 | 17.1875602057813 | 3633369 |
| Monaco | NaN | NaN | NaN | NaN | NaN | NaN | NaN |
| Republic of Montenegro | NaN | NaN | NaN | NaN | NaN | NaN | NaN |
| Netherlands | 1.99580842581707 | 1.775 | 80.4007317073171 | 14.7235949405444 | 67.3305328508120 | 17.9458722086436 | 16445593 |
| Norway | 1.81507058553292 | 1.960 | 80.7414634146342 | 14.6455888097593 | 66.2064766744808 | 19.1479345157599 | 4768212 |
| Poland | 5.00408460108383 | 1.390 | 75.5331707317073 | 13.3256480555872 | 71.4634305149354 | 15.2109214294774 | 38125759 |
| Portugal | -0.03467455605676 | 1.374 | 79.2497560975610 | 17.5012814880078 | 67.1365409199047 | 15.3621775920875 | 10622413 |
| San Marino | NaN | NaN | NaN | NaN | NaN | NaN | NaN |
| Serbia | 5.51795169957776 | 1.400 | 73.6365853658537 | 14.5167655385706 | 67.6335858157006 | 17.8496486457288 | 7350221 |
| Slovakia | 6.17046824289093 | 1.320 | 74.8107317073171 | 11.9677699353106 | 72.3868259638361 | 15.6454041008533 | 5406626 |
| Slovenia | 3.49251997044142 | 1.528 | 78.9739024390244 | 16.0267556735963 | 70.1117152095851 | 13.8615291168186 | 2021316 |
| Spain | 0.85776978982683 | 1.461 | 81.0880487804878 | 16.9394050582152 | 68.3398363315641 | 14.7207586102207 | 45555716 |
| Sweden | -0.40879886604371 | 1.910 | 81.2371707317073 | 17.7223651519496 | 65.5617228818501 | 16.7159119662004 | 9219637 |
| Switzerland | 1.89715399119828 | 1.480 | 82.1617073170732 | 16.6721873799941 | 67.8197089730996 | 15.5081036469063 | 7647675 |
| Ukraine | 2.09999999999999 | 1.390 | 68.2514634146342 | 15.9037623084261 | 70.1546462864768 | 13.9415914050970 | 46258200 |
| United Kingdom | 0.54791121956627 | 1.940 | 79.9033658536585 | 16.3019124620612 | 66.1561282590033 | 17.5419592789355 | 61406928 |
| Montenegro | 6.89999999999999 | 1.642 | 74.0975365853659 | 12.8497239486590 | 67.5957824239814 | 19.5544936273596 | 622344 |
| Isle of Man | NaN | NaN | NaN | NaN | NaN | NaN | 80543 |
| Romania | 9.42580218461200 | 1.350 | 73.3734146341464 | 14.8579664297396 | 69.8993946432444 | 15.2426389270160 | 21513622 |
If the first column and the head of the table are equal, then the interpreter tries to interpret the content of the table as an adjacency matrix, which defines a graph. If those values are symetrical according to the diagonal, then the matrix defines an undirected graph.
| Graph | A | B | C | D | E |
|---|---|---|---|---|---|
| A | 0 | 1 | 0 | 1 | 0 |
| B | 1 | 0 | 0 | 1 | 0 |
| C | 0 | 0 | 0 | 0 | 0 |
| D | 1 | 1 | 0 | 0 | 1 |
| E | 0 | 0 | 0 | 1 | 0 |
In contrast to this, if those values differ, then the result is simply an an directed graph, whereby the values define the strength of the line.
| Graph | A | B | C | D | E |
|---|---|---|---|---|---|
| A | 0 | 12 | 0 | 1 | 0 |
| B | -22 | 0 | 0 | 0.4 | 0 |
| C | 0 | 0 | 0 | 0 | 0 |
| D | 2 | 12 | 0 | 0 | 1 |
| E | 0 | 0 | 0 | 2 | 0 |
Unfortunatelly, self referenceing or multigraphs are currently not supported.
A Sankey diagram is a special type of directed graph that can be used to streams or the flow of something, such as engergy, money, etc.
https://en.wikipedia.org/wiki/Sankey_diagram
| Sankey | A | B | C | D | E |
|---|---|---|---|---|---|
| A | 2 | ||||
| B | 3 | ||||
| C | 1 | 1 | |||
| D | 1 | 1 | |||
| E | 2 | 1 | 1 | 1 |
Simply data-type="none" to prevent any kind of visualization.
| Sankey | A | B | C | D | E |
|---|---|---|---|---|---|
| A | 2 | ||||
| B | 3 | ||||
| C | 1 | 1 | |||
| D | 1 | 1 | |||
| E | 2 | 1 | 1 | 1 |
-
data-type: You can usedata-type="map|boxplot|barchart|..."to overwrite the automatically identfied representation with your desired one. The names can be taken from the previous titles, it is not relevant if you use lower or upper-case. This way it is also possible to use types that cannot be automatically infered at the moment, such as Sankey or BoxPlot.If you do not want to show tables as diagrams, you can also use
data-type="None"and only the table will be visible. -
data-show: Simply add this attribute or set it to true (data-show="true"), if you want to visualize your data immediately, without the need to click in the switch-button. It is still possible for your users to switch to the table representation. -
data-transpose: Like in the mathematical sense, set this attribute or set it to true (data-transpose="true"), if you want to switch rows and columns. One benefit is, that you can for example use PieChart and let your table grow vertically instead of using a horizontal monster. -
data-title: Normaly, the first cell defines the title of your diagram, but if you want larger titles and not have to write gigantic table headers, apply this attributedata-title="Use whatever title you want to ..." -
data-xlabel: As above, you can also define the strings for the labels, in this case for the x label -
data-ylabel: or the y label. -
data-src: Currently this attribute is used to refere to your geojson data, if you use thedata-type="Map"representation, but this might change in the future to load and visualize data directly, such as csv.If you are using geojson files from external websites such as:
https://code.highcharts.com/mapdata/
It can be usefull to use anycors, if the data cannot be visualized due to CORS restrictions:
data-src="https://cors-anywhere.herokuapp.com/https://code.highcharts.com/mapdata/custom/europe.geo.json"
--{{0}}--
A script should not define a one-way road to the student! So surveys are required.
Similar to text-quizzes, use the following syntax to define a text-survey, where the number of underlines defines the presented line numbers:
[[___ ___ ___ ___]]
What is your opinion on ... :
[[____ ____ ____ ____]]
--{{0}}--
And also this kind of survey is similar to a single choice quiz, but in this case numbers within parenthesis are used to define some kind of variable identifier. That is why they do not have to be in order.
[(1)] option 1
[(2)] option 2
[(3)] option 3
[(0)] option 0
You can only select one option:
[(1)] option 1
[(2)] option 2
[(3)] option 3
[(0)] option 0
--{{0}}--
Similar to multi-choice quizzes, you can define multi-choice survey vectors with a number in double square brackets. But, and this is also possible for all other kinds of surveys you can define some kind of variable name with a starting colon.
[[red]]         is it red
[[green]]       green
[[blue]]        or blue
[[dark purple]] no one likes purple ( last chance ;-) )
Select some of your favored colors!
[[red]]         is it red
[[green]]       green
[[blue]]        or blue
[[dark purple]] no one likes purple ( last chance ;-) )
--{{0}}--
For defining survey blocks you only have to a header row, whose definition is also used by the trailing rows.
Markdown-format:
[(totally)(agree)(unsure)(maybe not)(disagree)]
[                                             ] liaScript is great?
[                                             ] I would use it to make online **courses**?
[                                             ] I would use it for online **surveys**?
[(totally)(agree)(unsure)(maybe not)(disagree)]
[ ] liaScript is great?
[ ] I would use it to make online **courses**?
[ ] I would use it for online **surveys**?
--{{0}}--
I guess, multi-choice blocks are self-explanatory...
Markdown-format:
[[1][2][3][4][5][6][7]]
[                     ] question 1 ?
[                     ] question 2 ?
[                     ] question 3 ?
Result:
[[1][2][3][4][5][6][7]]
[                     ] question 1 ?
[                     ] question 2 ?
[                     ] question 3 ?
Well, thanks to the great project SvgBob the newest version of LiaScript also has support for some basic ASCII art drawings (not everything is supported yet). Simply use 4 or more backtics to enclose your artwork and draw whatever you want. And as with any other element, you can add some styling within HTML comments at the head of this element.
The following examples are taken from the examples on the SvgBob project site.
If you want to use a drawing tool for this, visit the online editor at:
https://ivanceras.github.io/svgbob-editor/
                           .--->  F
  A       B     C   D     /
  *-------*-----*---*----*----->  E
           \            ^ \
            v          /   '--->  G
             B --> C -'
  +------+   +-----+   +-----+   +-----+
  |      |   |     |   |     |   |     |
  | Foo  +-->| Bar +---+ Baz |<--+ Moo |
  |      |   |     |   |     |   |     |
  +------+   +-----+   +--+--+   +-----+
                ^         |
                |         V
  .-------------+-----------------------.
  | Hello here and there and everywhere |
  '-------------------------------------'
  E +-------------------------*--+     E |                         o
  D |-------------------*--*--|--*     D |                   o  o  |  o
  C |-------------*--*  |  |  |  |     C |             o  o  |  |  |  |
  B |-------*--*  |  |  |  |  |  |     B |       o  o  |  |  |  |  |  |
  A +-*--*--+--+--+--+--+--+--+--+     A +-o--o--|--|--|--|--|--|--|--|
      5 10 15 20 25 30 35 40 45 50         5 10 15 20 25 30 35 40 45 50


  85.67 ┤                                       ╭╮
  78.20 ┤                                       ││                  ╭╮
  70.73 ┤                                       ││  ╭╮ ╭╮ ╭╮   ╭╮  ╭╯╰─╮
  63.27 ┤                        ╭╮         ╭─╮ ││ ╭╯╰╮│╰─╯╰╮╭╮│╰──╯   │╭
  55.80 ┤   ╭╮                 ╭╮││╭╮ ╭╮╭╮  │ ╰─╯╰─╯  ││    ││││       ╰╯
  48.33 ┤   │╰╮      ╭──╮      │││││╰╮│╰╯│  │         ╰╯    ╰╯╰╯
  40.87 ┤╭╮ │ ╰╮╭╮  ╭╯  ╰─╮╭╮╭─╯╰╯╰╯ ╰╯  ╰──╯
  33.40 ┤││ │  ╰╯╰╮╭╯     ││╰╯
  25.93 ┤││╭╯     ╰╯      ╰╯
  18.47 ┼╯││
  11.00 ┤ ╰╯
        └───────────┴───────────┴───────────┴───────────┴───────────┴────
      2011        2012        2013        2014        2015        2016
   ____[]
  | ___ |
  ||   ||  device
  ||___||  loads
  | ooo |----------------------------------------------------------.
  | ooo |    |                          |                          |
  | ooo |    |                          |                          |
  '_____'    |                          |                          |
             |                          |                          |
             v                          v                          v
   .-------------------.  .---------------------------.  .-------------------.
   | Loadable module C |  |     Loadable module A     |  | Loadable module B |
   '-------------------'  |---------------------------|  |   (instrumented)  |
             |            |         .-----.           |  '-------------------'
             '------------+-------->| A.o |           |             |
                 calls    |         '-----'           |             |
                          |    .------------------.   |             |
                          |   / A.instrumented.o /<---+-------------'
                          |  '------------------'     |    calls
                          '---------------------------'
                                          .--> Base::Class::Derived_A
                                         /
                                        .----> Base::Class::Derived_B
        Something -------.             /         \\
                         \\           /           \\---> Base::Class::Derived
       Something::else    \\         /             \\
            \\             \\       /               '--> Base::Class::Derived
             \\             \\     /
              \\             \\   .-----------> Base::Class::Derived_C
               \\             \\ /
                '------ Base::Class
                        /  \\ \\ \\
                       '    \\ \\ \\
                       |     \\ \\ \\
                       .      \\ \\ '--- The::Latest
                      /|       \\ \\      \\
  With::Some::fantasy  '        \\ \\      '---- The::Latest::Greatest
                      /|         \\ \\
          More::Stuff  '          \\ '- I::Am::Running::Out::Of::Ideas
                      /|           \\
          More::Stuff  '            \\
                      /              '--- Last::One
          More::Stuff
   ----- O
          \
           \________
           /        \
          /        \ \
         /            \____________ N
         \            /
          \        / /
           \________/
       HO
        \
         \
          \____________
          /------------ O
         /
   _____/
 H2N
  +------+.      +------+       +------+       +------+      .+------+
  |`.    | `.    |\     |\      |      |      /|     /|    .' |    .'|
  |  `+--+---+   | +----+-+     +------+     +-+----+ |   +---+--+'  |
  |   |  |   |   | |    | |     |      |     | |    | |   |   |  |   |
  +---+--+.  |   +-+----+ |     +------+     | +----+-+   |  .+--+---+
   `. |    `.|    \|     \|     |      |     |/     |/    |.'    | .'
     `+------+     +------+     +------+     +------+     +------+'
  ____  ____  ____  ____                      ______________________
 /\   \/\   \/\   \/\   \                    /\                     \
/  \___\ \___\ \___\ \___\                  /  \    _________________\
\  / __/_/   / /   / /   /                  \   \   \                /
 \/_/\   \__/\/___/\/___/                    \   \   \__________    /
   /  \___\    /  \___\                       \   \   \    /   /   /
   \  / __/_  _\  /   /                        \   \   \  /   /   /
    \/_/\   \/\ \/___/                          \   \   \/   /   /
      /  \__/  \___\                             \   \  /   /   /
      \  / _\  /   /                              \   \/   /   /
       \/_/\ \/___/                                \      /   /
         /  \___\                                   \    /   /
         \  /   /                                    \  /   /
          \/___/                                      \/___/
                   _______
                  / _____ \
            _____/ /     \ \_____
           / _____/  311  \_____ \
     _____/ /     \       /     \ \_____
    / _____/  221  \_____/  412  \_____ \
   / /     \       /     \       /     \ \
  / /  131  \_____/  322  \_____/  513  \ \
  \ \       /     \       /     \       / /
   \ \_____/  232  \_____/  423  \_____/ /
   / /     \       /     \       /     \ \
  / /  142  \_____/  333  \_____/  524  \ \
  \ \       /     \       /     \       / /
   \ \_____/  243  \_____/  434  \_____/ /
   / /     \       /     \       /     \ \
  / /  153  \_____/  344  \_____/  535  \ \
  \ \       /     \       /     \       / /
   \ \_____/  254  \_____/  445  \_____/ /
    \_____ \       /     \       / _____/
          \ \_____/  355  \_____/ /
           \_____ \       / _____/
                 \ \_____/ /
                  \_______/
  .----------------------------------------------------------------------.
  |_.-._.-._.-._.-._.-._.-.    _.-._.-._.-.    _.-._.-._.-._.-._.-._.-._.|
  |_.-._.-._.-._.-._.-._. .::db .-._.-._. .::db .-._.-._.-._.-._.-._.-._.|
  |_.-._.-._.-._.-._.-._ .::d88b -._.-._ .::d88b -._.-._.-._.-._.-._.-._.|
  |_.-._.-._.-._.-._.-. .::d8888b       .::d8888b ._.-._.-._.-._.-._.-._.|
  |_.-._.-._.-._.-._.- .::d88!::::::::::::d888888b _.-._.-._.-._.-._.-._.|
  |_.-._.-._.-._.-._.- \  Y88\_________\  Y888888P _.-._.-._.-._.-._.-._.|
  |_.-._.-._.-._.-._.-. \  Y8888P ._.-. \  Y8888P ._.-._.-._.-._.-._.-._.|
  |_.-._.-._.-._.-._.-._ /dbY88Pdb _.-._ /dbY88Pdb _.-._.-._.-._.-._.-._.|
  |_.-._.-._.-._.-._.-. /d8P_YP Y8b .-. /d8P_YP Y8b .-._.-._.-._.-._.-._.|
  |_.-._.-._.-._.-     /d8P .-.\ Y8b   /d8P .- \ Y8b -._.-._.-._.-._.-._.|
  |_.-._.-._.-._ .::db/d8P _.-. \.::db/d8P _.-. \ Y8b ._.-._.-._.-._.-._.|
  |_.-._.-._.-. .::d88bYP ._.-. .::d88LSP ._.-._ \ Y8b    ._.-._.-._.-._.|
  |_.-._.-._.- .::d8888b       .::d8888b`b _.-._. \ Y8b:db _.-._.-._.-._.|
  |_.-._.-._. .::d88!::::::::::::d888888b`b .-._.- \ YPd88b .-._.-._.-._.|
  |_.-._.-._. \  Y88\_________\  Y888888Pd8b       .::d8888b -._.-._.-._.|
  |_.-._.-._.- \  Y8888P -._.- \  Y8888P!::::::::::::d888888b ._.-._.-._.|
  |_.-._.-._.-. \  Y88Pdb ._.-. \  Y88Pdb_________\  Y888888P ._.-._.-._.|
  |_.-._.-._.-._ \__YP Y8b _.-._ \__YP Y8b`P -._.- \  Y8888P -._.-._.-._.|
  |_.-._.-._.-._.-._. \ Y8b .-._.-. /d\ Y8b .-._.-. /dbY88P .-._.-._.-._.|
  |_.-._.-._.-._.-._.- \ Y8b -._.- /d8P\ Y8b -._.- /d8P_YP _.-._.-._.-._.|
  |_.-._.-._.-._.-._.-. \ Y8b     /d8P _\ Y8b     /d8P _.-._.-._.-._.-._.|
  |_.-._.-._.-._.-._.-._ \ Y8b:db/d8P ._ \ Y8b:db/d8P ._.-._.-._.-._.-._.|
  |_.-._.-._.-._.-._.-._. \ YPd88bYP -._. \ YPd88bYP -._.-._.-._.-._.-._.|
  |_.-._.-._.-._.-._.-._. .::d8888b       .::d8888b .-._.-._.-._.-._.-._.|
  |_.-._.-._.-._.-._.-._ .::d88!::::::::::::d888888b -._.-._.-._.-._.-._.|
  |_.-._.-._.-._.-._.-._ \  Y88\_________\  Y888888P -._.-._.-._.-._.-._.|
  |_.-._.-._.-._.-._.-._. \  Y8888P .-._. \  Y8888P .-._.-._.-._.-._.-._.|
  |_.-._.-._.-._.-._.-._.- \  Y88P _.-._.- \  Y88P _.-._.-._.-._.-._.-._.|
  |_.-._.-._.-._.-._.-._.-. \__YP ._.-._.-. \__YP ._.-._.-._.-._.-._.-._.|
  `----------------------------------------------------------------------'
                      |
  ____________    __ -+-  ____________
  \_____     /   /_ \ |   \     _____/
   \_____    \____/  \____/    _____/
    \_____                    _____/
       \___________  ___________/
                 /____\

        .---.        .-----------
       /     \  __  /    ------
      / /     \(  )/    -----
     //////   ' \/ `   ---
    //// / // :    : ---
   // /   /  /`    '--
  //          //..\\
         ====UU====UU====
             '//||\\`
               ''``
          Daron Brewood
And of course, if your ASCII table does not give you enough pleasure, you can also use any kind of Unicode symbol (also within the text).
  ┌─┬┐  ╔═╦╗  ╓─╥╖  ╒═╤╕
  │ ││  ║ ║║  ║ ║║  │ ││
  ├─┼┤  ╠═╬╣  ╟─╫╢  ╞═╪╡
  └─┴┘  ╚═╩╝  ╙─╨╜  ╘═╧╛
  ┌───────────────────┐
  │  ╔═══╗ Some Text  │▒
  │  ╚═╦═╝ in the box │▒
  ╞═╤══╩══╤═══════════╡▒
  │ ├──┬──┤           │▒
  │ └──┴──┘           │▒
  └───────────────────┘▒
   ▒▒▒▒▒▒▒▒▒▒▒▒▒▒▒▒▒▒▒▒▒
  4 ◇ Sep @tw1tt3rart
 ▀▄─▀▄─▀▄─▀▄─▀▄─▀▄─▀▄─▀
 ▄▀─▄▀─▄▀─▄▀─▄▀─▄▀─▄▀─▄
 ▀─▄▀─▄▀─▄▀─▄▀─▄▀─▄▀─▄▀
 ▄─▀▄─▀▄─▀▄─▀▄─▀▄─▀▄─▀▄
 ▀▄─▀▄─▀▄─▀▄─▀▄─▀▄─▀▄─▀
 ▄▀─▄▀─▄▀─▄▀─▄▀

 23 ◇ Apr @tw1tt3rart
 ║█║█║║█║█║█║║█║█║║█║█║█
 ║█║█║║█║█║█║║█║█║║█║█║█
 ║║║║║║║║║║║║║║║║║║║║║║║
 ╚╩╩╩╩╩╩╩╩╩╩╩╩╩╩╩╩╩╩╩╩╩╩

 19 ◇ Jan @tw1tt3rart
 ─────█─▄▀█──█▀▄─█─────
 ────▐▌──────────▐▌────
 ────█▌▀▄──▄▄──▄▀▐█────
 ───▐██──▀▀──▀▀──██▌───
 ──▄████▄──▐▌──▄████▄──
 RT
 @140artist
Image generated with:
http://www.underware.nl/fonts/zeitung_mono/features/ASCII+/#feature_info
........................................................................................................................
........................................................................................................................
........................................................................................................................
........................................................................................................................
........................................................................................................................
.........................................................=...=..........................................................
......................................................=.====.===.=.=....................................................
....................................................========.==========.................................................
...............................................===========I================.............................................
.........................................=...=========I===II=III=III=I======............................................
.........................................=.========I==III=II=III=II==I======............................................
.......................................=.=========III=IIIIII=I=IIII=I=====I=.===........................................
.....................................=..========I==IIIIIIIII=IIIIII=I=I==II======.==....................................
.....................................==========I=I=II=IIIIIIIAIIIAI=I====II========.==..................................
....................................=====I=I===I=.=III=IIIIAAIIIIAI=I==IIII============.................................
.....................................=====II==III==IIAIIIIIAII=AIAIIIIIIII===II=======..................................
...................................==.======II=III==IAIIIIIAII=AAIII=II==I===II=I=====.==.=.............................
....................................========IIIIIII=IIAIIIAAIIIAAIII==I==I==IIIII==I=======.............................
.............................=....=========IIIIIIIIIIIAIIAAAIIIIAIII=IAIII=IIIIIIII=========..==........................
.............................====.======I===IIAAAIIIIAAAIAAAAIAIAIIIIIAIIIAIIAAI======.=======.==.......................
............................===I===========IIIIAAAIIIIAAAAAAAIAIAIAI=IIIIAAIII=I=I==============........................
..............................==II=====III==IIIIIIAAI=AAIAAXAAAAIAAIIAAIAAIIIIII=I===IIII======....=....................
............................=..=IAI===IIIIIIIIIIIAAAAAIAIXIXAAXAIAXAAIIAAAIIAII=IIIIIII========.====....................
...........................====..IAII=IIIII=IIIIAIAIAAAAAXAXAAXAIAAAIAAAAIIIAIIIIIIIIII=====.=.===......................
..................=.......========IIIIIIIIIAIIIIIIIAAXAAAXAAXXXAIXAIAXIAAAIAIIA==I=II=====I=====........................
..................==......=========IIAIIIAIIIIAAAIIIAAAAAXAXXXXAAXAAAAAAAIAIIIII=III=======.=========...................
...................=I==..=====I======IIIIIAAIAIIIAAAAAXXAXXXXAXAAXAXXIAAIAIIIIIIAII==.==IIII==IIII==....................
....................=II===II===IIIIIIIAAAAIAAAAAIIIAXXXXXXXXXXXAAAAAAAXAAAAAAAAAIIIAAAAAIIIIII====......................
....................==IIIIIIIIIIIIAAAAAAXAAAAIIIAIIIAXXXMXXXMXAAXXIAXXAXAAAAIII=IIII======IIII=I=====...................
................==..====IIIAAAAIIIIAIAAAAAXAAXAIIIAAAIXAAMXMMMXXAAXXXXXXAAIIIIIAIIIIIIIIIIIIIII========.................
...............=====II===IIAAAAAIII=====IIAXXAXXAAIAAAAXIAMMMMXAAAXMMXAIIAAAI=====IAIIIIIAII========....................
...................=====IIIIIIAAAAAAAIIIIIIAAAIAAXMMXXXXXXMMMMMXXMMXAIAAAAAIII====IIAAAAIIII=======........=............
...................========IIIIIAXXAAAAIAIIIIIAAAIAXAAAXXXXMMMXXMMMAAAAAAAAAIAIIIIAAAIAIII===========.=====.............
................=======II=========IAXAAXXXXAAAAAXXAAXAAIMMMMMXXMMMAIAAAAIAAXXAAAAAAI==II=========..=======..............
..........========.======IIIIIIIIIIIAAAXXXXXXXXAAXXXMXXXAMMMMMMMXXAAAXAAAAAXAAAAAIIIIIIIIIIIIIIIIIII===.................
............===IIIAIIIIIIIIAAAAAAXXXXXXXXXXXXXAXXAXAXXMXXMMMMMMXMXXXXAAAAAAAIIAIIAAAAAAAAAAIIIIII=====..................
................======IIIIIIIIAAAAAAAAAXAXAAAAXMMMXXAAMXIAMMMMMMMXMXXXXXXXXXXXAAAIIIIIIIIIIAIAII========................
.................====II==I=IIIAIIIIAIAAXAAAAXXXXXXXMXXXMMAMMMMXIAMXAXXXXXXXXXXXAAAAAAAAAIAAIIIIII=I===..................
...............====================IIAAAAXXXXXXXAXXMMMMMXMMWWMMMXXXXXAAAAAAAAAXXXAAAAAII=================...............
....................===...======IIIAAAXXXXAAAXAXIAAIAXMMAAMWWMXAXXAXXXAXAAXXAXAXXXAIIIIIII====I==I====.=................
..................=====IIIIIIAAAAAAAAAAAI=IAIAAA=IIAXXAXMXMWMMIAAAAXXXXXAXAIAAAXAAAAAAAAIIIIII==========................
.................=====IIIIIIAAAIIIII=IIIIIIAXAAIAAAAXXXAIMMMMXIAIXAXXXAAXXXXXAIIIAAAIAAIAIIIII====II====................
.................=======III=I======IIIIIIIAXAAAAIIAAIIIAAAMMMAAAAAIIIAXXXMXXXXAIII==IIIII==IIIII========................
................=================II==IIIAAAAAAAIIAI===IIIMMMMXAIIAIIIIIAAXXXXXXXAAII==IIII========.====.................
.................=====..=============IIAAAAAIIIIIII===IIIXMMMAIIAIIAIII=IAAAAAXXAAAIAII==============...................
........................============IAAAIAAI===I======I==AMMMAIII=IAI====IIIAAAAAAAAIIIIIII===========..................
=....................=======..=====IIII===II============IIMMMIIIIIII=====I===IAAAAAAAI=I=========.......................
====================...====...==============I=============MMMI=================IIAAIIIIIIII========.....................
===========================....===========================MMMI===================IIIIII====I==.==.......................
===============================================..=========MMMI==.=....=================I===I====........................
==========================================================MMMA=============......===..===.===.==........................
==========================================================MMMA===========================..=====...===========.=........
==========================================================MMMX==========================================================
=========================================================IMMMX==========================================================
========II==IIIIIIIIIIIIIIIIIIIIIIIIIIIIIIIIIIIIIAAAIIAIIXMMMMAIIIIAAAIIIIIIIIIIIIIII=IIIII=IIIIIIIIIIII================
XXXXXXXXXXXXXXXXXXXXXXXXXXMXXMMMMMMMMMMMMMMMMMMMMMMMMMMMMMMMMMMMMMMMMMMXXXXMXXXXXXXXXXXXXXXXXXXXXXXXXXXXXXXXXXXXXXXXXXXX
MMMMMMMMMMMMMMMMMMMMMMMMMMMMMMMMMMMMMMMMMMMMMMMMMMMMMMMMMMMMMMMMMMMMMMMMMMMMMMMMMMMMMMMMMMMMMMMMMMMMMMMMMMMMMMMMMMMMXMMM
MMMMMMMMMMMMMMMMMMMMMMMMMMMMMMMMMMMMMMMMMMMMMMMMMMMMMMMMMMMMMMMMMMMMMMMMMMMMMMMMMMMMMMMMMMMMMMMMMMMMMMMMMMMMMMMMMMMMMMMM
MMMMMMMMMMMMMMMMMMMMMWMMMMMMMWMWWWWMMWMMWWWWMMWWWWWWWWWWWWMWWWMMWMWWMMMMWWMMMMMMMMMMMMMMMMMMMMMMMMMMMMMMMMMMMMMMMMMMMMMM
Macros are an easy way in LiaScript to hide reoccurring or tedious tasks. In
essence, they define a simple textsubstitution-system that can be parameterized
and also imported from other courses. Actually, everything that starts with an
@-symbol can be replaced by something that has been defined in the main-header
or sub-header of your document.
By now, you will have seen or changed macros like author, logo, or comment,
but you can do even more.
<!--
author: someone who wants to create something new

email: your contact-information
-->

# Main TitleThere are actually two types of macros, single line macros and block macros.
While the first one only returns a single line, the latter one preserves your
custom indentation. This single line macros start with a macro-name, which is
followed by a colon. The name has to start with a word-character. The starting
@-symbol is optional, but I would suggest to use it for custom macros and to
increase readability.
<!--
author: someone who wants to create something new

@Single.line: you can add as much content as you
  want to your single-line macro!

  The only thing that is important, is to use
     indentation.

     Not __matter__ how [much](#12) it is.

-->

# Main Title

@Single.line  <-- this will be replaced at compile-time by: v

you can add as much content as you want to your single-line macro! The only thing that is important, is to use indentation. Not __matter__ how [much](#12) it is.

@author <-- by: someone who wants to create something new
By the way, macros are case-sensitive, thus there is a difference between
@author and @Author.
Block-macros are not followed by an colon and are parsed until they reach the
@end symbol. Every macro can also be used to define Markdown content, HTML,
CSS, or even JavaScirpt.
<!--
@smile: ;-)

@block
this type of macro preserves the structure.

<h1>
@smile and you can also use macros, that
define other macros
</h2>

| Header 1   | Header 2   | Header 3   |
| :--------- | :--------- | :--------- |
| Item 1     | Item 2     | Item 3     |

<script>alert("hello world")</script>
@end
-->

# Main Title

@blockCommenting macros out or simply adding additional "personal" information to
to a section happens with two additional @@ for single-line, and three @@@s
to comment blocks...
<!--
@@comment: this is a single line macro
  that has been commented out

@@ if you prefer it, comment blocks can
@@ be defined like this
@@ ...

@@@block-comments

start with three @s and go until the
parser reaches ...

@end
-->Actually every section can define its own set of macros, that only exist in that in that single section. Only the initial main-header at the start of a document defines a set of global macros. This might be useful, if you want to switch the voice of the narrator, authorship, etc.
<!--
...
narrator: US English Female

-->

# Main Title

....

### Some other section
<!--
author: another author for this section
...
narrator: Australian Male

-->
It is also possible to pass parameters to macros, which looks like calling a
function in most common programming languages. Simply call a macro with
parentheses and put into everything, that you want to place within the macro,
where something is placed is simply defined by an @ + a number, thus @0,
@1, .., @n. Like most programming languages start counting at 0, also in
LiaScript @0 defines the first parameter.
<!--
@highlight: <b style="color: red">@0</b>
-->

@highlight(I want this text to be read and bold)
The following example shows, how multiple parameters can be passed to a macro, they are simply separated by commas. The main problem which appears is that, if you want to pass a string that contains commas, then this string has to be placed in backticks. As also depicted, a macro can also call/substitute another macro, which might be extremely useful if you have defined a very complex macro. You can define more "simple" macros, that call the "complex" one by setting some some default values, see therefor section uid.
<!--
@highlight: <b style="color: red">@0</b>

@red_and_green:
  @highlight(@0) <i style="color: green">@1</i>
-->

@red_and_green(red,`simply, simply, green`)
Last but not least, in order to go on with the basic Markdown syntax, it is also possible to pass multi-line parameters. How would you do this? Of course simply by using a common Markdown code-block with three backtics.
@red_and_green(red,```please to not use
this in production...

* it is better to write Markdown
* directly
```)
As mentioned in the code, try to avoid this, since it generates ugly Markdown code on GitHub or on any other Markdown-interpreter/editor. But you can also use a code-block, which contains information about syntax highlighting and a macro, that defines the title. The part within the code-block is then simply passed to the macro as the last and multi-line parameter.
<!--
link:   https://pannellum.org/css/style.css
        https://cdn.pannellum.org/2.4/pannellum.css

script: https://cdn.pannellum.org/2.4/pannellum.js

@panorama
<div id="panorama_@0" style="width: 100%; height: 400px;"></div>
<script>
  pannellum.viewer('panorama_@0', {
    "type": "equirectangular",
    "panorama": "@1",
    "autoLoad": false,
    "hotSpots": [@2]
});
</script>
@end
-->

```json @panorama("0",https://pannellum.org/images/cerro-toco-0.jpg)
{
  "pitch": 14.1,
  "yaw": 1.5,
  "type": "info",
  "text": "Baltimore Museum of Art",
  "URL": "https://artbma.org/"
},
{
  "pitch": -0.9,
  "yaw": 144.4,
  "type": "info",
  "text": "North Charles Street"
}
```In some cases, for example if you want to pass content to a javascript string
and you need to escape the content of the LiaScript content, wich could be a
multiline string for example. Then you can simply add a ' to your macro, for
example:
@'inputwill result in an escaped version of the input string@'input(1)is the same as above@'1as a parameter will also get escaped- similarly to any other
@'macro(with, some, params)
But be carefull to apply it only once in your macro chain as multiple escape sequences might result in multiple backslashes (
\\\") for special characters.
Creating macros, can be quite difficult, especially if it is about creating and
calling macros nested macros with various parameters. And defining macros in
Atom is somehow similar to navigating in the dark, since it is not possible to
inspect the DOM. But you can escape a macro by and additional @, which outputs
a gray and escaped HTML pre code block.
<!--
@highlight: <b style="color: red">@0</b>

@red_and_green:
  @highlight(@0) <i style="color: green">@1</i>
-->

@@red_and_green(red,`simply, simply, green`)
\red\ \simply, simply, green\The following macros are special ones that are used by the LiaScript to deal with a couple of convenience functions.
Attribution is an important issue. With the attribute command, you can define the attribution that is showed within the info field within the navigation panel. These elements get also imported if you import the functionality from another course.
A good attribution might look like the following ones...
<!--
attribute: [AlaSQL](https://alasql.org)
  by [Andrey Gershun](agershun@gmail.com)
  & [Mathias Rangel Wulff](m@rawu.dk)
  is licensed under [MIT](https://opensource.org/licenses/MIT)

attribute: [PapaParse](https://www.papaparse.com)
  by [Matthew Holt](https://twitter.com/mholt6)
  is licensed under [MIT](https://opensource.org/licenses/MIT)
-->The author information is visible within the information panel as well as on the course-card on the home-screen.
<!--
author: Your name
-->This information is shown at the course-card at the home-screen. It should contain a short and precise description of your course. This macro will only show one paragraph, even if you define more content.
<!--
comment: Learn something about ...
  even if you insert multiple paragraphs

  there will only be one paragraph
-->A convenience function that can be used to show the latest update time to the user. This is also shown at the information panel.
<!--
date: 08/03/2020
-->You can change the default appearance of your document, either if you prefer dark mode or light mode. This will not change the user preferences. The default mode is defined by the user settings.
<!--
dark: true

@@ or ...

dark: false
-->Simply add some contact information that is shown in the information panel. This can also be overwritten for every section.
<!--
email: contact@web.de
-->You can import the main macros of other courses, simply by using the import command, which is followed by the raw URL of the foreign course.
You can also import various different courses, every URL will be loaded before the course is loaded.
Only the definitions in the main header are loaded, this includes, scripts, css, macros, attribution, and onload.
Our basic templates are currently hosted at https://github.com/LiaTemplates .
Every course basically describes its macros and how to apply them.
Only the content of this course is loaded for speed-reasons, it is currently not possible to load a course, that requires macros of another course and so on.
<!--
import: https://raw.githubusercontent.com/liaTemplates/rextester_template/master/README.md
    https://other_url

import: this will import a third url
-->

``` python
print("Hello World")
```
@Rextester.eval(@Python)Use this only in conjunction with executable code and projects or with quizzes. This macro can only be used in a script tag and gets replaced by the current user input.
To refer to the inputs in a project, use the parameterized macro:
@input(0)   <== equal to @input
@input(1)Set the internationalization of the course. This will set basic button information The currently available languages are defined in:
https://github.com/liaScript/lia-localization
<!--
@@bulgarian
language: bg

@@english
language: en

@@german
language: de

@@persion
language: fa

@@armenian
language: hy

@@dutch
language: nl

@@ukrainian
language: ua
-->If you need to load additional CSS files, use link followed by the URL of your stylesheet.
Similar to import or script, you can load multiple files.
See https://github.com/liaScript/custom-style for more information on how to define custom styling.
<!--
link: https://some.css
  https://another.css
-->The logo definition requires a URL of an image, weather absolute or relative. It is used to define a background image for the course-card at the home-screen.
<!--
logo: ./pics/logo.png
-->You can change the default style of your document, either if you do not have any effects you can set mode to Textbook or start with and interactive Presentation.
The three modes a the same as defined within the document at the upper right button. The default mode is defined by the user settings.
<!--
mode: Presentation

mode: Slides

mode: Textbook
-->Set the narrator-voice of your course-speaker. The voice is a service of https://responsivevoice.org that is free for non-commercial educational content. The list below shows all currently available voices and languages.
<!--
narrator: Afrikaans Male
-->| Female | Male |
|---|---|
| UK English Female | UK English Male |
| US English Female | US English Male |
| Afrikaans Male | |
| Albanian Male | |
| Arabic Female | Arabic Male |
| Armenian Male | |
| Australian Female | Australian Male |
| Bangla Bangladesh Female | Bangla Bangladesh Male |
| Bangla India Female | Bangla India Male |
| Bosnian Male | |
| Brazilian Portuguese Female | Brazilian Portuguese Male |
| Catalan Male | |
| Chinese Female | Chinese Male |
| Chinese (Hong Kong) Female | Chinese (Hong Kong) Male |
| Chinese Taiwan Female | Chinese Taiwan Male |
| Croatian Male | |
| Czech Female | Czech Male |
| Danish Female | Danish Male |
| Deutsch Female | Deutsch Male |
| Dutch Female | Dutch Male |
| Esperanto Male | |
| Estonian Male | |
| Filipino Female | |
| Finnish Female | Finnish Male |
| French Canadian Female | French Canadian Male |
| French Female | French Male |
| Greek Female | Greek Male |
| Hindi Female | Hindi Male |
| Hungarian Female | Hungarian Male |
| Icelandic Male | |
| Indonesian Female | Indonesian Male |
| Italian Female | Italian Male |
| Japanese Female | Japanese Male |
| Korean Female | Korean Male |
| Latin Female | Latin Male |
| Latvian Male | |
| Macedonian Male | |
| Moldavian Female | Moldavian Male |
| Montenegrin Male | |
| Nepali | Nepali |
| Norwegian Female | Norwegian Male |
| Polish Female | Polish Male |
| Portuguese Female | Portuguese Male |
| Romanian Female | Romanian Male |
| Russian Female | Russian Male |
| Serbian Male | |
| Serbo-Croatian Male | |
| Sinhala | Sinhala |
| Slovak Female | Slovak Male |
| Spanish Female | Spanish Male |
| Spanish Latin American Female | Spanish Latin American Male |
| Swahili Male | |
| Swedish Female | Swedish Male |
| Tamil Female | Tamil Male |
| Thai Female | Thai Male |
| Turkish Female | Turkish Male |
| Ukrainian Female | |
| Vietnamese Female | Vietnamese Male |
| Welsh Male |
Sometimes it might be necessary to preload some JavaScript code that is gets executed before the course is loaded.
Or you want to define some global functions that can be used afterwards everywhere.
onload actually does the same as its HTML counterpart and is used to accomplish this task.
<!--
@onload
// this macro contains some important functions that are loaded
// only once ...

alert("Hello World")
@end
-->Load all required JavaScript files/libraries with this command.
<!--
script: https://some.js
  https://another.js
  ...
-->If you already have some translated versions of your course or know where they can be found, then use this macro. Simply add the name and the URL. This links will be also visible within the information panel of your course.
<!--
translation: Deutsch  translations/German.md
translation: Français translations/French.md
translation: Русский  translations/Russian.md
-->This macro can only be used within the document, not within the header.
Sometimes it is necessary to define unique identifiers if you want to access some HTML nodes and do not want to name every manually.
In this case it might be useful to define hidden macros, that make use of @uid which generates a unique identifier, whenever it is called.
See for example https://github.com/liaTemplates/Rextester to see the application of this pattern for creating macros.
<!--
@eval: @hidden_eval(@uid,@input)

@hidden_eval
<script>
// eval @input
...
// and do somethint with the content of "name_.."
document.getElementByName("name_@0")
</script>


<div id="id_@0"></div>

@end
-->A very important information is the version, it follows the major.minor.patch
notion. If you start to develop a course, you can leave this out, and you will
be in some kind of development-version or as long as you are in major-version 0
the course should be parsed, every time it is loaded. This is fine for small
courses and no persistent content. But, if you include executable code or
quizzes, this content is stored persistently at IndexedDB directly within your
browser.
If your course is ready or very large, it might make sense to define a major
version, such as 1.0.12. The benefit of this is, that every time, the user
loads the course, the app tries to download the raw Markdown file and then it
checks the version information, if the version is the same as the one that is
currently stored within IndexedDB, then it does not require to preprocess the
entire document again, instead it directly loads the preprocessed version
directly. This is especially useful for smart phones.
<!--
version: 0.0.1
...
-->

# Main Title
So how to change the version information?
If you only fix typos or add or change static content, it is sufficient enough
to increase the patch element and thus for example 1.0.14 to 1.0.15.
If you add slides to the end of your document, it is okay to increase the minor
version number, eg. going from 1.0.15 to 1.1.0.
Major versions changes are required, if you change the structure of your
document, especially quizzes and code. As already mentioned these persistent
state information are stored within IndexedDB, but moving code or quizzes from
one slide to another will might destroy previous states. For this purpose major
version changes are required (1.1.0 -> 2.0.0), which will result in a new
version also in IndexedDB. The old code/state is still available and can be
restored.
- Better integration with github/gitlab and the versioning of courses
- Automagically analyzed surveys
- Integration of WebGl and a 3D navigation
- Better Inline function-plotter
{1}{
}--{{1}}-- Programming paradigm experimenter and creator of liaScript and SelectScript...
{2}{
}--{{2}}-- The mind in the dark and the man behind the eLab-project ...
{3}{
}--{{3}}-- Embedded systems developer, creator or arduinoview, and Markdown evangelist ...
Footnotes
-
This is an explanation, than can consist of multiple blocks. ↩