API Mapper


The API Mapper is a visual tool for transforming the response of JSON APIs. It allows users to:
- Rename Fields
- Exclude fields which are not needed
- Transform Fields using built-in transformations, or custom transforms they have defined themselves
Setup
There are currently some workarounds needed to get the API Mapper up and running within the platform.
- Make the newly created service public

Additional steps for Feedhenry MbaaS targets
Additional steps that are required to be run on RHMAP Feedhenry mbaas (non OpenShift)
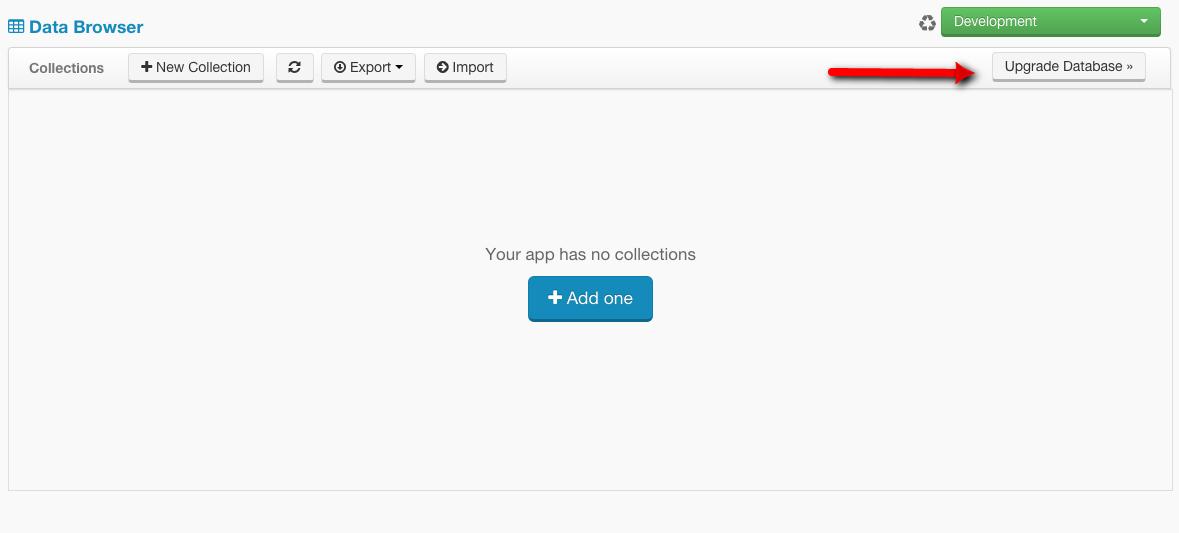
- Visit the data browser, depending on your application configuration a "Upgrade Database" action will be available, this means the application is using an old/legacy shared database and it needs to be upgraded to use a dedicated one. Note the application needs to be first finished its initial deploy and be running to perform this task.
- Re-deploy the service
- You can now use the API mapper under the "Preview" section of the studio. The mapper can be popped out of the studio fullscreen by visiting the deploy host of this service in a web browser.
Creating your first request
Today, we're going to connect to a GitHub JSON API.
- To get started, from the home page of the api mapper, select "New Request".
- In the URL field, paste the URL of our API:
https://api.github.com/repos/feedhenry-templates/fh-api-mapper - Our API requires us to add a
User-Agentheader field. In the "Header Key" value, writeUser-Agent. In the "Header Value" field, writeFHApiMapper. - Let's set up where this API gets mounted. Select the "Mount Path" tab, and enter a mount path - we're using
/thisrepo. - Click 'Create Request'. We have now saved our first request.
- Let's try this request. Click the blue "Send Request" button.
- In the "Response" section, verify the "Response Headers" and "Response Body" sections appear as expected. You can now see the response body.
Add a Mapping
- Once we've created and saved a request, we can then add a mapping. Click the blue "Add a Mapping" button.
- Once the mapping is created, we see a list of fields the API returns on the left. This API has a lot of fields. We're now going to modify the response which our API returns.
- Click the "owner" field, and the "Field Mapping" panel should update. We can now define transformations on this field.
- We're going to discard the "owner" field, and all of it's children. Untick the "Use this field" box. The change is automatically saved.
- Let's rename the
idfield to be called_id. Select the "id" field on the left, and in the "rename field" box, type_id. - Lastly, we're going to repurpose the boolean
privatefield to be apublicfield. As part of this, we're also going to invert the value of this field. As before, rename the field fromprivatetopublic. Now, select a transformation called "invert". - Now that we've transformed our response, let's see it in action. In the "Response" section, visit the "Response Body" tab. On the left is the previous API response. On the right is the Mapped Response.
- Verify the mapped response has a field named "public" set to true, and the
idfield now reads_id. Verify there is noownerfield.
Using the Mapped API
- Now that we've mapped our API, let's make use of this. First, we're going to test the mapped API using the command line.
- Navigate to the "Sample Code" section. Copy the "cURL Request" to the clipboard, and try the command in a *nix terminal.
- Verify the mapped response is returned.
- You can also use the Node.js code snippets. Copy the
Node.js Request Modulesnippet into a new file calledtest.js. You can then run this file from the terminal by runningnode test.js. You should see the mapped response output.
Writing your own Mappings
As well as using built-in mappings, you can also write your own transformation functions. Here's how.
-
In the studio's code editor, open the
application.jsfile in the root directory. -
You'll notice the API mapper route is instantiated by providing one optional transformation, called
mixedArrayTransform. By looking at this, you can probably figure out how to add your own!
We're going to add a transformation called 'even', which changes even numbers to 0, and odd numbers to 1 - really simple! Here's the implementation:// First, tell the mapper it operates on numbers exports.type = 'number'; // then, implement the function. exports.transform = function(n){ return n%2; };
-
Now that we've created our transformation file, we need to include it in
application.js. We'll replace the instantiation of the API mapper route with something like this:app.use('/', require('./lib/api')({
transformations : { even : require('./transformations/even.js') } })); -
You can now use your new transformation on numeric types!
Developing
- Needs mongodb to run locally
- e.g.
docker run -p 27017:27017 --name mongo_instance_001 -d mongo:3.2 --smallfiles
- e.g.
- Needs env vars set to start and connect to mongo (mimicing a SaaS MBaaS)
- e.g.
FH_SERVICE_APP_PUBLIC=true FH_MONGODB_CONN_URL=localhost:27017 npm start
- e.g.
Client
- Uses Patternfly http://www.patternfly.org/#_
- less in public/css, auto recompiles using less-middleware mounted as a route
- static content under public/
- browserified js, served via
app-built.js- requires re-running
grunt browserifyto rebuild
- requires re-running
- uses handlebars templates in views/templates (html files)
- uses bootstrap js
- uses backbone for models, collections & views https://github.com/feedhenry-templates/fh-api-mapper/tree/master/public/js
- Models
- Collections
- Views
base.view.js, which others extend- Request Default View (and request.html templates) https://github.com/feedhenry-templates/fh-api-mapper/blob/master/public/js/request.view.js
- Requests (default view) (and requests.html template) https://github.com/feedhenry-templates/fh-api-mapper/blob/master/public/js/requests.view.js
- Mapping (and mapping.html templates) https://github.com/feedhenry-templates/fh-api-mapper/blob/master/public/js/mapping.view.js
Backend
- main api mapper routers in
lib/api.js - uses mongoose for requests and mappings models in lib/models/
- Mappings are dynamically mounted as routes in
lib/api.jsvia populateSingleRoute & populateAllRoutes functions- Whenever a Request or Mapping changes, routes are updated
- https://github.com/feedhenry-templates/fh-api-mapper/blob/master/lib/api.js#L33-L79
Tests
npm test