Connected Mobility Solution on AWS | 🚧 Feature request | 🐛 Bug Report | ❓ General Question
Note: If you want to use the solution without building from source, navigate to the AWS Solution Page.
If you want to jump straight into building and deploying, click here
- Connected Mobility Solution on AWS
- Table of Contents
- Solution Overview
- Architecture Diagrams
- CMS Modules
- Deployment Setup/Pre-requisites
- Deploy
- Cost scaling
- Collection of Operational Metrics
- Teardown
- Developer Guide
- License
The Connected Mobility Solution (CMS) on AWS provides the automotive industry customers the capability to communicate between vehicles and the AWS Cloud, manage and orchestrate CMS on AWS deployments from a centralized developer platform, securely authenticate and authorize users and services onboard vehicles into AWS IoT Core, create vehicle profiles for storing data about registered vehicles and capture and store telemetry data emitted from registered vehicles. Additionally it provides capabilities to query stored vehicle data, create alerts and subscribe to notifications based on data thresholds, visualize vehicle telemetry data through a provided dashboard and simulate connected vehicle data.
For more information and a detailed deployment guide, visit the Connected Mobility Solution on AWS solution page.


For detailed information visit the module's README
For reference, there is a proton environment setup with further details in its README.
To deploy CMS on AWS, a variety of tools are required. These deploy instructions will install the following to your machine:
Certain tools also require specific versions. See the table below for the appropriate versions. Following the provided install instructions will install the correct verions.
For tools not listed here, stable versions should work appropriately.
| Dependency | Version |
|---|---|
| NodeJS | 18.17.1 |
| NPM | 9.6.7 |
| Python | 3.10.9 |
git clone https://github.com/aws-solutions/connected-mobility-solution-on-aws.git
cd connected-mobility-solution-on-aws
WARNING: If you do not
cdinto the repository before following these instructions, the correct versions may not be installed.
Install the following tools in the order instructed here. Where appropriate, a script has been provided to aid in install. Otherwise, please visit the installation guide provided by the tool's publisher to ensure a correct installation.
WARNING: If after a successful installation, a command is not found, you may need to restart your terminal.
Follow the nvm installation guide to install NVM. Ensure your installation properly set your path by running the script below.
nvm --version
# Expected Output: x.xx.xnvm install
nvm useFor more information see the nvm usage guide for installing the correct version of Node. Manually installing Node without the use of nvm is not recommended.
Follow the yarn installation guide. Ensure your installation properly set your path by running the script below.
yarn --version
# Expected Output: x.xx.xxFollow the pyenv installation guide to install Pyenv. You will likely need to manually add Pyenv to your PATH by following the provided instructions. Ensure your installation properly set your path by running the script below.
pyenv --version
# Expected Output: pyenv x.x.xxpyenv install -sFor more information see the pyenv usage guide for installing the correct version of Python. Manually installing Python without the use of pyenv is not recommended.
Follow the pipenv installation guide to install Pipenv. You will likely need to manually add Pipenv to your PATH by following the provided instructions. Ensure your installation properly set your PATH by running the script below.
pipenv --version
# Expected Output: pipenv, version xxxx.xx.xFollow the installation instructions laid out in the AWS CLI install page. This install is OS specific, and includes multiple options for both a system wide, and user specific install. Follow the install instructions most appropriate to you. Ensure your installation properly set your PATH by running the script below.
aws --version
# Expected Output: aws-cli/x.xx.xx ...Follow the installation guide to install the AWS CDK toolkit. Ensure your installation properly set your PATH by running the script below.
cdk --version
# Expected Output: x.xxx.x (build ...)Now that you have the correct tools, you can install the dependencies used by the solution using make install.
After installing, we will activate the environment which contains the dependencies.
make install
source ./.venv/bin/activateTo deploy the solution, a Route53 Hosted Zone is required to be setup in your account. You will provide the domain for this hosted zone in the following step when you setup your environment variables. This is a manual step. For more details, see Working with hosted zones.
To deploy the solution, a variety of environment variables are required. These environment variables will be used to provide the context to your CDK deployment.
ROUTE53_BASE_DOMAINis optional, if unset the base domain will be assumed to be the same as theROUTE53_ZONE_NAMEvariable. This must be set to a superset of theROUTE53_ZONE_NAME(e.g. Optional-Sub-Domain.ROUTE53_ZONE_NAME).- The Route53 Zone Name can be found from the Route53 Hosted Zone you setup in the previous step. Use the AWS console to find this domain.
BACKSTAGE_TEMPLATE_S3_UPDATE_REFRESH_MINSshould be set to something small such as1 minutefor development. It is recommended to have longer refresh intervals for cost savings in production environments.
NOTE: Do not use quotes around values in the .env file or else the make commands will fail.
Use the following command to create a .env file. Replace the defaults with appropriate values for your deployment.
cat > .env <<EOL
USER_EMAIL=you@domain.com
ROUTE53_ZONE_NAME=domain.com
ROUTE53_BASE_DOMAIN=subdomain.domain.com
BACKSTAGE_LOG_LEVEL=info
CMS_SOLUTION_VERSION=v0.0.0
BACKSTAGE_TEMPLATE_S3_UPDATE_REFRESH_MINS=30
BACKSTAGE_NAME=Default Name
BACKSTAGE_ORG=Default Name
EOLexport USER_EMAIL="you@domain.com"
export ROUTE53_ZONE_NAME="domain.com"
export ROUTE53_BASE_DOMAIN="subdomain.domain.com"
export BACKSTAGE_LOG_LEVEL="info"
export CMS_SOLUTION_VERSION="v0.0.0"
export BACKSTAGE_TEMPLATE_S3_UPDATE_REFRESH_MINS="30"
export BACKSTAGE_NAME="Default Name"
export BACKSTAGE_ORG="Default Org"Before continuing, run the following commands:
make check-cdk-env
make cdk-context
This will display your current CDK context which will be used for your deployment. Ensure the environment variables look correct and that all the expected values are displayed. If not, please retry setting your environment variables.
Refer to the deployment diagram for a detailed walk-through of what is deployed.
Ensure you've followed the steps in the deployment-setup/pre-requisites section.
- Pre-requisite tools installed. Refer to the Prerequisites section for details.
- Solution dependencies installed. Refer to the Solution Dependency Installation sections for details.
- A Route53 Hosted Zone in the deployment account. Refer to the Create a Route53 Hosted Zone section for details.
- Environment variables set. Refer to the Setup environment variables section for details.
It is safest to run a fresh bootstrap for your AWS CDK toolkit which provides the necessary context for the solution deployment. Run the following make command to perform this bootstrap.
make bootstrapThe following command will upload the necessary assets to S3 which allow for the deployment of CMS modules via Backstage.
This includes the template.yaml files used to instruct Backstage, as well as the .tar files for each module which provide
the source code for the Proton service templates setup later.
make upload-s3-deployment-assetsRunning this deployment will first deploy the ACDP, followed by the execution of the Backstage pipeline which will deploy Backstage.
make deployAfter the CDK deployment is completed, browse to CodePipeline in the AWS console and verify that the "Backstage-Pipeline" execution completes successfully.

After the pipeline has completed, the deployment can be considered successfully complete and Backstage is ready for use.
NOTE: It can take up to 10 minutes after the Backstage pipeline completes for Amazon Cognito's auth domain to become available for use with Backstage. If your Backstage domain will not load, please wait and try again.
NOTE: The S3 location where deployment assets were uploaded to is in your AWS account, and should have a name of the format
<AWS_ACCOUNT>-cms-resources-<AWS_REGION>
- Sign in the AWS Management Console, select your Region, and navigate to the AWS Proton Service Templates page.
- Select
Create service templatefor each module template you wish to register.
- Fill in the required fields (The following instructions detail how to register the CMS Vehicle Simulator Module template. The same steps can be applied to other modules as well by selecting the proper s3 path)
-
Select the
Use your own template bundle in S3 Option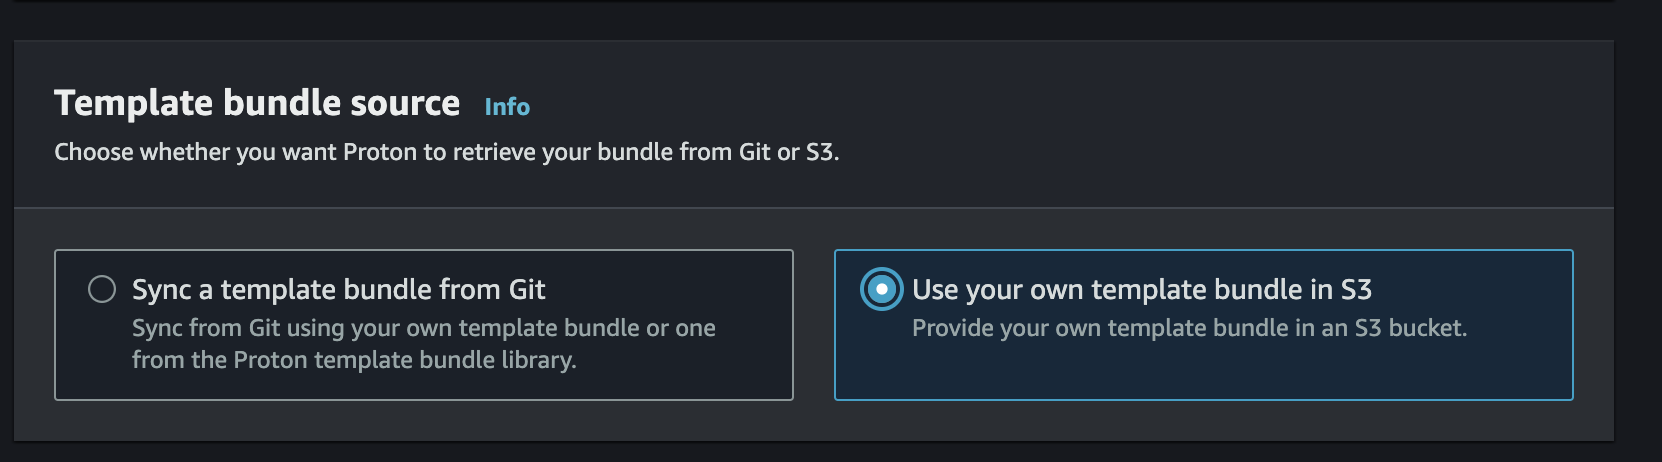
-
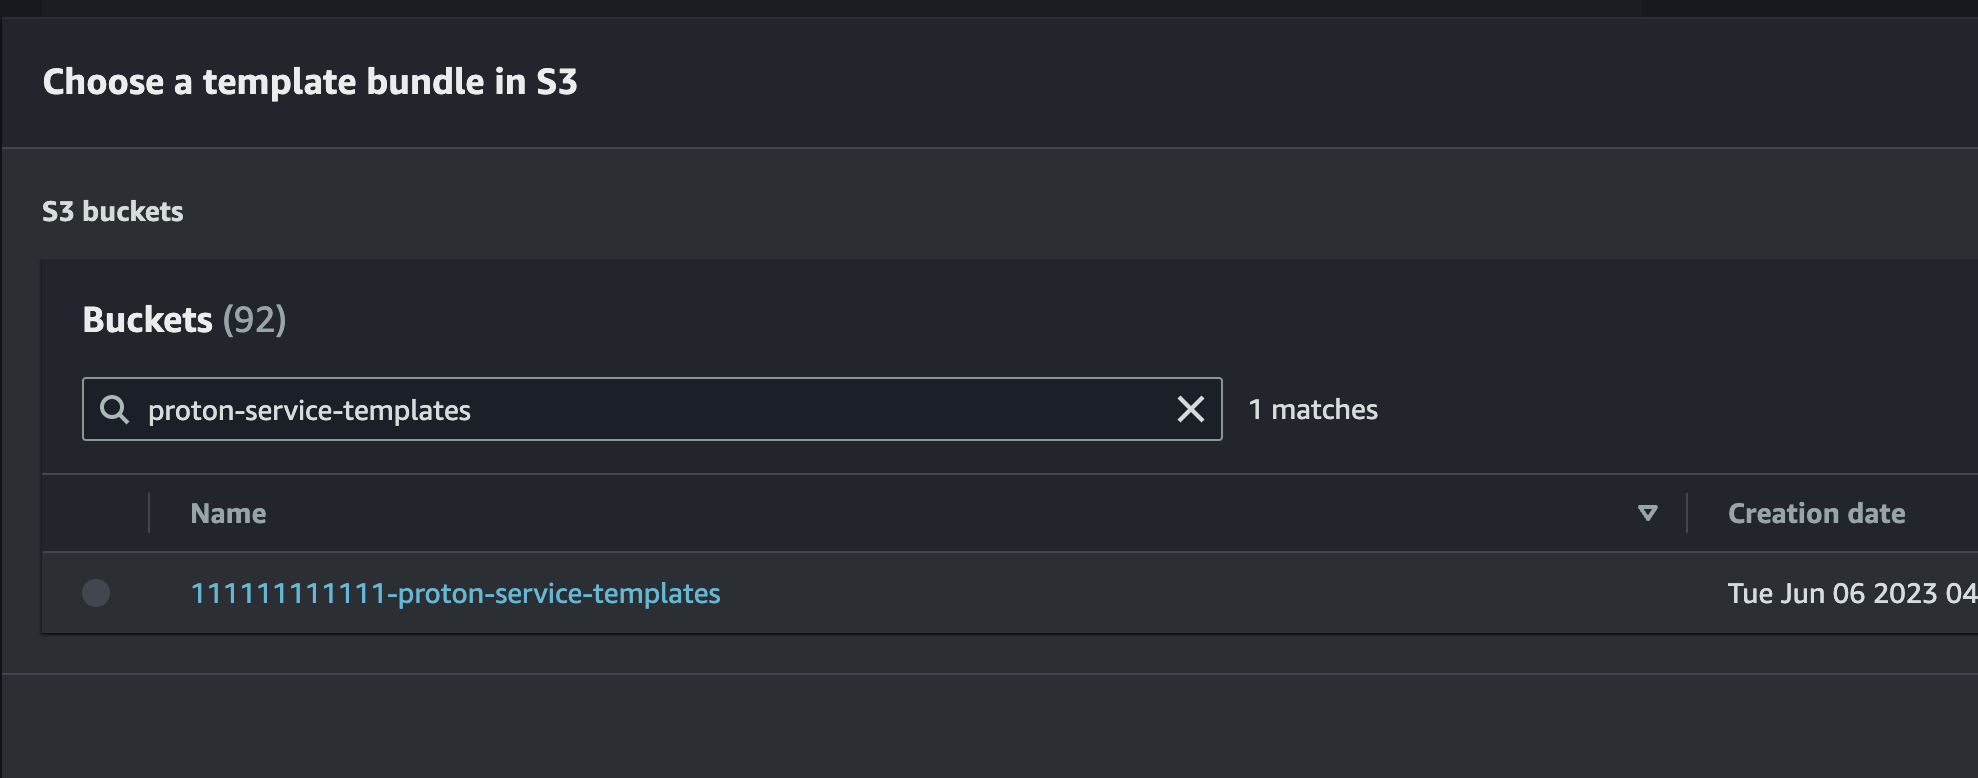
Select
Browse S3and locate the bucket where the templates were uploaded.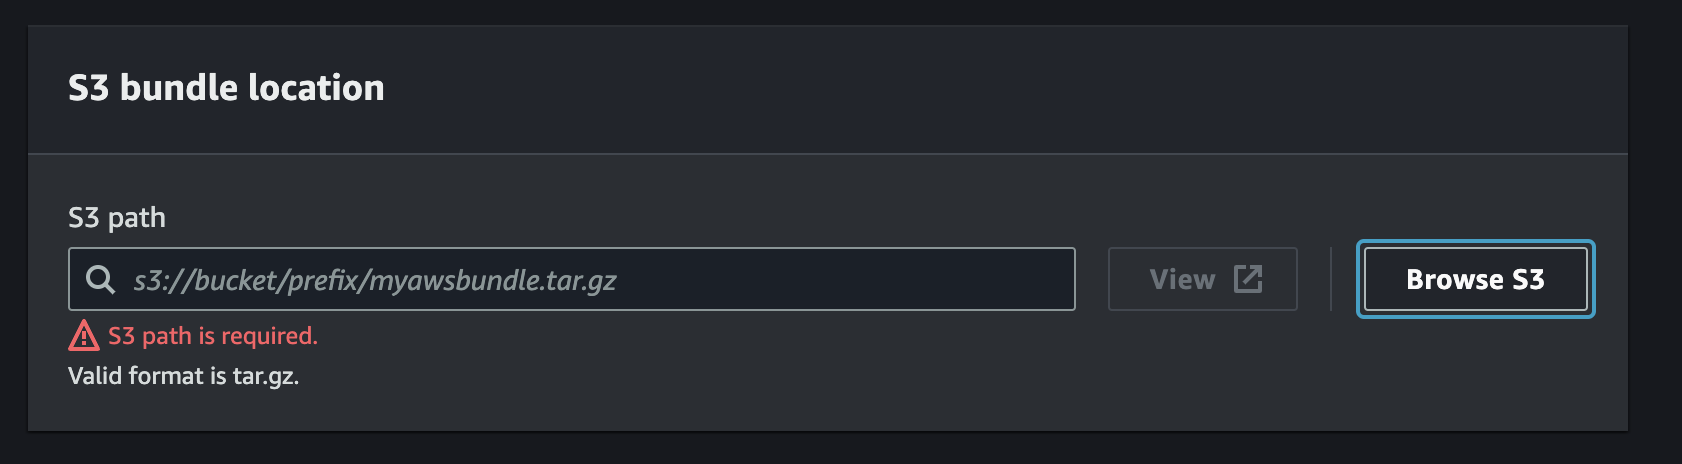
-
Locate the latest tar for the vehicle_simulator module template (the Amazon S3 path should be of the format
../<SOLUTION_VERSION>/modules/<MODULE_NAME>/proton/) Press theChoosebutton
-
In the repository, locate the Vehicle Simulator Proton Template YAML and find the template name under the
metadataNameproperty. This will be under theaws:proton:create-serviceaction. Use it to populate theService template name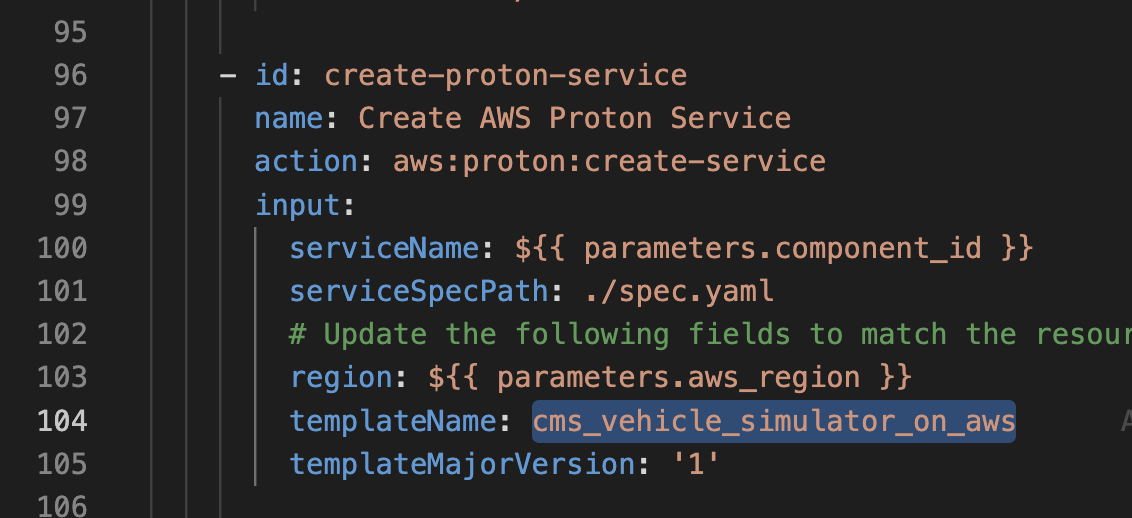
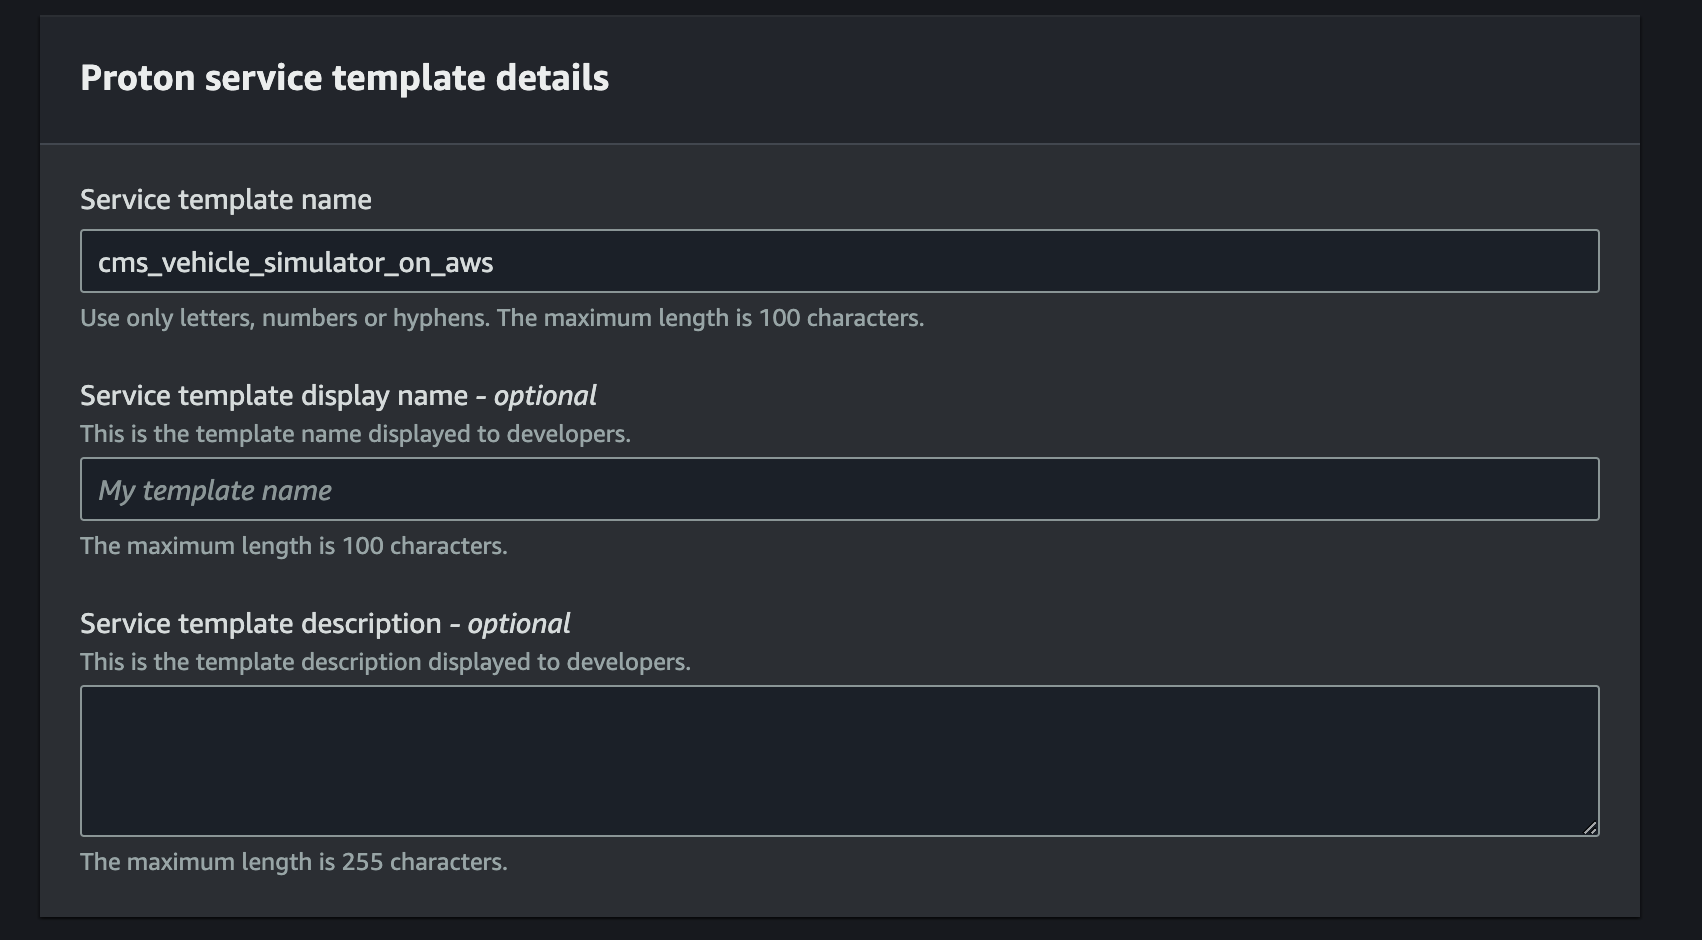
-
Set the
Compatible environment templatestocms_environment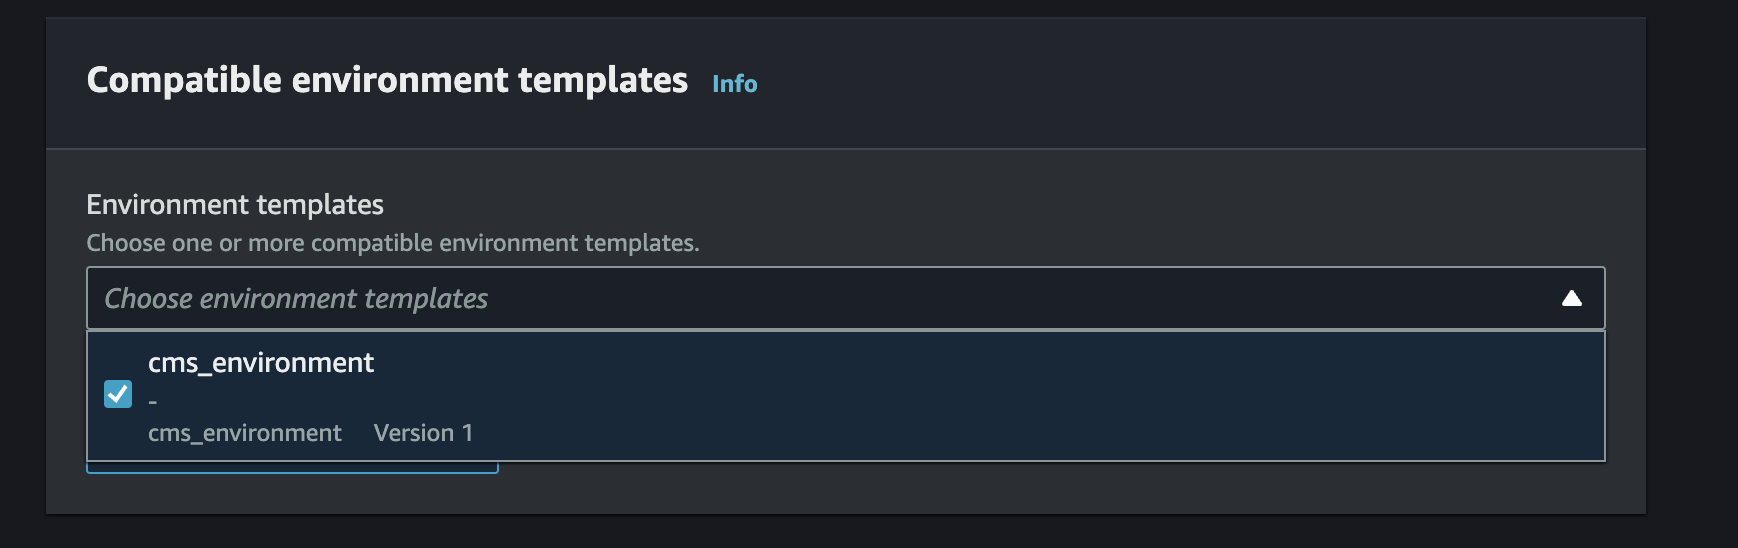
-
Leave the remaining settings as default and click
Create Service Template. -
After you receive a message stating
Successfully created service template cms_vehicle_simulator_on_aws., then select template version1.0and clickPublishto make it available for use by Backstage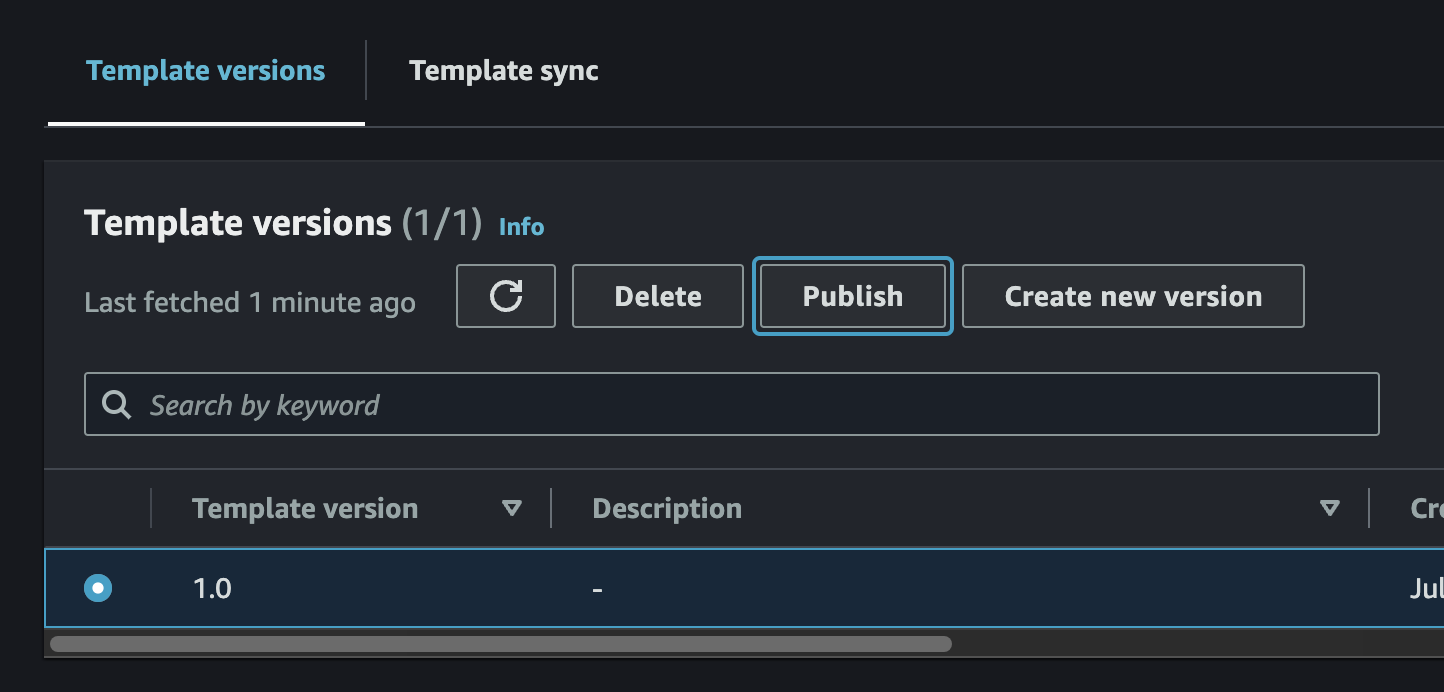
-


Some CMS on AWS modules have dependencies on other modules and must be deployed in order. Others do not have dependencies on other modules and can be deployed in any order, as long as the ACDP has been deployed first.
The deployment order that must be observed is as follows:
- CMS Authentication
- CMS Alerts
- CMS Connect and Store
- CMS API
- CMS EV Battery Health
- CMS Vehicle Provisioning
- CMS Vehicle Simulator
The following instructions detail how to deploy the CMS Vehicle Simulator Module. The same steps can be applied to other modules as well by replacing the URLs and names.
-
Navigate to the CMS Backstage URL in a web browser (ROUTE53_BASE_DOMAIN that was specified during deployment).
-
Sign in to Backstage using the credentials that were emailed to the user-email specified during deployment.
-
Follow the prompts to create a new password and set up multi-factor authentication (MFA).
-
On Backstage, navigate to the
Createpage available from theCatalogmenu in the side bar. Select theCHOOSEbutton on theCMS Vehicle Simulator on AWScard.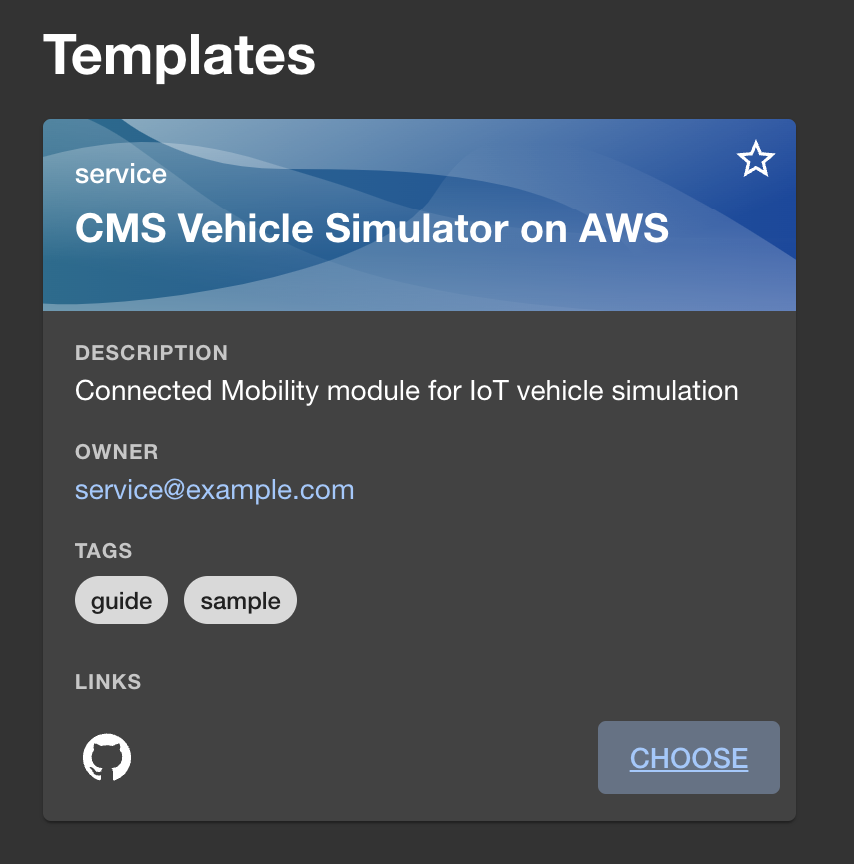
-
Fill in the form as required by the Vehicle Simulator template and click the
Next Stepbutton.
-
Click the
Createbutton.
-
Monitor the deployment and ensure that the Vehicle Simulator module deploys successfully.


Refer to the implementation guide for pricing information.
This solution collects anonymous operational metrics to help AWS improve the quality and features of the solution. For more information, including how to disable this capability, please see the implementation guide.
This solution creates multiple CloudFormation deployments; both from the top level cdk deploy as well as additional stacks from Proton and CodePipeline executions. Some resources cannot be torn down directly via the AWS Console or by using the AWS CLI.
The following commands assume the stage is dev, for other stages, replace dev with the appropriate value.
-
Capture and store the deployment UUID of the solution.
- This is used to look for any resources not destroyed by CloudFormation after teardown completes
make get-deployment-uuid
output will be a uuidv4 string:
XXXXXXXX-XXXX-XXXX-XXXX-XXXXXXXXXXXX
-
Delete CMS on AWS Modules in AWS Proton and CloudFormation that were deployed via Backstage
-
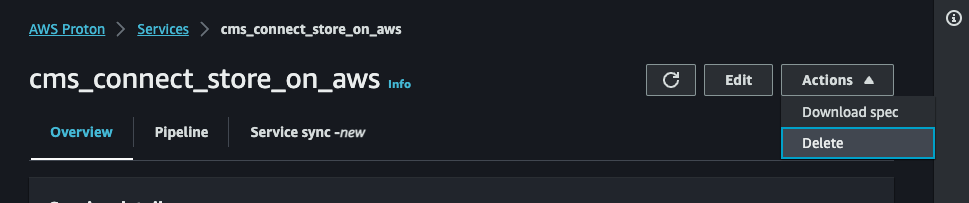
In AWS Proton, Navigate to the
Servicesview and delete any service attached to thecms-environmentEnvironment. Wait until all services successfully delete.NOTE: You have to click the link into the service to be able to delete it via the
Actionsdropdown
-
If the delete fails in AWS Proton, and the CodeBuild
cdk destroytask shows an error in the CodeBuild logs, most likely the module attempting to be deleted has a dependency blocking the deletion. Continue tearing down the rest of the modules and try again. Refer to the AWS Proton CodeBuild logs and CloudFormation console output for additional information. -
If the delete fails in AWS Proton, but the CloudFormation stack for the module is deleted successfully, most likely AWS Proton needs an additional role for account level CodeBuild. You might also see an error on the top of the screen reading
Validation exception...Operation cannot be run until pipeline roles have been configured.orAccountSettings.pipelineCodeBuildRoleArn has not been configured.. In this case, go toAccount Settingsand configure a role.WARNING: Proton's UI requires a GitHub Repository connection to configure roles. To get around this, set the roles using a CLI command. Note that the CLI command uses the arn value for the roles in your account. Replace the "1" and "X" placeholders in the following command with the values found in the IAM console for your account.
aws proton update-account-settings \
--pipeline-codebuild-role-arn arn:aws:iam::11111111111:role/cms-dev-cmsprotonenvironmentprotoncodebuildroleXXX-XXXXXXXXXXXX \
--pipeline-service-role-arn arn:aws:iam::11111111111:role/service-role/proton_role
- After AWS Proton shows that all services have been deleted, verify in the CloudFormation console that all CMS on AWS modules have been deleted, and if not, delete them.
-
-
Delete AWS Proton Service Templates, Environment, and Environment Templates.
NOTE: if you wish to keep services that have been deployed via backstage, skip these steps.
-
Navigate to the
Service Templatesview in AWS Proton and delete any CMS on AWS service templates.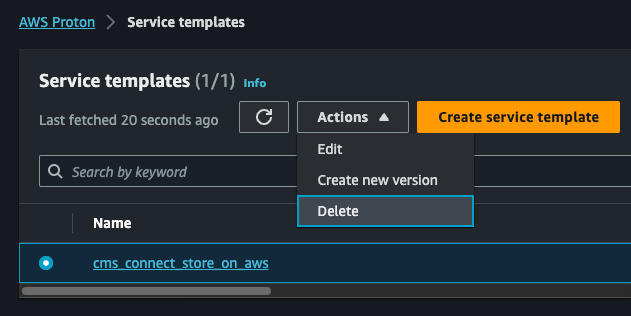
WARNING: If you receive the following Validation Exception:
Service template has major versions that must first be deleted., then you must run the delete command multiple times until all of the major versions have been deleted for the service template. -
Navigate to the
Environmentsview and delete thecms_environmentEnvironment.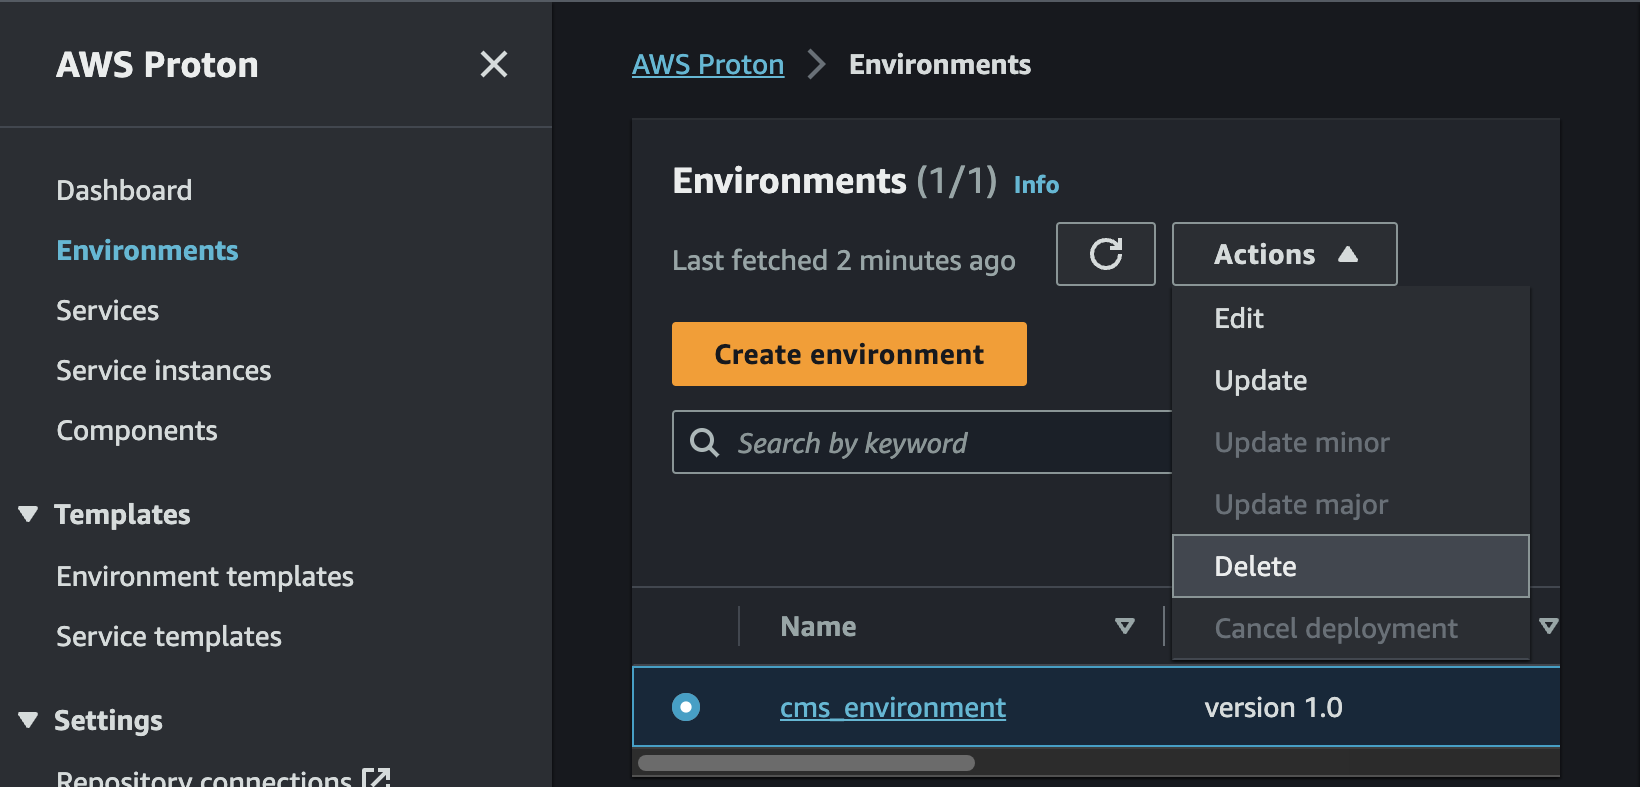
WARNING: If you receive the following Validation Exception:
Environment template has major versions that must first be deleted., then you must run the delete command multiple times until all of the major versions have been deleted for the environment template. -
Navigate to the
Environment Templatesview and delete thecms_environmentEnvironment Template.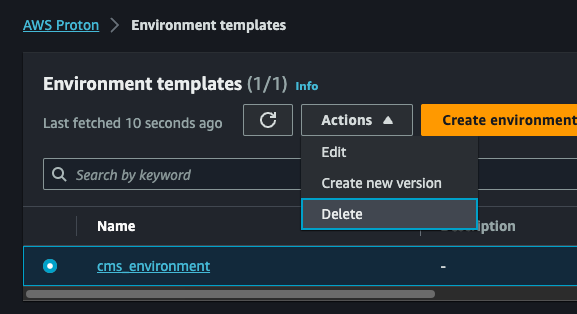
-
Validate on the AWS Proton dashboard that all resources have been removed.
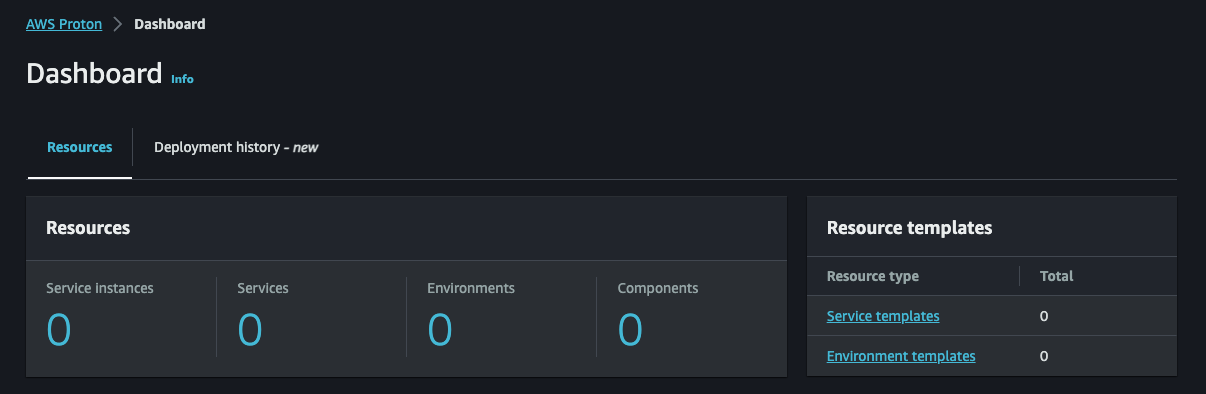
-
Navigate to CloudFormation and delete the AWS Proton CodeBuild stack (AWSProton-Codebuild-#######).
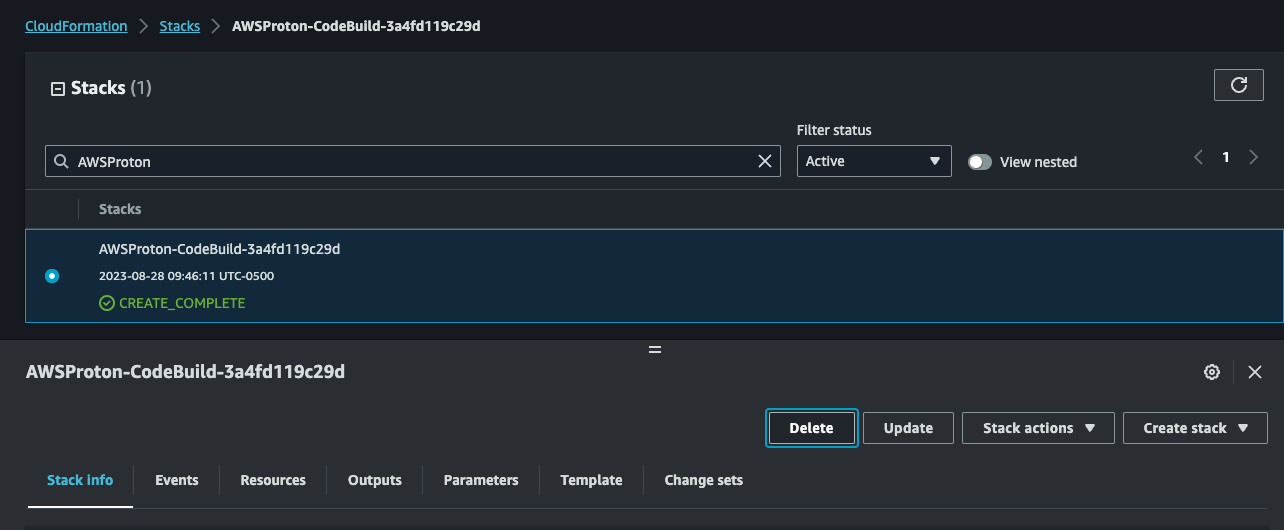
-
Verify that the
cms-environmentstack was removed when tearing down AWS Proton, and if not, delete it.
-
-
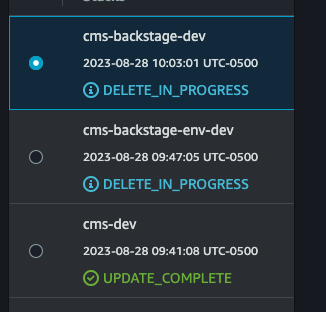
Delete the Backstage CloudFormation Stacks
Navigate to CloudFormation and delete the following stacks:
- cms-backstage-dev
- cms-backstage-env-dev


NOTE: The
cms-backstage-devstack might fail to delete due to the ACM certificate creation custom resource. After delete fails, click delete again and select retain on the custom resource. This will not leave any resources in the account.

-
Delete the CMS Backstage Amazon ECR repository
Navigate to Amazon ECR, and delete the repository called
backstage.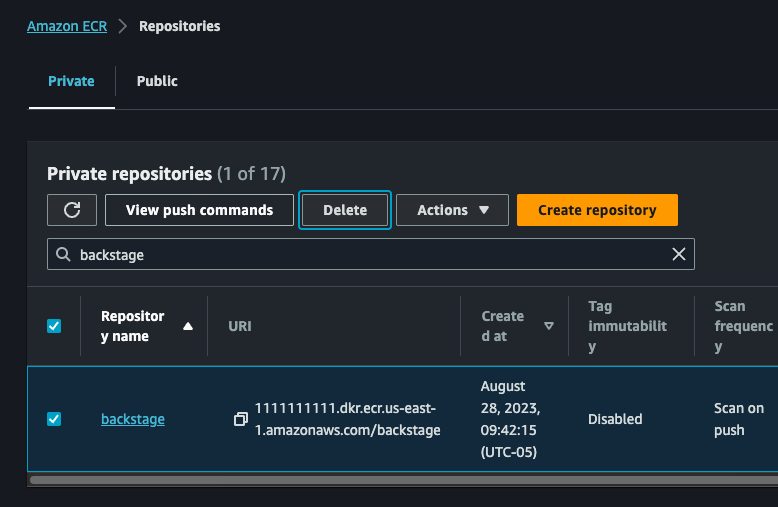
-
Delete the CMS on AWS CloudFormation Stacks
NOTE: The
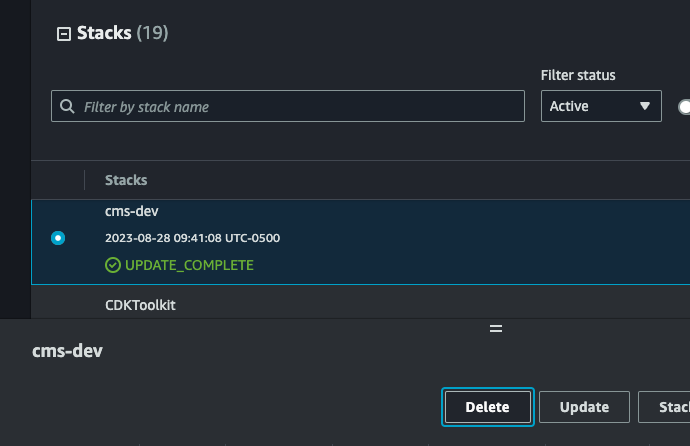
cms-devstack in this step can only be deleted if the prevous steps for deletingcms-backstage-*stacks have finished. Please wait for the deletes to finish in the CloudFormation console before moving on.Navigate to CloudFormation and delete the
cms-environmentandcms-devstacks.WARNING: This is your last opportunity to capture the deployment UUID. Please make sure you have captured it using the make command specified in step 1 of the Teardown section.
-
Manually cleanup the following resources:
- S3 Buckets
- Cognito User Pool
- KMS Keys
Locate the leftover resources using the following command which first requires you to export the
DEPLOYMENT_UUIDvariable using the value previously acquired from AWS Systems Manager.If you tore down the CMS on AWS stack without capturing the UUID, the below command can be run by removing the
Solutions:DeploymentUUIDKey filter, however the results will include other CMS on AWS stacks if they exist, so use this method with caution.export DEPLOYMENT_UUID=<DEPLOYMENT_UUID_VALUE_FROM_SSM> aws resourcegroupstaggingapi get-resources --tag-filters \ Key=Solutions:SolutionID,Values=SO0241 \ Key=Solutions:DeploymentUUID,Values=$DEPLOYMENT_UUID \ --query "ResourceTagMappingList[*].ResourceARN"
This query results in a list of ARNs to assist you with locating the resources in the AWS Console. Resources can then be manually deleted, or deleted via a script, utilizing the resource ARNs where appropriate.
WARNING: Some resources may take some time to cleanup after CloudFormation finishes tearing down, and could show in the output even if they no longer exist. For example, Amazon VPC, Fargate, and Amazon ECS resources can remain queryable for up to 30 minutes after deletion.
Example Output:
[
   "arn:aws:cognito-idp:us-east-1:11111111111:userpool/us-east-1_XXXXXXXX",
   "arn:aws:dynamodb:us-east-1:11111111111:table/cms-alerts-on-aws-stack-dev-cmsalertsusersubscriptionsconstructuseremailsubscriptionstableXXXXXXXXXXX",

   "arn:aws:ecs:us-east-1:11111111111:task-definition/cms-backstage-dev:1",
   "arn:aws:ecs:us-east-1:11111111111:task-definition/cms-backstage-dev:2",
   "arn:aws:s3:::cms-connect-store-on-aws-connectstoreconnectstore-XXXXXXXXXXX",
   "arn:aws:s3:::cms-dev-cmsprotonenvironmentprotonenvironmentbuck-XXXXXXXXXXX",
   "arn:aws:dynamodb:us-east-1:11111111111:table/cms-alerts-on-aws-stack-dev-cmsalertsnotificationconstructnotificationstableXXXXXXX-XXXXXXXXXX",
   "arn:aws:logs:us-east-1:11111111111:log-group:cms-backstage-dev-cmsbackstagebackstageloggroupXXXXXXXX-XXXXX",
   "arn:aws:logs:us-east-1:11111111111:log-group:cms-dev-cmspipelinescmsvpcloggroupXXXXXXXX-XXXXX",
   "arn:aws:s3:::cms-dev-cmspipelinesbackstagecodepipelineartifact-XXXXXXXXXX",
   "arn:aws:s3:::cms-backstage-dev-cmsbackstagebackstageelblogsbuc-XXXXXXXXXX",
   "arn:aws:acm:us-east-1:11111111111:certificate/XXXXXXXX-XXXX-XXXX-XXXX-XXXXXXXXXXXX",
   "arn:aws:cognito-idp:us-east-1:11111111111:userpool/us-east-1_XXXXXXX",
   "arn:aws:logs:us-east-1:11111111111:log-group:cms-connect-store-on-aws-stack-dev-connectstoreconnectstoreiotconnectivitylog1234abc-XXXXXXXXX",
   "arn:aws:rds:us-east-1:11111111111:cluster-snapshot:cms-backstage-env-dev-snapshot-cmsbackstageenvbackstageaurorapostgresXXXXX-XXXXXXXXX",
   "arn:aws:s3:::cms-connect-store-on-aws-connectstoreconnectstore-XXXXXXXXXXX",
   "arn:aws:s3:::cms-backstage-env-dev-cmsbackstageenvbackstagecat-XXXXXXXXXXX",
   "arn:aws:kms:us-east-1:11111111111:key/XXXXXXXX-XXXX-XXXX-XXXX-XXXXXXXXXXXX",
   "arn:aws:kms:us-east-1:11111111111:key/XXXXXXXX-XXXX-XXXX-XXXX-XXXXXXXXXXXX",
   "arn:aws:kms:us-east-1:11111111111:key/XXXXXXXX-XXXX-XXXX-XXXX-XXXXXXXXXXXX",
   "arn:aws:kms:us-east-1:11111111111:key/XXXXXXXX-XXXX-XXXX-XXXX-XXXXXXXXXXXX",
]


By default, this solution implements safe logging which does not expose any sensitive or vulnerable information. CMS on AWS does not currently support a one-step system for enabling more detailed debug logs. To add additional logs to the solution, you are required to alter the source code. Examples of logging implementations can be found in the existing Lambda functions.
By default, the solution disabled Lambda event logging, which contains sensitive information. However, this functionality is provided by the AWS Lambda Powertools library which is utilized by each Lambda function. To quickly enable event logging, navigate to the Lambda function in the AWS Console and add the following Lambda environment variable:
POWERTOOLS_LOGGER_LOG_EVENT="true"
For other logging options and methods for enabling event logging, see the AWS Lambda Powertools documentation.
By default, the solution's deployment instructions deploy the ACDP and Backstage with a log level of "INFO". To enable debug logs for Backstage, change the following environment variable when you deploy the solution:
BACKSTAGE_LOG_LEVEL="DEBUG"
This solution contains a number of linters and checks to ensure code quality. If you are not planning to commit code back to source, you can run the pre-commit hooks manually using the following command:
pre-commit run --allAfter making changes, run unit tests to make sure added customization passes the tests:
./deployment/run-unit-tests.shCopyright Amazon.com, Inc. or its affiliates. All Rights Reserved.
Licensed under the Apache License, Version 2.0 (the "License"). You may not use this file except in compliance with the License. You may obtain a copy of the License at
http://www.apache.org/licenses/LICENSE-2.0
Unless required by applicable law or agreed to in writing, software distributed under the License is distributed on an "AS IS" BASIS, WITHOUT WARRANTIES OR CONDITIONS OF ANY KIND, either express or implied. See the License for the specific language governing permissions and limitations under the License.