This repository contains a short guide to get started with Camunda Cloud. It contains instructions on how to model your first process, create a user task form, and automate a service task. During the guide you will use Console, Modeler, Zeebe, Operate, and Tasklist.
- Repository structure
- Setup the environment
- Model the process
- Deploy process
- Start process instance
- Complete the user task
- Complete the service task
- Further references
- Local setup
The repository contains the following folders:
- images - Contains screenshots and images for the guide
- java - Plain Java example for deploy, create instance, and a job worker
- nodejs - Node.js example for deploy, create instance, and a job worker
- csharp - C# example for deploy, create instance, and a job worker
- process - Contains the BPMN process and the user task form
- spring - Spring Boot example for deploy, create instance, and a job worker
To follow this guide, we need a running Camunda Cloud cluster. For this purpose, we use the Camunda Cloud SaaS offering at https://camunda.io.
If you prefer a local setup, visit the end of this guide.
After the sign-up and log-in at https://camunda.io, a cluster is already available with the latest stable version of Zeebe and the name Test Cluster.

If there is no cluster available, create a new one with the latest stable version of Zeebe.
After the cluster is available, we need to create a pair of Client Credentials. To do this, take the following steps:
- Navigate to the Clusters detail page.
- Switch to the API tab.
- Create a new client credential and either note down the client id and client secret, or download the credentials file.
In this example, we'll model a simple process to send an email message.
Camunda Cloud allows you to use the BPMN standard to model your business processes. The process consists of two tasks: a user task to allow a human to enter the message content, and a service task to automatically send the email message.

Note: To keep the scope of this guide easy to follow, we only build the scaffolding for this process automation example and will not actually send an email. This can be a task for you to extend the example and connect to a mail provider.
To create the process, we use the desktop Camunda Modeler or Cloud Modeler.

Find the finished process at process/send-email.bpmn.
To help users complete the user task Enter Message, we create a user task form using the modeler.
Use Camunda Modeler or Cloud Modeler to create the form.

Find the finished form at process/enter-email-message.form.
Now that we've created a form, we must configure the user task to use the form. To do this, we copy the JSON content of the form into the Form Json Configuration field under the Forms tab of the modeler.

The last step is defining the job type of the service task. The job type is needed for a job worker to subscribe to the jobs of the task and complete them. The Camunda Cloud Documentation contains more information about job workers.

Deploy the process using Camunda Modeler, Cloud Modeler, zbctl, or your own code.
To deploy the process using Camunda Modeler, follow these steps:
- Select Deploy current diagram.

- Configure the endpoint for the deployment. For Camunda Cloud,
you need the cluster id from the cluster details page, and the client
credentials you created.


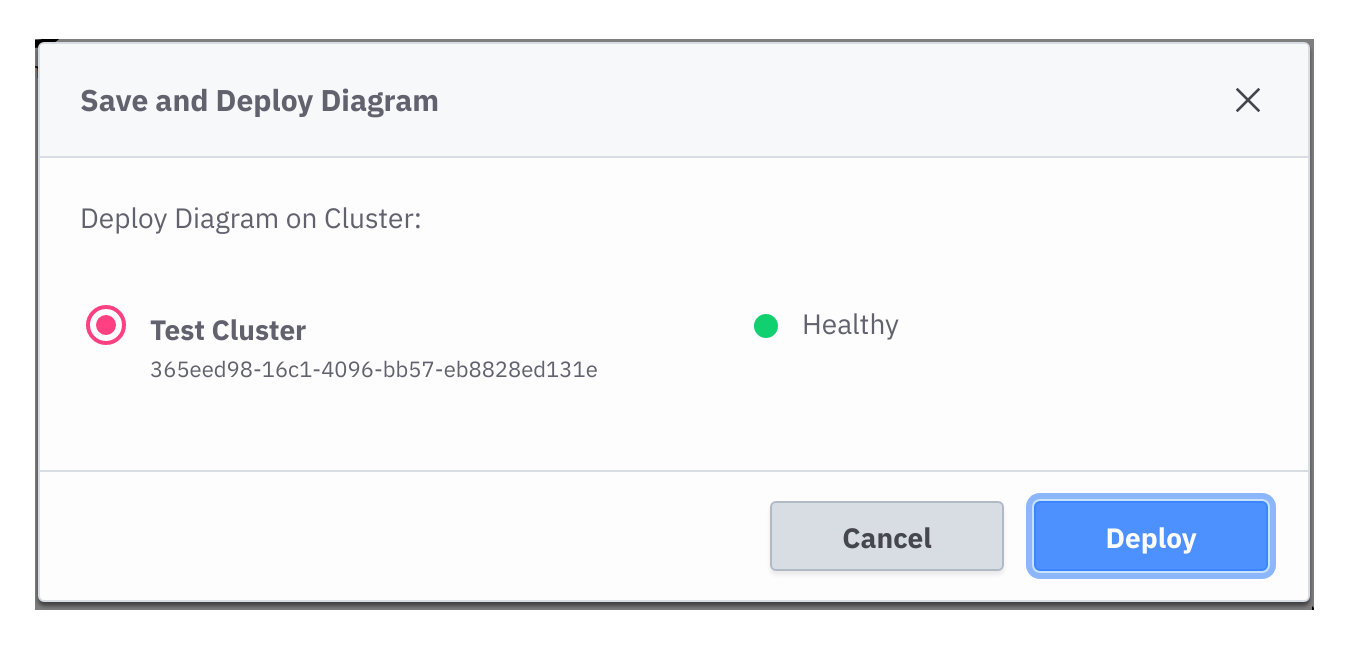
To deploy the process using Cloud Modeler, follow these steps:
- Select Deployment > Save and Deploy.

- Select the cluster to deploy the diagram on.


To the deploy the process using zbctl, use the
following command:
zbctl deploy send-email.bpmn \
  --address 365eed98-16c1-4096-bb57-eb8828ed131e.zeebe.camunda.io:443 \
  --clientId 'GZVO3ALYy~qCcD3MYq~sf0GIszNzLE_z' \
  --clientSecret '.RPbZc6q0d6uzRbB4LW.B8lCpsxbBEpmBX0AHQGzINf3.KK9RkzZW1aDaZ-7WYNJ'
For Camunda Cloud, we need the cluster id and the client credentials.
Writing your own code allows you to deploy the process (for example, on application startup) to ensure the latest version is deployed. To see examples of this, visit the programming language specific folders.
Start a new instance of the process using Camunda Modeler, Cloud Modeler, zbctl, or your own code.
After the process is deployed, click Start Current Diagram to start an instance of the process with Camunda Modeler.

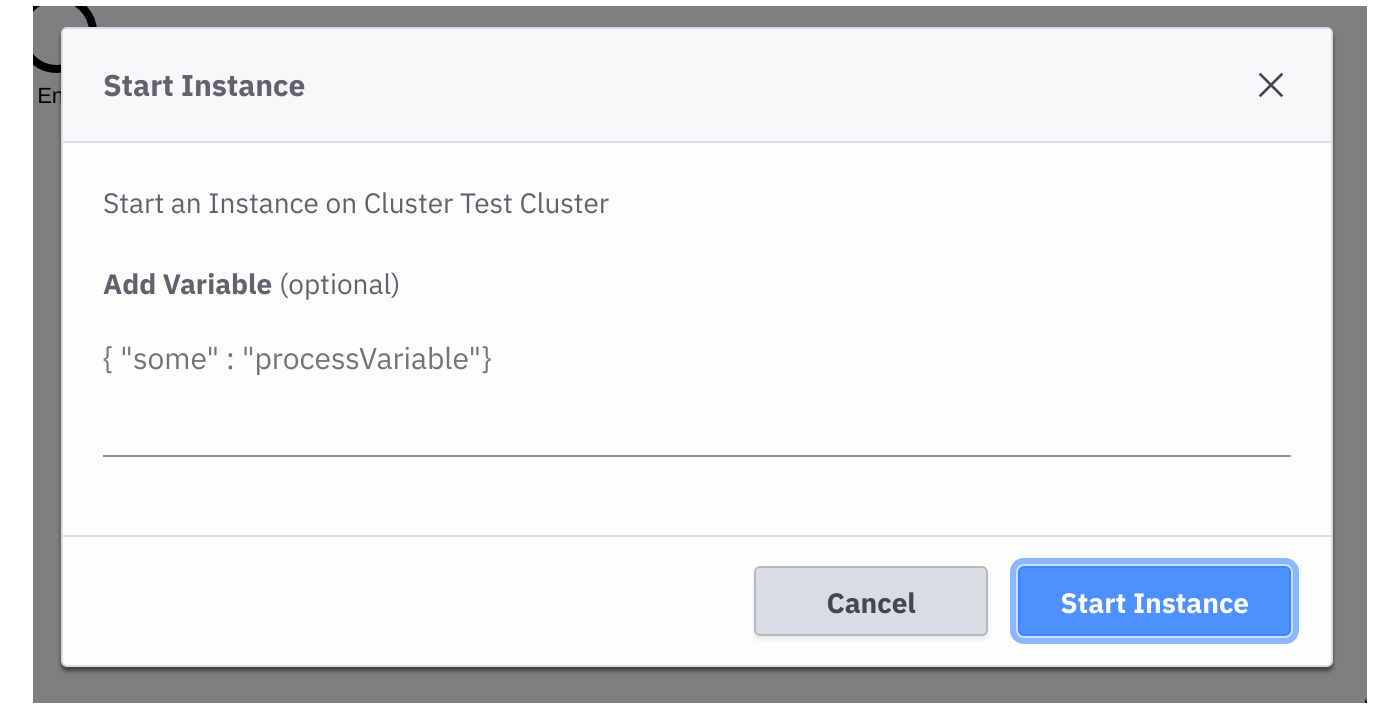
To start an instance of the process using Cloud Modeler, follow these steps:
- Select Deployment > Start Instance.

- Specify optional process
variables
before starting the instance.


To start a process instance of the BPMN process id send-email using zbctl,
use the following command:
zbctl create instance send-email \
  --address 365eed98-16c1-4096-bb57-eb8828ed131e.zeebe.camunda.io:443 \
  --clientId 'GZVO3ALYy~qCcD3MYq~sf0GIszNzLE_z' \
  --clientSecret '.RPbZc6q0d6uzRbB4LW.B8lCpsxbBEpmBX0AHQGzINf3.KK9RkzZW1aDaZ-7WYNJ'
For Camunda Cloud, we need the cluster id and the client credentials.
Writing your own code allows you to start an instance of the process on an external trigger, like an incoming message or a user request. To see examples of this, visit the programming language specific folders.
The first task of the process is the user task Enter Message.
To complete the user task, we use Tasklist. To do this, visit the cluster's details page in Camunda Cloud and launch Tasklist.
Take the following steps:
- In Tasklist, select the Enter Message task from the list of tasks.
- Click the Claim button to assign the task to you to work on it.
- Fill out the E-Mail Content field with the message you want to send.
- Select Complete Task.

The second task of the process is the service task Send Email.
To complete the service task, we need to implement the business logic. Therefore, we must create a job worker for the task type we defined in the diagram. The job worker will subscribe to all jobs with the same task type.
To define the task type, we select the service task in the diagram and use
the properties panel to set the task type to email.

To implement the logic, we implement a job worker. Check out the programming language specific folders to find the job worker implementations.
Find more information in the Camunda Cloud Documentation, or join the Camunda Cloud Forum and Camunda Cloud Slack community.
To run the getting started guide against a locally-hosted instance, set up the following components:
If docker is available in your system, the docker-compose.yaml in the root
folder can be used to spin up a local environment.
docker-compose up -d
After this, Zeebe is available under localhost:26500. Disable security
inside the client when connecting to it.
Operate will be available under http://localhost:8080 and Tasklist will be available under http://localhost:8081.
See the following additional resources: