This addon builds on the excellent work of Adrian Kumpf. See his repo for information regarding the TeslaMate application.
This addon is part of my Home Assistant addon repo - see link for instructions on how to add to Home Assistant.
- Add my repository to Home Assistant. See installing third party addons from the Home Assistant documentation.
- Add the
TeslaMateand thePostgreSQLaddons from my repo and theGrafanaaddon from the community repo. - Before starting Postgres, configure the addon by setting the DB name, username and password. Now you can start it up.
If using the Postgres addon from my addon repo, the database host is 29b65938-postgres.
Below is a snippit from the TeslaMate addon configuration, just replace the DB name, username and password on the Configuration tab of the addon before starting it and you will be good to go.
database_user: username
database_pass: password
database_name: databasename
database_host: 29b65938-postgres
database_ssl: false
database_port: 5432You must have a username and password defined for your MQTT user, do not use the HA local login (thanks quach128). Below is a sample configuration using the Mosquitto MQTT addon available in the Home Assistant core addon repo:
disable_mqtt: false
mqtt_host: core-mosquitto
mqtt_user: mymqttuser
mqtt_pass: mymqtttpass
mqtt_tls: false
mqtt_tls_accept_invalid_certs: trueYou must specify an access control list entry for the teslamate user, for example:
user teslamate
topic readwrite teslamate/#
See the official docs on how to configure access control with Mosquitto
I recommend you use the existing Grafana addon from the community addons, if you do, please enable the following plugins in your yaml configurations, e.g.
plugins:
  - natel-discrete-panel
  - pr0ps-trackmap-panel
- grafana-piechart-panelConfigure a PostgreSQL data source as follows:
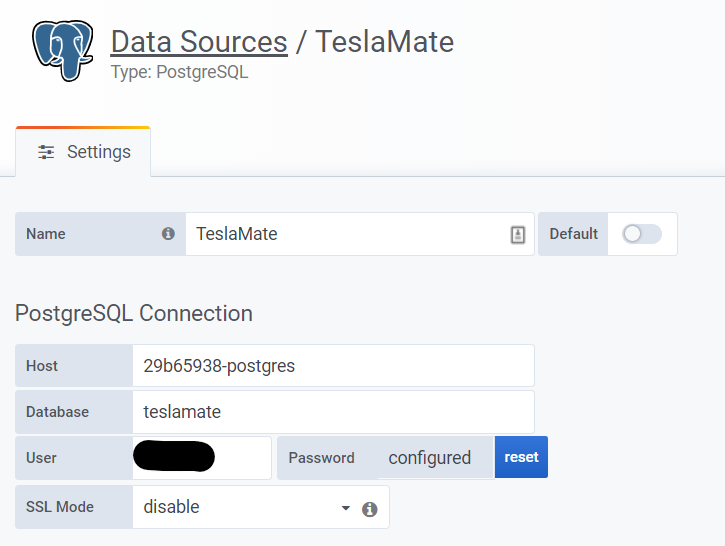
Without this step you won't be able to use the TeslaMate dashboards, so this is recommended.
Configure the Grafana addon and set the admin username and password - we will need this to upload the dashboards:
Important! These environment variables are only parsed on the initial set up of Grafana. If you already have the addon configured you'll need to remove it and re-add, setting this configuration for the initial start-up.
env_vars:
  - name: GF_SECURITY_ADMIN_USER
    value: admin
  - name: GF_SECURITY_ADMIN_PASSWORD
    value: mysecretpassword
Now configure the Teslamate addon:
grafana_import_dashboards: true
grafana_folder_name: TeslaMate
grafana_host: a0d7b954-grafana   # this is correct if you use the community addon
grafana_port: 3000               # this is correct if you use the community addon
grafana_user: admin
grafana_pass: mysecretpasswordIt is now possible to import CSV data from TeslaFi, refer to the official docs.
Follow this process:
-
Copy the CSV data to the
/share/teslamatefolder on your Home Assistant instance. You can do this using the Samba or SSH addons. -
Make sure the
import_pathconfiguration setting is set to/share/teslamate. -
Restart the TeslaMate addon and navigate to the web UI, you should be presented with the import screen.
-
Import the data
-
Once imported sucessfully, delete the CSV files to avoid the import screen being presented.