Sample event bus implementation that uses RabbitMQ as a message broker for high-performance communication between microservices.
The implementation is designed to work with ASP.NET Core, and it supports the default dependency-injection provider. The sample also handles cases where a connection between the message broker and the application is lost. It automatically reconnects once communication is available again.
If you have many microservices that need to communicate with each other in asynchronous ways, a common communication approach you can use is event-based communication. These microservices can follow a publish/subscribe pattern to achieve this.
Each microservice publish or listen to events that are dispatched and received through an event bus. The event bus is a communication channel for these services. In this sample, we use RabbitMQ as the message broker, which means this is the middleware software we use to dispatch and listen to events, via our message bus implementation. RabbitMQ is a very popular message broker, ideal for high-performance applications.
The sample here is based on the eShopOnContainers implementation. This project is a Microsoft sample that shows how to design microservices using .NET Core and related technologies. I also took some examples from the RabbitMQ.EventBus.AspNetCore library to understand how to handle message delivery errors.
Check these references to better understand how RabbitMQ communication works under the hood.
I use the event bus in this sample injecting an IEventBus interface on a sample EventBusController. This interface exposes methods to publish events, to subscribe to events, and remove subscriptions according to needs:
public interface IEventBus
{
	void Publish<TEvent>(TEvent @event)
		where TEvent : Event;

	void Subscribe<TEvent, TEventHandler>()
		where TEvent : Event
		where TEventHandler : IEventHandler<TEvent>;

	void Unsubscribe<TEvent, TEventHandler>()
		where TEvent : Event
		where TEventHandler : IEventHandler<TEvent>;
}
These events are classes that represent messages sent and received from the message broker. To create events, we need to inherit the Event class.
When we want to listen to events, we need to create event handlers, that are classes responsible for receiving and processing them. To do this, you can simply implement the IEventHandler<TEvent> interface.
public interface IEventHandler<in TEvent>
	where TEvent : Event
{
	Task HandleAsync(TEvent @event);
}
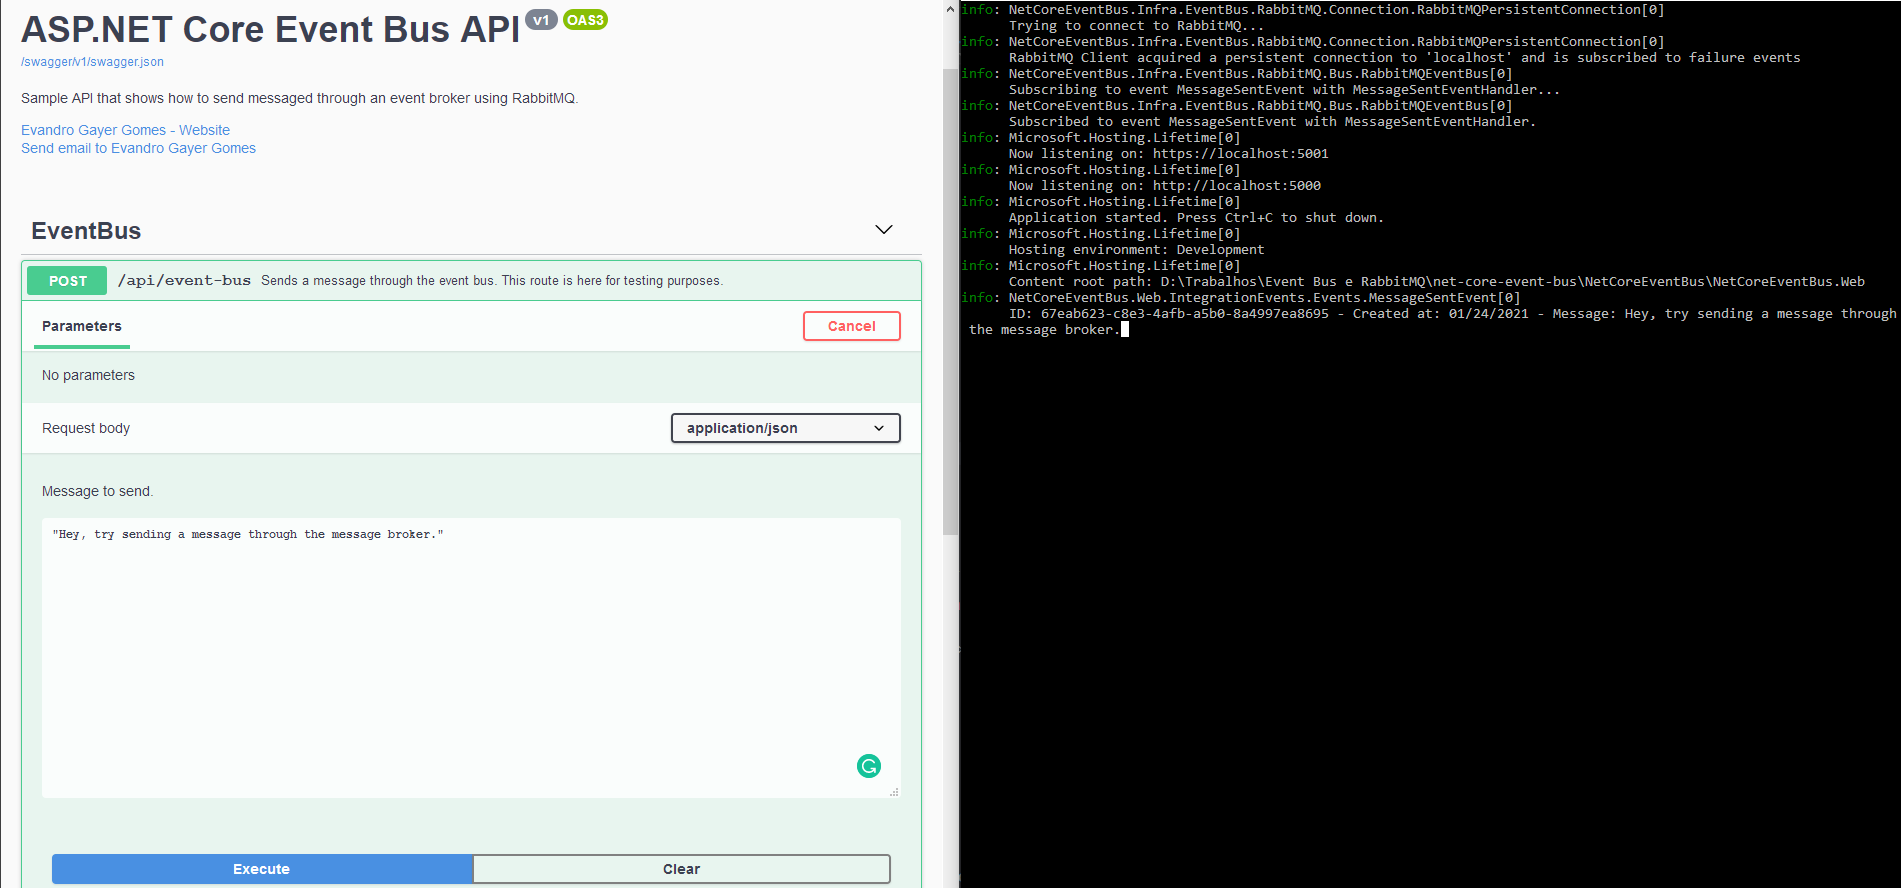
There is a sample MessageSentEvent on the API that I added to illustrate how to send and receive messages.
When we send this MessageSentEvent event using the /api/event-bus route, the event bus sends it using RabbitMQ to a specific queue (be sure to read RabbitMQ documentation to understand its concepts).
There is a MessageSentEventHandler that receives these messages and simply logs them to the console using the default ILogger<T> interface from ASP.NET Core.
To configure the event bus, I created an AddRabbitMQEventBus extension that configures it using data from application settings. This can be seen on the Startup class as follow:
private void ConfigureEventBusDependencies(IServiceCollection services)
{
	var rabbitMQSection = Configuration.GetSection("RabbitMQ");
	services.AddRabbitMQEventBus
	(
		connectionUrl: rabbitMQSection["ConnectionUrl"],
		brokerName: "netCoreEventBusBroker",
		queueName: "netCoreEventBusQueue",
		timeoutBeforeReconnecting: 15
	);

	services.AddTransient<MessageSentEventHandler>();
}
There is a second sample method on Startup that configures all event handlers (in this case, there is only one sample handler, but you can configure as many as you want, and you can even have many event handlers for a given event):
private void ConfigureEventBusHandlers(IApplicationBuilder app)
{
	var eventBus = app.ApplicationServices.GetRequiredService<IEventBus>();

	// Here you add the event handlers for each integration event.
	eventBus.Subscribe<MessageSentEvent, MessageSentEventHandler>();
}
To test this, I recommend you to run a RabbitMQ instance using Docker. Be sure to install it following the install instructions for your operating system.
First, run the following command to start a Docker instance for RabbitMQ:
docker run -it --rm --name rabbitmq -p 5672:5672 -p 15672:15672 rabbitmq:3-management.
Then, run the application via Visual Studio or using dotnet run on the command line, and navigate to /swagger.
The API documentation shows the sample route to send messages through the event bus. You can send as many messages as you want and check them being displayed on the console log as follow:
The implementation handles the following situations:
-
When the connection between the application and RabbitMQ is lost, the sample will try to reconnect after a small delay. The implementation also recreates all queue bindings, to guarantee no messages will be lost (try stopping the Docker container and connecting it again to see this in action);
-
If something fails when processing a message due to an exception, the application enqueues it back to process it later (I decided to not implement a dead letter exchange strategy for this sample).
I decided to implement this sample to understand how we can use RabbitMQ for microservices communication. I also needed to understand how to handle connection losses with the message broker.
I strongly recommend you study the concepts behind event-driven communication and RabbitMQ before adopting them in your applications. Check the following links for reference:
- Implementing event-based communication between microservices (integration events) - Microsoft Docs
- RabbitMQ Tutorials
- eShopOnContainers - Microsoft
I also suggest you try the well-tested libraries we have available on Github. Here are some good ones: