Lab: Build a Continuous Delivery Pipeline with Jenkins and Kubernetes
Prerequisites
- A GitHub account
- A Google Cloud Platform Account
Prework - The easy way
The easy prework configures a lab GCE instance with all tools installed and ready to go. Use this option if you have a Chromebook or aren't interested in configuring your workstation to perform the lab:
-
Create a new Google Cloud Platform project: https://console.developers.google.com/project
-
Enable the Google Container Engine and Google Compute Engine APIs
-
Start a new GCE instance in the console with the following options:
-
Zone: us-central1-f
-
Project access: Allow API access to all Google Cloud services...
-
Management > Automation > Startup script:
#!/bin/bash
apt-get upgrade -y
apt-get install -y git

# Configure gcloud
gcloud components update kubectl --quiet
ln -s /usr/local/share/google/google-cloud-sdk/bin/kubectl /usr/local/bin/kubectl

cat <<"EOF" > /etc/profile.d/gtc.sh
if [ ! -f "$HOME/.gtcinit" ]; then
  echo "INITIALIZING INSTANCE FOR GTC LAB"
  gcloud config set compute/zone us-central1-f

  # Make project dir
  if [ ! -d "$HOME/gtc" ]; then
    mkdir -p $HOME/gtc
  fi

  # Clone jenkins-kube-cd
  if [ ! -d "$HOME/gtc/jenkins-kube-cd" ]; then
    cd $HOME/gtc
    git clone https://github.com/evandbrown/jenkins-kube-cd.git
  fi

  touch $HOME/.gtcinit
fi
EOF
-
SSH to the instance from the console. The tools and source you need for the lab will be configured and you will be placed in the
~/gtcdir -
Go into the jenkins-kube-cd folder:
cd ~/gtc/jenkins-kube-cd -
Run
gcloud compute instances listto confirm things are working
Prework - The not easy, but not really that hard way
If you choose this prework, you'll configure all of the tools for the lab on your workstation. You probably already have them: it's just git, gcloud, and kubectl. Then you'll clone a repo from GitHub:
-
Create a new Google Cloud Platform project: https://console.developers.google.com/project
-
Enable the Google Container Engine and Google Compute Engine APIs
-
Install
gcloud: https://cloud.google.com/sdk/ -
Configure your project and zone:
gcloud config set project YOUR_PROJECT ; gcloud config set compute/zone us-central1-f -
Enable
kubectl:gcloud components update kubectl -
Clone the lab repository to your workstation:
$ git clone https://github.com/evandbrown/jenkins-kube-cd.gitOptional shortcut
In the upcoming steps you will use gcloud and kubectl to provision a Kubernetes cluster and deploy everything required to run Jenkins. If you don't want to copy/paste ~12 commands, you can simply run ./shortcut.sh in the jenkins-kube-cd directory you just cloned. No one will judge you if you do. If you do this, you can skip down to Connect to Jenkins
Create a Kubernetes Cluster
You'll use Google Container Engine to create and manage your Kubernetes cluster. Start by setting an env var with the cluster name, then provisioning it with gcloud:
$ gcloud container clusters create gtc \
  --scopes https://www.googleapis.com/auth/cloud-platform
Now you can confirm that the cluster is running and kubectl is working by listing pods:
$ kubectl get podsAn empty response is what you expect here.
Create a Jenkins Replication Controller and Service
Here you'll create a Replication Controller running a Jenkins image, and then a service that will route requests to the controller.
Note: All of the files that define the Kubernetes resources you will be creating for Jenkins are in the
kubernetes/jenkinsfolder in thejenkins-kube-cdfolder. You are encouraged to take a look at them before running the create commands.
The Jenkins Replication Controller is defined in kubernetes/jenkins/jenkins.yaml. Create the controller and confirm a pod was scheduled:
$ kubectl create -f kubernetes/jenkins/jenkins.yaml
replicationcontrollers/jenkins-leader

$ kubectl get pods
NAME                   READY     STATUS    RESTARTS   AGE
jenkins-leader-to8xg   0/1       Pending   0          30s
Now, deploy the Jenkins Service found in kubernetes/jenkins/service_jenkins.yaml:
$ kubectl create -f kubernetes/jenkins/service_jenkins.yaml
...
Notice that this service exposes ports 8080 and 50000 for any pods that match the selector. This will expose the Jenkins web UI and builder/agent registration ports within the Kubernetes cluster, but does not make them available to the public Internet. Although you could expose port 8080 to the public Internet, Kubernetes makes it simple to use nginx as a reverse proxy, providying basic authentication (and optional SSL termination). Configure that in the next section.
Create a build agent replication controller
Now that you're running Jenkins, you'll want to run some workers that can do the build jobs assigned by Jenkins. These workers will be Kubernetes pods managed by a replication controller. The pods will be configured to have access to the Docker service on the node they're schedule on. This will allow Jenkins build jobs to be defined as Docker containers, which is super powerful and flexible.
The build agent Replication Controller is defined in kubernetes/jenkins/build_agent.yaml. Create the controller and confirm a pod was scheduled:
$ kubectl create -f kubernetes/jenkins/build_agent.yaml
replicationcontrollers/jenkins-builder

$ kubectl get pods
NAME                   READY     STATUS    RESTARTS   AGE
jenkins-builder-9zttr   0/1       Pending   0          23s
jenkins-leader-to8xg    1/1       Running   0          4h
Resize the build agent replication controller to contain 5 pods:
$ kubectl scale replicationcontroller jenkins-builder --replicas=5Use kubectl to verify that 5 pods are running.
Create a Nginx Replication Controller and Service
The Nginx reverse proxy will be deployed (like the Jenkins server) as a replication controller with a service. The service will have a public load balancer associated.
The nginx Replication Controller is defined in kubernetes/jenkins/proxy.yaml. You'll use the Kubernetes secrets API to create an htpasswd file that lets nginx enforce basic authentication. Deploy the secrets and proxy to Kubernetes:
$ kubectl create -f kubernetes/jenkins/ssl_secrets.yaml$ kubectl create -f kubernetes/jenkins/proxy.yamlNow, deploy the proxy service found in kubernetes/jenkins/service_proxy.yaml. This will expose the nginx pods to the Internet:
$ kubectl create -f kubernetes/jenkins/service_proxy.yaml
...
Connect to Jenkins
Now find the public IP address of your proxy service and open it in your web browser. The default username and password is jenkins:
$ kubectl get service/nginx-ssl-proxy
NAME              LABELS                      SELECTOR                    IP(S)             PORT(S)
nginx-ssl-proxy   name=nginx,role=ssl-proxy   name=nginx,role=ssl-proxy   10.95.241.75      443/TCP
                                                                          173.255.118.210   80/TCP
Copy down the URL of your Jenkins server and save it somewere. You'll be using it in upcoming sections.
Spend a few minutes poking around Jenkins. You'll configure a build shortly...
Your progress, and what's next
You've got a Kubernetes cluster managed by Google Container Engine. You've deployed:
- a Jenkins replication controller
- a (non-public) service that exposes Jenkins
- a Nginx reverse-proxy replication controller that routes to the Jenkins service
- a public service that exposes Nginx
You have the tools to build a continuous delivery pipeline. Now you need a sample app to deliver continuously.
The sample app
You'll use a very simple sample application - gceme - as the basis for your CD pipeline. gceme is written in Go. When you run the gceme binary on a GCE instance, it displays the instance's metadata in a pretty card:

The binary supports two modes of operation, designed to mimic a microservice. In backend mode, gceme will listen on a port (8080 by default) and return GCE instance metadata as JSON, with content-type=application/json. In frontend mode, gceme will query a backend gceme service and render that JSON in the UI you saw above. It looks roughly like this:
-----------      ------------      ~~~~~~~~~~~~        -----------
|         |      |          |      |          |        |         |
|  user   | ---> |   gceme  | ---> | lb/proxy | -----> |  gceme  |
|(browser)|      |(frontend)|      |(optional)|   |    |(backend)|
|         |      |          |      |          |   |    |         |
-----------      ------------      ~~~~~~~~~~~~   |    -----------
                                                  |    -----------
                                                  |    |         |
                                                  |--> |  gceme  |
                                                       |(backend)|
                                                       |         |
                                                       -----------
Both the frontend and backend modes of the application support two additional URLs:
/versionprints the version of the binary (declared as a const inmain.go)/healthzreports the health of the application. In frontend mode, health will be OK if the backend is reachable.
Run the app on your workstation:
./gceme -port=8181 &- Run a frontend on 8080 that connects to the backend:
./gceme -frontend=true -backend-service=http://localhost:8181 -port=8080 &-
Open your browser to
localhost:8080orcurl localhost:8080to confirm the service is working. -
Kill the processes:
killall gceme
Fork and clone the app
Here you'll create your own copy of the gceme source code in GitHub and download it to your workstation. The source code in this repository is for the gceme binary, and a Dockerfile that describes how to package the binary in a container.
Note: If you're using the pre-configured lab instance, perform the following steps in
~/gtc
-
Open the
gcemerepo in your browser: https://github.com/evandbrown/gceme -
Click the
Forkbutton to make a copy of the repository in your GitHub account -
Clone the repository to your lab instance or laptop (e.g.,
git clone https://github.com/YOUR_USERNAME/gceme.git)
Deploy the sample app to Kubernetes
In this section you will deploy the gceme frontend and backend to Kubernetes. Although you just downloaded the gceme source, the files for this section are in the jenkins-kube-cd project. These files consist of the Kubernetes manifests that describe the environment that the gceme binary/Docker image will be deployed to. They use a default gceme Docker image that you will be updating with your own in a later section.
You'll have two environments - staging and production - and use Kubernetes namespaces to isolate them.
Important: If you used the
shortcut.shscript earlier, you still need to follow these steps.
Note: The manifest files for this section of the tutorial are in
kubernetes/gcemein thejenkins-kube-cdrepo. You are encouraged to open and read each one before creating it per the instructions.
-
Create the namespaces:
$ kubectl create -f kubernetes/gceme/namespace-staging.yaml$ kubectl create -f kubernetes/gceme/namespace-prod.yaml -
Create the replication controllers and services for staging:
$ kubectl --namespace=staging create -f kubernetes/gceme/service_frontend.yaml$ kubectl --namespace=staging create -f kubernetes/gceme/service_backend.yaml$ kubectl --namespace=staging create -f kubernetes/gceme/frontend.yaml$ kubectl --namespace=staging create -f kubernetes/gceme/backend.yaml$ kubectl --namespace=staging scale rc/gceme-frontend --replicas=4 -
Repeat step 2, but for the
productionnamespace:$ kubectl --namespace=production create -f kubernetes/gceme/service_frontend.yaml$ kubectl --namespace=production create -f kubernetes/gceme/service_backend.yaml$ kubectl --namespace=production create -f kubernetes/gceme/frontend.yaml$ kubectl --namespace=production create -f kubernetes/gceme/backend.yaml$ kubectl --namespace=production scale rc/gceme-frontend --replicas=4 -
Retrieve the public IP for both services:
$ kubectl --namespace=staging get service/gceme-frontend
NAME      LABELS       SELECTOR              IP(S)           PORT(S)
gceme     name=gceme   name=gceme-frontend   10.235.248.11   80/TCP
                                             104.197.84.5
$ kubectl --namespace=production get service/gceme-frontend
NAME LABELS SELECTOR IP(S) PORT(S)
gceme name=gceme name=gceme-frontend 10.235.243.23 80/TCP
104.197.36.222 -
Confirm that both services are working by opening them in your browser
-
Open a terminal and poll the staging endpoint's
/versionURL so you can easily observe rolling updates in the next section:$ while true; do curl http://YOUR_STAGING_SERVICE_IP/version; sleep 1; done
Create a pipeline
You'll now use Jenkins to define and run a pipeline that will test, build, and deploy your copy of gceme to your Kubernetes cluster. You'll approach this in phases. Let's get started with the first.
Note: This section uses source files in the
gcemeproject.
Phase 1: Create a Multibranch Workflow project
This lab uses Jenkins Workflow to define builds as groovy scripts. Navigate to your Jenkins UI and follow these steps to configure a Multibranch Workflow project (hot tip: you can find the IP address of your Jenkins install with kubectl get service/nginx-ssl-proxy):
-
Click the New Item link in the left nav
-
Name the project gceme, choose the Multibranch Workflow option, then click
OK -
Click
Add Sourceand choosegit -
Paste the HTTPS clone URL of your GitHub repository into the Project Repository field. You can find this value on your GitHub page in the right column:
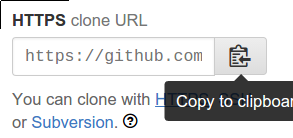
-
Click
Save, leaving all other options with their defaults

Phase 2: Create a Jenkinsfile to pass the build
Make the build pass by adding a simple valid Jenkinsfile script to your gceme repo. The file should be in your repo's root and have the following contents:
node('docker') {
  sh "echo success"
}
The Jenkinsfile is written using the Jenkins Workflow DSL (Groov-based). It allows an entire build pipeline to be expressed in a single script, and supports powerful features like parallelization, stages, and user input.
git add Jenkinsfile, then git commit, and finally git push origin master to push your changes to GitHub.
Navigate to your gceme project in Jenkins, click Branch Indexing in the left column, then choose Index Now. This will cause Jenkins to detect the Jenkinsfile in your master branch and recognize that branch as buildable.
When indexing completes, go back to the gceme project in Jenkins and click the build button in the master branch row (the icon is a clock with a green triangle). After a few moments the build should complete successfully. You may need the refresh the page to see the result:

Phase 3: Modify Jenkinsfile to bulid and test the app
Modify your Jenkinsfile script so it contains the following complete script (or copy the file from misc/Jenkinsfile in the jenkins-cube-cd repo). Be sure to replace _REPLACE_WITH_YOUR_PROJECT_ID on line 7 with your project name:
node('docker') {
  checkout scm

  // Kubernetes cluster info
  def cluster = 'gtc'
  def zone = 'us-central1-f'
  def project = 'REPLACE_WITH_YOUR_PROJECT_ID'

  // Run tests
  stage 'Go tests'
  docker.image('golang:1.5.1').inside {
    sh('go get -d -v')
    sh('go test')
  }

  // Build image with Go binary
  stage 'Build Docker image'
  def img = docker.build("gcr.io/${project}/gceme:${env.BUILD_TAG}")
  sh('gcloud docker -a')
  img.push()

  // Deploy image to cluster in dev namespace
  stage 'Deploy to QA cluster'
  docker.image('buildpack-deps:jessie-scm').inside {
    sh('apt-get update -y ; apt-get install jq')
    sh('export CLOUDSDK_CORE_DISABLE_PROMPTS=1 ; curl https://sdk.cloud.google.com | bash')
    sh("/root/google-cloud-sdk/bin/gcloud container clusters get-credentials ${cluster} --zone ${zone}")
    sh('curl -o /usr/bin/kubectl https://storage.googleapis.com/kubernetes-release/release/v1.0.1/bin/linux/amd64/kubectl ; chmod +x /usr/bin/kubectl')
    sh("kubectl --namespace=staging rollingupdate gceme-frontend --image=${img.id} --update-period=5s")
    sh("kubectl --namespace=staging rollingupdate gceme-backend --image=${img.id} --update-period=5s")
    sh("echo http://`kubectl --namespace=staging get service/gceme-frontend --output=json | jq -r '.status.loadBalancer.ingress[0].ip'` > staging")
  }

  // Deploy to prod if approved
  stage 'Approve, deploy to prod'
  def url = readFile('staging').trim()
  input message: "Does staging at $url look good? ", ok: "Deploy to production"
  sh('gcloud docker -a')
  img.push('latest')
  docker.image('buildpack-deps:jessie-scm').inside {
    sh('apt-get update -y ; apt-get install jq')
    sh('export CLOUDSDK_CORE_DISABLE_PROMPTS=1 ; curl https://sdk.cloud.google.com | bash')
    sh("/root/google-cloud-sdk/bin/gcloud container clusters get-credentials ${cluster} --zone ${zone}")
    sh('curl -o /usr/bin/kubectl https://storage.googleapis.com/kubernetes-release/release/v1.0.1/bin/linux/amd64/kubectl ; chmod +x /usr/bin/kubectl')
    sh("kubectl --namespace=production rollingupdate gceme-frontend --image=${img.id} --update-period=5s")
    sh("kubectl --namespace=production rollingupdate gceme-backend --image=${img.id} --update-period=5s")
    sh("echo http://`kubectl --namespace=production get service/gceme-frontend --output=json | jq -r '.status.loadBalancer.ingress[0].ip'`")
  }
}
Don't commit the new Jenkinsfile just yet. You'll make one more change in the next section, then commit and push them together.
Deploy a change
Now that your pipeline is working, it's time to make a change to the gceme app and let your pipeline test, package, and deploy it.
- In the
gcemerepository on your workstation openhtml.goand replace the wordbluewithorange(there should be exactly two occurrences):
//snip
<div class="card orange">
<div class="card-content white-text">
<div class="card-title">Backend that serviced this request</div>
//snip-
In the same repository, open
main.goand change the version number from1.0.0to2.0.0://snip const version string = "2.0.0" //snip
-
git add Jenkinsfile html.go main.go, thengit commit, and finallygit push origin masteryour change. When the change has pushed, -
When your change has been pushed to GitHub, navigate to Jenkins and click the button to run your build.
-
Once the build is running, click the down arrow next to the build in the left column and choose Console Output:

-
Track the output for a few minutes and watch for the
kubectl rollingupdate...to begin. When it starts, open the terminal that's polling staging's/versionURL and observe it start to change. -
When the change is deployed to staging and you are prompted to deploy it:

-
If everything looks good, click the Deploy to production link. Confirm that production looks good when it completes.
-
Look at the
Jenkinsfilein the project and analyze how the approval workflow is written.
Extra credit: deploy a breaking change, then roll back
Make a breaking change to the gceme source, push it, and deploy it through the pipeline to production. Then pretend latency spiked after the deployment and you want to roll back. Do it! Faster!
Things to consider:
- What is the Docker image you want to deploy for roll back?
- How can you interact directly with the Kubernetes to trigger the deployment?
- Is SRE really what you want to do with your life?
Clean up
Clean up is really easy, but also super important: if you don't follow these instructions, you will continue to be billed for the Google Container Engine cluster you created.
To clean up, navigate to the Google Developers Console Project List, choose the project you created for this lab, and delete it. That's it.