Azure Spring Apps enables you to easily run a Spring Boot applications on Azure. It manages the infrastructure of Spring Cloud applications hiding all complications of container and container managements so developers can focus on their code. It provides lifecycle management using comprehensive monitoring and diagnostics, configuration management, service discovery, CI/CD integration, blue-green deployments, and more.
Note: Azure Spring Cloud is now Azure Spring Apps as of today (May-22, 2022)
This example shows you how to deploy an existing Java Spring Boot/Cloud application to Azure. When you're finished, you can continue to manage the application with Azure services via the Azure CLI, Bicep templates or switch to using the Azure Portal.
It's forked from Azure-Samples/spring-petclinic-microservices and originally from spring-petclinic/spring-petclinic-microservices. Code change's minimized, all deployment models work properly which introduced in the previous repos such as
- Starting services locally without Docker
- Starting services locally with docker-compose
- Deploying Spring Boot apps using Azure Spring Apps and MySQL
You will need to check these config repos too. They provide app configs to your runtime.
- euchungmsft/spring-petclinic-microservices-config - configuration as example on public
- euchungmsft/spring-petclinic-microservices-config-private - working configuration on private protected by GitHub authentication
Deploy Spring Boot apps using Azure Spring Apps and Azure Services
You will
- Build an existing Spring Boot/Cloud applications
- Provision Azure Spring Apps service and Azure Services using Bicep template from commandline or/and portal. See what is Bicep
- Deploy applications to Azure
- Bind applications to Azure services
- Open and test the applications
- Monitor the applications
- Integrate with APIM using Swagger doc
- Automate deployments using GitHub Actions
- Find how to store sensitive informtion to Azure Key Vault Secret and how to use/manage them
- Find how to implement second level cache transparently using Azure Cache for Redis for better performance
- Find how to implement Spring Cloud Stream backed by Azure Event Hub replacing Kafka you might have been using
- Find how to implement Spring Data backed by Azure CosmosDB replacing MongoDB
In order to deploy a Java app to cloud, you need an Azure subscription. If you do not already have an Azure subscription, you can activate your MSDN subscriber benefits or sign up for a free Azure account.
In addition, you will need the following:
| Azure CLI version 2.17.1, higher or latest | Bicep latest | Java 11 | Maven latest | MySQL CLI latest | Git latest | jq utility latest
Note: The Bash shell. While Azure CLI should behave identically on all environments, shell semantics vary. Therefore, only bash can be used with the commands in this repo. WSL2/Ubuntu is my recommendation to complete this example. See this for WSL Installation on your Windows, see this for Ubuntu (18+) download. Azure Cloud Shell is another good choice too. See this
Before you start, install the Azure Spring Apps extension for the Azure CLI using the following command
az extension add --name spring-cloudNote:
spring-cloudCLI extension2.1.0or later is a pre-requisite to enable the latest Java in-process agent for Application Insights. If you already have the CLI extension, you may need to upgrade to the latest using --
Note: Brand new extension's available as of today (May-25, 2022) as it's renamed to Azure Spring Apps. Try to update from your command line
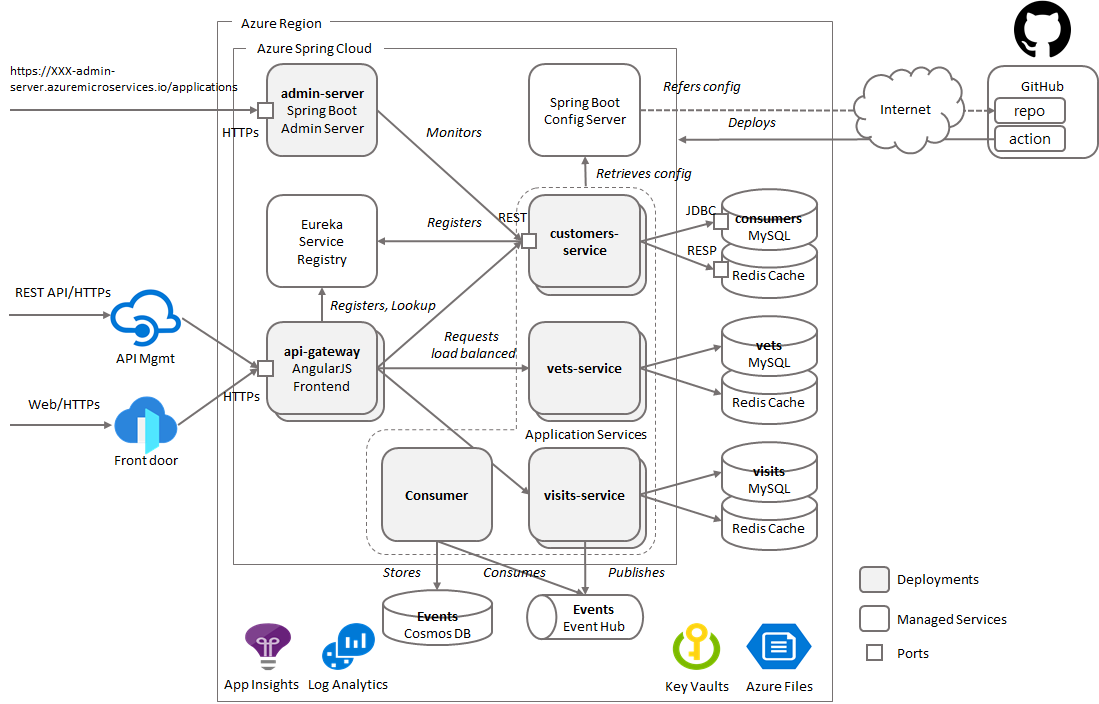
az extension update --name spring-cloudBased on the PetClinic App, Azure-Samples/spring-petclinic-microservices we've added Azure services with integration, and Consumer service which communicates with the app services over Event Hub
- All app components communicate with KeyVaults to retrieve sensitive information stored in secrets
- All app components bound to Azure Files as permanent storage
- All app components with data acess gets second level cache on Redis
- All components bound to Log Analytics to send logs and metrics
- Endpoints to
admin-serverandapi-gatewayfor extenal access - config-server in Azure Spring Apps gets the app configs from repos on GitHub with authentication
- CI/CD by GitHub Actions are added with appropriate authentication to access the resources on Azure
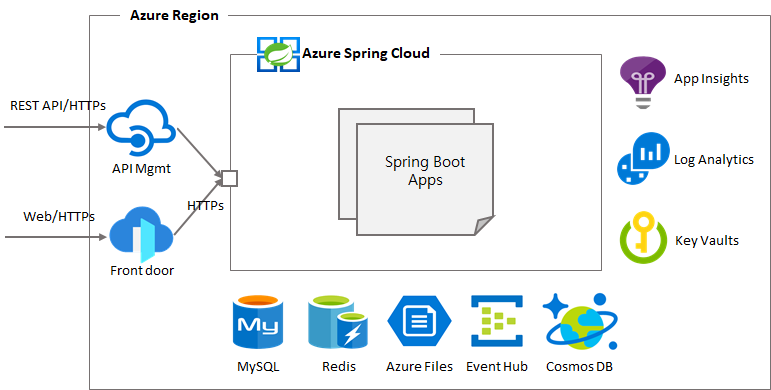
Simple and basic deployment model for the purpose of test
- Where the customer doesn't care about network dedication
- Each of Azure Services allows access with access control over the network
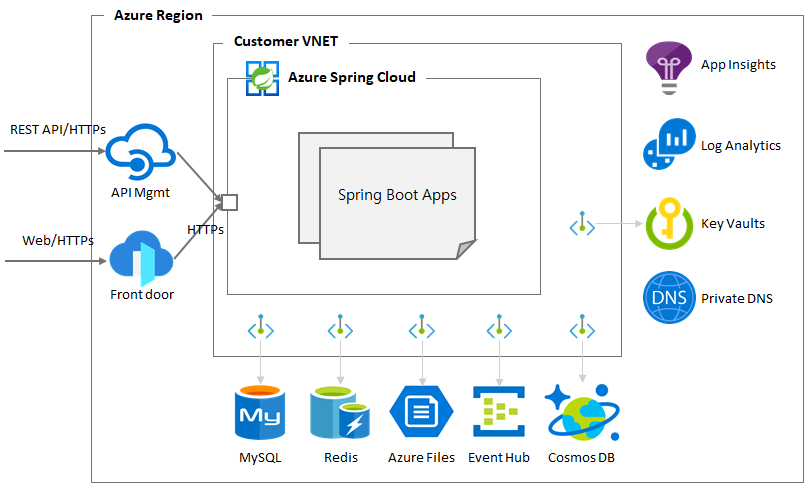
Secure and dedicated deployment for serious purpose
- All app components are deployed in the customer VNet which enables them to access directly to its components such as AKS, load balancers and so on
- Each of Azure Services allow to access over private endpoints deployed in the VNet
Note: My recommendation is to start to fork these repos to yours first than cloning these right away from this repo. It helps you to run later half of this document, to config GitHub Action, you need to get your developer token for authentication, and to store your credentials in the repo
Create a new folder and clone the repositories to your environment
mkdir [your source code folder name]
cd [your source code folder name]
git clone [your source code repo URL, or https://github.com/microsoft/csu-digiapps-cm-java_on_springcloud]
git clone [your config repo URL, or https://github.com/euchungmsft/spring-petclinic-microservices-config]
spring-petclinic-microservices is source code and working repo, spring-petclinic-microservices-config is for the configuration repo to push back to GitHub.
Change directory and build the project.
cd spring-petclinic-microservices
mvn clean package -DskipTests -Denv=cloud
This will take a few minutes.
Rename .env-example to .env and update it
mv .env-example .envOpen .env
PROJECT_NAME=[your project name, to give names to all resoures]

RESOURCE_GROUP=${PROJECT_NAME}-rg
REGION=westus
..
..
PROJECT_NAME is for automatically naming the resources. MY_UPN is User Principal Name of your Azure portal account. Check this from Azure Active Directory - Users
Login to the Azure CLI and choose your active subscription. Be sure to choose the active subscription that is whitelisted for Azure Spring Apps
az login or
az login --use-device-codeYou need a Resource Group and Service Principal to authenticate from your environment. Simply run bin/init.sh, it consist of steps listed below
bin/init.sh- Creating a Resource Group
- Creating a Service Principal
- Updating .env
- Set defaults in your environment with az command
and you'll get something like this as a result of step-2. Save it for later steps
{
  "clientId": "XXXXXXXX-XXXX-XXXX-XXXX-XXXXXXXXXXXX",
  "clientSecret": "XXXXXXXXXXXXXXXXXXXXXXXXXXXXXXXXXX",
  "subscriptionId": "XXXXXXXX-XXXX-XXXX-XXXX-XXXXXXXXXXXX",
  "tenantId": "XXXXXXXX-XXXX-XXXX-XXXX-XXXXXXXXXXXX",
  "activeDirectoryEndpointUrl": "https://login.microsoftonline.com",
  "resourceManagerEndpointUrl": "https://management.azure.com/",
  "activeDirectoryGraphResourceId": "https://graph.windows.net/",
  "sqlManagementEndpointUrl": "https://management.core.windows.net:8443/",
  "galleryEndpointUrl": "https://gallery.azure.com/",
  "managementEndpointUrl": "https://management.core.windows.net/"
}
.env must be updated like this already. Check AZURE_CLIENT_ID, AZURE_CLIENT_SECRET, AZURE_TENANT_ID if they are correct
AZURE_CLIENT_ID=XXXXXXXX-XXXX-XXXX-XXXX-XXXXXXXXXXXX
AZURE_CLIENT_SECRET=XXXXXXXXXXXXXXXXXXXXXXXXXXXXXXXXXX
AZURE_TENANT_ID=XXXXXXXX-XXXX-XXXX-XXXX-XXXXXXXXXXXX
AZURE_OBJECT_ID=XXXXXXXX-XXXX-XXXX-XXXX-XXXXXXXXXXXX
AZURE_OBJECT_ID is automatically updated in the shell script with command like below. Once you've done bin/init.sh successfully, you don't have to run this separately
az ad sp show --id $AZURE_CLIENT_ID | jq -r .objectIdLoad all required variables in your environment
source ./.envSet default sunscription to use in this example
az account set --subscription ${SUBSCRIPTION}Provision infrastructure components and Azure Spring Apps
az deployment group create \
 -g $RESOURCE_GROUP \
 -f iac/bicep/spc-main.bicep \
 --parameters location=$REGION \
  projectName=$PROJECT_NAME
Or alternatively on the portal,
It consists of
- VNet creation, optionally when it's on Standard sku (Basic as default)
- Storage Account creation with a blob and fileshare
- Spring Cloud creation (Basic as default)
Check iac/bicep/spc-main.bicep for further details
Provision Azure services
az deployment group create \
 -g $RESOURCE_GROUP \
 -f iac/bicep/services-main.bicep \
 --parameters location=$REGION \
  projectName=$PROJECT_NAME \
  database_name=$MYSQL_DATABASE_NAME \
  mysql_adminUsername=$MYSQL_SERVER_ADMIN_NAME \
  mysql_adminPassword=$MYSQL_SERVER_ADMIN_PASSWORD \
  servicePrincipal="{ \"clientId\": \"$AZURE_CLIENT_ID\",
  \"tenantId\": \"$AZURE_TENANT_ID\",
  \"objectId\": \"$AZURE_OBJECT_ID\" }"
Or alternatively on the portal,
It consists of
- KeyVault creation
- MySQL creation
- Event Hub creation
- Redis creation
- Cosmos DB creation
- APIM creation
Check iac/bicep/services-main.bicep for further details
Configure log analytics
bin/loganalytics-diagnostics.shIt consists of
- Log Analytics workspace creation
- Log Analytics config for Spring Cloud
- Diagnostic Settings sending logs and metrics from Spring Cloud to Log Analytics
To add Application Insights in your environment, on your portal, select your spring cloud instance, click on Application Insights blade on the left, check on 'Enable Application Insights', Click on 'Create New' link, give it a new name for your App Insights instance.
Give permission to access KeyVault secrets
az keyvault set-policy --name $KEY_VAULT \
--upn $MY_UPN \
--secret-permissions all

az keyvault set-policy --name $KEY_VAULT \
--object-id $AZURE_OBJECT_ID \
--secret-permissions all
Initialize MySQL
mysql -u ${MYSQL_SERVER_ADMIN_LOGIN_NAME} \
 -h ${MYSQL_SERVER_FULL_NAME} \
 -P 3306 "--password=$MYSQL_SERVER_ADMIN_PASSWORD" \
 -e "-- CREATE DATABASE $MYSQL_DATABASE_NAME;
CREATE USER 'root' IDENTIFIED BY '$MYSQL_DATABASE_NAME';
GRANT ALL PRIVILEGES ON petclinic.* TO 'root';
CALL mysql.az_load_timezone();
SELECT name FROM mysql.time_zone_name;
quit
"
Database 'petclinic' as default is already been created in the previous step. Just skipping it in this command line
If you get trouble to access your MySQL from your environment, Cloud Shell is an easy walkaround in this step. Put .env on your Cloud Shell, run source ./.env then run the command line above
Adding Storage Account
KEY0=`az storage account keys list -g $RESOURCE_GROUP --account-name $STORAGE_ACCOUNT_NAME  | jq -r .[0].value`
echo $KEY0
az spring-cloud storage add \
 --storage-type StorageAccount \
 --account-key $KEY0 \
 --account-name $STORAGE_ACCOUNT_NAME \
--name $SHARE_NAMEIn your spring-petclinic-microservices-config repo, open application.yml. Find on-profile: mysql section in the middle. The app will work with this profile
spring:
  config:
    activate:
      on-profile: mysql
  datasource:
    schema: classpath*:db/mysql/schema.sql
    data: classpath*:db/mysql/data.sql
    url: <your mysql connection string>
    username: <your mysql user name>
    password: <secret-name:spring-datasource-password>
    initialization-mode: ALWAYS
...
  cloud:
    azure:
      eventhub:
        connection-string: <your event hub connection string>
        checkpoint-storage-account: <your storage account name for checkpoint>
        checkpoint-access-key: <your storage account access key for checkpoint>
        checkpoint-container: <your blob container name for checkpoint>
        namespace: <your event hub namespace>
    stream:
      function:
        definition: consume;supply
      bindings:
        consume-in-0:
          destination: <your event hub name>
          group: $Default
        supply-out-0:
          destination: <your event hub name>
Commit and push it to your remote repo
git remote add origin https://github.com/<your gh account name>/spring-petclinic-microservices-config
git push -u origin masterBack to spring-petclinic-microservices, make a copy application.yml.example to application.yml
cp application.yml.example application.ymlCustomize application.yml
spring:
  cloud:
    config:
      server:
        git:
          uri: [your config repo url]
          username: [your login id at GitHub]
          password: [your developer token at GitHub]
          label: main
        native:
          search-locations: classpath:.
  profiles:
    active: native
Your developer token is from your GitHub account setttings. See this for further details
Note: don't remove spring.cloud.config.server.git.label
Once config-server configuration's ready, run this from your command line
az spring-cloud config-server set \
 --config-file application.yml \
 --name ${SPRING_CLOUD_SERVICE}
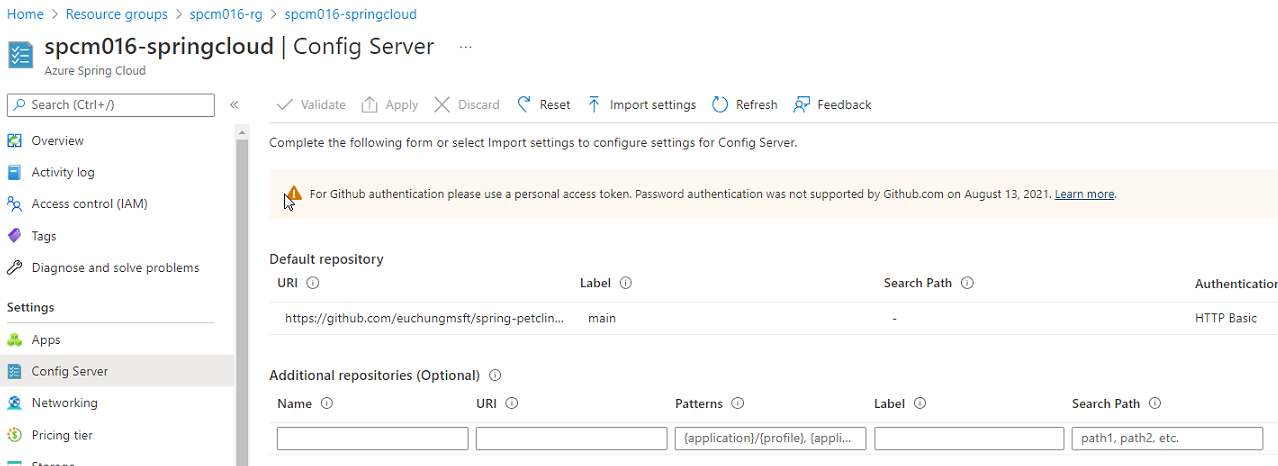
Once you have done config server settings, you'll see it like this on your portal UI
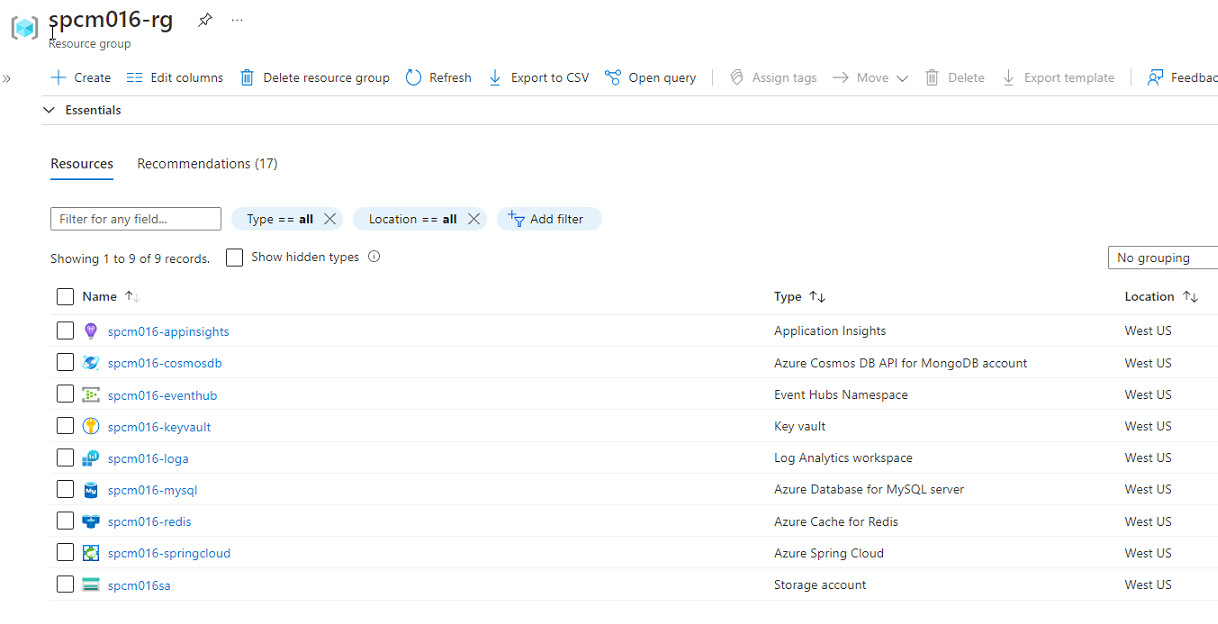
Once you have done all service deployments, you'll see something like this in your resource group
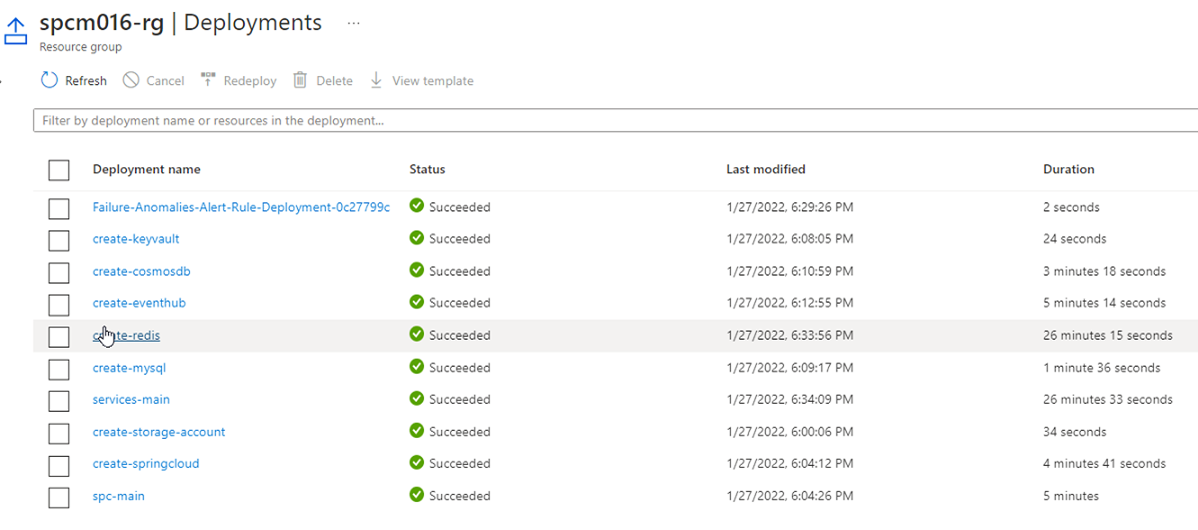
For Deployments
Now you're ready to deploy your app.
This example uses redisson for second level cache with Redis. You need to create redisson config first with the brand new Redis instance that you have created in the previous step, and copy it to all services that second level cache's configured - customer-service, vets-service, visits-service
KEY0=`az redis list-keys --name ${PROJECT_NAME}-redis --resource-group ${RESOURCE_GROUP} | jq -r .primaryKey`
echo "{\"singleServerConfig\":{\"address\": \"redis://${PROJECT_NAME}-redis.redis.cache.windows.net:6379\", \"password\": \"$KEY0\"}}" > redisson.json
cat redisson.json

cp redisson.json spring-petclinic-${CUSTOMERS_SERVICE}/src/main/resources/
cp redisson.json spring-petclinic-${VETS_SERVICE}/src/main/resources/
cp redisson.json spring-petclinic-${VISITS_SERVICE}/src/main/resources/
Rebuild the apps with the redisson updates
mvn clean package -DskipTests -Denv=cloudNote: To run PetClinic app locally, See this document
App deployment consists of follwoing steps
- Create apps on your Azure Spring Apps instance
- Append persistent storage to your apps created
- Deploy the apps
- Browse logs
These steps are repeating, for your convenience, there's a bash script bin/spring-cloud.sh, which helps you to run those steps easily
bin/spring-cloud.sh create api-gateway
bin/spring-cloud.sh create admin-server
bin/spring-cloud.sh create customers-service
bin/spring-cloud.sh create vets-service
bin/spring-cloud.sh create visits-service
bin/spring-cloud.sh create consumer-service
Run all of these at once. It normally takes minutes. Both config and discover servers are a part of Azure Spring Apps. You don't have to deploy both
bin/spring-cloud.sh append-persistent-storage customers-service
bin/spring-cloud.sh append-persistent-storage vets-service
bin/spring-cloud.sh append-persistent-storage visits-service
bin/spring-cloud.sh append-persistent-storage consumer-service
Run all of these at once. We only bind the storage to the app components, not for api-gateway, admin-server
bin/spring-cloud.sh deploy api-gateway
bin/spring-cloud.sh deploy admin-server
bin/spring-cloud.sh deploy customers-service
bin/spring-cloud.sh deploy vets-service
bin/spring-cloud.sh deploy visits-service
bin/spring-cloud.sh deploy consumer-service
Run all of these at once. It normally takes minutes
bin/spring-cloud.sh logs api-gateway
bin/spring-cloud.sh logs admin-server
bin/spring-cloud.sh logs customers-service
bin/spring-cloud.sh logs vets-service
bin/spring-cloud.sh logs visits-service
bin/spring-cloud.sh logs consumer-service
You can run these separetely if neccessary
Use bin/spring-cloud.sh command for delete, stop, start, restart of your apps
Once you have done all app deployments, you'll see something like this
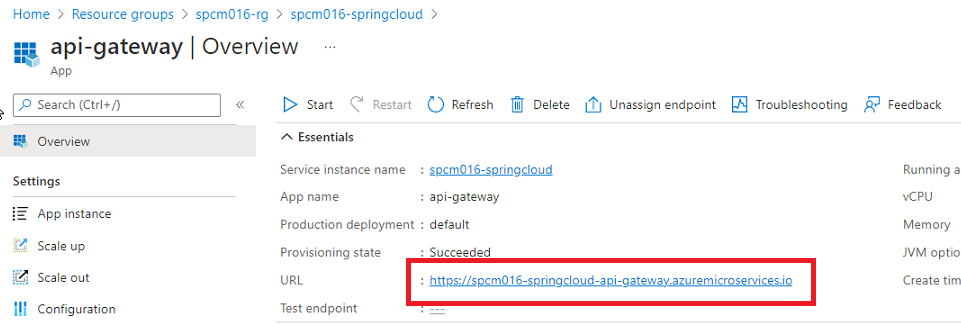
Both of api-gateway and admin servers are assigned endpoints. On your portal UI, select your Spring Cloud instance, click on Apps, select api-gateway from right, click on the URL on Overview
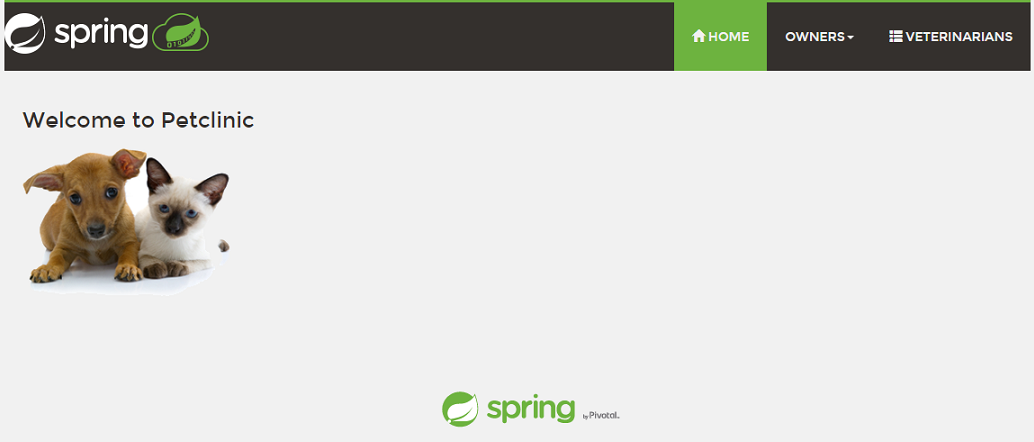
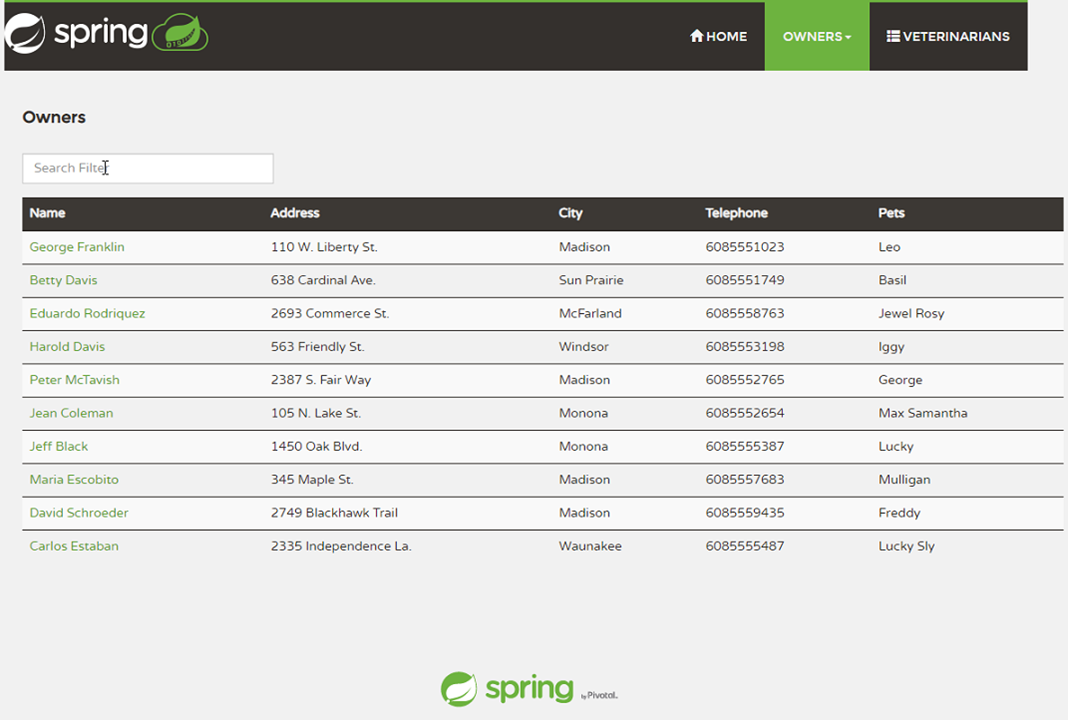
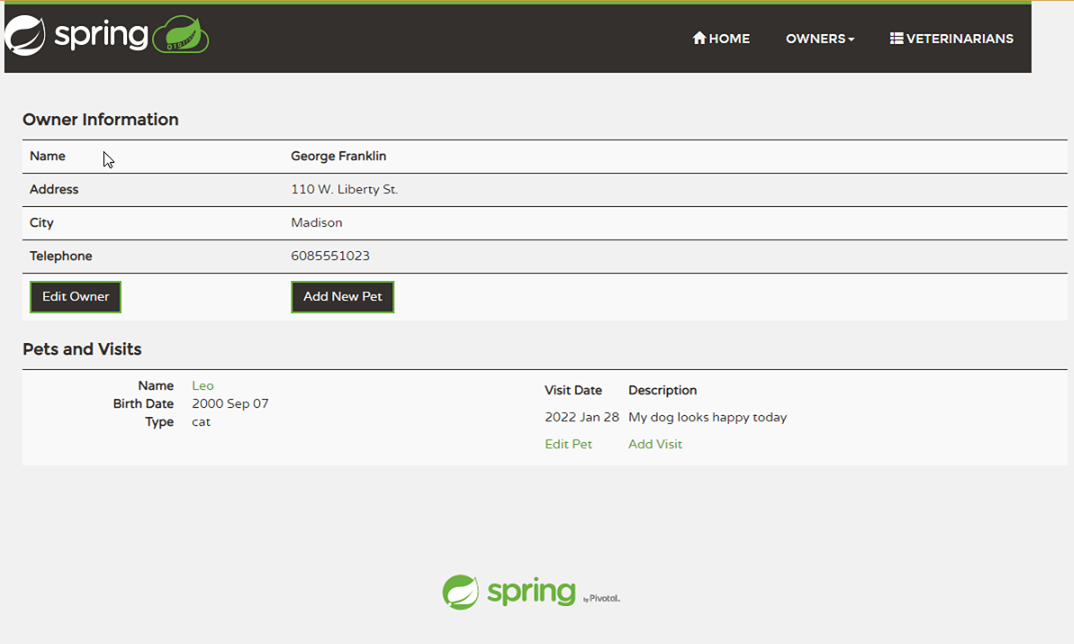
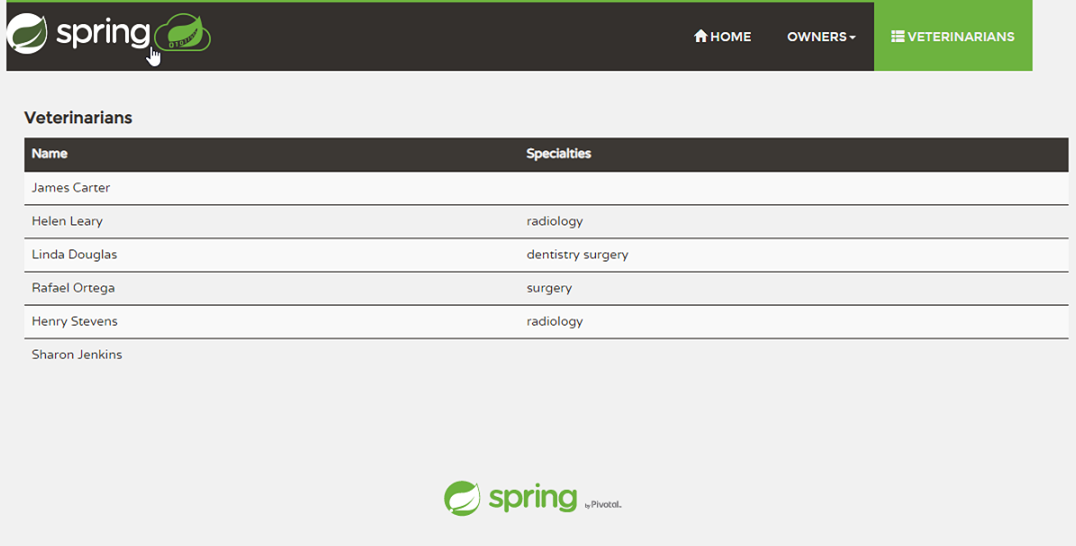
Navigate from menu on the top
You can simply run these commands from your shell
curl -X GET https://${SPRING_CLOUD_SERVICE}-${API_GATEWAY}.azuremicroservices.io/api/customer/owners
curl -X GET https://${SPRING_CLOUD_SERVICE}-${API_GATEWAY}.azuremicroservices.io/api/customer/owners/4
curl -X GET https://${SPRING_CLOUD_SERVICE}-${API_GATEWAY}.azuremicroservices.io/api/customer/owners/
curl -X GET https://${SPRING_CLOUD_SERVICE}-${API_GATEWAY}.azuremicroservices.io/api/customer/petTypes
curl -X GET https://${SPRING_CLOUD_SERVICE}-${API_GATEWAY}.azuremicroservices.io/api/customer/owners/3/pets/4
curl -X GET https://${SPRING_CLOUD_SERVICE}-${API_GATEWAY}.azuremicroservices.io/api/customer/owners/6/pets/8/
curl -X GET https://${SPRING_CLOUD_SERVICE}-${API_GATEWAY}.azuremicroservices.io/api/vet/vets
curl -X GET https://${SPRING_CLOUD_SERVICE}-${API_GATEWAY}.azuremicroservices.io/api/visit/owners/6/pets/8/visits
curl -X GET https://${SPRING_CLOUD_SERVICE}-${API_GATEWAY}.azuremicroservices.io/api/visit/owners/6/pets/8/visits
Those are the APIs that you can access over api-gateway or directly. But if you want to access app components directly for test purpose, you need to assign endpoints to them first
And these are are Actuator endpoints by Spring Boot for your test and monitor.
What's Spring Boot Actuator ? It brings production-ready features to the Spring Boot apps - Monitoring the apps, gathering metrics, understanding traffic, or the state of our database become trivial with this dependency. Actuator is mainly used to expose operational information about the running application ??health, metrics, info, dump, env, etc. It uses HTTP endpoints or JMX beans to enable us to interact with it. See this for further details
curl -X GET https://${SPRING_CLOUD_SERVICE}-${API_GATEWAY}.azuremicroservices.io/actuator/
curl -X GET https://${SPRING_CLOUD_SERVICE}-${API_GATEWAY}.azuremicroservices.io/actuator/env
curl -X GET https://${SPRING_CLOUD_SERVICE}-${API_GATEWAY}.azuremicroservices.io/actuator/configprops
curl -X GET https://${SPRING_CLOUD_SERVICE}-${API_GATEWAY}.azuremicroservices.io/api/customer/actuator
curl -X GET https://${SPRING_CLOUD_SERVICE}-${API_GATEWAY}.azuremicroservices.io/api/customer/actuator/env
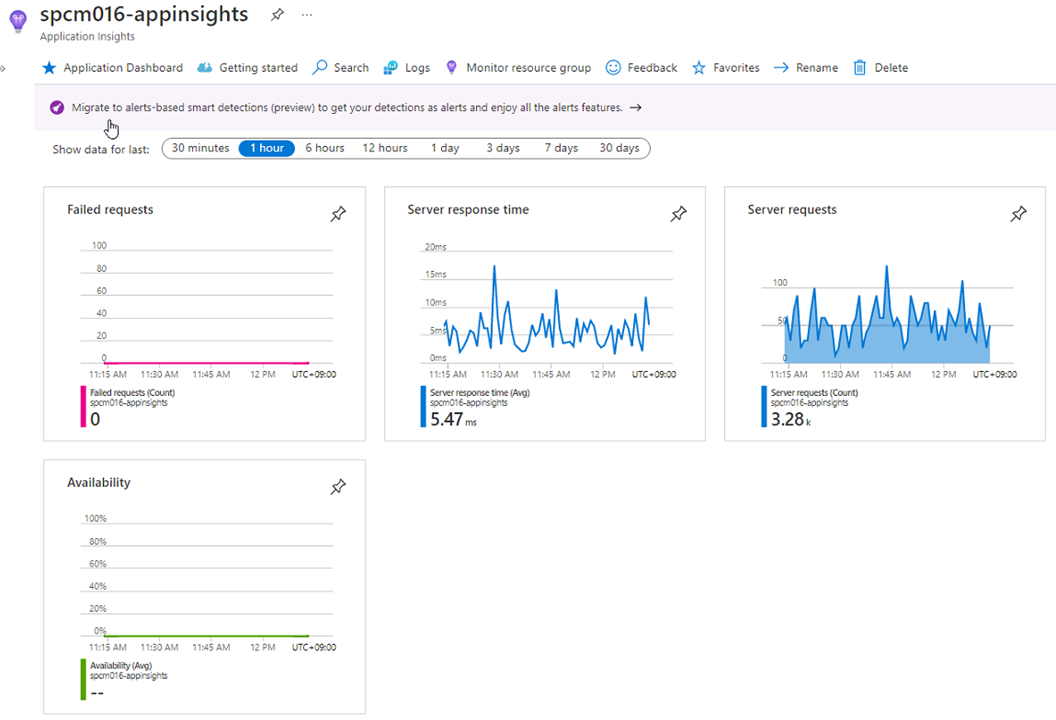
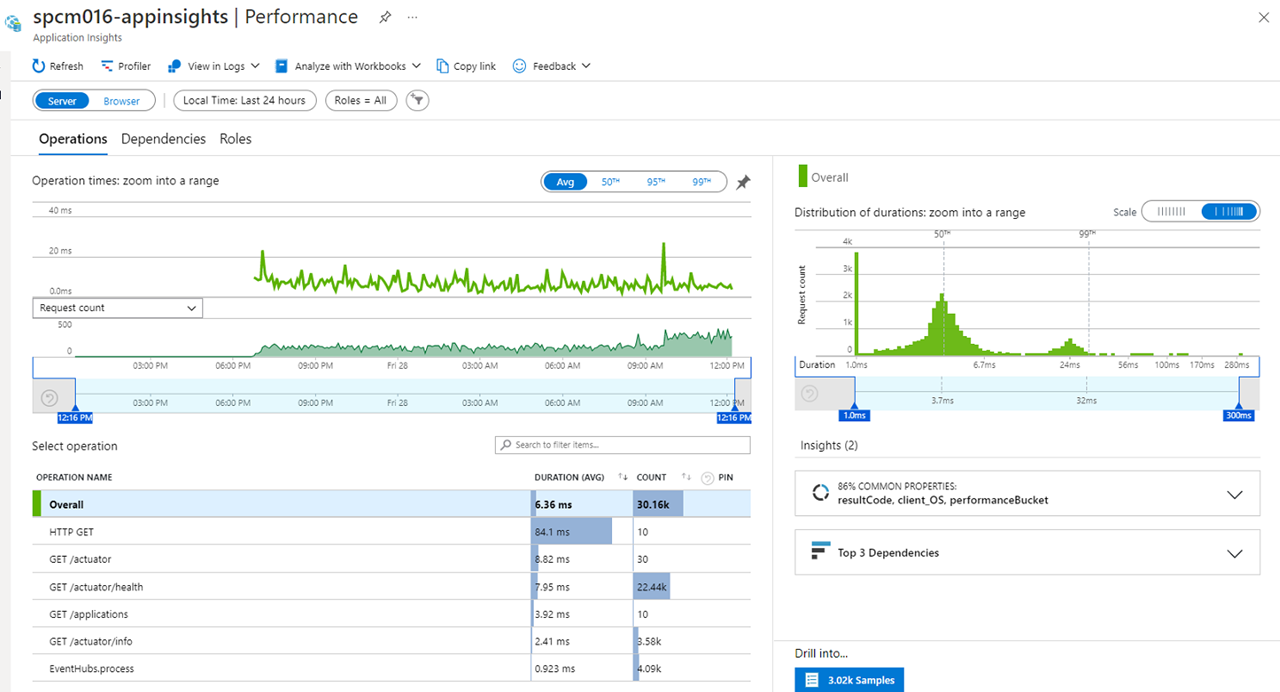
curl -X GET https://${SPRING_CLOUD_SERVICE}-${API_GATEWAY}.azuremicroservices.io/api/customer/actuator/configpropsOpen the Application Insights created by Azure Spring Apps and start monitoring Spring Boot applications. You can find the Application Insights in the same Resource Group where you created an Azure Spring Apps service instance.
Navigate to the Performance blade
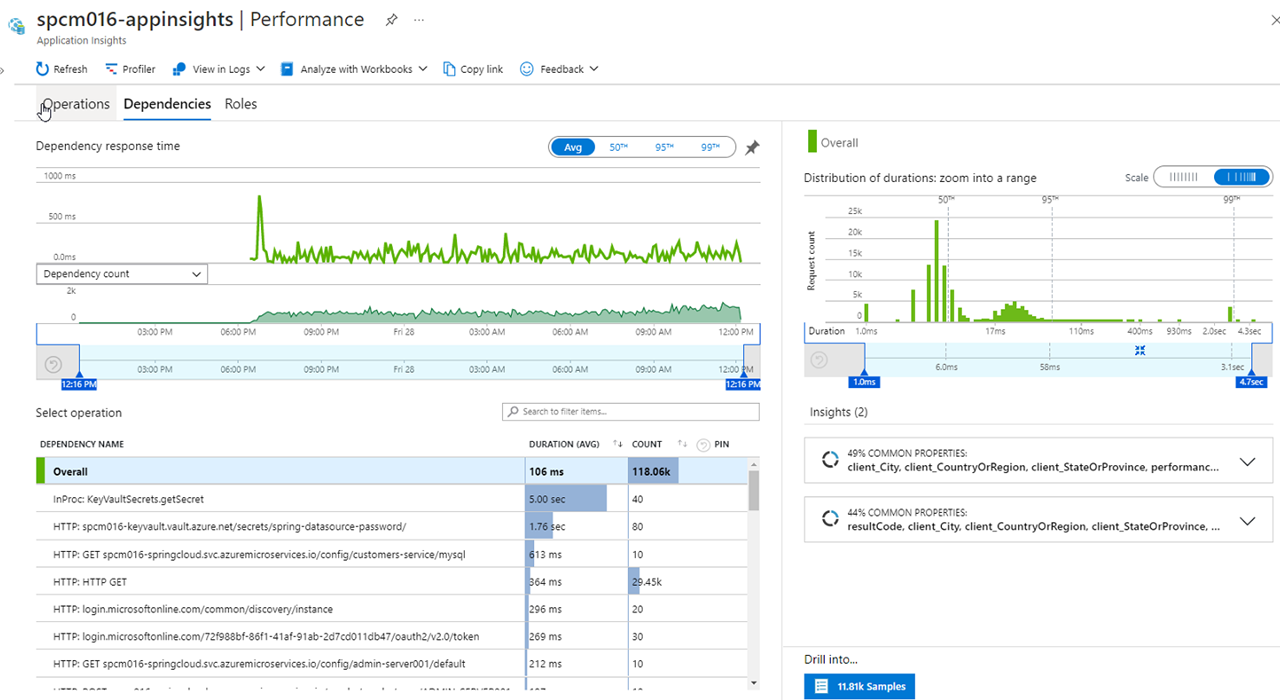
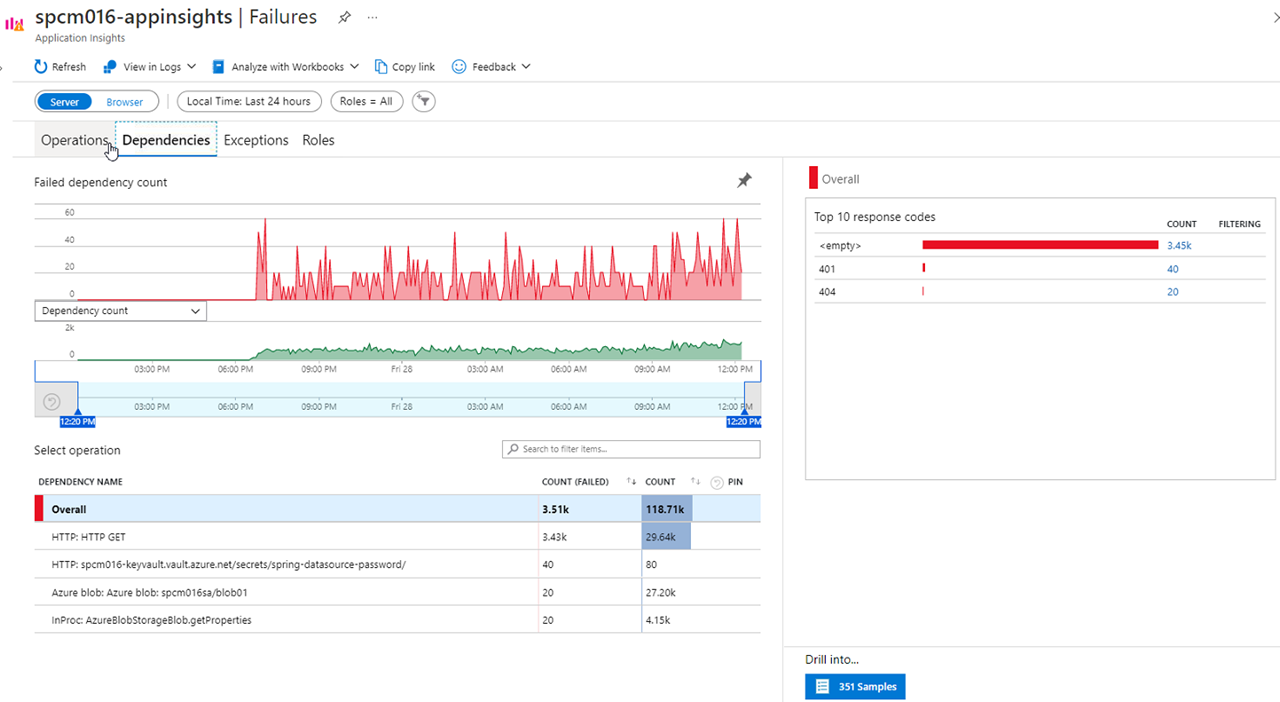
Click on Dependencies, you can see the performance number for dependencies to the services
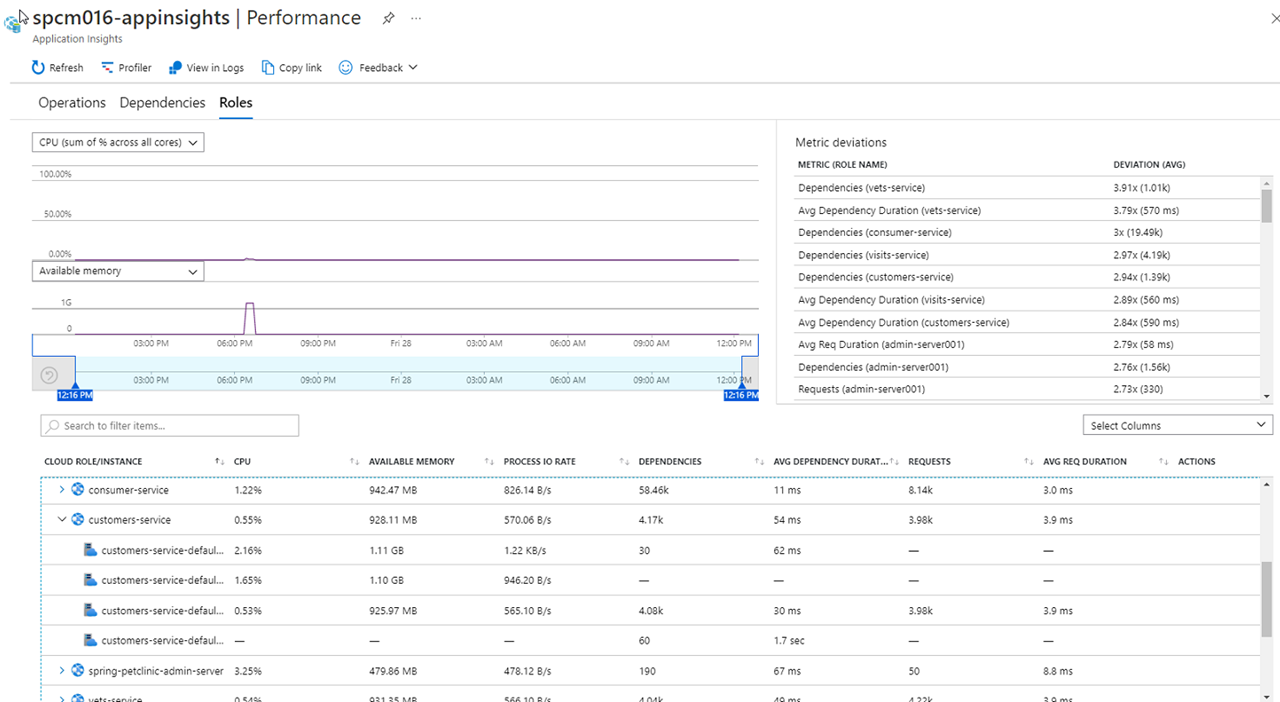
Click on Roles, you can see the performance number to compare across instances and roles
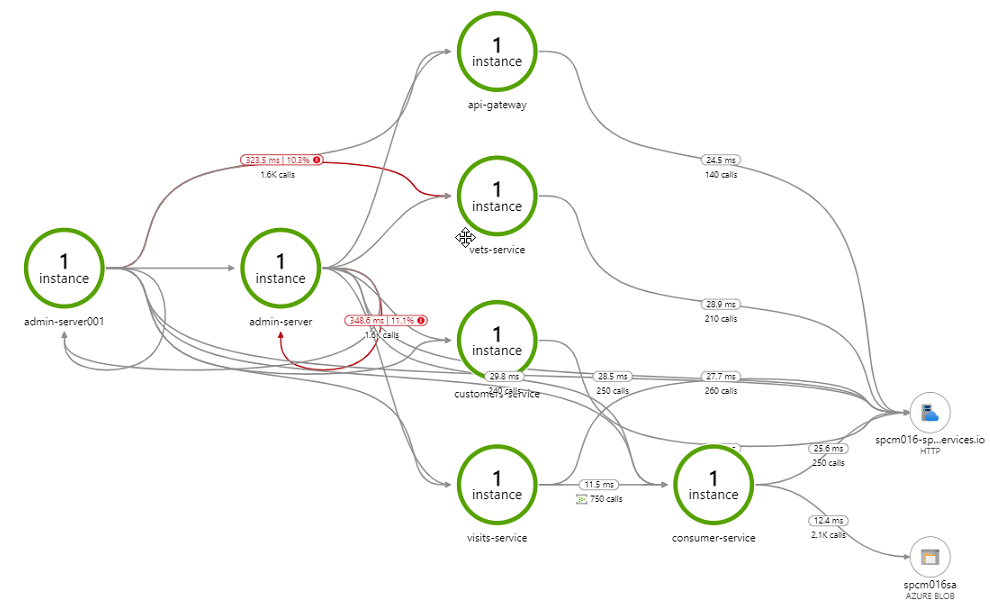
Navigate to the Application Map blade
Navigate to the Failures blade
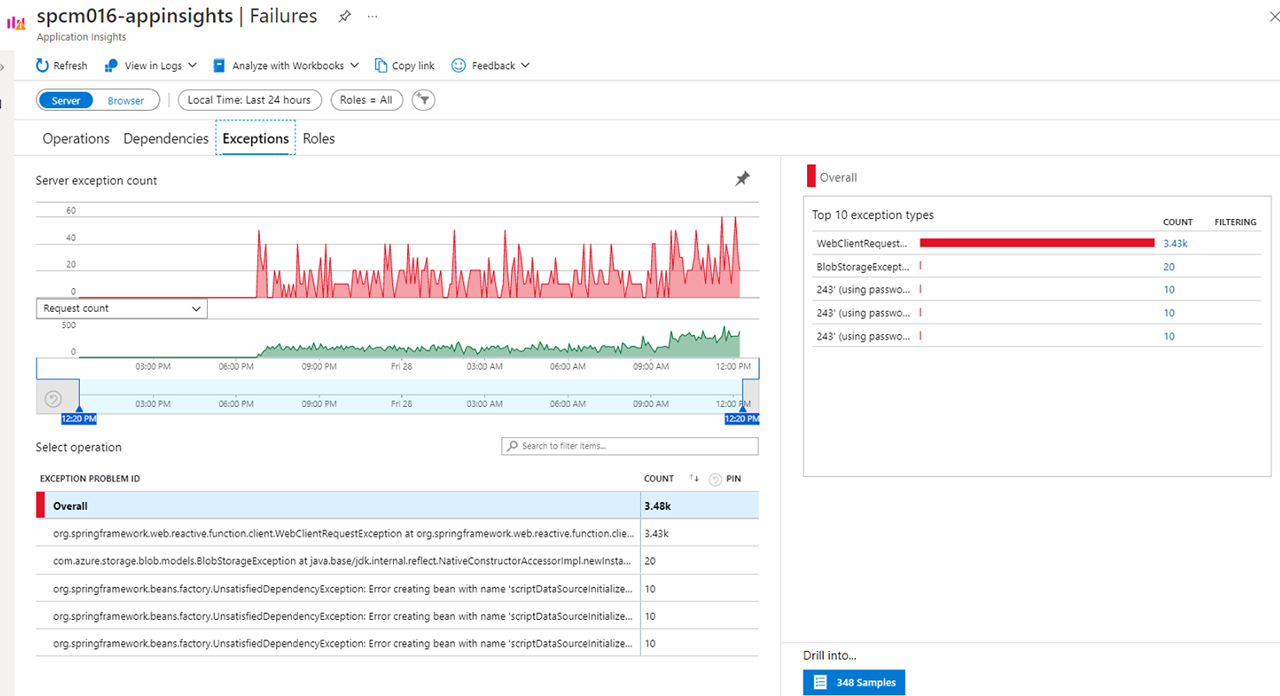
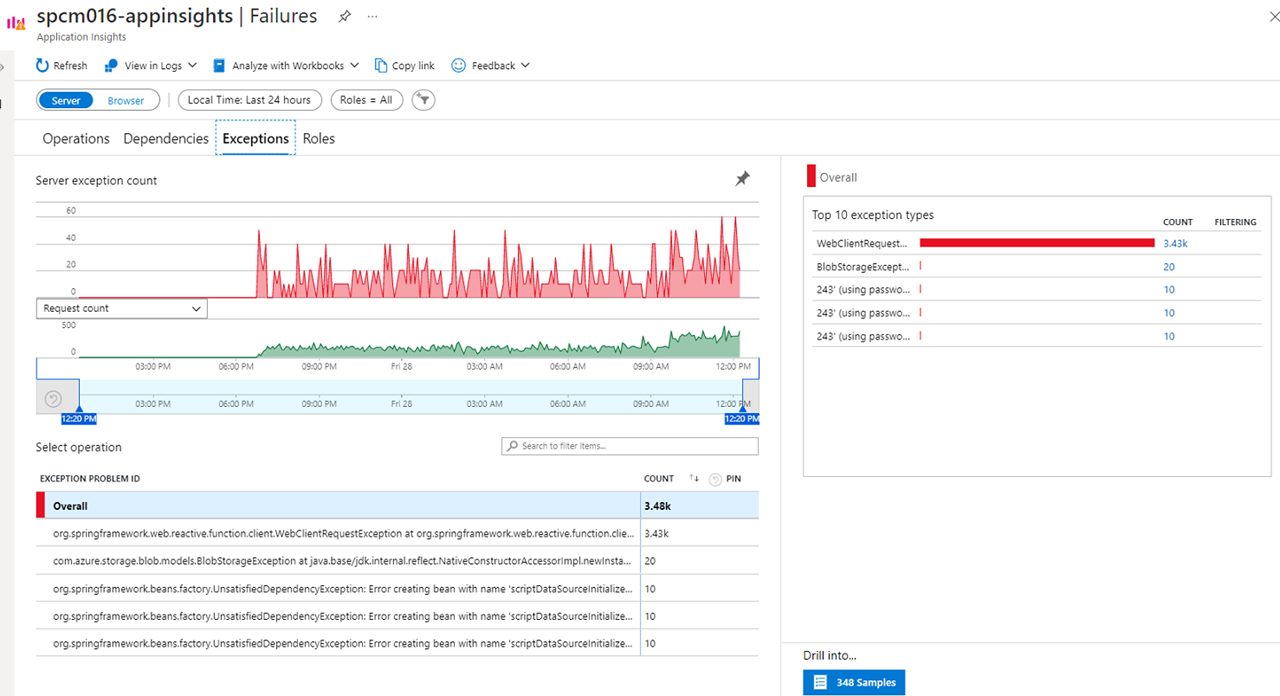
Click on Exceptions, you can see a collection of exceptions
Click on an exception to see the end-to-end transaction and stacktrace in context
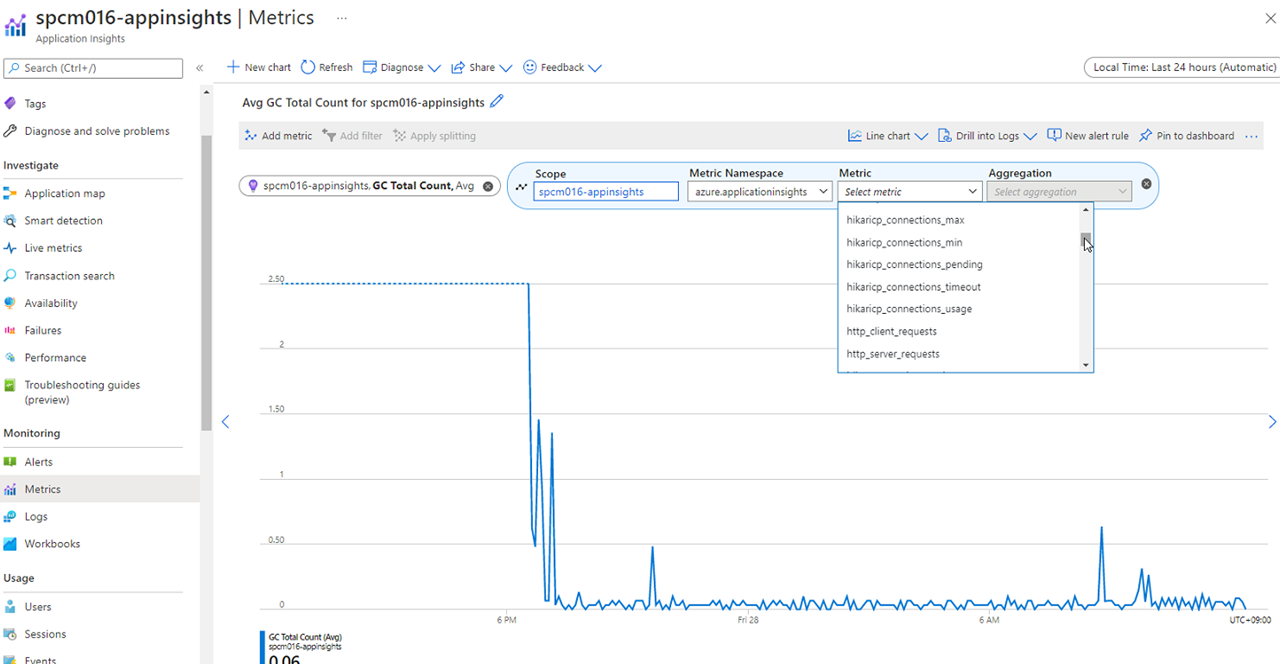
Navigate to the Metrics blade
Note: Spring Boot registers a lot number of core metrics: JVM, CPU, Tomcat, Logback and so on. You can find custom metrics for these. The Spring Boot auto-configuration enables the instrumentation of requests handled by Spring MVC. All those three REST controllers OwnerResource, PetResource and VisitResource have been instrumented by the @Timed Micrometer annotation at class level
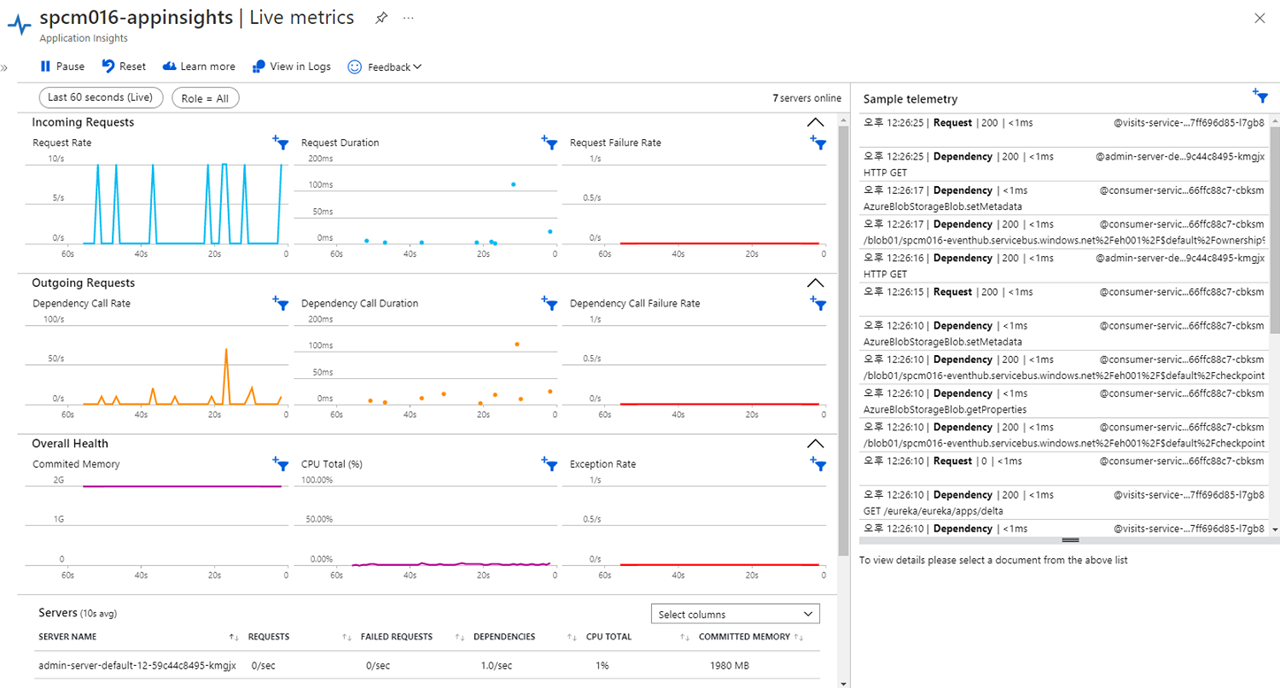
Navigate to Live Metrics blade, you can see live metrics on screen with low latencies < 1 second
Find this document for the instructions
Find this document for the instructions
- CI and CI/CD Workflows
- Configure workflows for CI
- Configure workflows for CI/CD
- Reviewing workflows
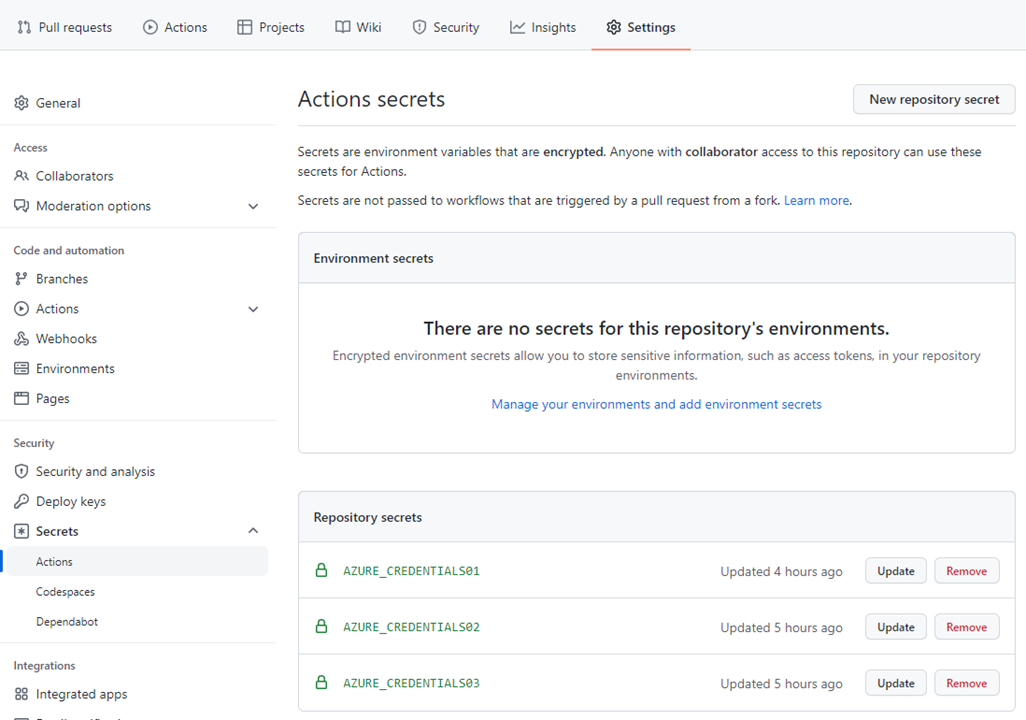
You need two Azure credentials stored on the repo. One's for Azure login from CLI, the other's for AZURE_CLIENT_SECRET to pass to the apps as the environment variables. From the top menu on the repo, select Settings, click on Secrets on left menu and click on Actions. Click on New repository secret, and save your Service Principal details as AZURE_CREDENTIALS01 that you saved in the initial steps. And another is AZURE_CLIENT_SECRET as AZURE_CREDENTIALS02, repeat the steps and save
There are two workflows defined in .github\workflows
- ci-build-all.yml ... full build by Maven with testing
- cd-build-deploy-all.yml ... full build by Maven skipping testing and deploy
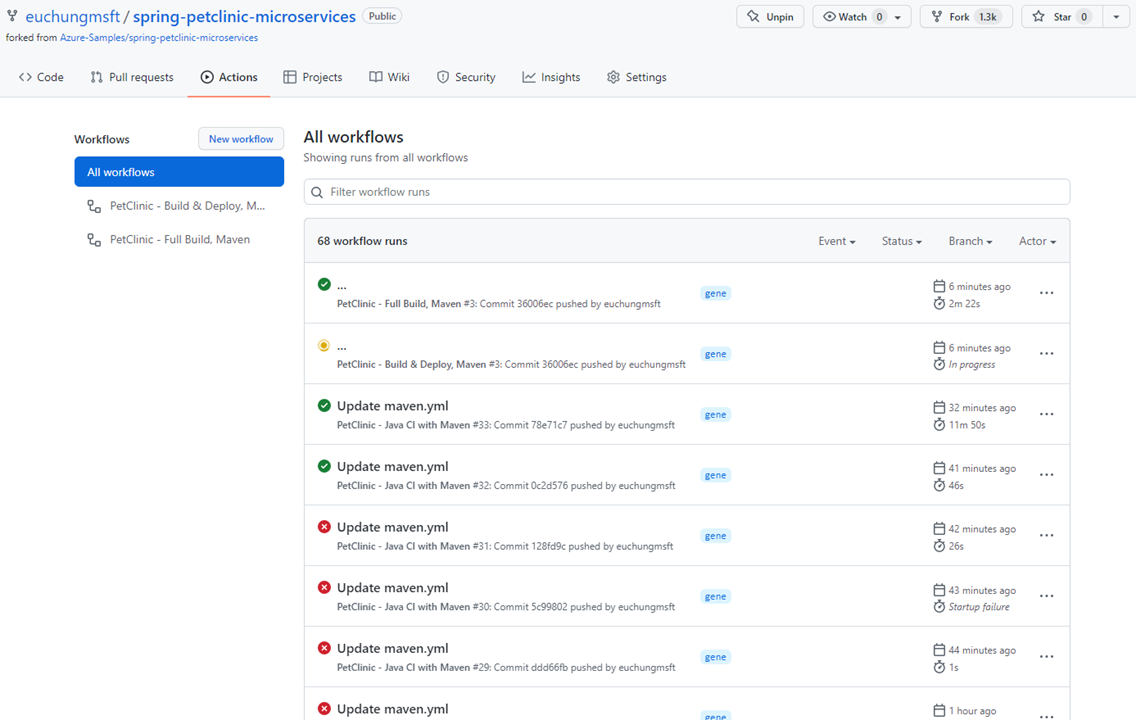
Go to Actions on your repo, it will look like this
For ci-build-all.yml, update PROJECT_NAME, AZURE_RESOURCE_GROUP_NAME on env section on the top
name: PetClinic - Full Build, Maven

on:
  workflow_dispatch:  # works manually
#  push:
#    branches: [ your brandch name here ]
#  pull_request:
#    branches: [ your brandch name here ]

env:
  PROJECT_NAME: 'your project name here'
  AZURE_RESOURCE_GROUP_NAME: 'your resource group name here'
..
It consists of these steps
- Checkout the repo
- Seting up Java 11 with Maven cache config
- Log on to Azure
- Setting up redisson.json with your Redis key as password and place it to
/src/main/resources/of each app components - Maven clean, package with test
- Log out from Azure
For cd-build-deploy-all.yml,
name: PetClinic - Build & Deploy, Maven

on:
  workflow_dispatch:  # works manually
#  push:
#    branches: [ your brandch name here ]
#  pull_request:
#    branches: [ your brandch name here ]

env:
  PROJECT_NAME: 'your project name here'
  ASC_PACKAGE_PATH: ${{ github.workspace }}
  AZURE_SUBSCRIPTION_ID: 'your subscription id here'
  AZURE_RESOURCE_GROUP_NAME: 'your resource group name here'
  AZURE_LOCATION: 'target region here'
  SPRING_CLOUD_SERVICE: 'your spring cloud instance name here'
..

  AZURE_CLIENT_ID: 'your client id'
  AZURE_CLIENT_SECRET: ${{ secrets.AZURE_CREDENTIALS02 }}
  AZURE_TENANT_ID: 'your tenant id'
  KEYVAULT_URI: 'your Key Vault URI'
It consists of these steps
- Checkout the repo
- Seting up Java 11 with Maven cache config
- Log on to Azure
- Setting up redisson.json with your Redis key as password and place it to
/src/main/resources/of each app components - Maven clean, package skipping test
- Deploy the apps for each -
api-gateway,admin-server,customers-service,vets-service,visits-service,consumer-service - Log out from Azure
Navigate to Actions on your repo
Click on the latest item
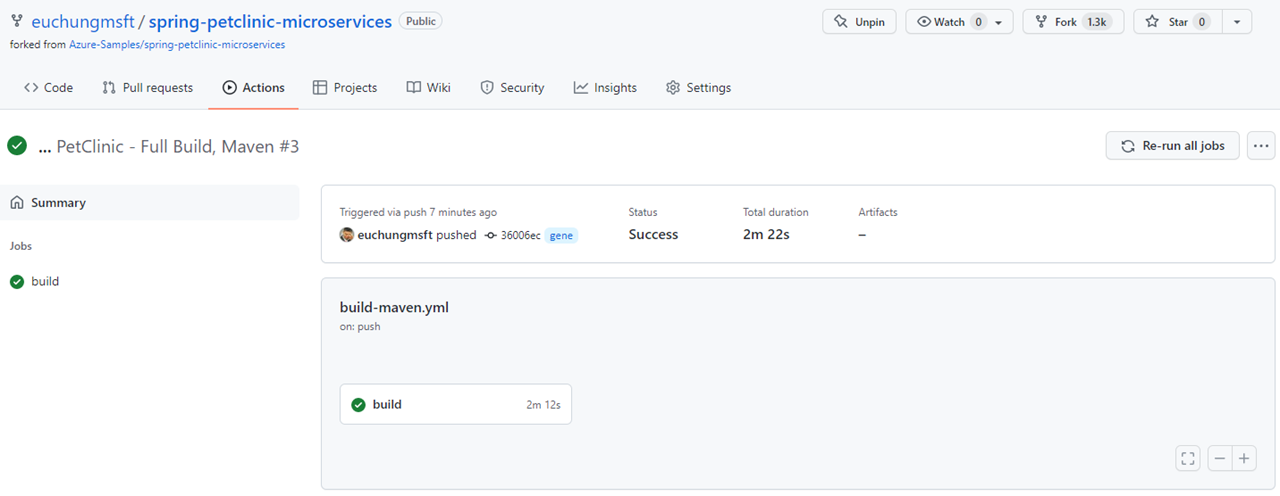
It looks like this for CI workflows
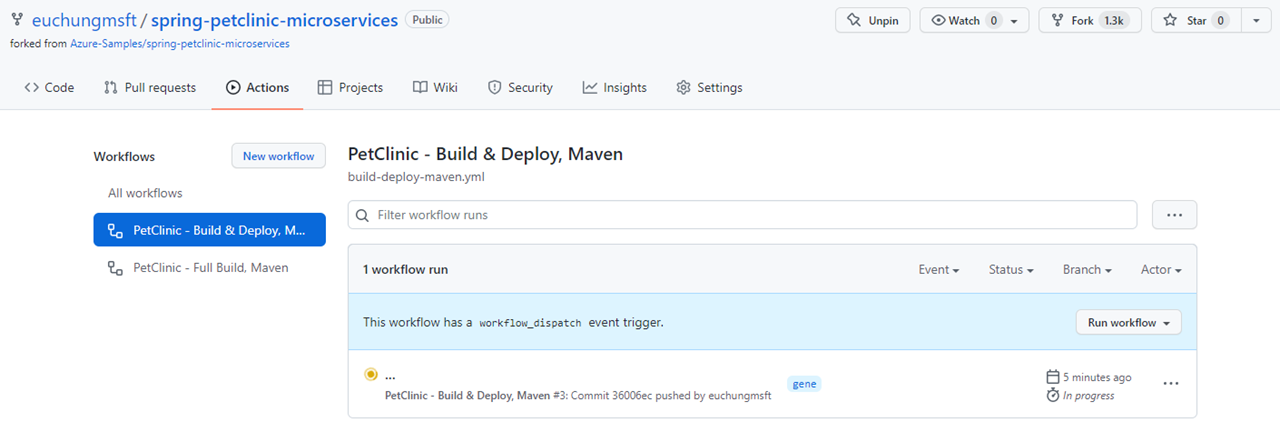
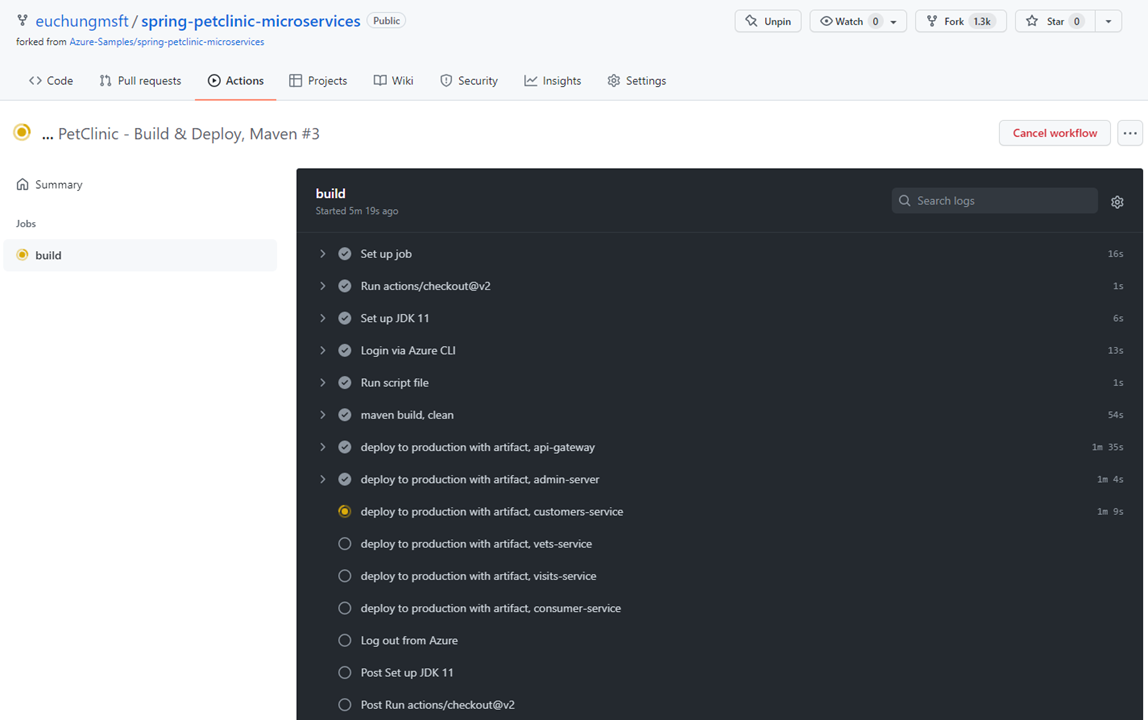
It looks like this when it's working
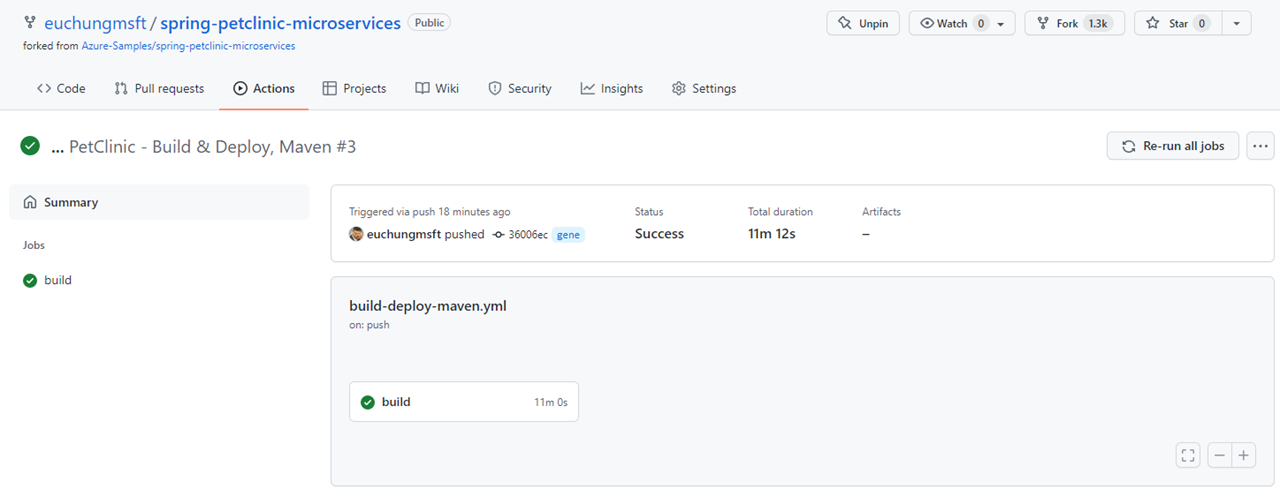
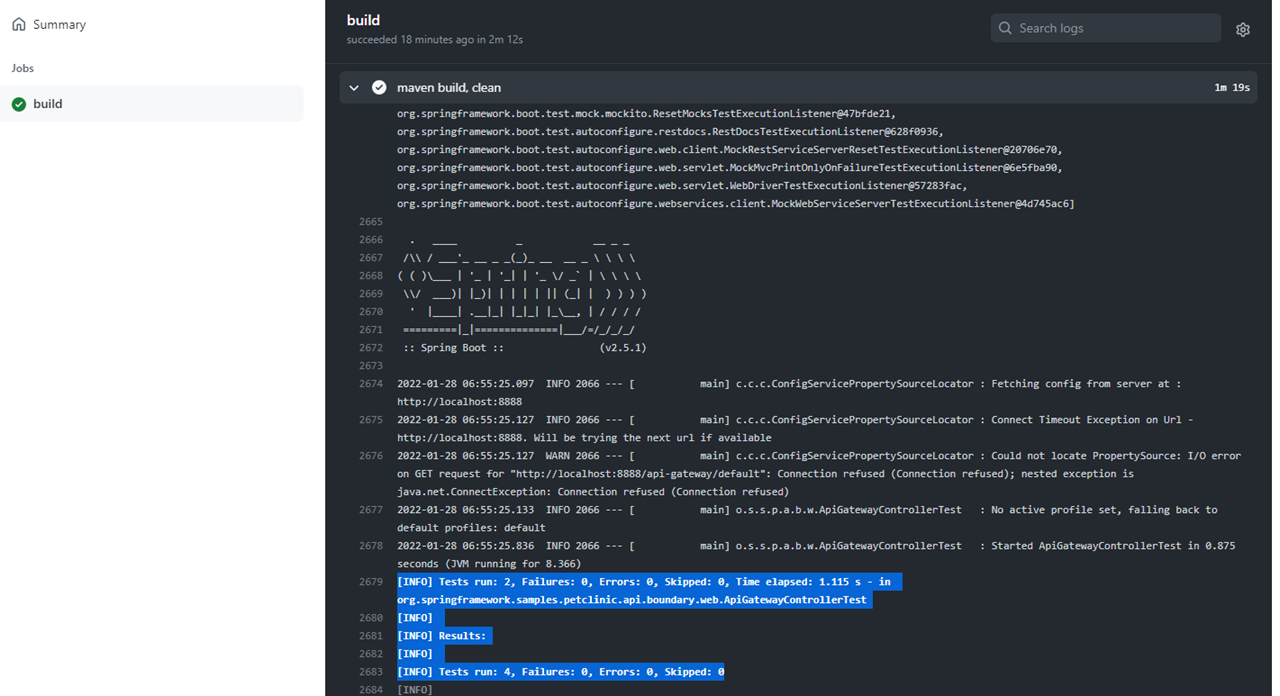
When it's successfully done with test steps, it looks like this
Find this document for further details
/mnt/c/Workspace/Lombard/dai001/spring-petclinic-microservices/iac/bicep/spc-main.bicep(12,5) : Warning no-unused-vars: Variable "vSAName" is declared but never used. [https://aka.ms/bicep/linter/no-unused-vars]
Solution:
Simply ignore these warnings while runing az deployment group create. It's because of optional paramaters unused while creating the resources. You can just ignore these when you try this with CLI or Quick Start Button but in Git Hub Action, you need to skip this warnings by adding continue-on-error: true to Jobs or Steps. That's because current version of deployment agent in Azure CLI detects it's an error than warning
org.eclipse.jgit.api.errors.TransportException: Missing delta base 02b518cc23536be854b9f58a136fb10c03468649
    at org.eclipse.jgit.api.FetchCommand.call (FetchCommand.java:224)
    at pl.project13.core.JGitProvider.fetch (JGitProvider.java:364)
    at pl.project13.core.JGitProvider.getAheadBehind (JGitProvider.java:351)
Solution: It's simply ingored while running the workflows on the Actions as default. It occurs when Maven tries to update local repo with the dependencies for the builds. Functionally there's no issues by this
This Spring microservices example is forked from Azure-Samples/spring-petclinic-microservices - see Petclinic README) and originated from spring-petclinic/spring-petclinic-microservices - see Petclinic README.
This project welcomes contributions and suggestions. Most contributions require you to agree to a Contributor License Agreement (CLA) declaring that you have the right to, and actually do, grant us the rights to use your contribution. For details, visit https://cla.opensource.microsoft.com.
When you submit a pull request, a CLA bot will automatically determine whether you need to provide a CLA and decorate the PR appropriately (e.g., status check, comment). Simply follow the instructions provided by the bot. You will only need to do this once across all repos using our CLA.
This project has adopted the Microsoft Open Source Code of Conduct. For more information see the Code of Conduct FAQ or contact opencode@microsoft.com with any additional questions or comments.
This project may contain trademarks or logos for projects, products, or services. Authorized use of Microsoft trademarks or logos is subject to and must follow Microsoft's Trademark & Brand Guidelines. Use of Microsoft trademarks or logos in modified versions of this project must not cause confusion or imply Microsoft sponsorship. Any use of third-party trademarks or logos are subject to those third-party's policies.
