Northern Trail Outfitters Sample App

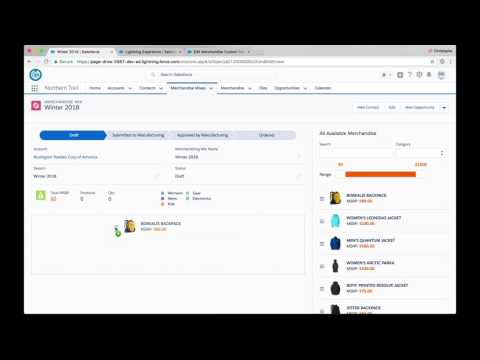
Northern Trail Outfitters (NTO) is a fictional outdoor clothing company. This application helps NTO merchandisers create “merchandise mixes” for their large retailers . A merchandise mix is a collection of products a retailer carries for a season. Merchandise mixes are submitted to a Heroku-hosted sample manufacturing app using Platform Events. Regardless of the industry you work in, this app demonstrates how to build applications with Lightning Components and how to use Platform Events to integrate with external systems.
Read this blog post to learn more about the application.
Table of Contents
- Installation
- Code Highlights
- Additional Resources
Installation
There are two ways to install Northern Trail Outfitters:
- Using Salesforce DX
- Using an unlocked package
Installing Northern Trail Outfitters using Salesforce DX
This is the recommended installation option for developers who want to experience the app and the code.
-
Authenticate with your hub org (if not already done):
sfdx force:auth:web:login -d -a myhuborg
-
Clone this repository:
git clone https://github.com/trailheadapps/northern-trail-outfitters cd northern-trail-outfitters -
Create a scratch org and provide it with an alias (nto):
sfdx force:org:create -s -f config/project-scratch-def.json -a nto
-
Push the app to your scratch org:
sfdx force:source:push
-
Assign the nto permission set to the default user:
sfdx force:user:permset:assign -n nto
-
Load sample data:
sfdx force:data:tree:import --plan ./data/Merchandise__c-plan.json sfdx force:data:tree:import --plan ./data/Account-Merchandising_Mix__c-plan.json -
Open the scratch org:
sfdx force:org:open -
Select Northern Trail Outfitters in the App Launcher.
-
Click the Merchandise Mix tab and select the first record.
Installing Northern Trail Outfitters using an unlocked package
This is the recommended option for non developers. Use this option if you want to experience the sample app but do not plan to modify the code.
-
Sign up for a developer edition.
-
Enable My Domain. Follow the instructions to enable My Domain here.
-
Click this link to install the Northern Trail Outfitters unlocked package into your developer edition org.
-
Select Install for All Users. When prompted, make sure you grant access to the external sites (api.einstein.ai).
-
Load sample data (Account):
- In Setup, type Data Import in the Quick Find box and click Data Import Wizard.
- Click Launch Wizard.
- Click Accounts and Contacts, and click Add New Records.
- Drag account.csv from the data folder of this project to the upload area.
- Click Next, Next, and Start Import.
-
Load sample data (Merchandise):
- In Setup, type Data Import in the Quick Find box and click Data Import Wizard.
- Click Launch Wizard.
- Click the Custom objects tab, click Merchandise, and click Add New Records.
- Drag merchandise.csv from the data folder of this project to the upload area.
- Click Next, Next, and Start Import.
-
Load sample data (Merchandise Mix):
- In Setup, type Data Import in the Quick Find box and click Data Import Wizard.
- Click Launch Wizard.
- Click the Custom objects tab, click Merchandise Mix, and click Add New Records.
- For Which Account field in your file do you want to match against to set the Account lookup field?, select Account Name.
- Drag merchandise_mix.csv from the data folder of this project to the upload area.
- Click Next, Next, and Start Import.
-
Select Northern Trail Outfitters in the App Launcher.
-
Click the Merchandise Mix tab and select the first record.
Code Highlights
Caching data with storable actions
Storable actions make it easy to implement client-side data caching, which is one of the most impactful things you can do to improve the performance of your Lightning components. Check out MerchandiseListHelper and MerchandiseMixHelper. A storable action is used to retrieve funds from the server and cache the response at the client-side. Read this blog post for more information.
Caching data with a custom cache
In addition to storable actions, you can also build your own custom cache solution. For example, for data that never (or rarely) changes, you can build a custom cache that retrieves the data from the server once, caches the response, and never goes back to the server. Check out the DataCache static resource for an example. And then check out the CategorySelector component to see how it’s used to cache the list of categories. Read the Modularizing Code in Lightning Components blog post for more details, and for different strategies to implement a custom cache.
Using Base Lightning Components
Custom user interfaces are built by leveraging Base Lightning Components like lightning:path. This simplifies the development experience as validations, CSS-styling and and data handling are automatically handled by the platform. See the MixPath component for an example.
Third-party JavaScript libraries and standard HTML5 interactions
The MixChart component shows how a third-party library like ChartJS can be used within Lightning Experience. The MerchandiseMix component provides another example and uses the countUp.js library. MerchandiseMix also shows how to use standard HTML 5 functionality like drag & drop.
Additional Resources
Install the Northern Trail Outfitters Manufacturing app to experiment with platform event-based integration.
When you create a Merchandise Mix in Salesforce and change its status to Submitted to Manufacturing, the Mix Status Change process automatically publishes the Mix_Submitted__e platform event. The manufacturing app is listening for that event and automatically adds the merchandise mix to the mix list when a Mix_Submitted__e event comes in.
When you click the Approve button next to a merchandise mix in the manufacturing app, the manufacturing app publishes a Mix_Approved__e event. The Mix Status Change process (in Process Builder) listens for that event and automatically changes the bundle status to Approved by Manufacturing when an event comes in. If a user is looking at the record details page for that mix, the status will automatically change (no page refresh required) because the status path component is using the Streaming API to listen for status changes. For this last part to work, you need to execute the following Salesforce DX command to create the Streaming API topic:
sfdx force:apex:execute -f ./apex/createPushTopic.apex
Take a look at the createPushTopic.apex file in the /apex folder to examine the push topic creation logic.
Note that you could also have listened directly for the platform event in the status path component and update the status to Approved by Manufacturing in the UI when the event comes in. However, that approach could lead to inconsistencies in case the server-side status update (handled by the Mix Status Change process) fails, because a validation rule is not met for example. In that case the UI would show the status as Approved by Manufacturing, while the status in the database would still be Submitted to Manufacturing.