📢 This is the version 1 of this application. I have created a newer version which supports Ring Devices.
You can find that here - https://github.com/asishrs/smartthings-ringalarmv2
- 🕐 This setup is going to take 30 minutes to an hour depending on your exposure on the SmartThings app, AWS Lambda, and Java.
- 💵 Deploying the Bridge Application in AWS as a Lambda is free but you will be charged for the use of API Gateway and Data Transfer. Based on my initial calculation this will less than a dollar per month.
This page explains, how to set up Ring Alarm as a virtual device on your SmartThings. Ring Alarm uses WebSockets to communicate to ring server for checking Alarm Status and Status changes. Unfortunately, SmartThings app does not support WebSockets, and we have to create a bridge application which accepts HTTP calls from SmartThings and communicate to Ring Alarm via WebSockets. Below diagram explains the flow.
Note: I have SmartThings classic app, and this approach is tested using that. If you are using new SmartThings app, let me know if this approach requires any changes. PRs are welcome!
If you are still reading this, that means you are ready to invest at least an hour!!!
This setup requires the deployment of two different components.
As I mentioned before, the bridge application is a proxy between the SmartThings custom app and Ring Alarm. For ease of deployment, I created this as an AWS Lambda function using Java.
You need to install this Lambda in AWS and set up an API gateway to communicate to that. This approach is using the API with Lambda integration using API Gateway. This code also requires an API authentication token. If you are already familiar with setting Lambda with API token, you can skip to the SmartThings Device Handler and Smart App.
Follow the below steps to install and setup Lambda in AWS. You need to have AWS account and the latest Lambda build from here before proceeding to the next step. If you don't have an account, start here
If you want to build the Lambda on your side, you can do that by cloning this repo and then executing ./gradlew build -x test
-
Open https://console.aws.amazon.com/lambda/home?region=us-east-1#/functions
-
Click on Create Function and provide below details
- Name - a name for your lambda (Example: Ring-Alarm)
- Runtime - Select Java 8
- Role - Select Create new role from a template(s)
- Role Name - a name for the role (Example: ring-alarm-user)
- Policy templates - Leave Empty
-
Click on Create function. This process takes a few seconds.
-
Once your function is ready, you will be directed to function settings page.
-
On the Designer section, click on API gateway on the left side navigation.
-
Configure API Gateway
- API - Select Create a new API
- Security - Select Open with API Key
- Click on Add
-
Click on Save button on right side top.
-
On the Designer section, click on your function name.
-
In the Function Code section, make sure you have values for Upload a .ZIP or JAR file as Code Entry type and Java 8 as Runtime.
-
Click on the Upload button and select the ring-alarm-{version}-SNAPSHOT.zip downloaded or the local built version in build/distributions/ directory.
-
Update Handler as org.yagna.lambda.APIRequestHandler::handleRequest
-
Click on Save button on right side top.
-
Update API
- Open https://us-east-1.console.aws.amazon.com/apigateway/home?region=us-east-1#/apis
- Under APIs, click on your API.
- Click / above /Ring-Alarm
- From the Actions, select Create Resource
- Enable Configure as proxy resource
- Resource Path - Update value as {ring-action+}
- Click on Create Resource
- Lambda Function - Enter name of your Lambda function
- Click on Save
- Click in Ok
- Enable API Key
- Click in ANY from the Resource /{ring-action+}
- Click on Method Request on the right-hand side.
- Change API Key Required to true and click on the small apply icon.
- Deploy API
- Under the API, select your API
- Click in Resources
- From the Actions, select Deploy API
- Select Deployment stage as default
- Click Deploy
- Save Invoke URL for SmartThings Application configuration
-
Get API Key
- From the API main page, select API Keys
- Select your API Key
- Click on Show link on the API key
- Save API Key for SmartThings Application configuration.
-
Link Usage Plan
- From the API main page, select Usage Plans
- Click Ring-Alarm-*
- Click Add API Stage
- Select the approriate API and Stage
Ring Alarm requires to pass location id and zid of your alarm as part the web sockets call. Though this can achieve via API calls, we don't want to do that as this increases the total number of calls to make before actual web sockets call. You can get those values from the network panel of your browser. Follow below steps to get those.
- Login to Ring Dashboard
- location ID is shown in the URL: https://app.ring.com/location//dashboard or
- Login to Ring Dashboard
- Open your chrome network panel (Option + Command + I in Mac, Ctrl + Shift + I in Windows) and login to Ring Alarm.
- In the network panel, search for locations.
- Click on the location API call on the left side.
- From the right side
- In the Header panel, confirm the URL is https://app.ring.com/rhq/v1/devices/v1/locations
- In the Preview panel, you can see the value of location_id. Save location_id for lambda testing and SmartThings Application configuration.
- Open your chrome network panel (Option + Command + I in Mac, Ctrl + Shift + I in Windows) and login to Ring Alarm.
- In the network panel, search for socket.io
- Click on the WebSocket call on the left side.
- From the right side
- In the Frames panel, check a frame response with message like
"msg":"DeviceInfoDocGetList"(Tip: If you are using chrome browser, you can see a red color down arrow on the left side of message.) - Copy that value (Right Click on the mouse and select Copy Message) and paste in your favorite text editor. I prefer an editor like Visual Studio Code as I can format that big message body using JSON format.
- Search for Ring Alarm on the message and then copy the first zid after Ring Alarm.
- Save zid for lambda testing and SmartThings Application configuration.
- In the Frames panel, check a frame response with message like
- URLs
- POST /{Invoke URL From Above}/status
- POST /{Invoke URL From Above}/off
- POST /{Invoke URL From Above}/home
- POST /{Invoke URL From Above}/away
- Sample cURL request
curl -X POST \
  {Invoke URL From Above}/status \
  -H 'x-api-key: your-aws-api-key' \
  -d '{
  "user": "ring username",
  "password" : "ring password",
  "locationId" : "ring location Id",
  "zid" : "ring zid"
}'
You need to install the device handler and smart app using the SmartThings ID to use the Lambda API calls.
- Login at http://graph.api.smartthings.com
- Select My Locations, select the location you want to use.
- Select My Device Handlers
- Click on the + New Device Handler button on the right.
- On the New Device Handler page, Select the Tab From Code
- Copy the ring-alarm-device-handler.groovy source code and paste it into the IDE editor window.
- Click the Create button at the bottom.
- Click the blue Save button above the editor window.
- Click the Publish button next to it and select For Me. You have now self-published your Device Handler
- Select My Devices
- Click on the + New Device button on the right.
- Fill the Name and Network ID Field (can be anything you like)
- Under Type, select RingAlarm
- Select appropriate options under Location and Hub
- Click Create
- Click Preferences (edit)
- Input below:
- Ring User Name
- Ring Password
- API Url - Invoke URL from Lambda setup (should end with .com/default)
- API Key - API key from Lambda setup
- Location Id - Location Id value found in browser Network panel.
- ZID - ZID value found in browser Network panel.
- (optional) Login at http://graph.api.smartthings.com
- (optional) Select My Locations, select the location you want to use.
- Select My SmartApps
- Click on the + New SmartApp button on the right.
- On the New SmartApp page, Select the Tab From Code
- Copy the ring-alarm-app.groovy source code and paste it into the IDE editor window
- Click the Create button at the bottom.
- Click the blue Save button above the editor window.
- Click the Publish button next to it and select For Me. You have now self-published your SmartApp
This is based on Smarthing Classic App.
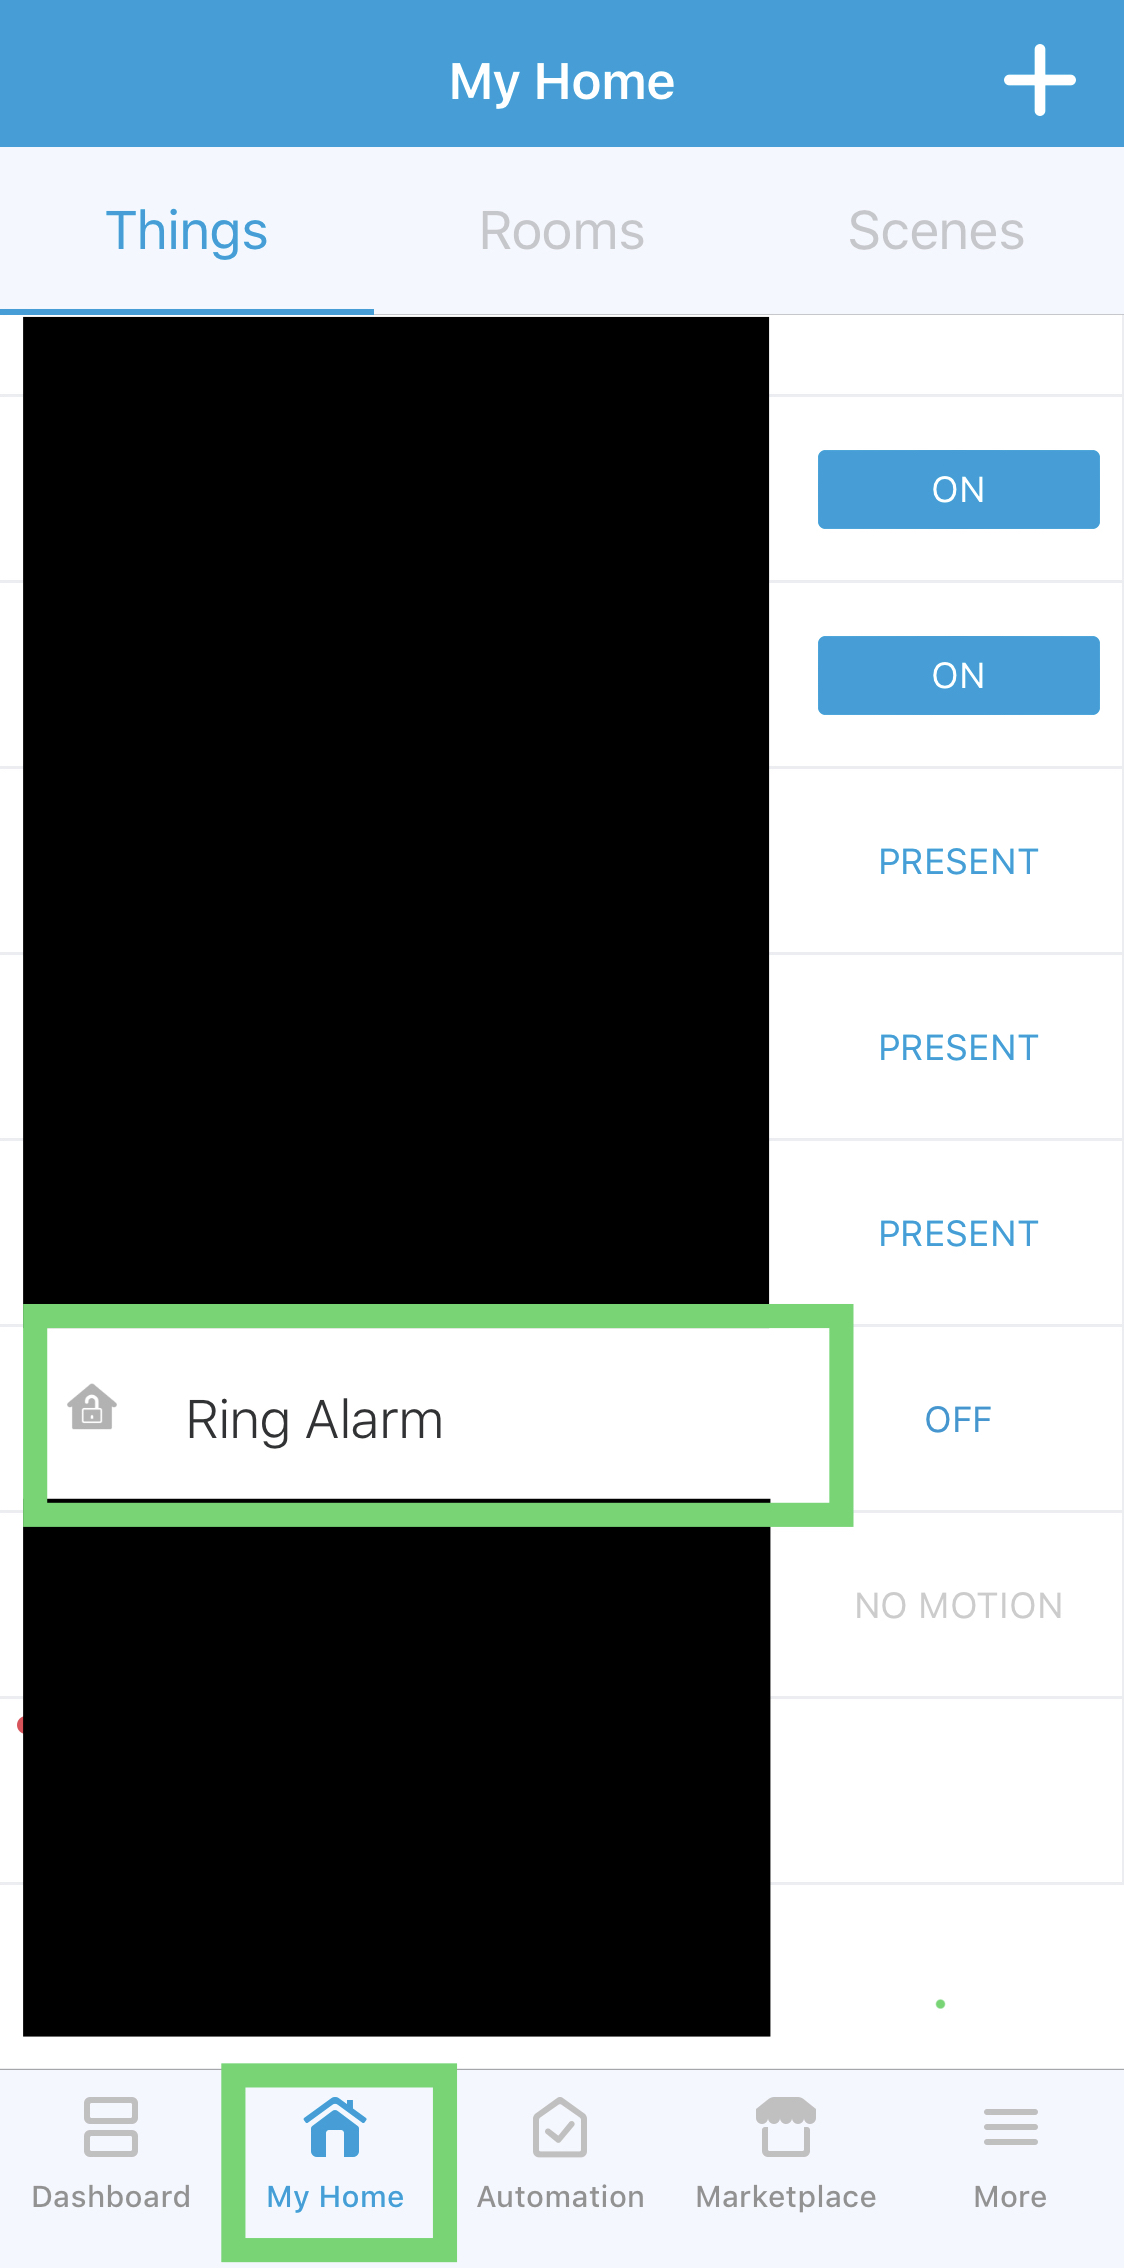
- Open your SmartThings app and go to My Home
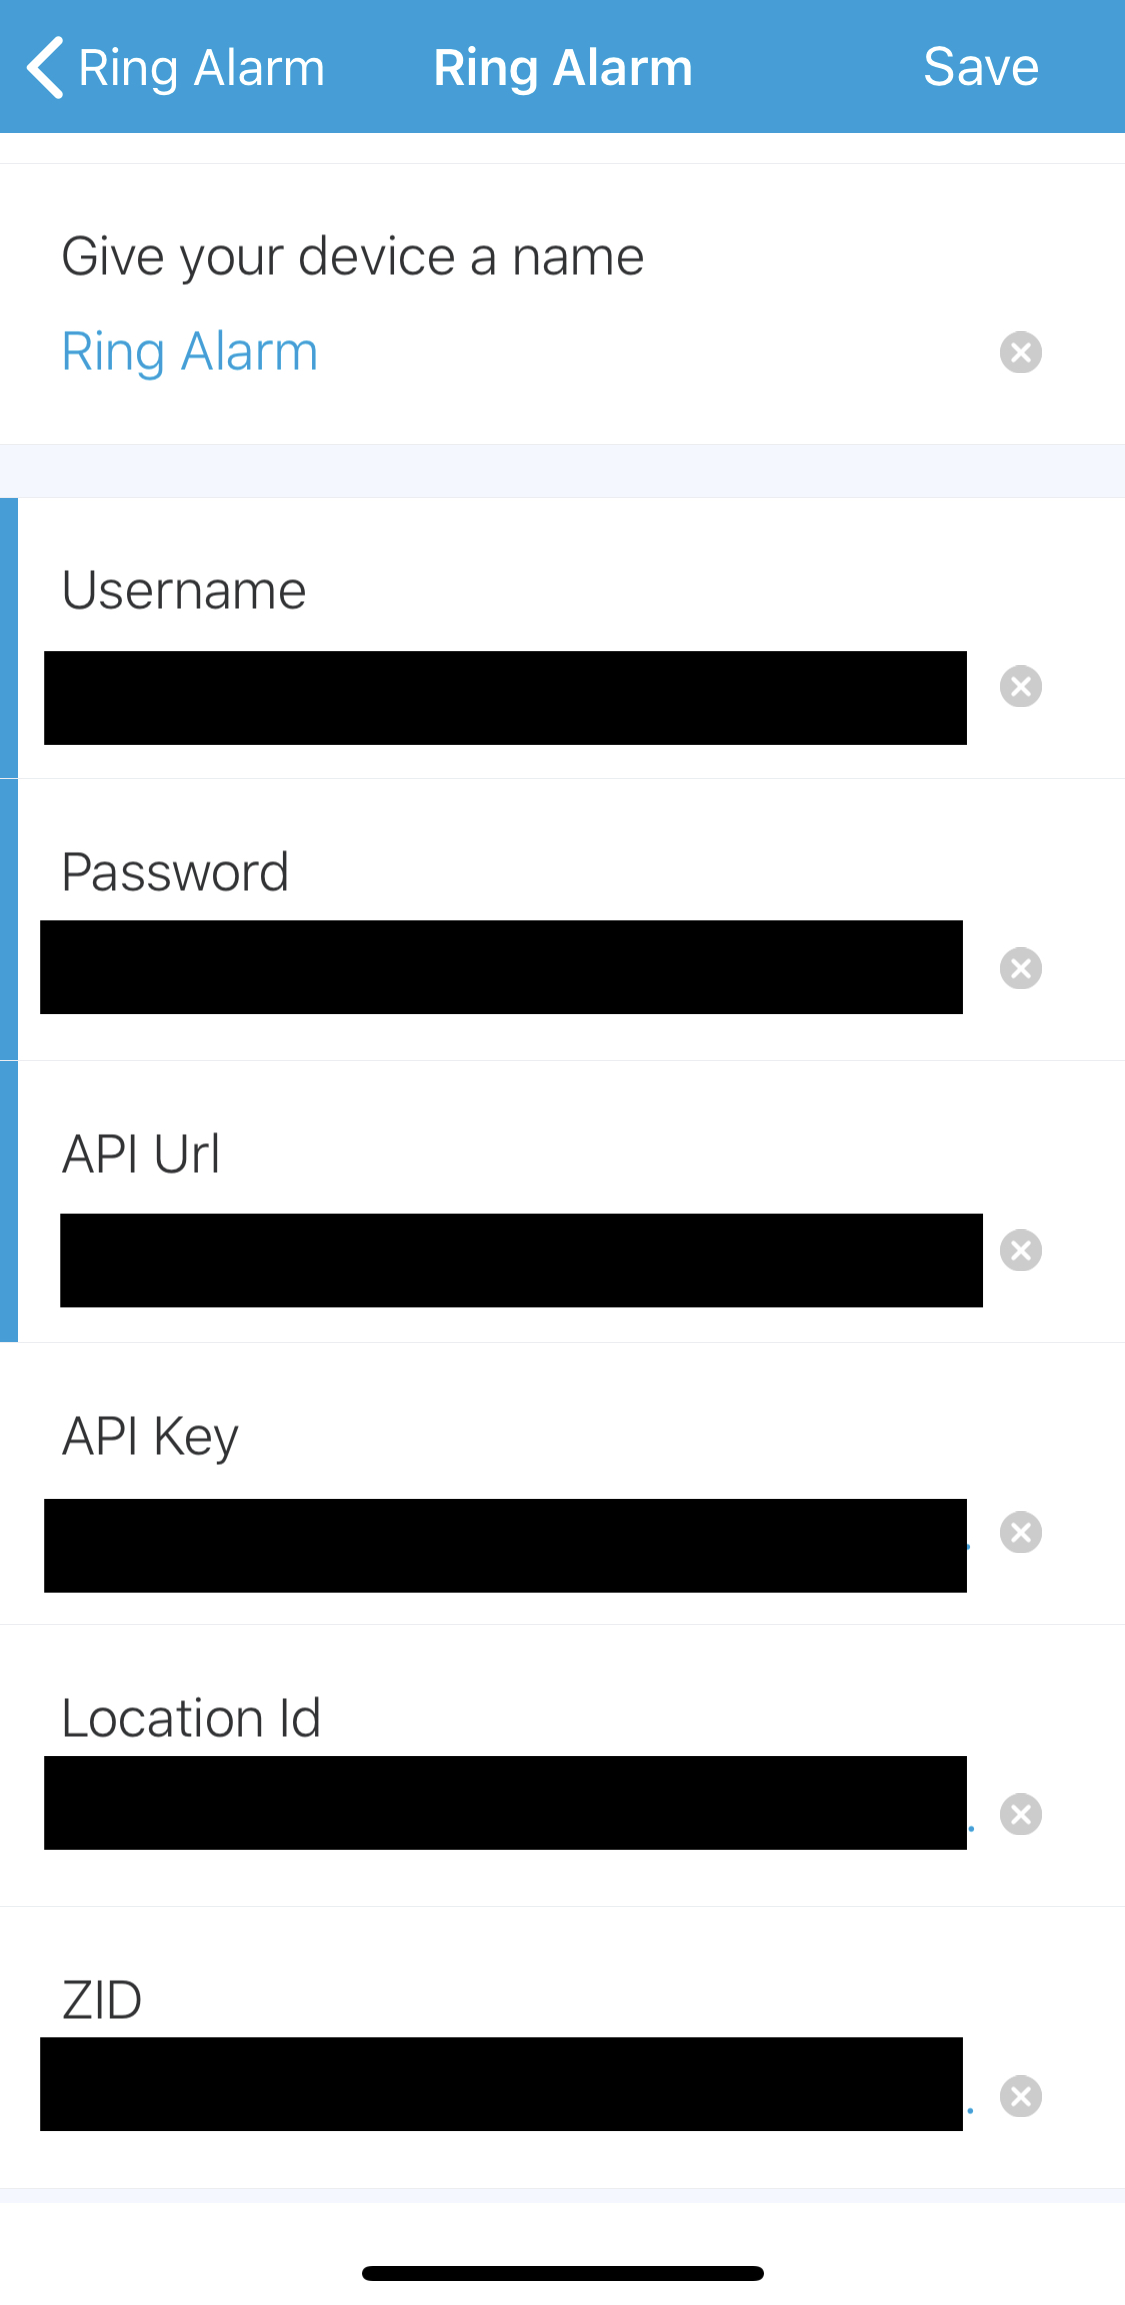
- Tap on the Ring Alarm and then tap on the settings (gear icon).
- Add below
- Ring User Name
- Ring Password
- API Url - Invoke URL from Lambda setup
- API Key - API key from Lambda setup
- Location Id - Location Id value found in browser Network panel.
- ZID - ZID value found in browser Network panel.
| My Home | Ring Alarm Settings |
|---|---|
 |
 |
SmartThings - Ring Alarm is released under the MIT License.
