
By Eliana Lopez
This project contains the full documentation and start to end process of modifying and RC car with a Raspberry Pi Model B+.
click to expand
- HyperChargers Remote Controlled Car
- Raspberry Pi 3 Model B+
- Raspberry Pi Camera V2.1
- L298N Motor Drive Controller Board Module
- Mophie USB Power Bank, 10,500mAh
- Female/Female Jumper Wires
- Male/Female Jumper Wires
This is the hardware setup of the Raspberry Pi RC car within the diagram below. If unable to see it for any reason you can view the diagram here!

Once you are finished setting up, I have added a folder named TESTING that has a Python file called motorControl.py. This file is created to see if your motors are connected correctly or referenced to the Raspberry Pi.
If you need any more information regarding Raspberry Pi GPIO pins this website contains more information.
Overall the layout of the code within your Raspberry Pi should look like this:

The files camera_pi.py and appCam.py are created by Miguel Grinberg.
- camera_pi.py is the direcotry camWebServer
- camApp.py is the webserver application
web.py is the file that utilizes the webserver and integers the Raspberry Pi GPIOs that are being used, along with our camera.
This is a simple example of a "Hello, World!" program in Flask
from flask import Flask
app = Flask(__name__)

@app.route("/")
    def hello():
        return "Hello, World!"

if __name__ == "__main__":
app.run()The folders static and templates are the HTML and CSS of our web application. It just helps design and format our Web User Interface when controlling the modified RC Car in Raspberry Pi
Turn on the Raspberry Pi via normally or SSH network (for a truly wireless experience)
For SSH network I use VNC viewer and put the IP address of the Raspberry Pi in order to conect to with with my laptop.
I have left these resources down below if needed:
Raspberry Pi Terminal input:
sudo python3 web.py
Got to http://0.0.0.0:5000/ in your browser to enter the motor controller user interface
This is the end result of the modified car.

Here are some short thoughts I have learned from this project:
- The integeration of various programming languages
- Learned more about the technicalities of the Raspberry Pi
- Learned more about pratical design of the car itself such as adding velcro straps to contain the out-covering and a bumper to protect the Raspberry Pi
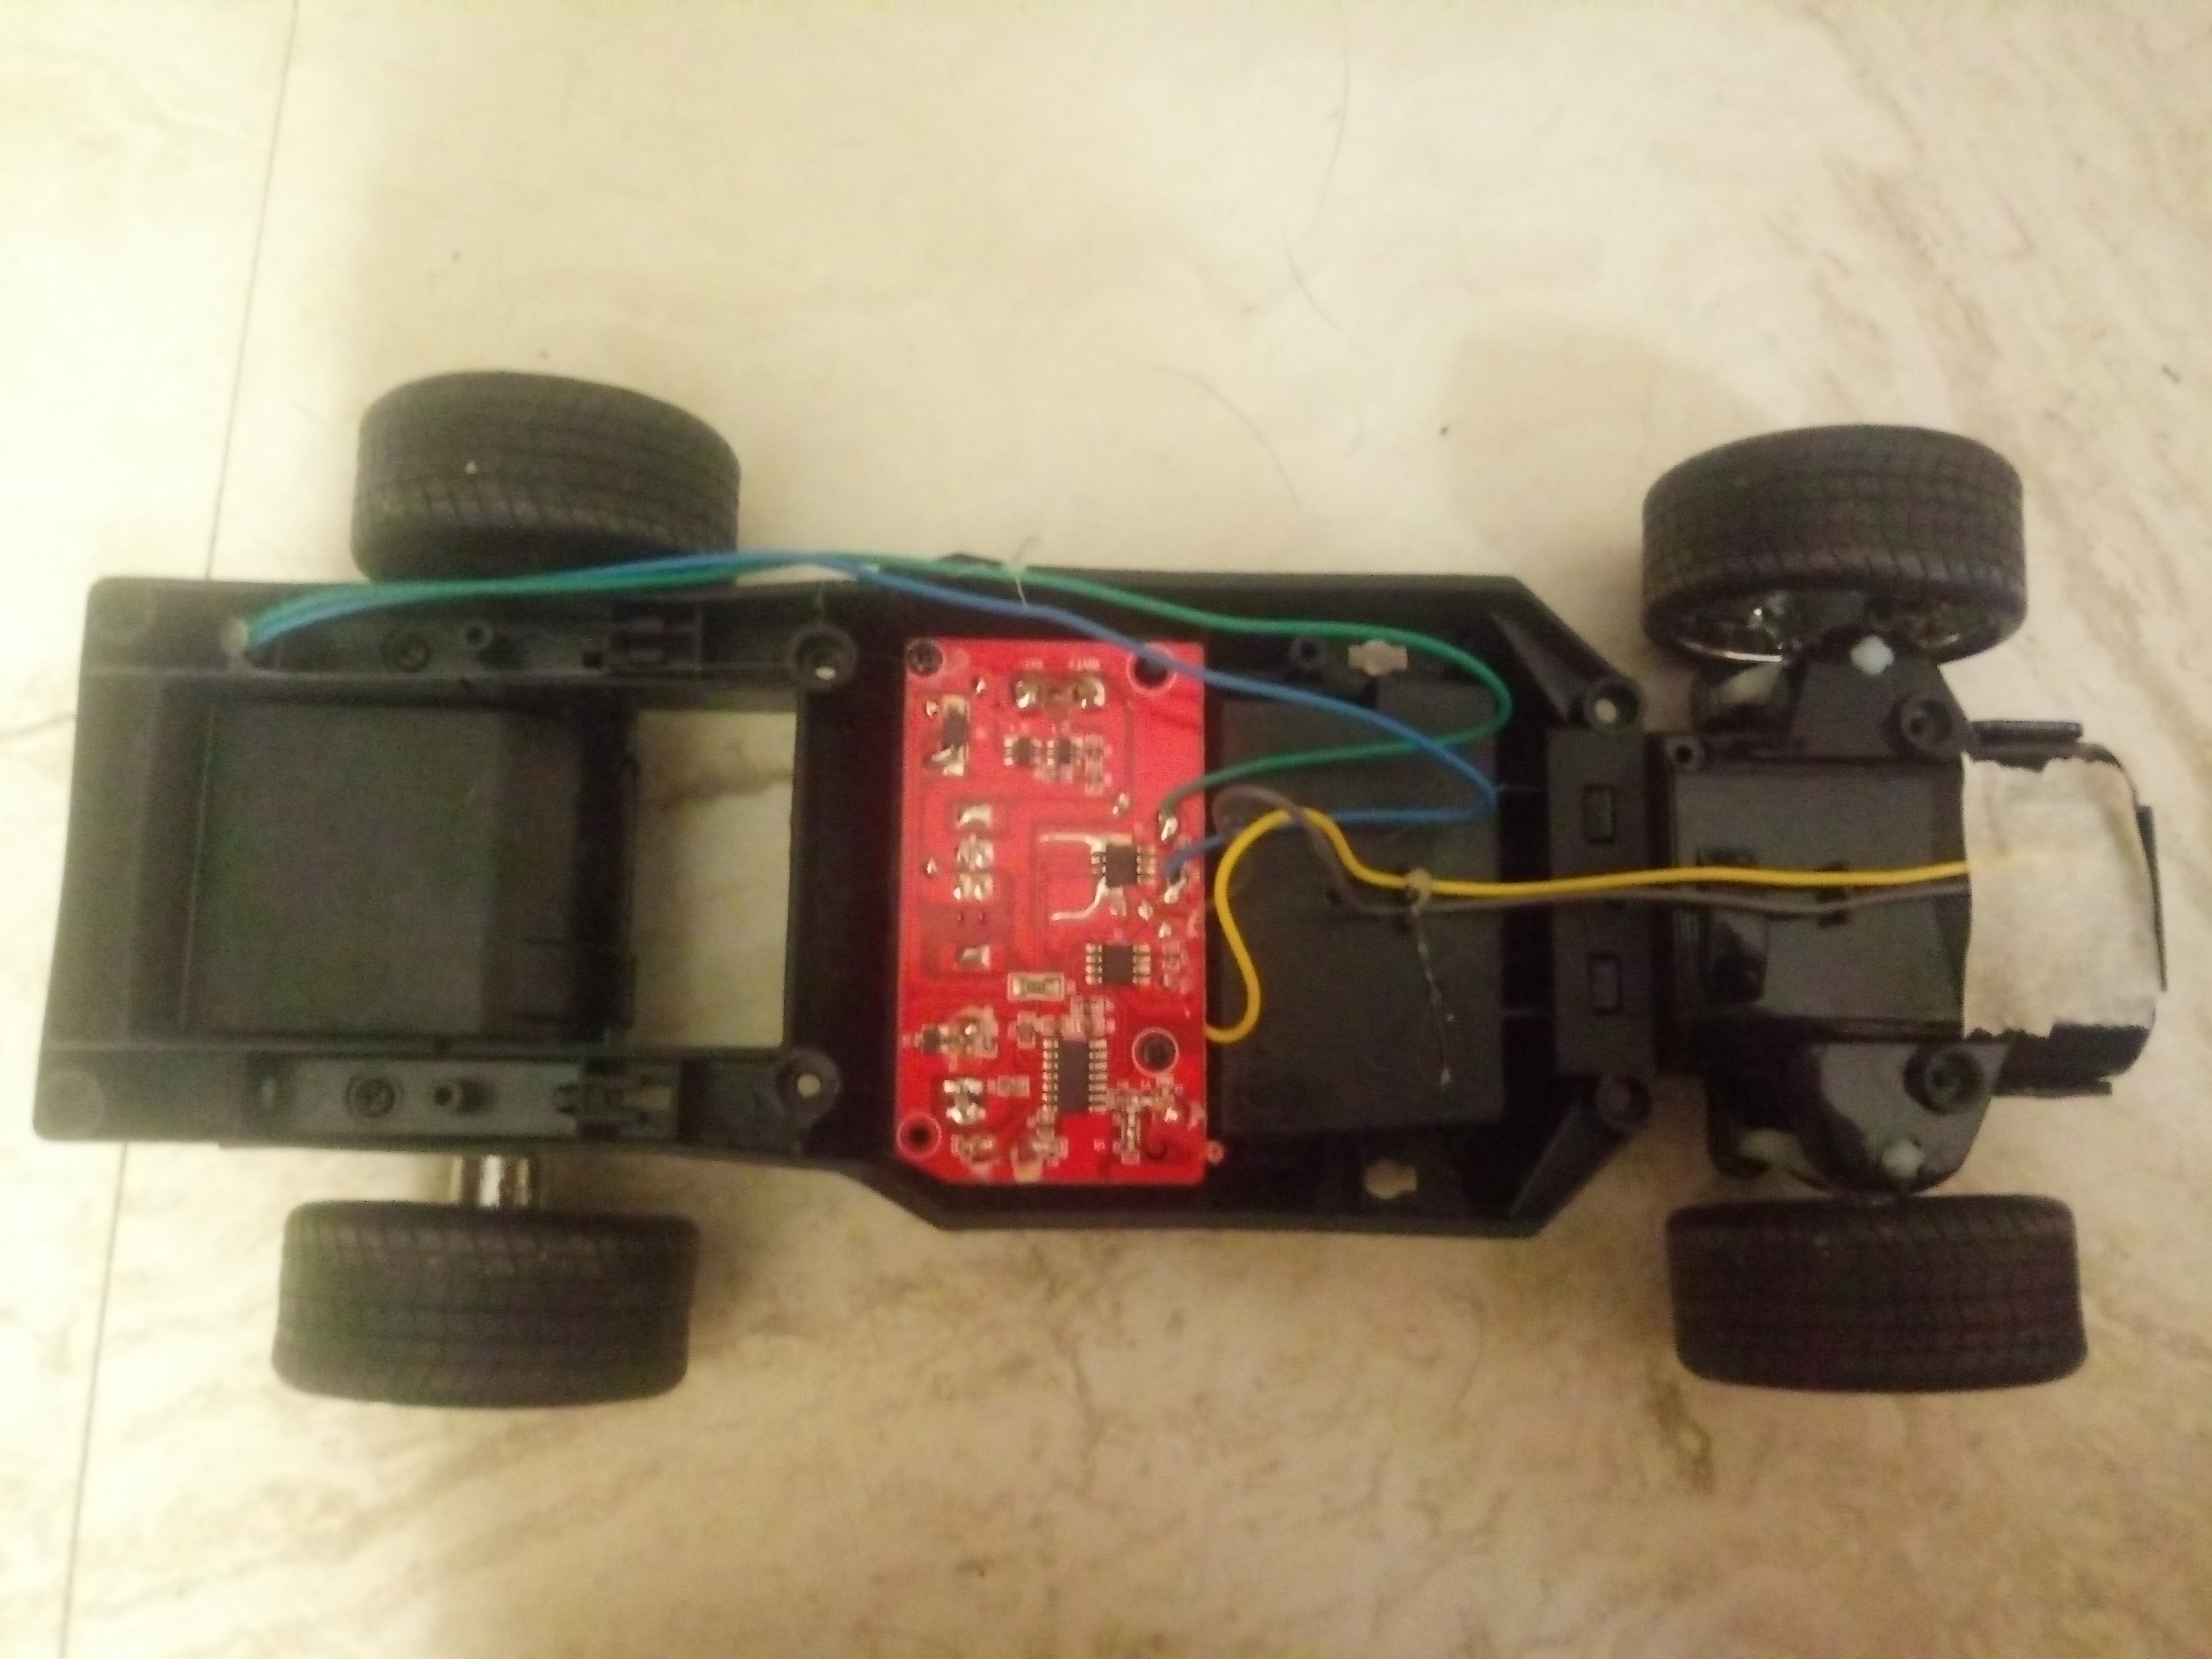
How it started
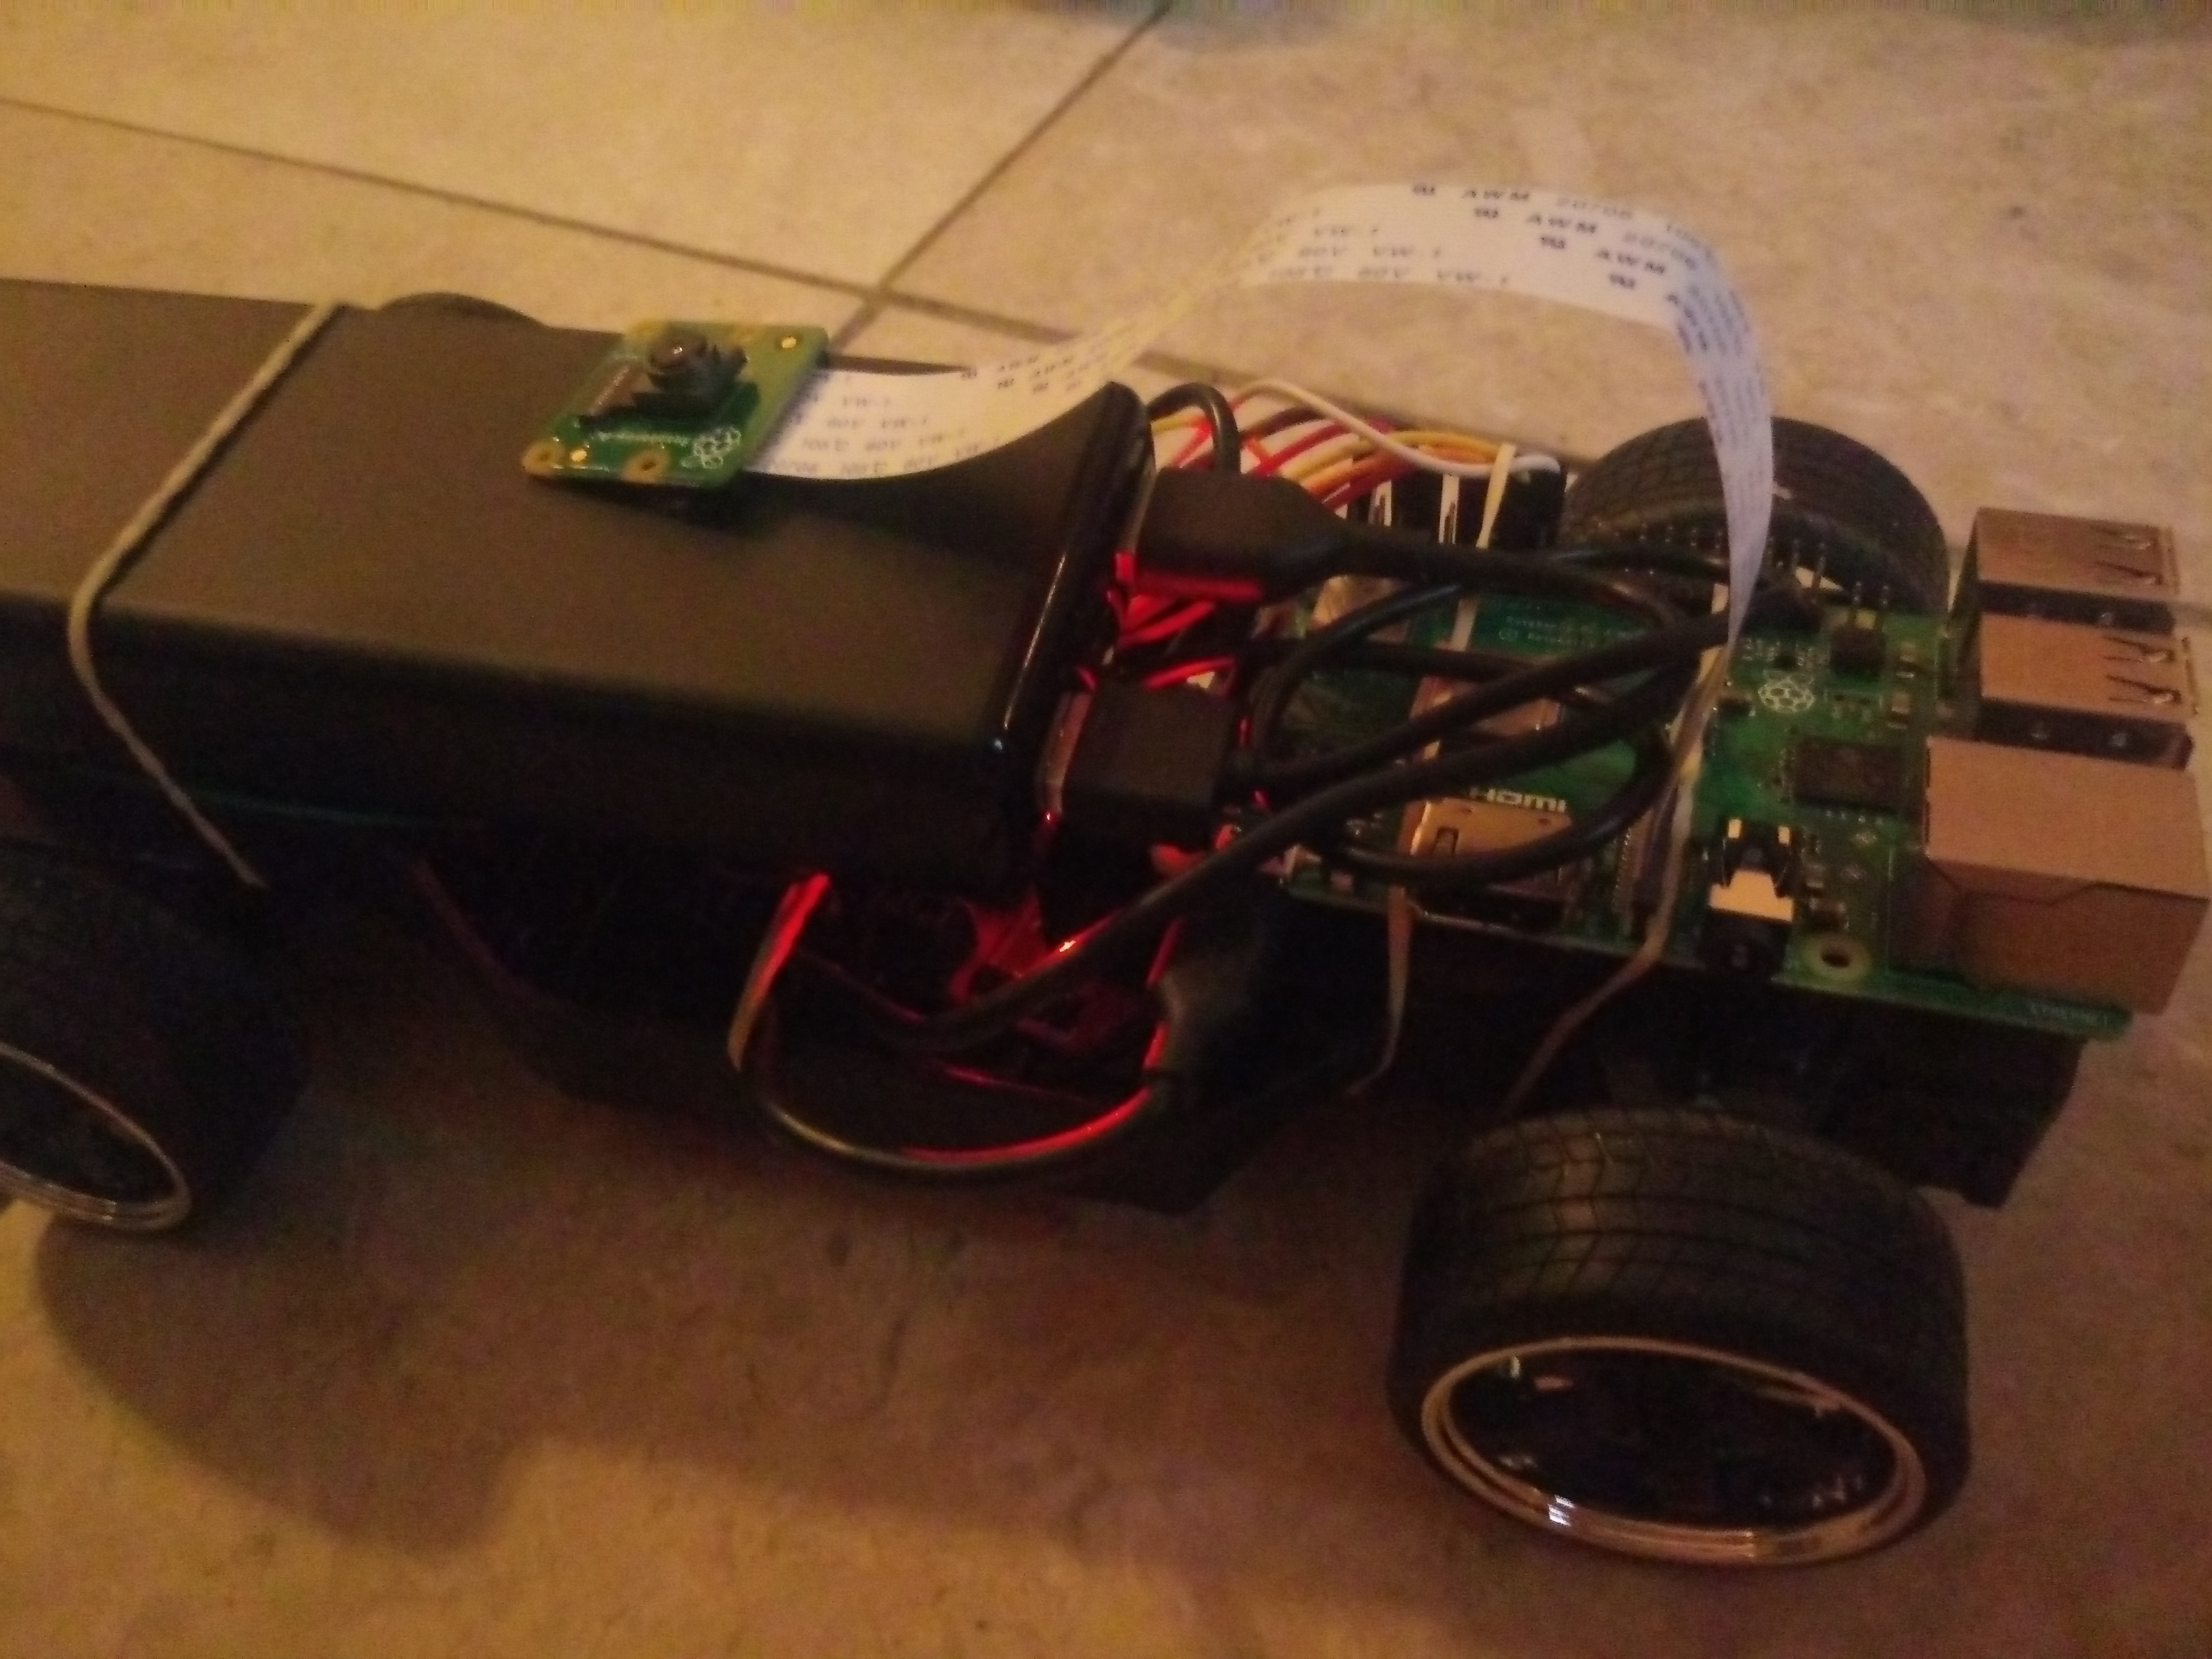
How it's going
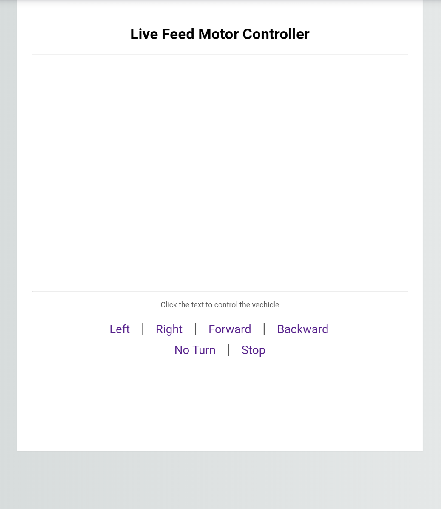
Web User Interface Part I
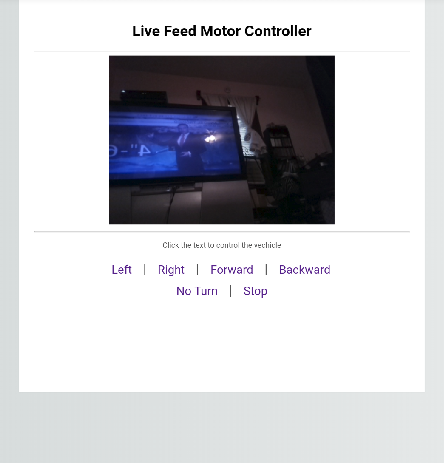
Web User Interface Part II - final product