The Wayfarers project contains an application called Hike Booker which is a website that gives details on guided hikes in the Banff National Park area.
General users can view details on the hikes such as difficulty, distance and estimated duration as well as a description of the route. Users can also register with the website and sign in - allowing them to then comment on hike routes, 'like' hikes and manage their bookings for scheduled hikes.
The admin user of the site can add new hike routes, approve general user comments, schedule guided hikes, and approve/confirm bookings for scheduled hikes.

- US01: Illustrate purpose of application through UI
- As a Site User I can view the landing page so that I can determine the purpose of the application
- US02: Navigate site
- As a Site User I can navigate using the menu so that I can easily access application functionality
- US03: View hike/excursion list
- As a Site User I can view a list of hikes/excursions so that I can select one to access more details
- US04: View hike information
- As a Site User I can click on a Hike so that I can view its full details
- US05: Book a hike
- As a Site User I can book a scheduled hike so that a place is reserved for me
- US06: View booked hikes
- As a Site User I can access a list of hikes I have booked so that I can see an itinerary of hikes
- US07: Cancel a hike booking
- As a Site User I can cancel a hike I have booked so that a place is no longer reserved for me
- US08: View likes
- As a Site User I can view the number of likes on each hike so that I can see which are most popular
- US09: Like / Unlike a hike
- As a Site User I can like or unlike a hike so that I can give feedback on my experience
- US10: Comment on hike
- As a Site User I can attach comments to a hike so that I can give feedback and be involved in the conversation
- US11: View comments
- As a Site User I can view comments on individual hikes so that feedback can be recorded to help identify any improvements needed or any aspects that worked well
- US12: Approve comments
- As a Site Admin I can review and then approve or disapprove comments so that unsuitable or objectionable content can be filtered out
- US13: Account registration and login
- As a Site User I can register an account so that I can log in and then book a hike, comment on hikes, like hikes
- US14: Manage hikes
- As a Site Admin I can create, read, update and delete hikes and associated hike schedules so that I can manage site content and hike availability
- US15: Create hike drafts
- As a Site Admin I can create draft hikes so that I can finish writing the content later and release once approved
- US16 Approve Bookings
- As a Site Admin I can review and then approve or disapprove bookings so that group size for hikes can be managed
- US17 View past hikes
- As a Site User I can access a list of hikes in that past that I booked so that I can see hikes I have previously done
-
F01 Navigation Bar
The navigation bar has a consistent look and placement each page supporting easy and intuitive navigation. It includes a Logo, and a link to the Home page. If the user is not signed in then links are available to the Register and Sign in pages. If a user is signed in then the links available, in addition to the Home link, are for My Bookings and Sign out; and the active username and a user icon are also displayed.
If the user signed in is the admin user then an additional link of Admin is also shown on the navigation bar. This link takes the user to the Django Admin screens where data in the underlying database can be added, retrieved, modified and deleted.
The navigation bar is responsive on multiple screen sizes - on smaller screens it coverts to a 'burger' menu style.


-
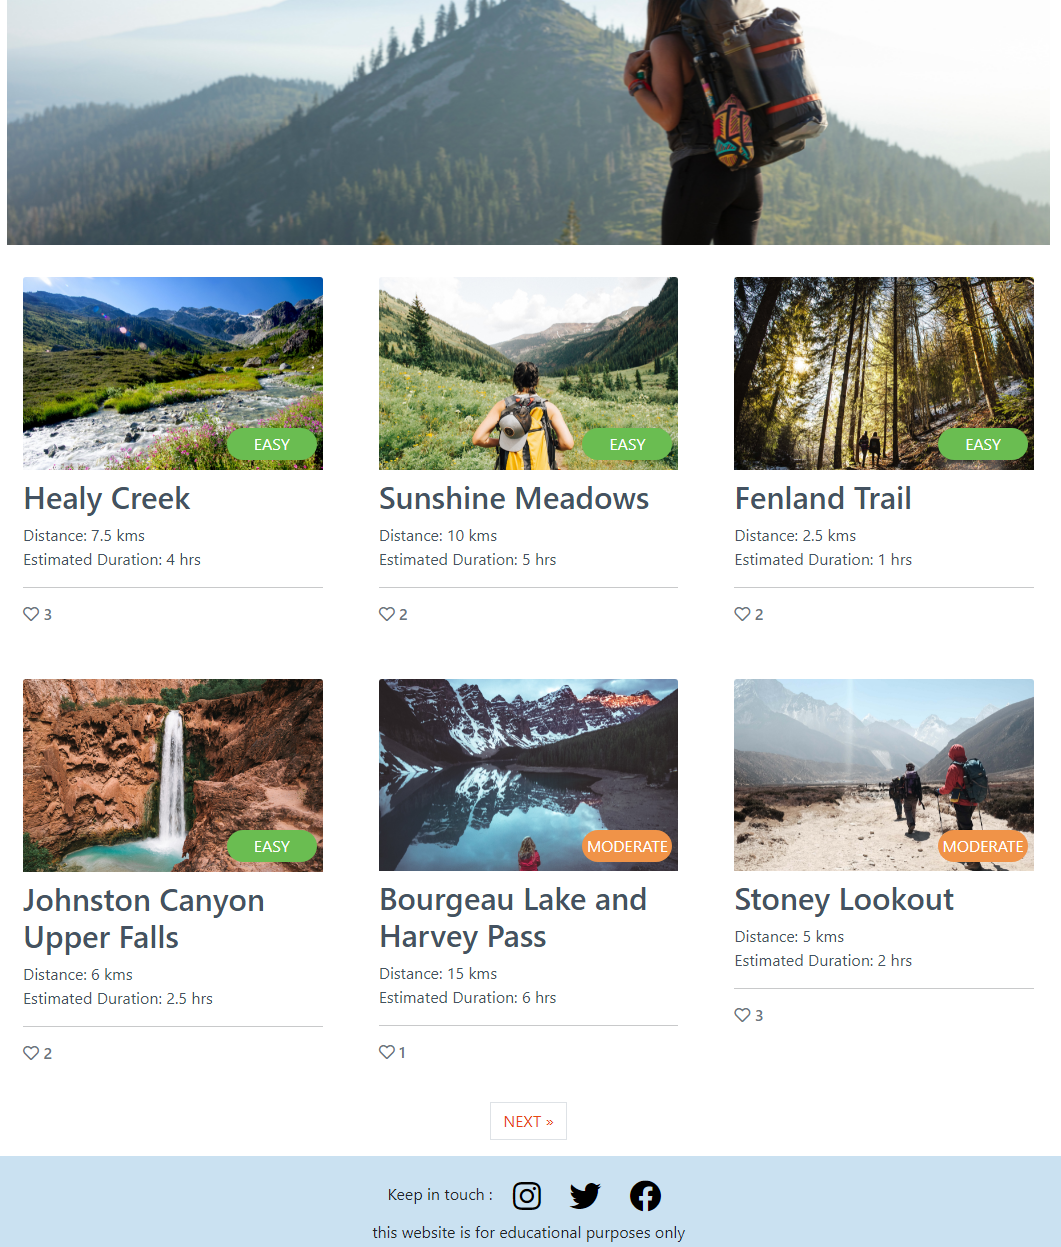
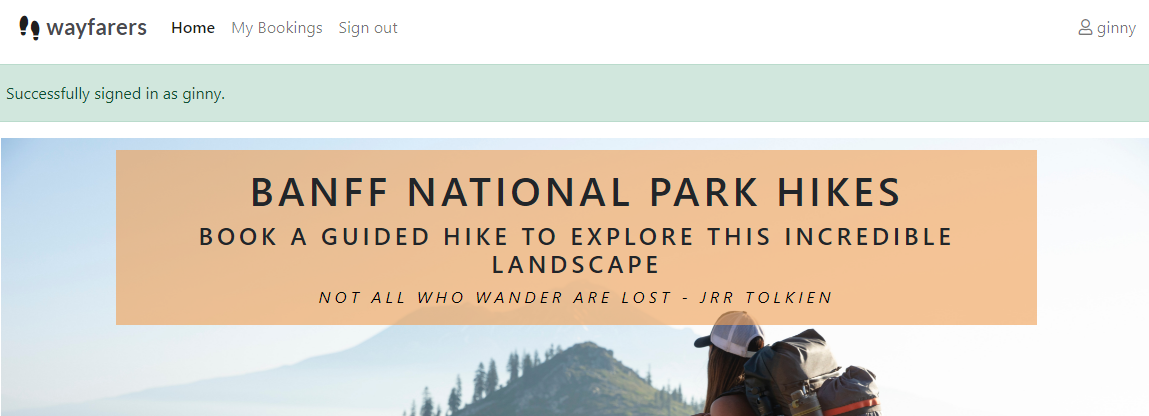
F02 Landing page image and text
At the top of the landing page (home page) there is an area that includes a photograph and a text overlay which together clearly identify the purpose of the site as a place to find and book guided hikes in Banff.

-
F03 Hike Summaries
Further down on the landing/home page a list of hike summaries is shown. Each summary gives an image of the hike, a title, details on distance and estimated duration, number of likes and easy to read label on the hike image rating the difficulty of the route - easy/moderate/hard. At a glance the user can decide quickly if this is a hike that might appeal to them. To keep the page uncluttered, summaries are limited to a maximum of 6 per page, with pagination available when more than 6 hike routes exist.
-
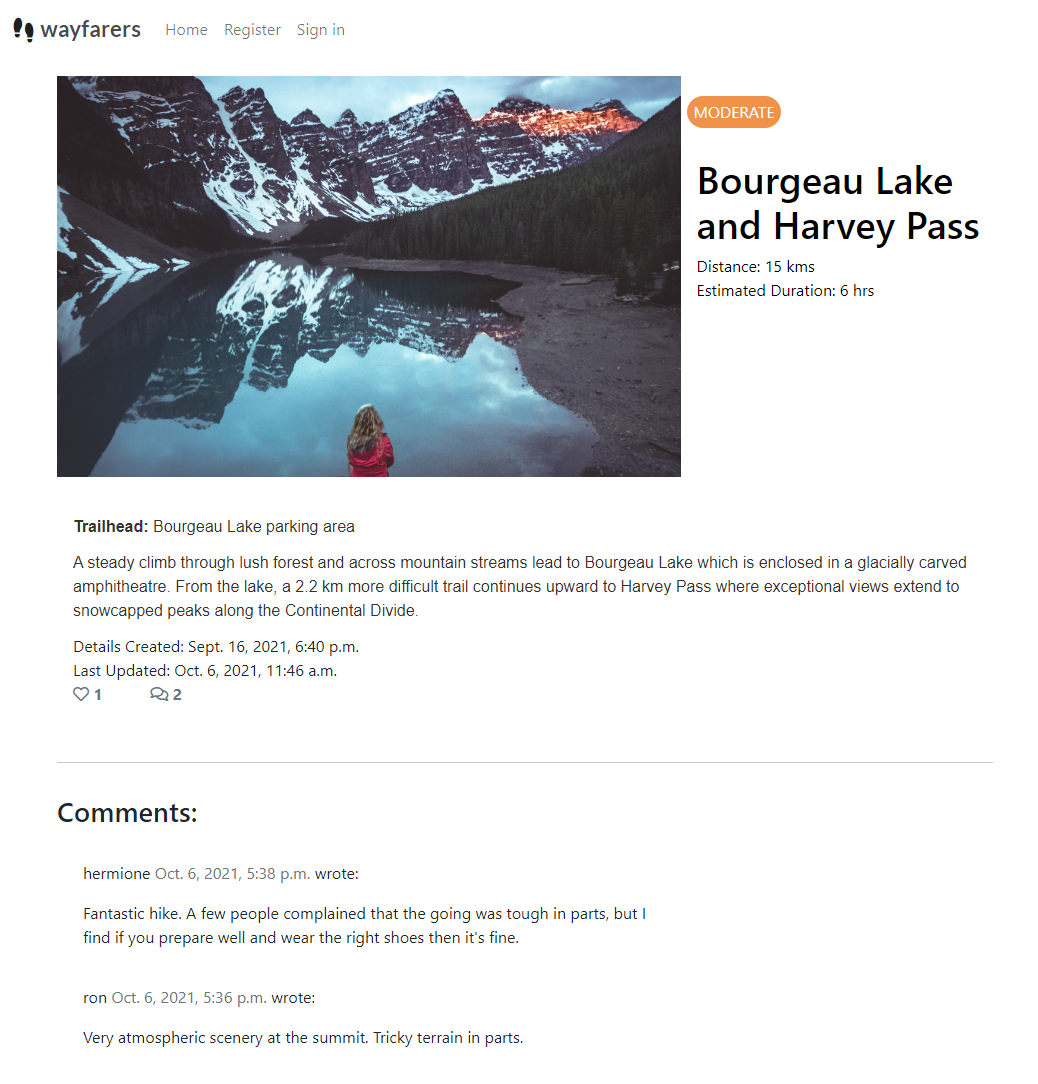
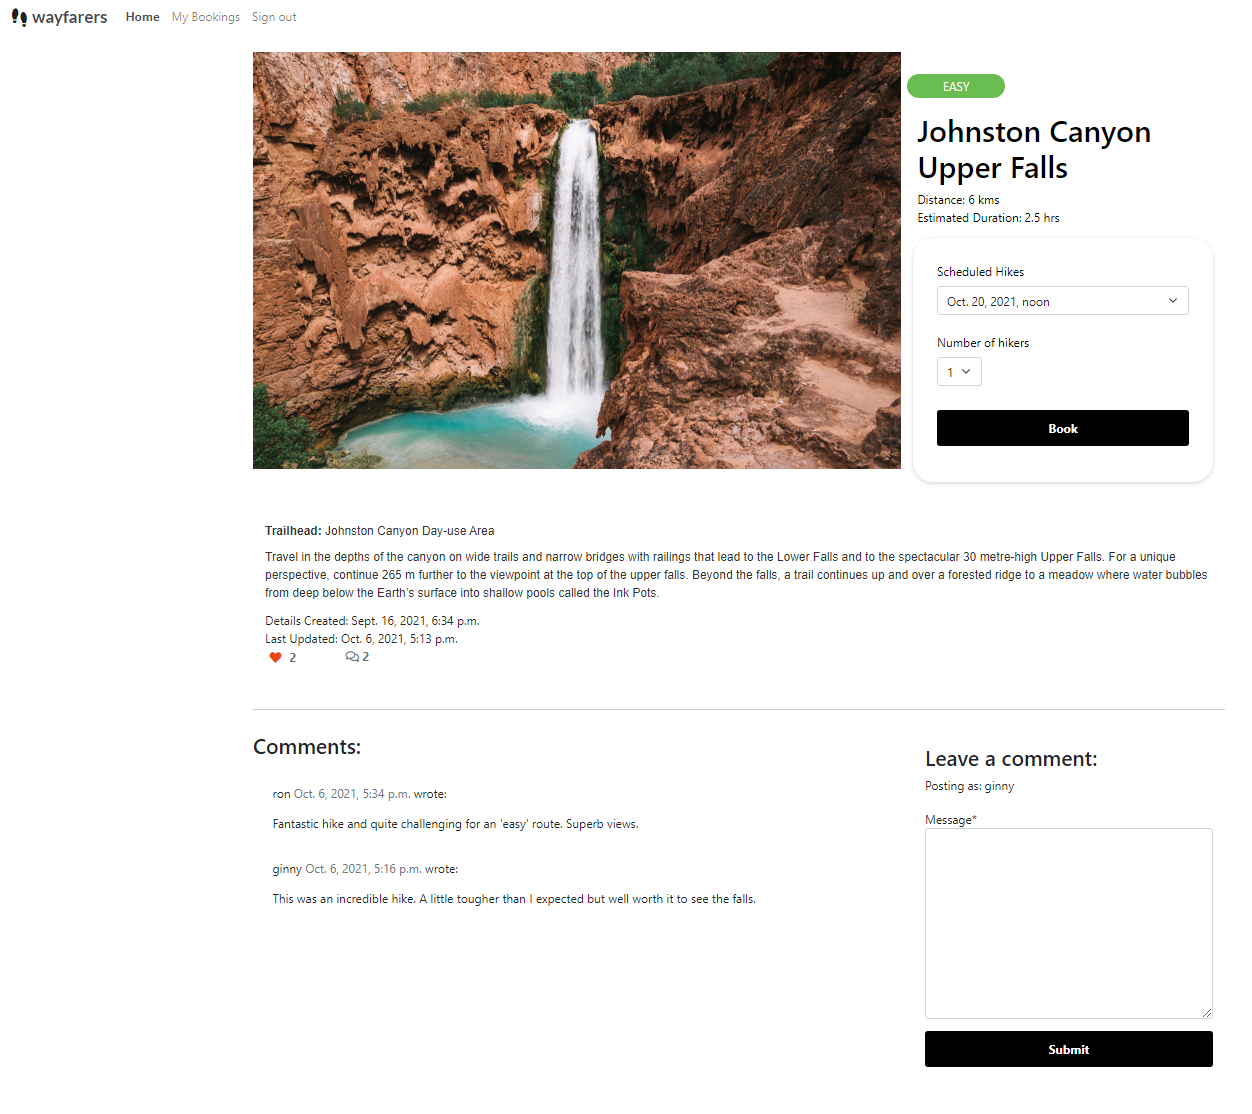
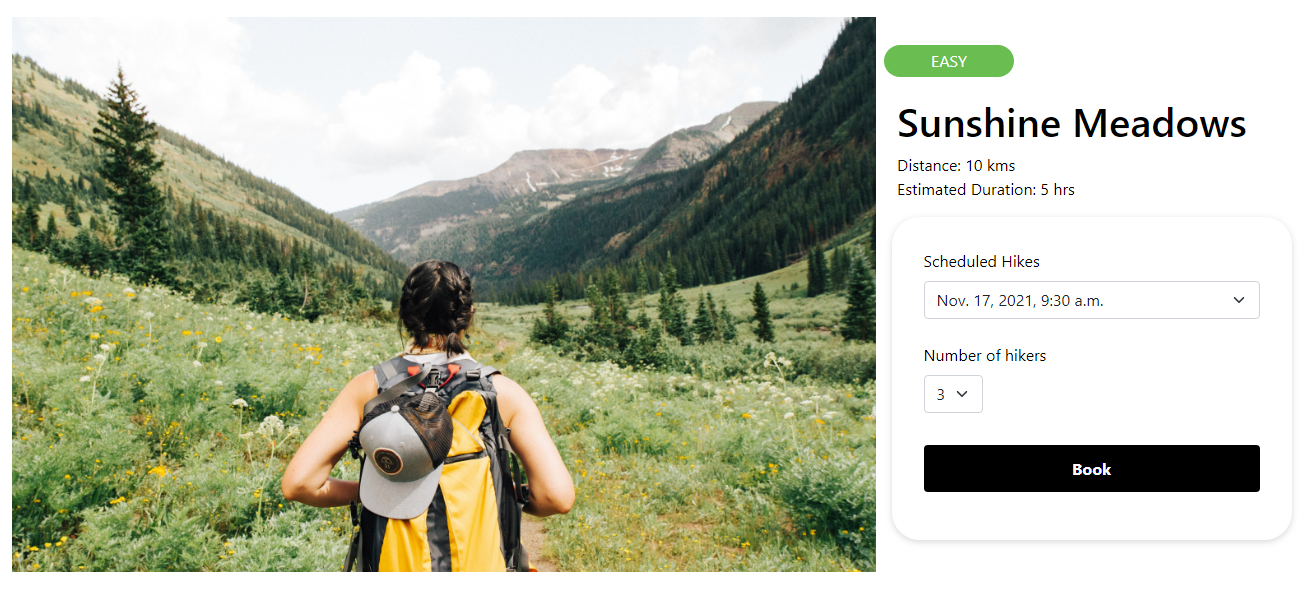
F04 Hike Detail Page
When a user clicks on a hike summary title on the home page they are brought to the Hike Detail page for the clicked hike. Here the user is shown a full description of the hike, information on when the hike details were created and last edited, the trailhead location for the hike, the difficulty rating, distance, estimated duration, number of likes, number of comments and they can read all of the comments approved for the hike which are listed in order most recent first. Only users who are signed in can comment on a hike, 'like' a hike or book a hike if any have been scheduled. Commenting on a hike is detailed below in F05 Comment on a hike. Liking a hike is detailed below in F06 Like a hike. Booking a hike is detailed below in F07 Book a hike.
-
F05 Comment on hike
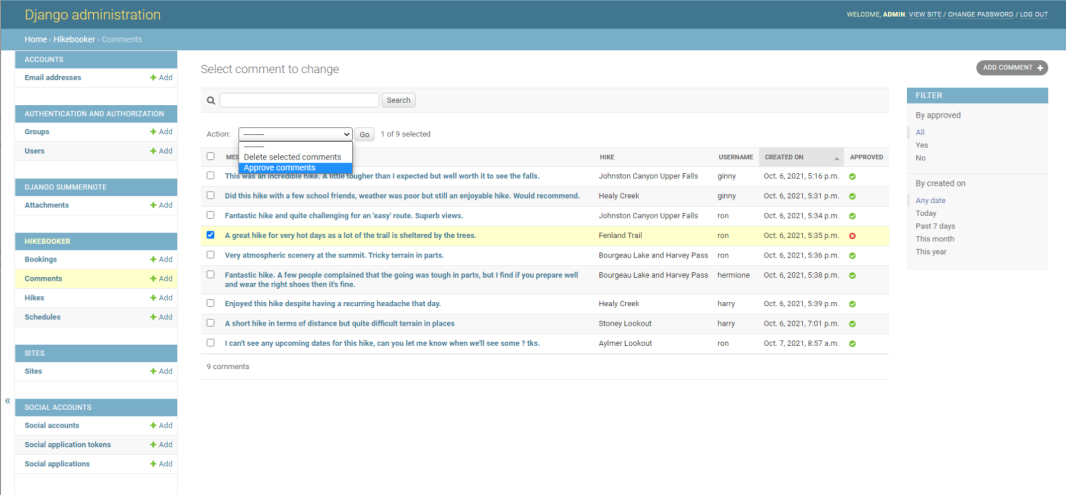
In order to comment on a hike a user must be signed in. A comment can be added on any Hike Detail page. The user enters their comment in a text box under the hike description and clicks on Submit. The comment must be approved by the admin user before it will be visible on the Hike Detail page.
To approve comments the admin user logs in to the admin pages, opens the Comments table, selects the comment(s) to be approved, chooses the 'Approve Comments' action from the drop-down menu and clicks 'Go'. Alternatively, they can be approved one at a time by clicking on the comment row to open it, updating the value in the approved field and saving the update.
All comments approved for a hike are shown on that hike's Hike Detail page in the order of newest first.
-
F06 Like a hike In order to like a hike a user must be signed in. A hike can be liked on its Hike Detail page. The user simply needs to click on the like/heart icon to toggle between like/unlike.

-
F07 Book a hike
In order to book a hike a user must be signed in. A hike can be booked from its Hike Detail page. The user selects a hike date/time from the drop-down list of scheduled hikes and can choose a number 1 to 5 to indicate how many people they want included on their booking. Then the user clicks on the Book button to complete the booking and get re-directed to their My Bookings page to see all of their upcoming and past bookings.
The list of scheduled hikes drop-down on the Hike Detail page will only show hikes in the future, not any with dates in the past. If no future dates/times are scheduled for a hike then the list is empty and the Book button is deactivated.
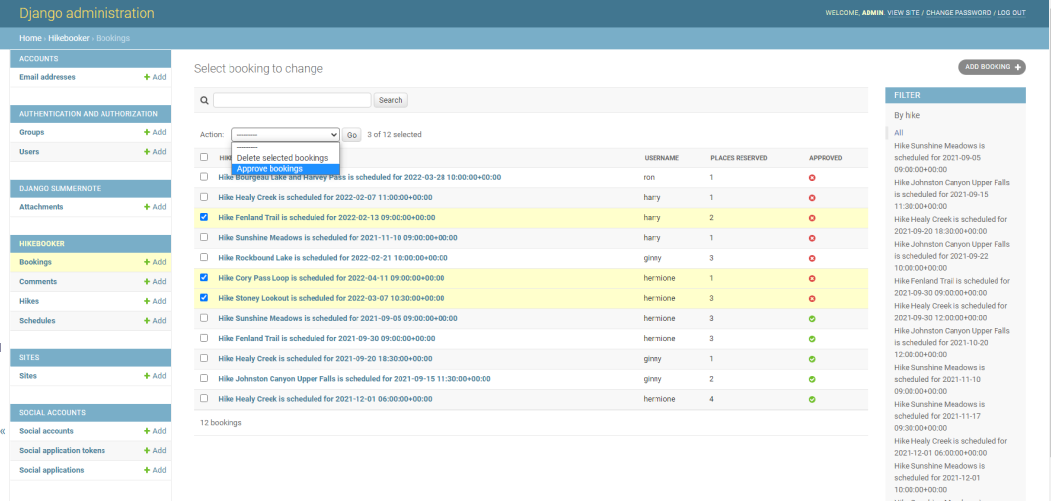
All of the users booked hikes will appear on their My Bookings page - even if not yet confirmed/approved - this allows the user to see if their booking request has been accepted or not. Bookings need to be confirmed by admin to ensure that a hike is not over booked.
To approve bookings the admin user logs in to the admin pages, opens the Bookings table, selects the booking(s) to be approved, chooses the 'Approve Bookings' action from the drop-down menu and clicks 'Go'. Alternatively, they can be approved one at a time by clicking on the booking row to open it, updating the value in the approved field and saving the update.
-
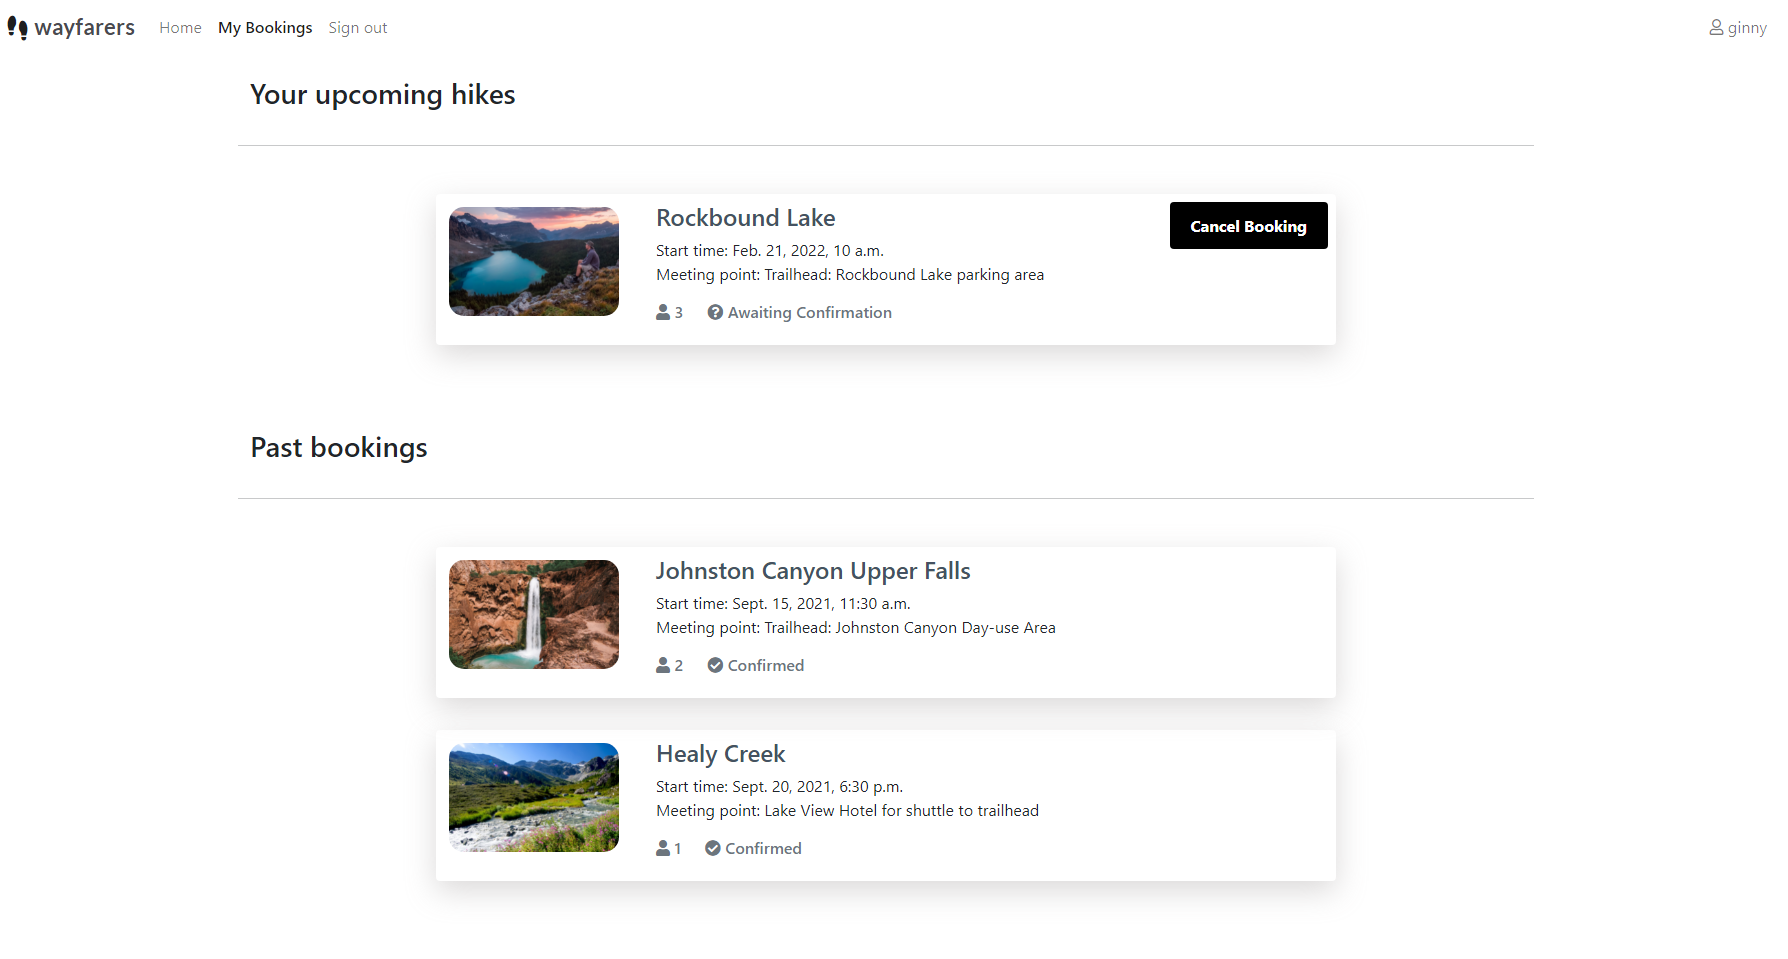
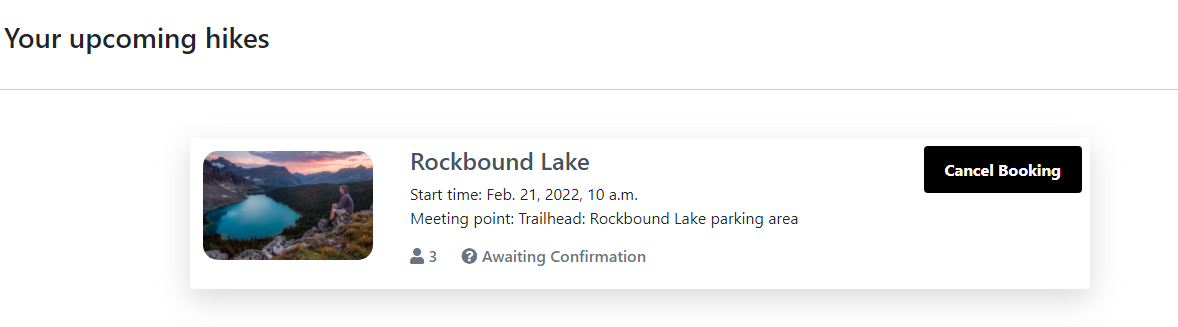
F08 My Bookings Page
In order to access the My Bookings page a user must be signed in. The My Bookings page provides a convenient place for the user to quickly view their upcoming and past bookings. Upcoming bookings can be cancelled using the Cancel Booking button associated with the booking - this will be detailed in section F09 below. By clicking on the image associated with the booking the user can go to the Hike Detail page for the hike. The booking also shows the number of people the booking is for and whether or not the booking has been confirmed/approved.
-
F09 Cancel a hike booking
To cancel a hike booking the user that booked the hike must be signed in. They can view the hike booking on the My Bookings table and cancel by clicking on the Cancel Hike button associated with the booking. The user will be prompted to confirm that they really want to cancel to prevent them accientally deleting their booking. Bookings with a scheduled date in the past cannot be cancelled.
-
F10 User authentication
The application provides the following user authentication related functions :
-
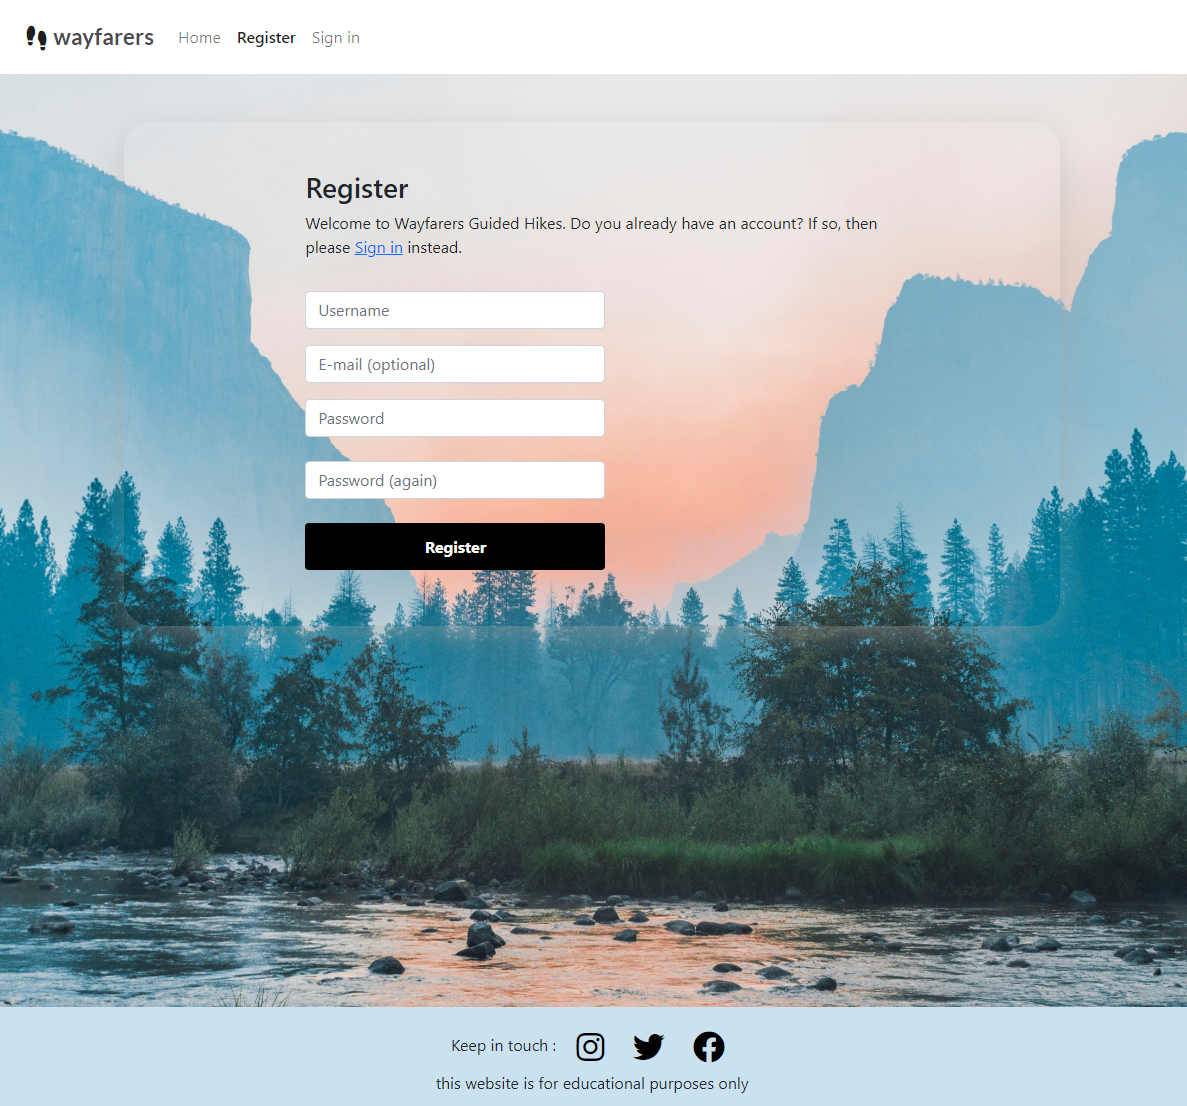
User Registration
-
A user needs to be registered before they can sign in. The option to Register appears on the navigation bar when no user is currently signed in. To Register, the user needs to provide a) a username which has not already been registered, b) an optional email address (if this is provided then it needs to be an email address that is not already registered) and c) a password which they must enter twice. Once registered a user can sign in.
-
-
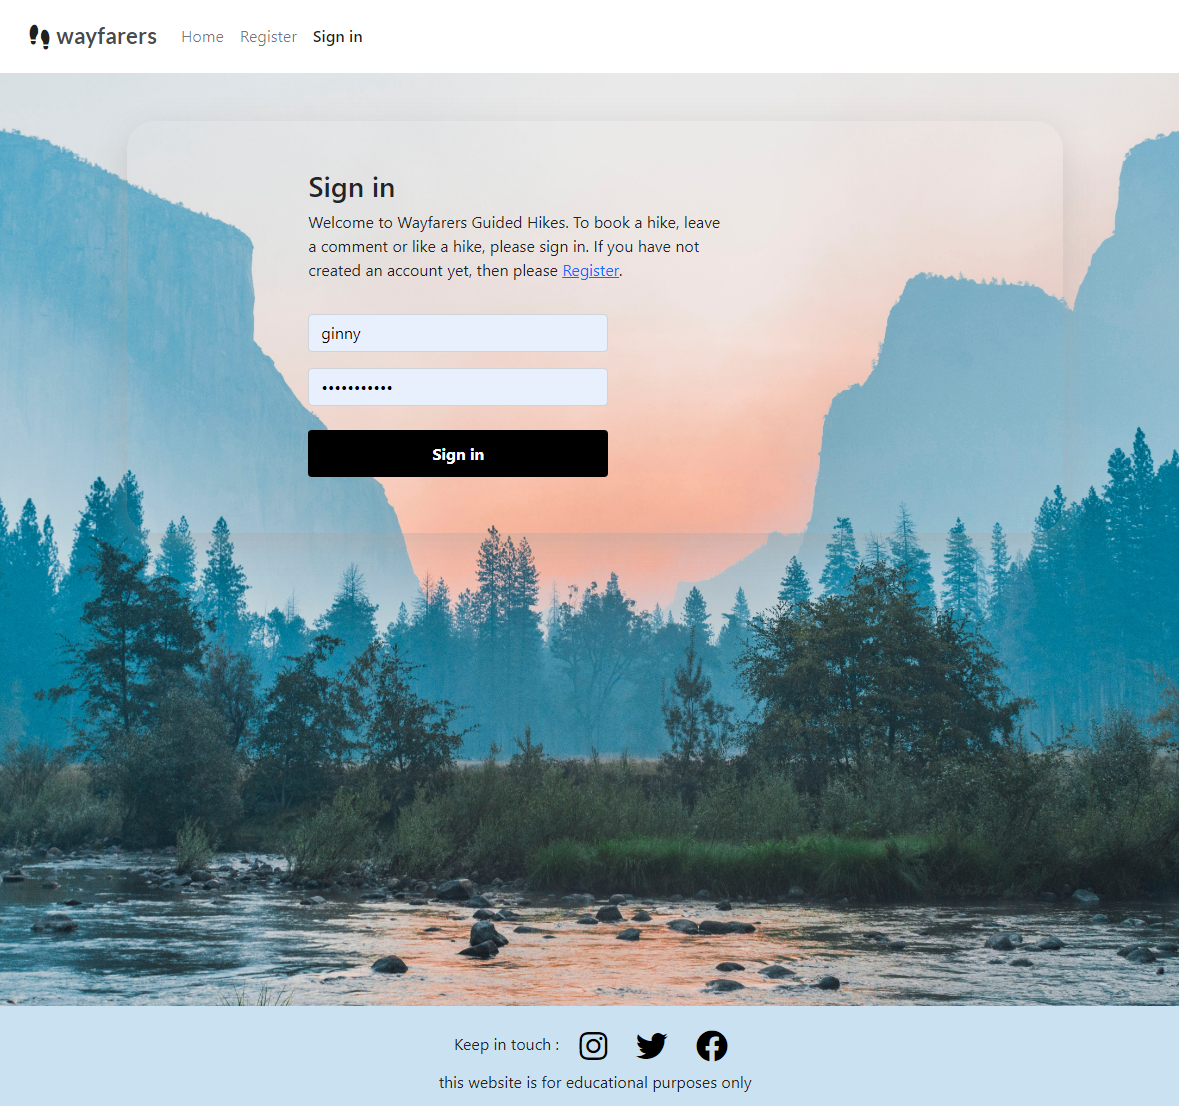
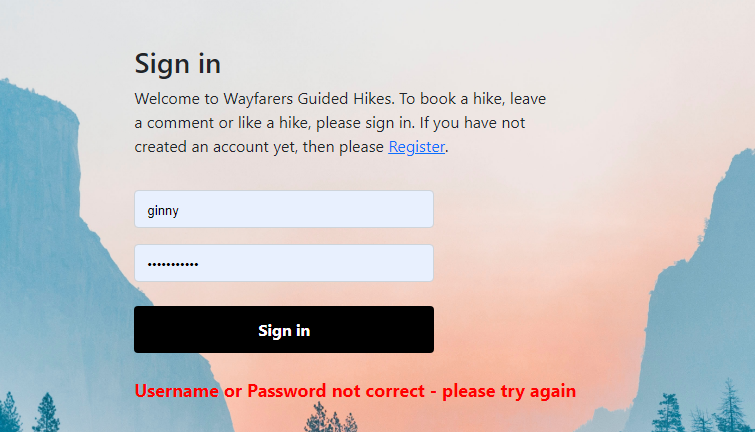
User Sign in
-
Once registered a user can sign in and will have access to extra functionality, namely :
- can comment on a hike
- can like a hike
- can book and cancel hikes
-
To sign in the user must provide a) a registered username and b) the password for the username
-
-
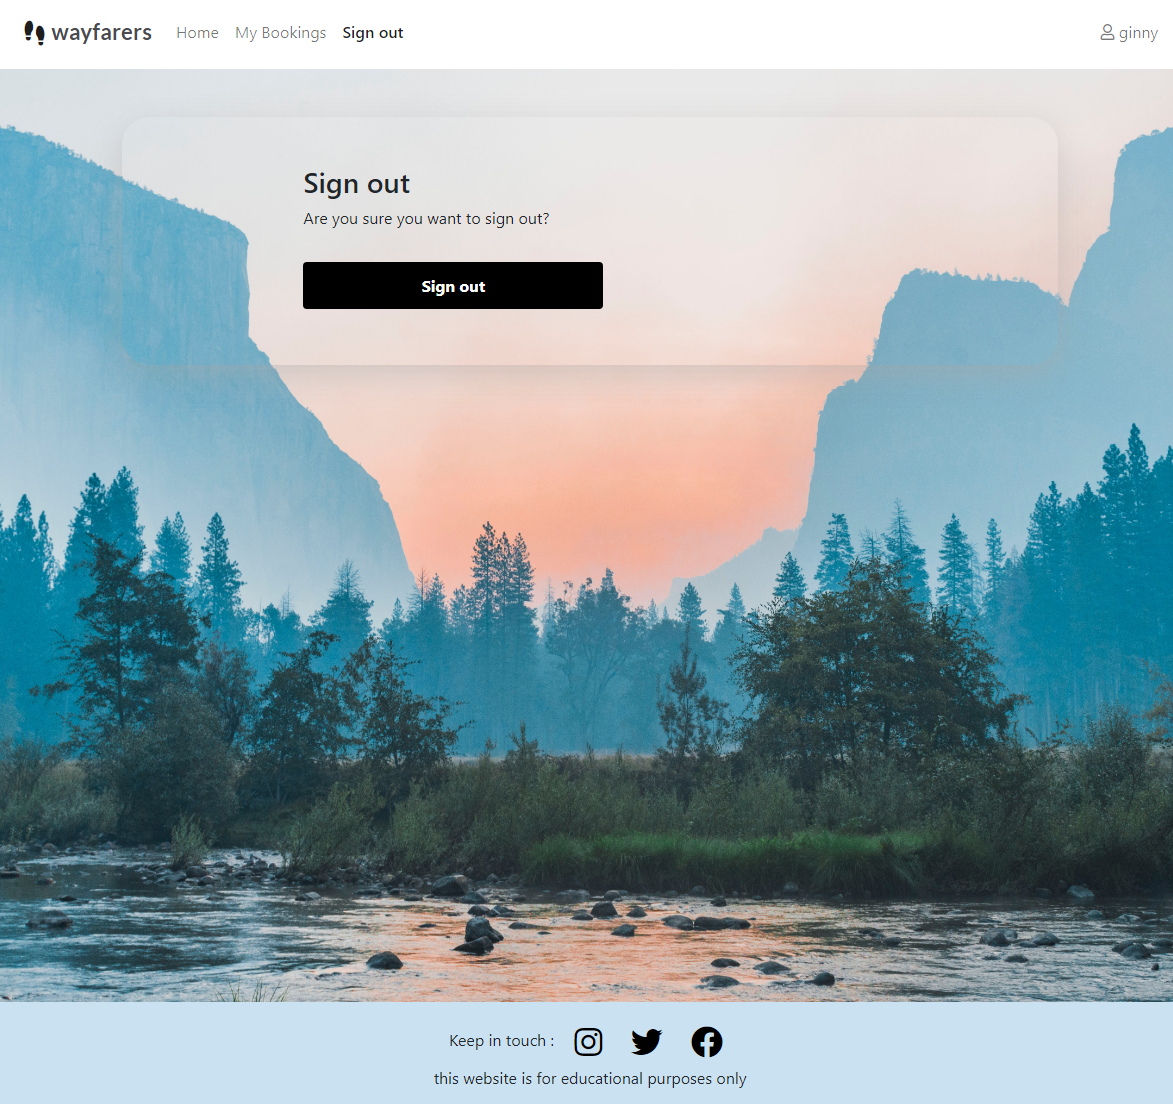
User Sign out
-
A signed in user can sign out by clicking on the Sign out link on the navigation bar. The user simply needs to confirm the action by clicking on the Sign out button on the page.
-
-
-
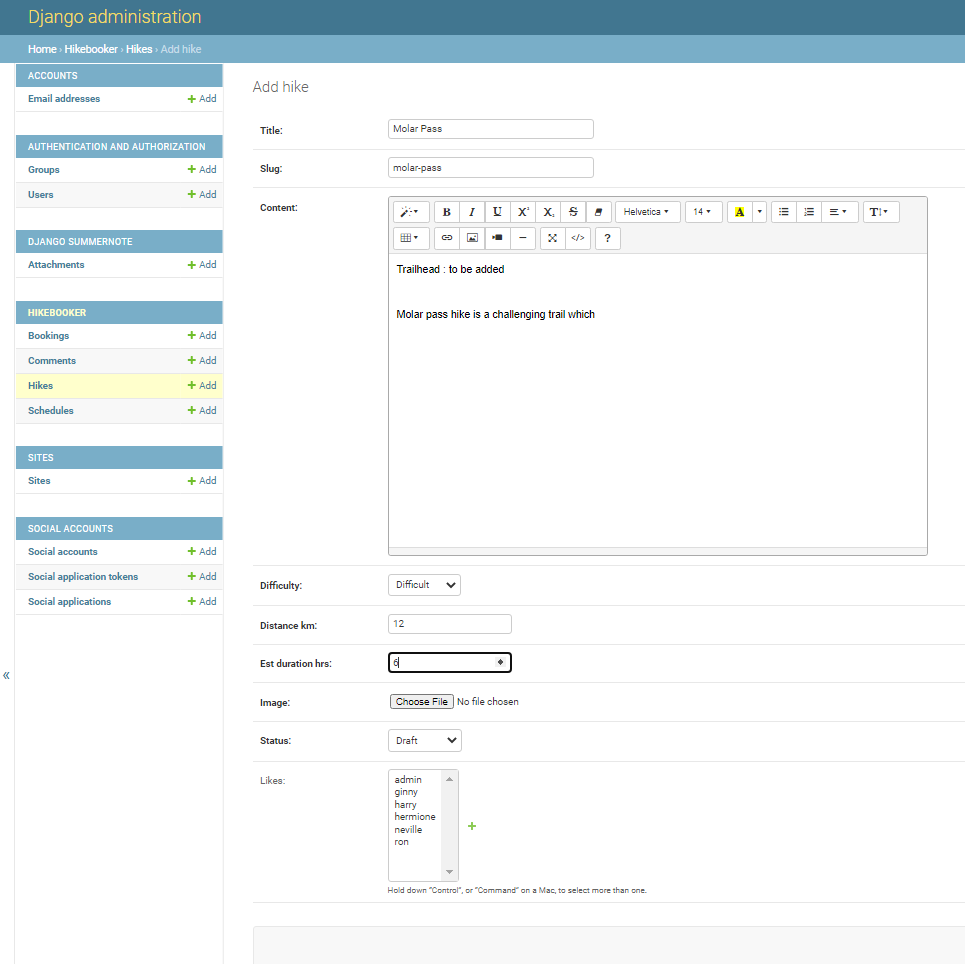
F11 Add and Publish a hike
The admin user adds and publishes hikes using the admin pages. The admin user can access these pages either by appending '/admin' to the application url or by signing in to the application and clicking on the Admin link that appears on the navigation bar only when admin is signed in.
To add a new hike, the admin user can use the "+ Add" link to the right of the Hike table name and then fill in the data fields for the hike. Hike titles must be unique and a slug will be automatically generated as the title is typed in. A rich editor (summernote) is made available for the hike description content field so that formatting can be easily added. Hike difficulty is selected from a drop-down list and the distance and duration numbers are rounded to 2 decimal places. A default image will be used for the hike if the admin user does not upload one. Hikes can be saved with a status of Draft (default) and will not be visible to general users until this status is updated to Published - this allows the admin to save a hike a WIP and finish it later.
-
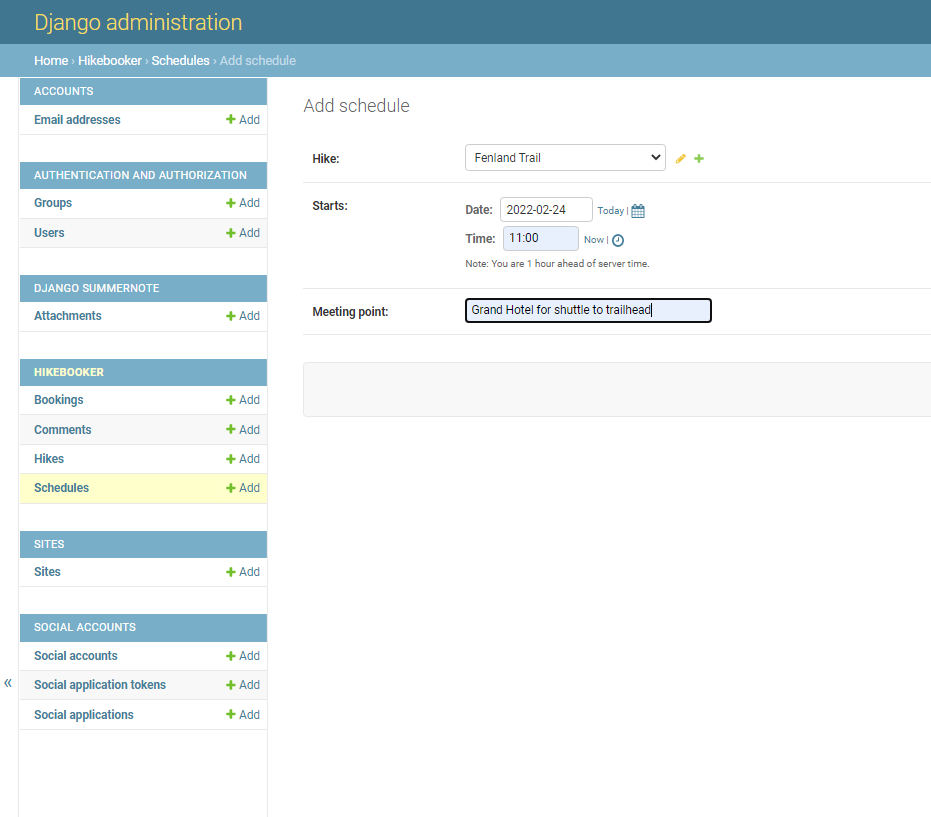
F12 Add a schedule for a hike
The admin user adds scheduled hikes using the admin pages. See F11 above on how the admin user can navigate to the admin pages.
To add a new date/time for a hike the admin user can use the "+ Add" link for the Schedule table. To fill in the data fields a hike needs to be selected from the drop-down list of existing hikes, a date and time needs to be specified and text is added specifying where the meeting point for the hike will be.
Once a new schedule for a hike is added it becomes available for booking on that hikes's Hike Detail page (as long as the date/time assigned to the hike is not in the past).
-
F13 On-screen messages
To enhance usability of the application, user messages appear on-screen to confirm when certain actions have happened or report on problems. For successful operations, a message will appear at the top of the screen and then fade-out/slide-up after 5 seconds. For problems logging in, messages will appear in red text on-screen and stay until a user attempts the operation again.
-
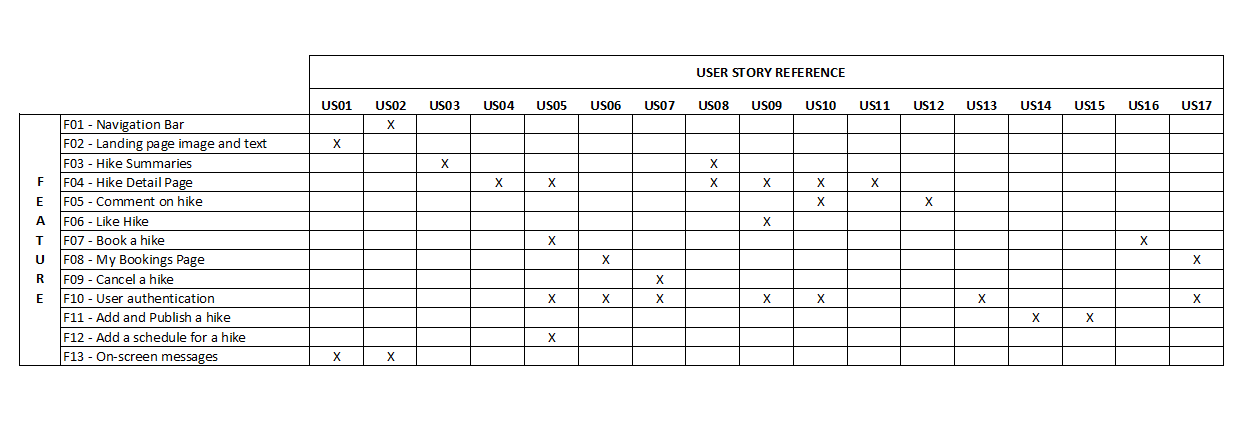
How these features support the user stories
The User Stories in the User Experience (UX) part of this document are numbered 1 to 17. The existing features are listed above as F01 to F13. Below is a traceability matrix cross-referencing the user stories with the features, illustrating which features support which stories :


-
Improve modal dialog to confirm deletion
The dialog to ask the user to confirm that they want to cancel a booking is very basic and could be improved have a format consistent with the application.
-
Improve UI with intuitive schedule calendar
Ideally the selection of booking dates and times would use a more sophisticated visual calendar with available days selectable and colour-coded.
-
Add hike capacity handling functionality
Ensuring that bookings do not exceed capacity is currently handled by requiring that the admin user confirm/approve bookings. This could be improved by including a capacity limit field in the schedule table and adding logic to calculate remaining spaces available as part of data validation on booking.
-
Improve UI with visual route maps
An external map API such as Google Maps could be added to give the user a richer and more interactive user-experience and help them visualize the hike routes.
-
Improve integration of admin pages
A link to the Admin pages from the application navigation bar was added and the favicon appears on the admin pages but the overall look and feel of the admin pages could be restyled to better integrate them with the application.
-
The wireframe diagrams below describe the Home, Hike Detail, My Bookings, Sign in, Sign out and Register pages. Wireframes are not provided for the Django Admin pages used by the application to create data records, publish hike data, approve comments and bookings.
Desktop Wireframes
Tablet Wireframes

Smartphone Wireframes
-
Notes on the ER diagrams :
-
The ER diagrams provided show the logical data model. The many-to-many relationship between hikes and their 'likes' is represented as normalized tables to clarify the relationship. In the models.py file the 'likes' data item is declared as part of the Hike class, with django handling how this relationship is represented in the physical database tables in the background.
-
The Users table in the ER diagrams is also a logical representation of the data captured during user registration and how it relates to the application data model. The Users table itself is not declared in the models.py file, but is handled by the django modules and this logical view does not reflect all columns and constraints etc. used by the physical data tables in the database.
-
The data model tables are split into two diagrams so that the relationships between the tables can be easily read.
-
A booking is a many-to-many relationship between Schedule and Users but because it also has its own data - places_reserved, it is declared in its own separate class in models.py
-
Because there could be multiple guided hikes on the same hike trail in a single day, the schedule table needs a composite primary key of the hike_id and 'starts' column. This is handled using a constraint in models.py.
ER Diagrams - Hike-Comment-Likes
ER Diagrams - Hike-Schedule-Booking
-


A GitHub Project with linked Issues was used as the Agile tool for this project. User Stories with acceptance criteria were defined using GitHub Issues and development of code for these stories was managed using a Kanban board. All of the User Stories were linked to a 'parent' Epic issue to show how they all supported the over-arching goal of the project. The acceptance criteria were tested as each story moved to 'Done' and were also included in the final pre-submission manual testing documented in the Testing section of this README.
The Epic, User Stories and Kanban board can be accessed here : Wayfarers Agile Tool
- Google Fonts: used for the Lato font
- Font Awesome: was used to add icons for aesthetic and UX purposes.
- Git: was used for version control by utilising the Gitpod terminal to commit to Git and Push to GitHub.
- GitHub: is used as the respository for the project code after being pushed from Git. In addition, for this project GitHub was used for the agile development aspect through the use of User Stories (GitHub Issues) and tracking them on a Kanban board.
- dbdiagram.io was used to create the Entity Relationship diagrams for the application data model
- Balsamiq: was used to create the wireframes during the design process.
- Django was used as the framework to support rapid and secure development of the application
- Bootstrap was used to build responsive web pages
- Gunicorn was used as the Web Server to run Django on Heroku
- dj_database_url library used to allow database urls to connect to the postgres db
- psycopg2 database adapter used to support the connection to the postgres db
- Cloudinary used to store the images used by the application
- Summernote used to provide WYSIWYG editing on the Hike editing screen
- Django allauth used for account registration and authentication
- Django crispy forms used to simplify form rendering
- jquery library used to fade out alert messages
- Django testing tools used for python mvt testing
- Jest - used to test jquery in script.js
- coverage used to check how much of the python code has been covered by automated tests
-
-
As this project uses Django templates the html has been validated by manually clicking through the application pages, copying the source of the rendered pages and then validating this version of the html using the W3C Validator (link shown above). HTML for the Django admin site pages was not edited so has not been validated here. The Signup, Login and Logout pages from Django allauth were customized and so have been validated, with results below.
-
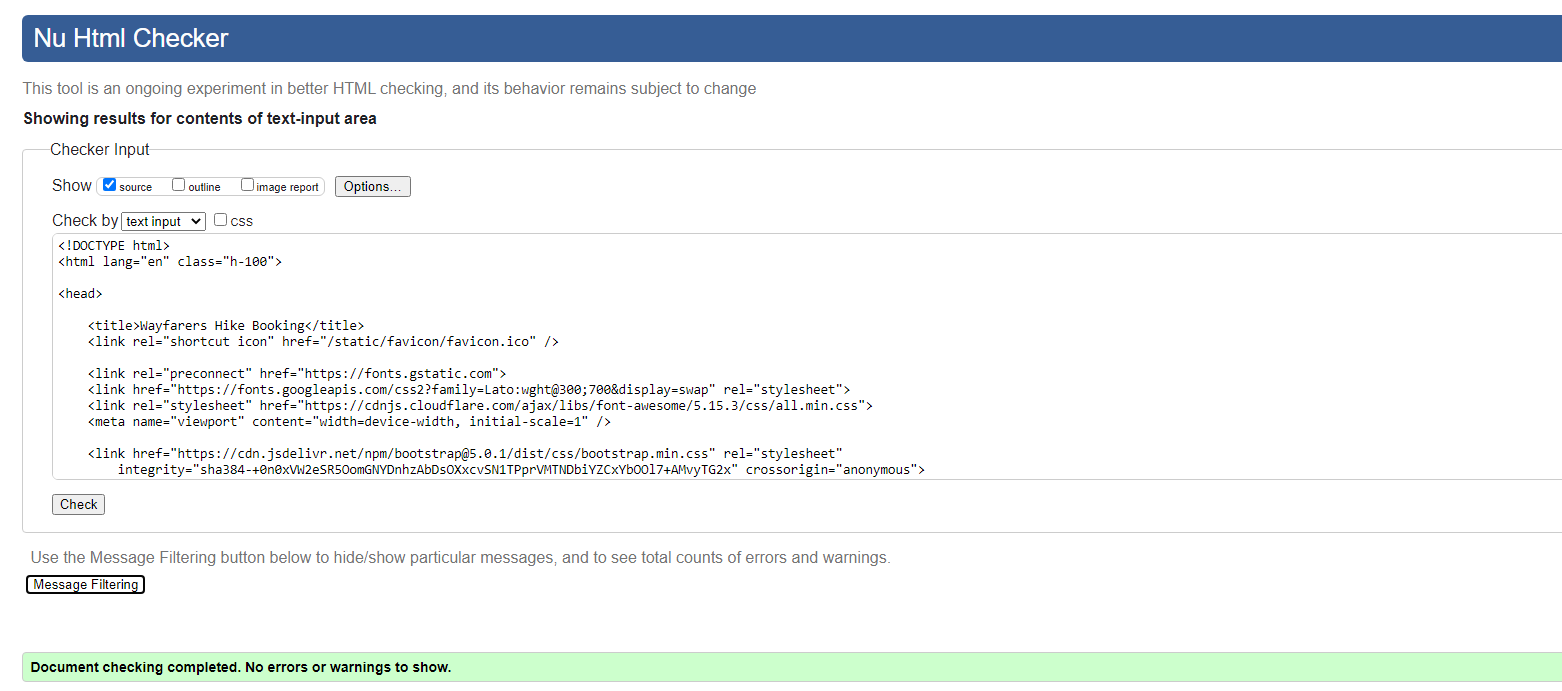
results for index.html
-
Index Page - Summary
-
-
results for hike_detail.html
-
Hike Detail Page - Summary
-
-
results for hike_mybookings.html
-
My Bookings Page - Summary
-
-
results for signup.html
-
Signup/Register Page - Summary

-
-
results for login.html
-
Login/Sign in Page - Summary
-
-
results for logout.html
-
Logout/Sign out Page - Summary
-
-
-
-
style.css validation results

-
-
script.js validation results
script.test.js validation results
-
project urls.py validation results

project settings.py validation results

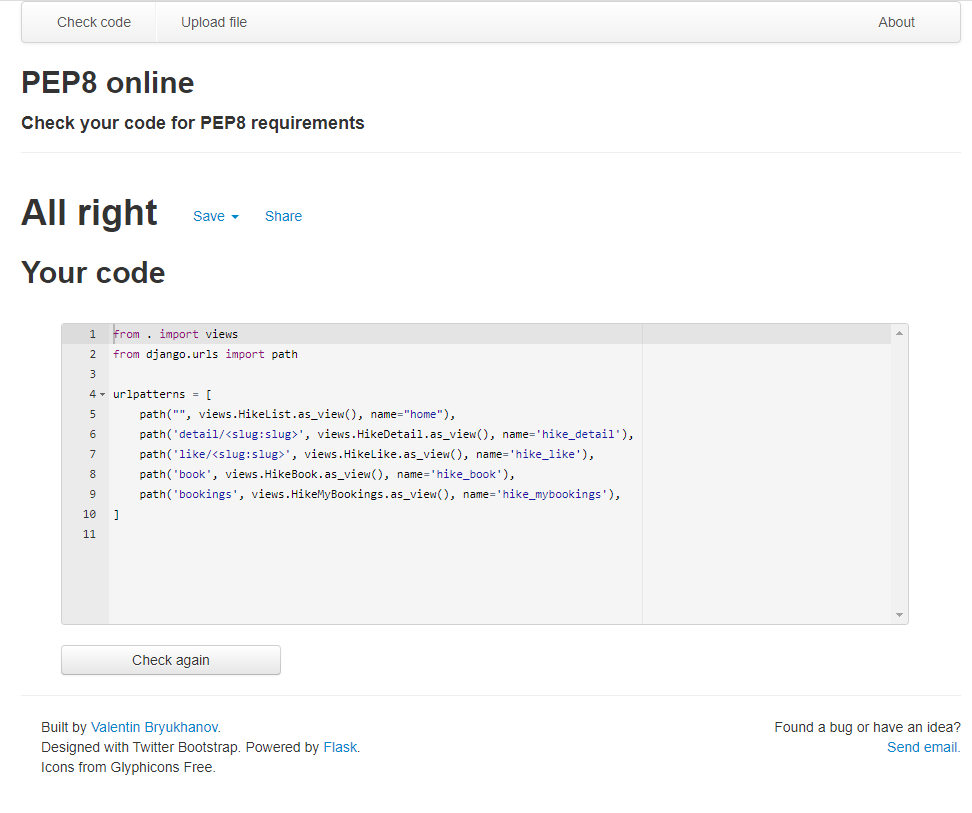
application urls.py validation results
admin.py validation results
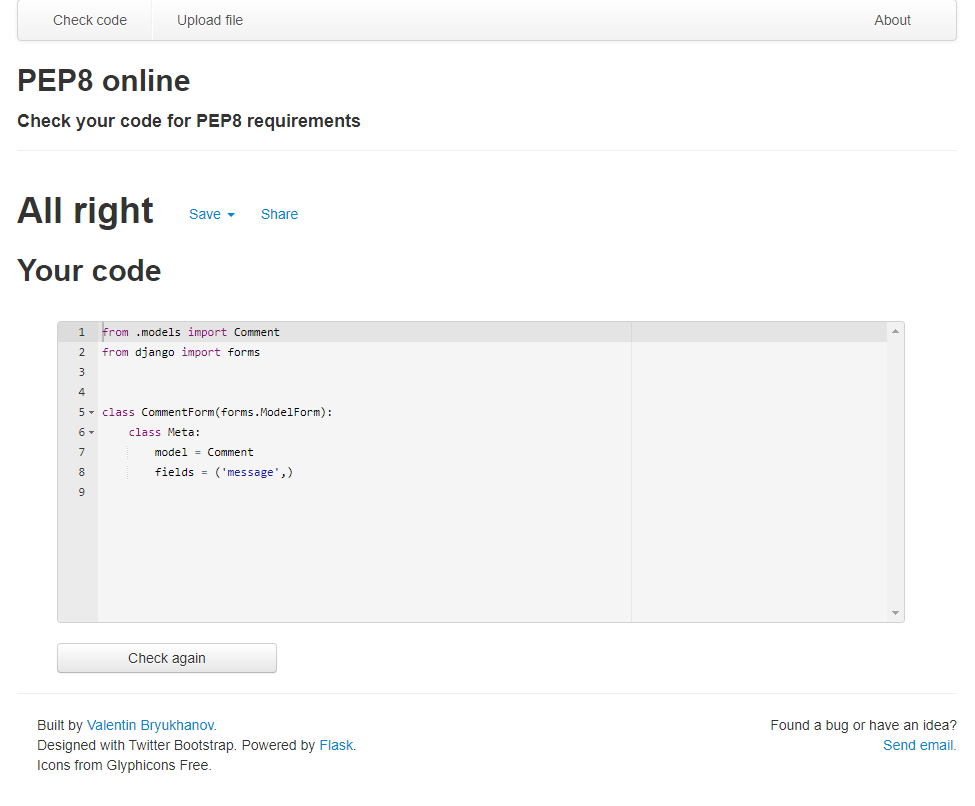
forms.py validation results
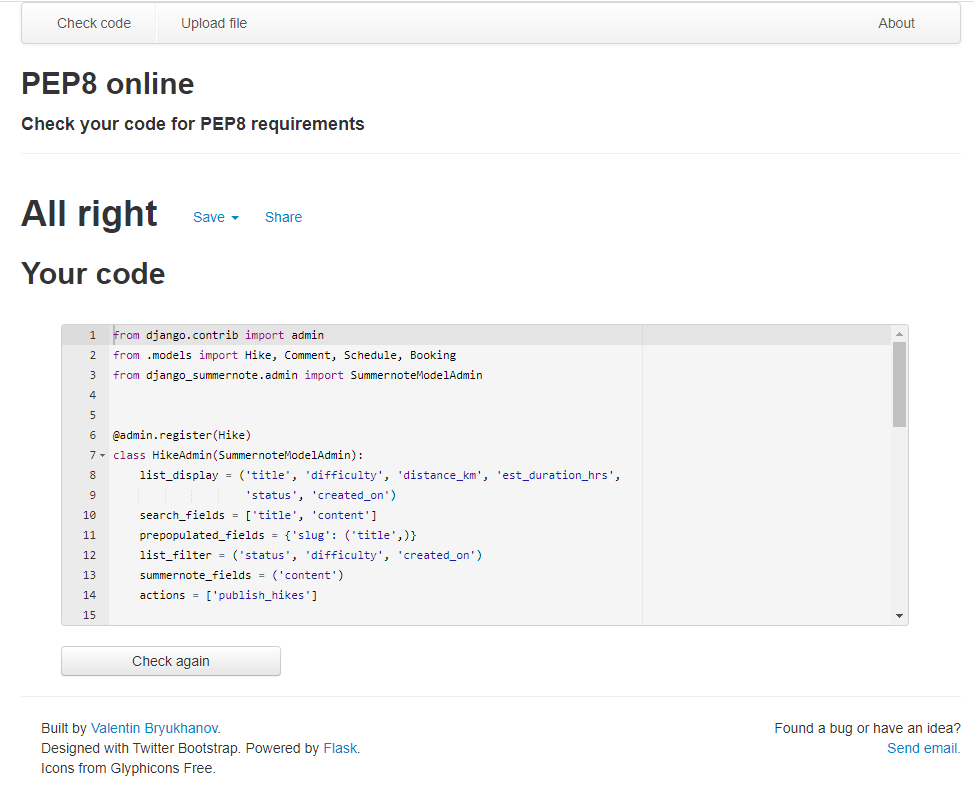
models.py validation results

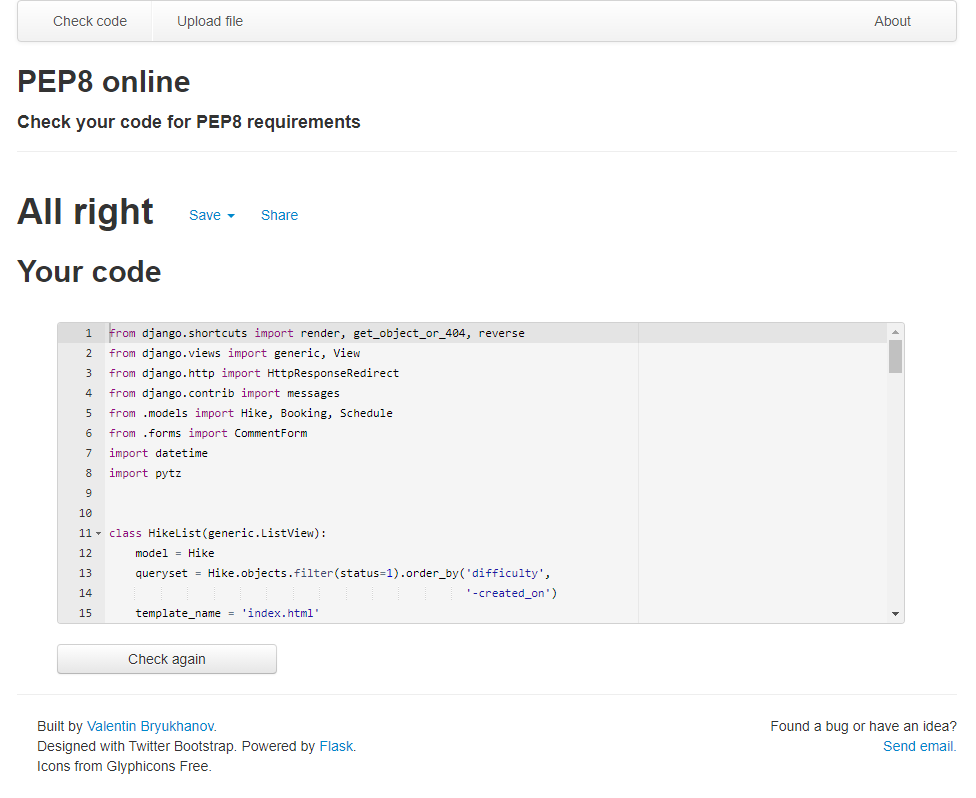
views.py validation results
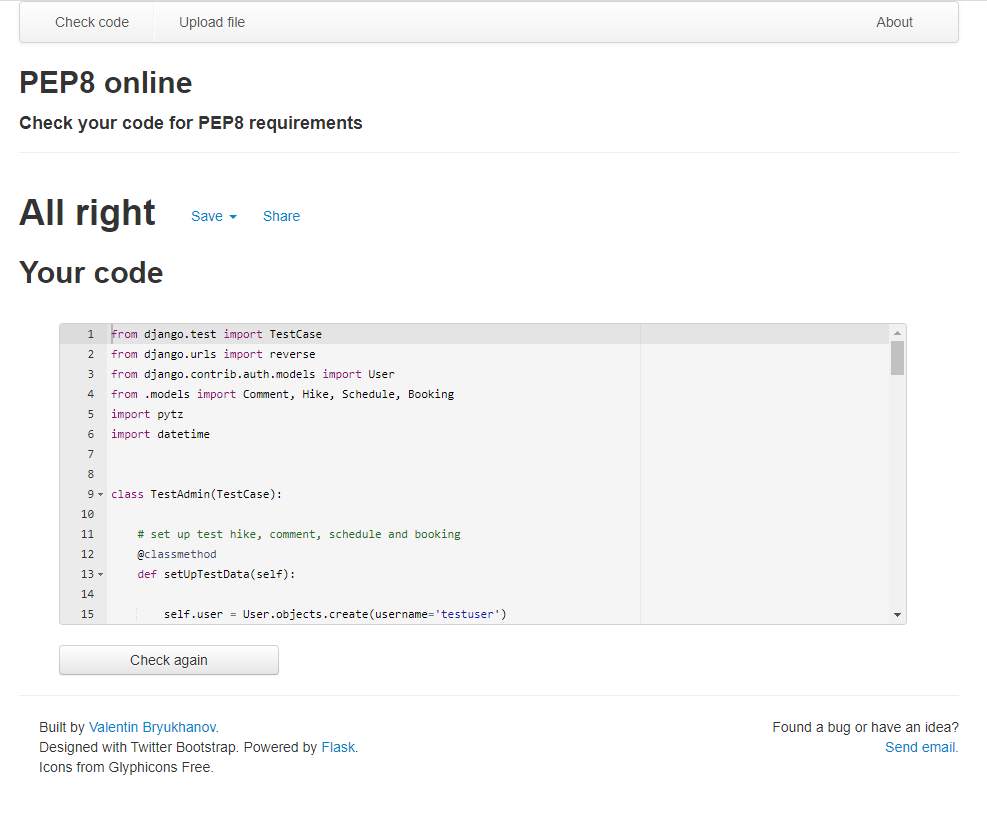
test_admin.py validation results
test_forms.py validation results
test_models.py validation results

test_views.py validation results


-
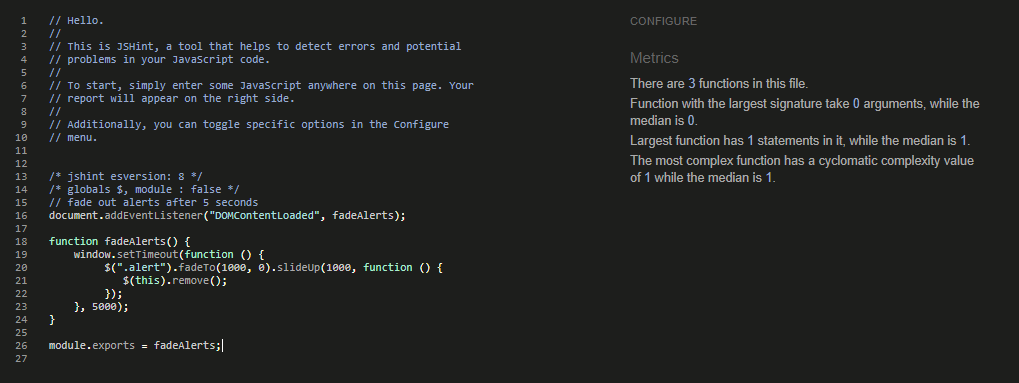
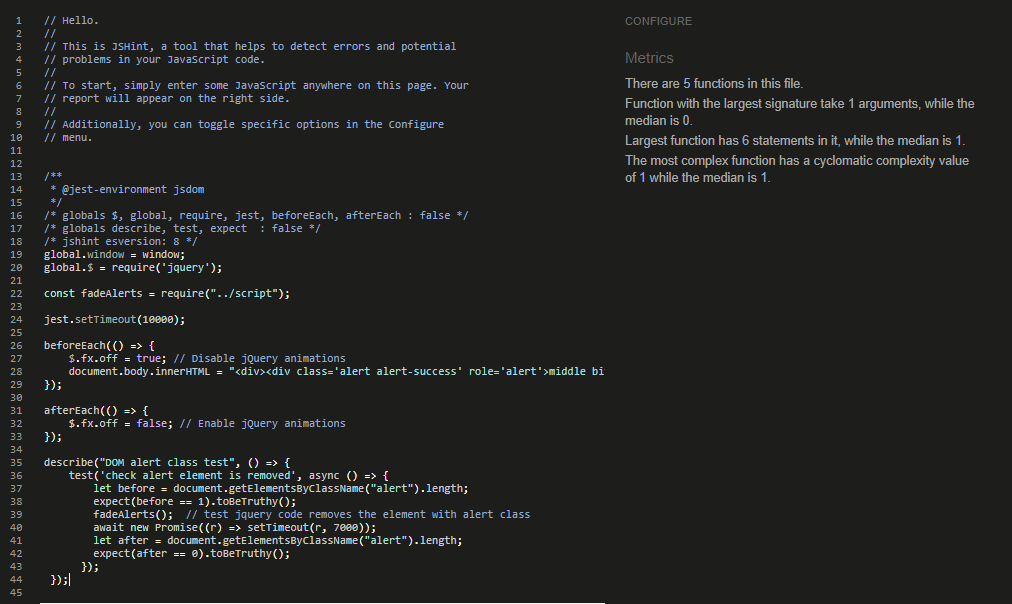
Jest was used to test the application javascript and jquery code. The functionality tested was the code to fade out, slide up and remove any raised alert messages after a 5 second delay. The code is located in Script JS, the test is located in Test JS
-
Jest test results :

-
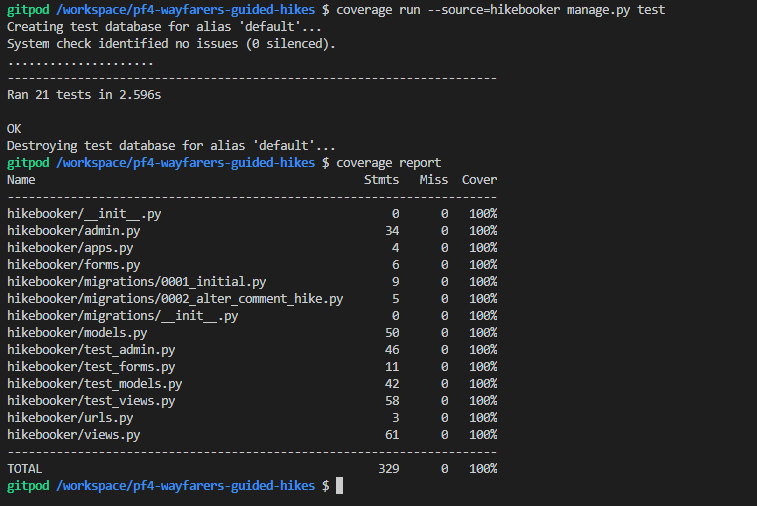
Django testing tools were used to test the application python code.
-
DB tests were run in the development environment against a local SQLite3 database.
-
Tests were written for the following files :
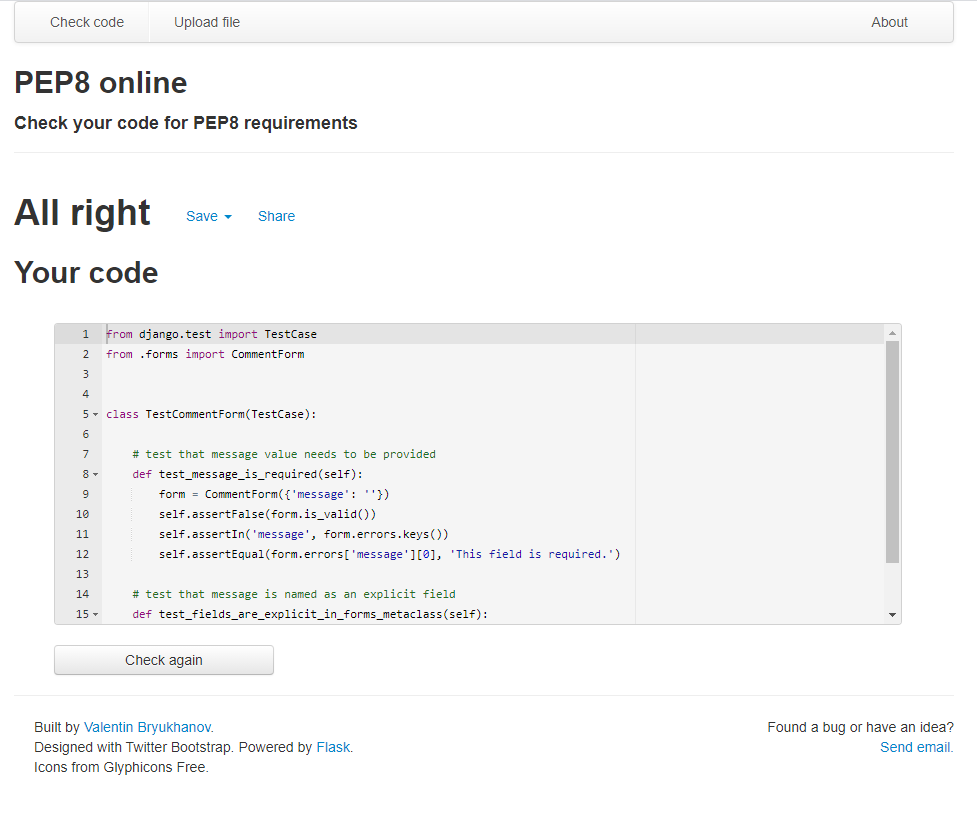
- forms.py test file: test_forms.py
- models.py ters file: test_models.py
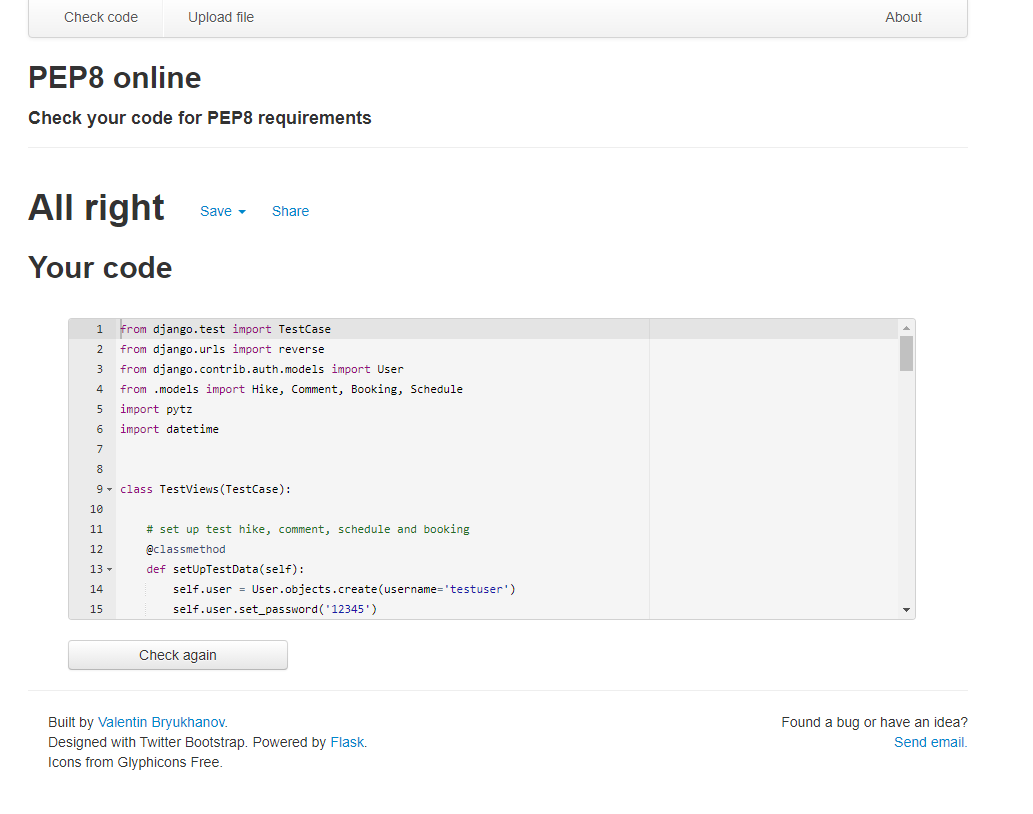
- views.py test file: test_views.py
- admin.py test file: test_admin.py (tests were added for the customizations made to the django admin functionality)
-
Django test results and coverage :


- Chrome DevTools was used to test the responsiveness of the application on different screen sizes. In addition, testing has been carried out on the following browsers :
- Google Chrome version 9.0.4606.81 (64-bit)
- Firefox version 93.0 (64-bit)
- Microsoft Edge 94.0.992.38 (64-bit)
-
The link below details the test cases that were used, the results, and a cross-reference to the Feature ID that each test case exercised (click link to open pdf). The test cases are primarily based on the User Story acceptance criteria that were used to test iterations of the code during development.
- Currently no known bugs.
Detailed below are instructions on how to clone this project repository and the steps to configure and deploy the application. Code Institute also provides a summary of similar process steps here : CI Cheat Sheet
- How to Clone the Repository
- Create Application and Postgres DB on Heroku
- Configure Cloudinary to host images used by the application
- Connect the Heroku app to the GitHub repository
- Executing automated tests
- Final Deployment steps
-
Go to the https://github.com/elainebroche-dev/pf4-wayfarers-guided-hikes repository on GitHub
-
Click the "Code" button to the right of the screen, click HTTPs and copy the link there
-
Open a GitBash terminal and navigate to the directory where you want to locate the clone
-
On the command line, type "git clone" then paste in the copied url and press the Enter key to begin the clone process
-
To install the packages required by the application use the command : pip install -r requirements.txt
-
When developing and running the application locally set DEBUG=True in the settings.py file
-
Changes made to the local clone can be pushed back to the repository using the following commands :
- git add filenames (or "." to add all changed files)
- git commit -m "text message describing changes"
- git push
-
N.B. Any changes pushed to the master branch will take effect on the live project once the application is re-deployed from Heroku
-
Log in to Heroku at https://heroku.com - create an account if needed.
-
From the Heroku dashboard, click the Create new app button. For a new account an icon will be visible on screen to allow you to Create an app, otherwise a link to this function is located under the New dropdown menu at the top right of the screen.
-
On the Create New App page, enter a unique name for the application and select region. Then click Create app.
-
On the Application Configuration page for the new app, click on the Resources tab.
-
In the Add-ons search bar enter "Postgres" and select "Heroku Postgres" from the list - click the "Submit Order Form" button on the pop-up dialog.
-
Next, click on Settings on the Application Configuration page and click on the "Reveal Config Vars" button - check the DATABASE_URL has been automatically set up.
-
Add a new Config Var called DISABLE_COLLECTSTATIC and assign it a value of 1.
-
Add a new Config Var called SECRET_KEY and assign it a value - any random string of letters, digits and symbols.
-
The settings.py file should be updated to use the DATABASE_URL and SECRET_KEY environment variable values as follows :
-
DATABASES = {'default': dj_database_url.parse(os.environ.get('DATABASE_URL'))}
-
SECRET_KEY = os.environ.get('SECRET_KEY')
-
-
In Gitpod, in the project terminal window, to initialize the data model in the postgres database, run the command : python3 manage.py migrate
-
Make sure the project requirements.txt file is up to date with all necessary supporting files by entering the command : pip3 freeze --local > requirements.txt
-
Commit and push any local changes to GitHub.
-
In order to be able to run the application on localhost, add SECRECT_KEY and DATABASE_URL and their values to env.py
- Log in to Cloudinary - create an account if needed. To create the account provide your name, email and set up a password. For "primary interest" you can choose "Programmable Media for image and video API". Click "Create Account" and you will be sent an email to verify your account and bring you to the dashboard.
- From the dashboard, copy the "API Environment variable" value by clicking on the "Copy to clipboard" link.
- Log in to Heroku and go to the Application Configuration page for the application. Click on Settings and click on the "Reveal Config Vars" button.
- Add a new Config Var called CLOUDINARY_URL and assign it the value copied from the Cloudinary dashboard, but remove the "CLOUDINARY_URL=" at the beginning of the string.
- In order to be able to run the application on localhost, also add the CLOUDINARY_URL environment variable and value to env.py
- Go to the Application Configuration page for the application on Heroku and click on the Deploy tab.
- Select GitHub as the Deployment Method and if prompted, confirm that you want to connect to GitHub. Enter the name of the github repository (the one used for this project is (https://github.com/elainebroche-dev/pf4-wayfarers-guided-hikes) and click on Connect to link up the Heroku app to the GitHub repository code.
- Scroll down the page and choose to either Automatically Deploy each time changes are pushed to GitHub, or Manually deploy - for this project Manual Deploy was selected.
- The application can be run from the Application Configuration page by clicking on the Open App button.
- The live link for this project is (https://pf4-wayfarers.herokuapp.com/)
-
The existing automated jquery/javascript test can be executed using jest as follows :
- If jest is not installed then run the command : npm install --save-dev jest
- Run the js test file using the command : npm test
-
The existing automated django/python tests are executed using unittest as follows :
- Run the python tests using the command : python3 manage.py test
- To run just a subset of the tests, then append the application and test file name to the command, e.g. : python3 manage.py test hikebooker.test_models
-
Test coverage for the django/python tests can be reviewed using the coverage tool :
- If coverage is not installed then run the command : pip3 install coverage
- Execute the following series of commands to determine test coverage :
- coverage run --source=hikebooker manage.py test
- coverage report
- coverage html
- python3 -m http.server (detailed results can be viewed via the browser in the htmlcov directory)
Once code changes have been completed and tested on localhost, the application can be prepared for Heroku deployment as follows :
- Set DEBUG flag to False in settings.py
- Ensure this line exists in settings.py to make summernote work on the deployed environment (CORS security feature): X_FRAME_OPTIONS = 'SAMEORIGIN'
- Ensure requirements.txt is up to date using the command : pip3 freeze --local > requirements.txt
- Push files to GitHub
- In the Heroku Config Vars for the application delete this environment variable : DISABLE_COLLECTSTATIC
- On the Heroku dashboard go to the Deploy tab for the application and click on deploy branch
The live link to the application can be found here - P4 Wayfarers Hikes
- Much of the coding and testing relies heavily on information in the "Hello Django" and "I Think Therefore I Blog" walkthroughs in the Code Institue Full Stack Frameworks module.
- Code on how to implement data model constraints was based on information found here : Constraints
- Information on errors when a foreign key field was included in search field list was found here : Search Forgein Key
- Code to restrict data value range : Min Max Values
- Information on how to round decimal field to 2 places : Round Decimals
- Information on how to implement jumbotron images : Jumbotron
- Code on how to remove trailing zeroes from decimal fields : Normalize function
- Setting to turn off auth email verification : EMAIL VERIFICATION
- Some ideas on how to format the authentication/Sign in/Registration pages came from : Page layout demo
- Code to 'bold' active navbar link : Active Link
- Code to remove class from base.html : Override class
- Code to help with order_by for composite foreign key : Composite order
- Code to help filter upcoming bookings : Date handling
- Code to build dropdown for schedule : Drop-down control
- Code on how to build dropdown : Additional Drop-down information
- Code on how to convert number string to list : Python lists
- Code on how to display messages to user : Alert messages
- Additional code on alert message handling : Fade and Slide
- Code to test automatically generated dates : Date Mocking
- Code on how to use setUpTestData : Test Data generation
- Code on how to create a user reference and log them in : Test User login
- Code to help with naive date : Timezone aware dates
- Code to help with testing admin.py customizations : Custom Admin test
- Code on how to delay jest test : Jest Delay
- Code on how to stop jquery animations for jest testing : De-activate animations
- Information on individual hikes was found on the Government of Canada - Parks Canada website : Parks Canada
- The Lato font used was imported from Google Fonts
- Fontawesome was used for icons, including icons for like, comments, user - Font Awesome
- The applicaiton favicon was created from the "exchange" icon image on Font Awesome
- The default hike image : Photo by Wes Hicks on Unsplash
- Jumbotron background image : Photo by Stephen Leonardi on Unsplash
- Hike image : Photo by Cara Fuller on Unsplash
- Hike image : Photo by Larisa Birta on Unsplash
- Hike image : Photo by Kalen Emsley on Unsplash
- Hike image : Photo by Kalen Emsley on Unsplash
- Hike image : Photo by Holly Mandarich on Unsplash
- Hike image : Photo by Toomas Tartes on Unsplash
- Hike image : Photo by Kalen Emsley on Unsplash
- Hike image : Photo by Simon English on Unsplash
- Hike image : Photo by Ted Bryan Yu on Unsplash
- Hike image : Photo by Vlad D on Unsplash
- Background for Register, Sign in and Sign out : Photo by Bailey Zindel on Unsplash
- Thank you to my mentor Brian Macharia for his continuing help and feedback. His advice and tips have been very beneficial, especially in the area of coding standards and best practice.