Skeleton stack (for development purpose) built in Symfony, Angular and Keycloak, running on Docker containers using docker-compose tool.

- Angular skeleton application following best practices
- API with symfony and Api-plateform
- REST
- GraphQL (switch to branch graphql)
- Identity manager (Keycloak)
- OIDC Authentication (Code Flow + PKCE)
- Two-Factor Authentication (Password + OTP)
- API Authentication/Authorization (Bearer authentication with access token using Keycloak)
- Docker
- NodeJs/Npm
First, clone this repository:
git clone https://github.com/el-abdel/SAK.git
Next got to sak-docker folder.
cd sak-docker
Then run this command to build your environment.
docker-compose -f docker-compose/sak.yml up
Do not forget to add virtual hosts (keycloak.local, sak-api.local, phpmyadmin.local) in your /etc/hosts file.
For better performance the vendor folder is not shared in our volumes, so we need to install our dependencies in the container. To do so run:
docker-compose -f docker-compose/sak.yml run --rm composer install --ignore-platform-reqs
Create and init database:
-
connect to app container:
docker exec -it sak-api bash -
create the database (in the container run the following commands):
cd sak-api
php bin/console doctrine:database:create
php bin/console doctrine:schema:update -f
You can visit your Symfony application on the following URL: http://sak-api.local/api
Install Angular CLI (Optional):
npm install -g @angular/cli
Install app. dependencies:
cd sak-web
npm install
And finally run you angular application locally using:
ng serve
OR
npm start
Do not forget to verify Keycloak and Api configuration under
sak-web/src/environments/environment.ts.
You can visit your Angular application on the following URL: http://localhost:4200
After building and running your containers, visit keycloak admin console on this URL: http://keycloak.local:8080/auth
-
You need to create a realm, go to
Realm list > Add realm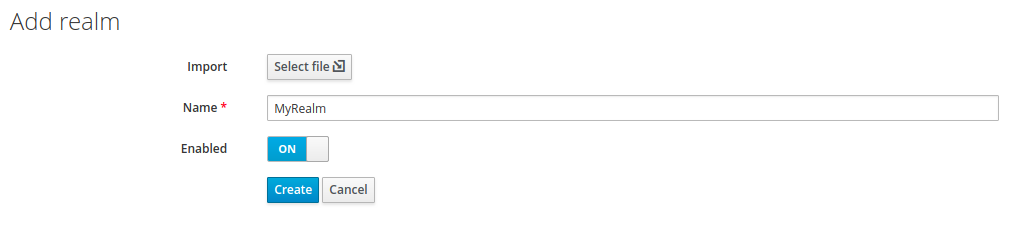
-
Enable Two-Factor Authentication
-
Enforce new users to configure OTP
Open Keycloak admin page, open
Authentication, go to theRequired Actionstab, then Click on theDefault Actionin the Configure OTP row.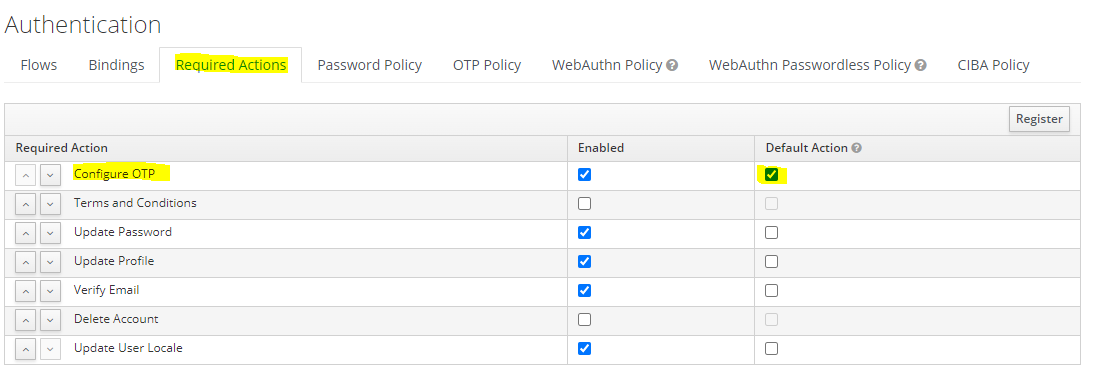
-
OTP Policy configuration
Open Keycloak admin page, open
Authentication, go to theOTP Policytab.
Recommended OTP Policy:
Time based OTP Type (TOTP) is considered a more secure. TOTP requires time be synchronized between Keycloak server and an end user device.
If the server and the device cannot be synchronized use Counter Based type (HOTP).
Configure Look Ahead Window to 3.
Check the keycloak documentation related to OTP Policies for more details.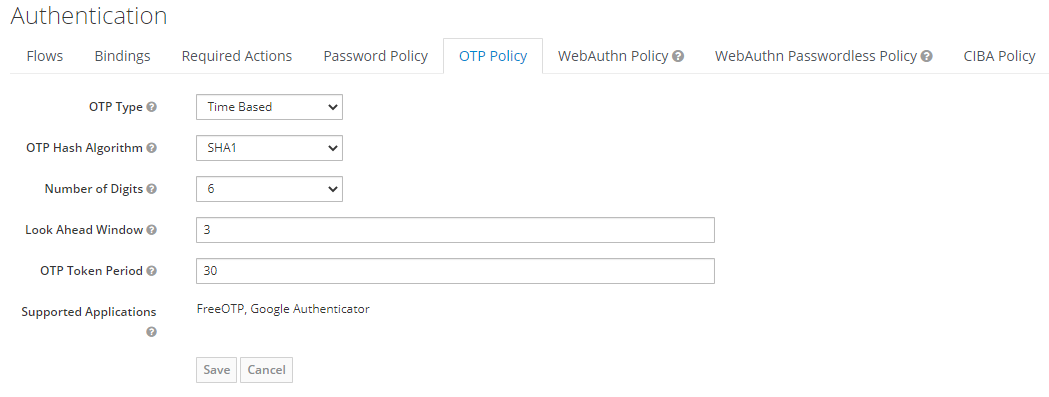
-
-
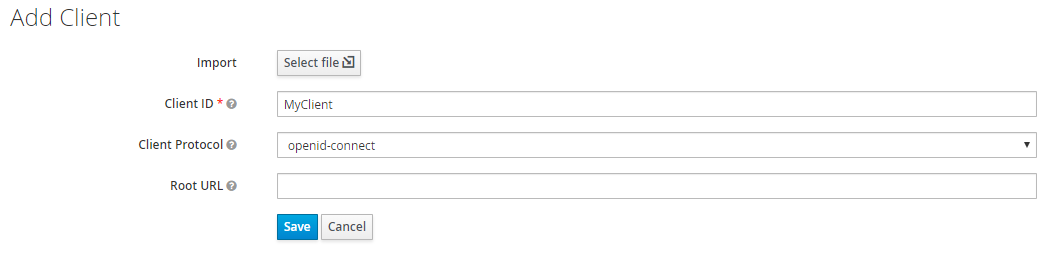
Create clients by going in
Main menu > Clients > CreateWe need to create two clients one for Authorization and another one for Authentication
-
Configure authentication client
you can configure the client by going in
Main menu > Clients > [Your client]. The authentication client Access type is public.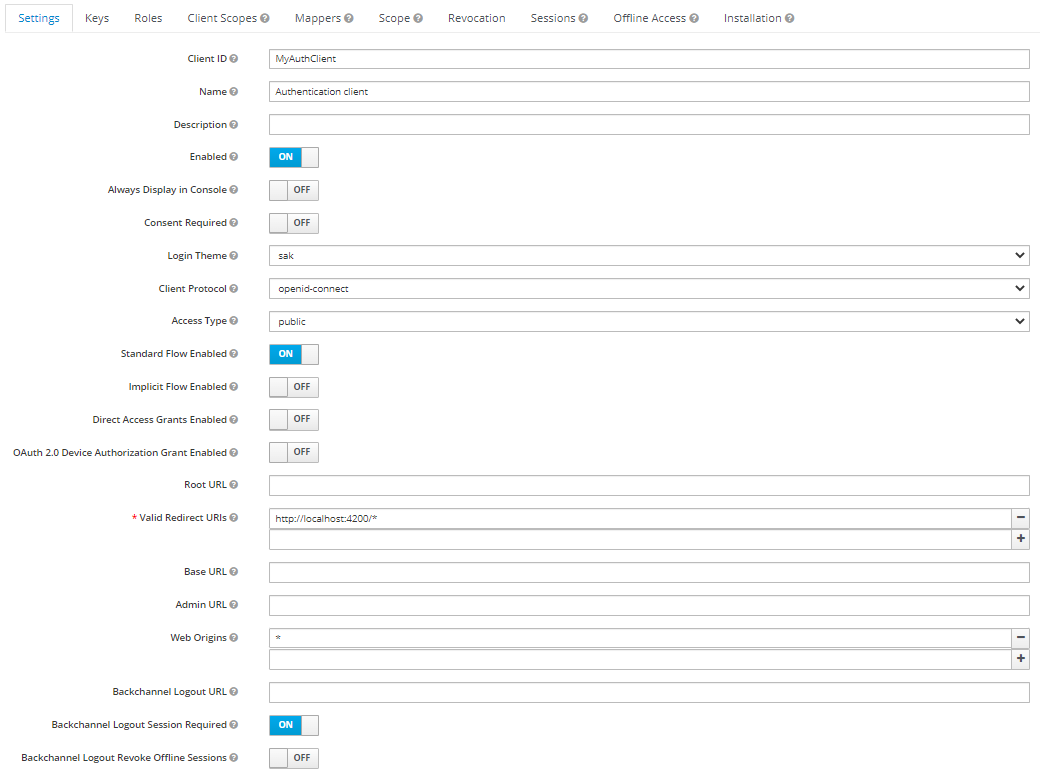
-
Configure authorization client
you can configure the client by going in
Main menu > Clients > [Your client]. The authorization client Access type must be bearer-only.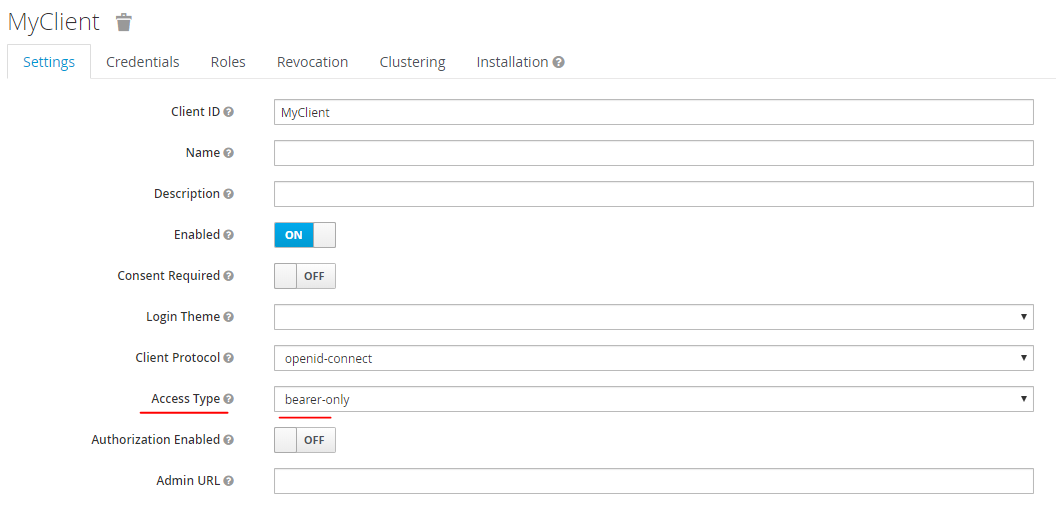
You can find the client secret in Credentials tab
-
Add a role to authorization client:
In keycloak, roles are an abstraction of permissions for our application (used in security.yaml). In our case we need to define a role named ROLE_API.
You can configure it in authorization clientMain menu > Clients > [Your client] > Roles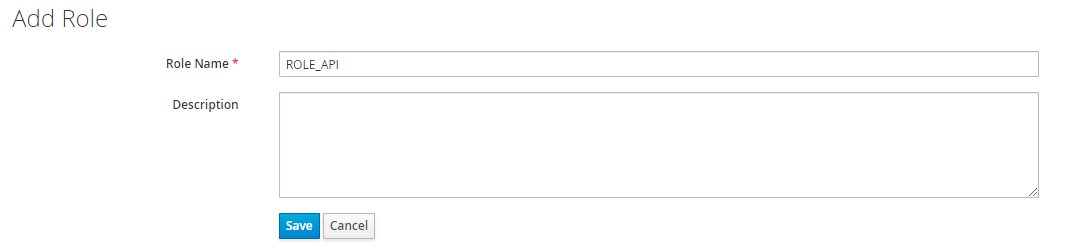
-
-
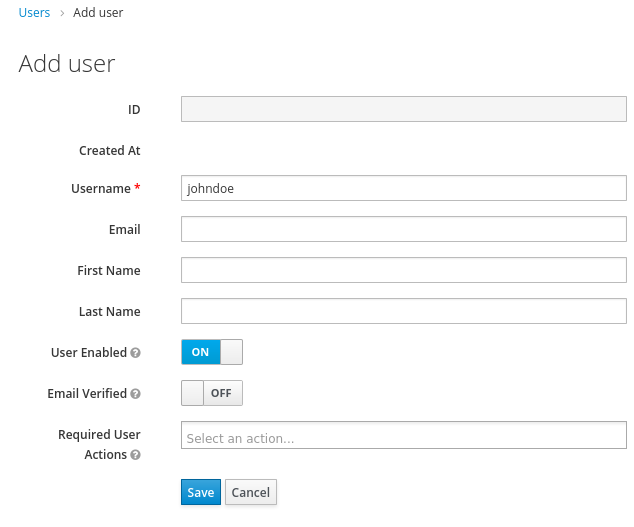
Create a user
-
From the menu, click Users to open the user list page.
-
On the right side of the empty user list, click Add User to open the Add user page.
-
Click the Credentials tab to set a temporary password for the new user. then set a new password for this user.
This password is temporary and the user will be required to change it at the first login. If you prefer to create a password that is persistent, flip the Temporary switch to Off and click Set Password.
-
-
Assign a role to a use
To add a role, go to
Main menu > Users > View all users > [Some User] > Role Mappings.- In the Client Roles dropdown, select your authorization client that contains our role(s).
- Select Role ROLE_API in Available Roles list, then click Add selected to assign role to the user.


For this part you can refer to my package ABELkeycloakBearerOnlyAdapterBundle, where you'll find a step by step documentation on how to secure your Symfony App using Keycloak.
To implement authentication in Angular application we are using: keycloak-angular, you can visit the package repository for more information.