SwiftOverpassAPI
A Swift module for querying, decoding, and visualizing Overpass API data.
What is Overpass API?
Overpass API is a read only database for querying open source mapping information provided by the OpenStreetMap project. For more information visit the Overpass API Wiki and the OpenStreetMap Wiki.
Installation
SwiftOverpassAPI is available through CocoaPods. To install it, simply add the following line to your Podfile:
pod 'SwiftOverpassAPI'Usage
Creating a bounding box
Create a boxed region that will confine your query:
Option 1: Initialize with a MKCoordinateRegion:
let center = CLLocationCoordinate2D(
	latitude: 37.7749,
	longitude: -122.4194)

let queryRegion = MKCoordinateRegion(
	center: center,
	latitudinalMeters: 50000,
	longitudinalMeters: 50000)

let boundingBox = OPBoundingBox(region: region)
Option 2: Initialize with latitudes and longitudes:
let boundingBox = OPBoundingBox(
	minLatitude: 38.62661651293796,
	minLongitude: -90.1998908782745,
	maxLatitude: 38.627383487062005,
	maxLongitude: -90.1989091217254)
Building a Query
For simple query generation, you can use OPQueryBuilder class:
do {
	let query = try OPQueryBuilder()
		.setTimeOut(180) //1
		.setElementTypes([.relation]) //2
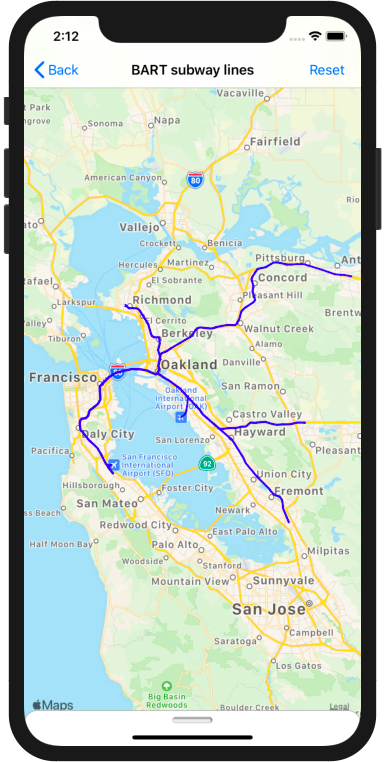
		.addTagFilter(key: "network", value: "BART", exactMatch: false) //3
		.addTagFilter(key: "type", value: "route") //4
		.addTagFilter(key: "name") //5
		.setBoundingBox(boundingBox) //6
		.setOutputType(.geometry) //7
		.buildQueryString() //8
} catch {
	print(error.localizedDescription)
}- Set a timeout for the server request
- Set one or more element types that you wish to query (Any combination of
.node,.wayand/or.relation) - Filter for elements whose "network" tag's value contains "BART" (case insensitive)
- Filter for elements whose "type" tag's value is exactly "route"
- Filter for all elements with a "name" tag. Can have any associated value.
- Query within the specified bounding box
- Specify the output type of the query (See "Choosing a query output type" below)
- Build a query string that you pass to the overpass client that makes requests to an Overpass API endpoint
The Overpass Query language enables diverse and powerful queries. This makes building a catch-all query builder quite difficult. For more complicated queries, you may need to create the query string directly:
let boundingBoxString = OPBoundingBox(region: region).toString()

let query = """
	    data=[out:json];
	    node["network"="BART"]
		["railway"="stop"]
		\(boundingBoxString)
		->.bartStops;
	    (
		way(around.bartStops:200)["amenity"="cinema"];
		node(around.bartStops:200)["amenity"="cinema"];
	    );
	    out center;
	    """
This query finds all theaters less than 200 meters from any BART (Bay Area Rapid Transit) stop. To learn more about the Overpass Query Language, I recommend checking out out the Overpass Language Guide, the Overpass Query Language Wiki, and Overpass API by Example. You can test overpass queries in your browser using Overpass Turbo.
Choosing a query output type
When using OPQueryBuiler you can choose from the following output types:
public enum OPQueryOutputType {
	case standard, center, geometry, recurseDown, recurseUp, recurseUpAndDown

	// The Overpass API language syntax for each output type
	func toString() -> String {
		switch self {
		case .standard:
			return "out;"
		case .recurseDown:
			return "(._;>;);out;"
		case .recurseUp:
			return "(._;<;);out;"
		case .recurseUpAndDown:
			return "((._;<;);>;);out;"
		case .geometry:
			return "out geom;"
		case .center:
			return "out center;"
		}
	}
}- Standard: Basic output that does not fetch additional elements or geometry information
- Recurse Down: Enables full geometry reconstruction of query elements. Returns the queried elements plus:
- all nodes that are part of a way which appears in the initial result set; plus
- all nodes and ways that are members of a relation which appears in the initial result set; plus
- all nodes that are part of a way which appears in the initial result set
- Recurse Up: Returns the queried elements plus:
- all ways that have a node which appears in the initial result set
- all relations that have a node or way which appears in the initial result set
- all relations that have a way which appears in the result initial result set
- Recurse Up and Down: Recurse up then recurse down on the results of the upwards recursion
- Geometry: Returned elements full geometry information that is sufficient for visualization
- Center: Returned elements contain their center coordinate. Best/most efficient option when you don't want to visualize full element geometries.
Making an Overpass request
let client = OPClient() //1
client.endpoint = .kumiSystems //2

//3
client.fetchElements(query: query) { result in
	switch result {
	case .failure(let error):
		print(error.localizedDescription)
	case .success(let elements):
		print(elements) // Do something with returned the elements
	}
}- Instantiate a client
- Specify an endpoint: The free-to-use endpoints provided will typically be slower and may limit your usage. For better performance you can specify your own custom endpoint.
- Fetch elements: The decoded response will be in the form of a dictionary of Overpass elements keyed by their database id.
Generating MapKit Visualizations
Generate visualizations for all elements the returned element dictionary:
// Creates a dictionary of mapkit visualizations keyed by the corresponding element's id
let visualizations = OPVisualizationGenerator
	.mapKitVisualizations(forElements: elements)
Generate a visualization for an individual element:
if let visualization = OPVisualizationGenerator.mapKitVisualization(forElement: element) {
	// Do something
} else {
	print("Element doesn't have a geometry to visualize")
}
Displaying Visualizations via MKMapView
Step 1: Add overlays and annotations to mapView using the included visualization generator
func addVisualizations(_ visualizations: [Int: OPMapKitVisualization]) {

	var annotations = [MKAnnotation]()
	var polylines = [MKPolyline]()
	var polygons = [MKPolygon]()

	for visualization in visualizations.values {
		switch visualization {
		case .annotation(let annotation):
			newAnnotations.append(annotation)
		case .polyline(let polyline):
			polylines.append(polyline)
		case .polylines(let newPolylines):
			polylines.append(contentsOf: newPolylines)
		case .polygon(let polygon):
			polygons.append(polygon)
		case .polygons(let newPolygons):
			polygons.append(contentsOf: newPolygons)
		}
	}

	if #available(iOS 13, *) {
		// MKMultipolyline and MKMultipolygon generate a single renderer for all of their elements. If available, it is more efficient than creating a renderer for each overlay.
    	let multiPolyline = MKMultiPolyline(polylines)
		let multiPolygon = MKMultiPolygon(polygons)
		mapView.addOverlay(multiPolygon)
		mapView.addOverlay(multiPolyline)
	} else {
		mapView.addOverlays(polygons)
		mapView.addOverlays(polylines)
	}

	mapView.addAnnotations(annotations)
}
Depending on its case, a visualization can have one of the following associated values types:
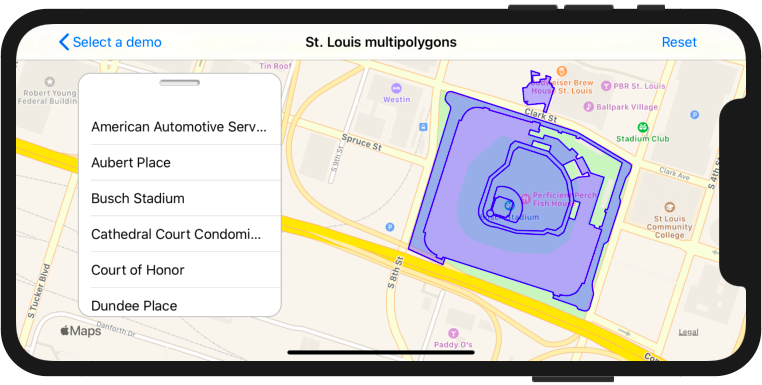
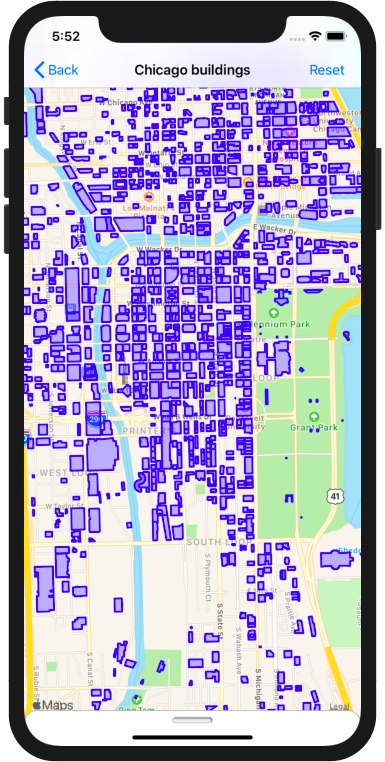
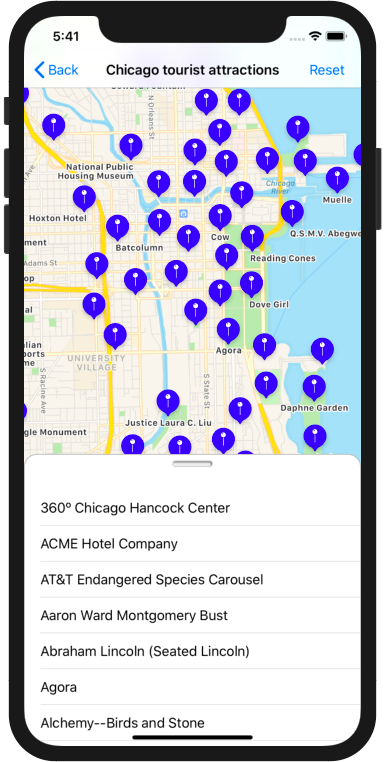
MKAnnotation: For single coordinates. The title of the annotation is the value of the element's name tag.MKPolyline: Commonly used for roadsMKPolygon: Commonly used for simple structures like buildings[MKPolyline]: An array of related polylines in a collection such as a route or a waterway[MKPolygon]: An array of related polygons that make up a more complicated structures.
Step 2: Display views for the overlays and annotations
extension MapViewController: MKMapViewDelegate {
	// Delegate method for rendering overlays
	func mapView(
		_ mapView: MKMapView,
		rendererFor overlay: MKOverlay) -> MKOverlayRenderer
	{
		let strokeWidth: CGFloat = 2
		let strokeColor = UIColor.theme
		let fillColor = UIColor.theme.withAlphaComponent(0.5)

		if let polyline = overlay as? MKPolyline {
			let renderer = MKPolylineRenderer(
				polyline: polyline)
			renderer.strokeColor = strokeColor
			renderer.lineWidth = strokeWidth
			return renderer
		} else if let polygon = overlay as? MKPolygon {
			let renderer = MKPolygonRenderer(
				polygon: polygon)
			renderer.fillColor = fillColor
			renderer.strokeColor = strokeColor
			renderer.lineWidth = strokeWidth
			return renderer
		}	else if let multiPolyline = overlay as? MKMultiPolyline {
			let renderer = MKMultiPolylineRenderer(
				multiPolyline: multiPolyline)
			renderer.strokeColor = strokeColor
			renderer.lineWidth = strokeWidth
			return renderer
		} else if let multiPolygon = overlay as? MKMultiPolygon {
			let renderer = MKMultiPolygonRenderer(
				multiPolygon: multiPolygon)
			renderer.fillColor = fillColor
			renderer.strokeColor = strokeColor
			renderer.lineWidth = strokeWidth
			return renderer
		} else {
			return MKOverlayRenderer()
		}
	}

	/*
		// Make sure to add the following when configure your mapView:

		let markerReuseIdentifier = "MarkerAnnotationView"

		mapView.register(
			MKMarkerAnnotationView.self,
			forAnnotationViewWithReuseIdentifier: markerReuseIdentifier)
	*/

	// Delegate method for setting annotation views.
	func mapView(
		_ mapView: MKMapView,
		viewFor annotation: MKAnnotation) -> MKAnnotationView?
	{
		guard
			let pointAnnotation = annotation as? MKPointAnnotation
		else {
			return nil
		}

		let view = MKMarkerAnnotationView(
			annotation: pointAnnotation,
			reuseIdentifier: markerReuseIdentifier)

		view.markerTintColor = UIColor.theme
		return view
	}
}
Example App
To run the example project, clone the repo, and run pod install from the Example directory first.
Author
ebsamson3, ebsamson3@gmail.com
Aknowledgements
Thanks to all those who contribute to Overpass API and OpenStreetMap. Thank you to Martin Raifer, whose osmtogeojson code saved me a lot of time helped me understand out how to process Overpass API elements.
License
SwiftOverpassAPI is available under the MIT license. See the LICENSE file for more info.


