Infrastructure groups within organizations generally group users under the Lines of Businesses (LoBs) they belong to for charge-back. Existing chargeback models are generally built on Virtual Machine (VM) usage pools where VM's are allocated to LoBs on-demand and usage is based on resource consumption over a period of time. With the density and multi-tennancy offered through cloud native technology like OpenShift, depending on a VM based changeback alone is insufficient. This article will cover several design points around how to deal with chargeback in an organization adopting OpenShift as their enterprise PaaS strategy.
We will cover this in the following sections:
In situations where guaranteed SLA's are required (production), it makes sense to devote entire nodes to LoBs. This does come at the cost of under utilization/less density and LoBs paying for resources they might not entirely consume. As with any decision in the IT world,, this is an engineering trade-off. OpenShift provides a mechanism to limit LoB's to VMs and details are covered under the Limiting LoBs to VMs section below.
The second situation is where LoBs do not need SLAs but just need a location to run/test workloads at lowest cost. This is where pod/namespace/project specific chargeback can be performed. This is covered in the Entity resource consumption section.
Ideally, an infrastructure provider group within an organization can provide both the above options and let LoBs decide which mechanism makes sense e.g Node based for prof and perf testing, namespace/project/pod (granular) based for dev/test/qa/sandbox environments. This solution is detailed in the Hybrid Chargeback (ideal) section.
Typically organizations will charge for:
- Software Licensing
- CPU Capacity consumed
- Memory utilization
- Storage consumption
- Network
- Floor Space
- Power
- Human Resources
This can be a mix of constant baseline + amortized and utilization cost. Depending on the hardware consumed, chargeback for an on-premise cloud can be significantly cheaper than public cloud and even within on-premise infrastructure choices, options like IBM's LinuxONE can be much cheaper than Intel/AMD based options.
OpenShift entities include pods, deployments, namespaces, persistent volume claims etc. Chargeback on these entities is the easiest mechanism as it is inbuilt into OpenShift as part of the metering component
As LoBs will have namespaces (or clusters, depending on the multi-tenancy model) for specific use-cases, we will look at chargeback using Namespaces using the inbuilt metering capabilities.
- CPU (request, usage and utilization)
- Memory (request, usage and utilization)
- Storage (i.e persistent volume claim, request and usage)
The oc -n openshift-metering get reportqueries command returns a list of what can be queried including cluster-wide reporting, node-wide, namespace-wide and the more granular pod and PVC consumption. Limiting ourselves to just namespaces here:
...
namespace-cpu-request
namespace-cpu-usage
namespace-cpu-utilization
namespace-memory-request
namespace-memory-usage
namespace-memory-utilization
namespace-persistentvolumeclaim-request
namespace-persistentvolumeclaim-usage
...
You can start metering with a Report custom resource. For scheduled report's, it will look something like this:
apiVersion: metering.openshift.io/v1
kind: Report
metadata:
  name: pod-cpu-request-hourly
spec:
  query: "pod-cpu-monthly"
  reportingStart: "2020-05-05T00:00:00Z"
  schedule:
    period: "monthly"
    monthly:
      dayOfMonth: 1
      hour: 0
      minute: 0
      second: 0
They have the following rules:
| Name | Data Type | Range |
|---|---|---|
| hour | Integer | 0-23 |
| minute | Integer | 0-59 |
| second | Integer | 0-59 |
| dayOfWeek | String | day of week spelled out (e.g monday, tuesday) |
| dayOfMonth | Integer | 1-31 |
More information about reports can be found here.
OpenShift deploys workloads into Worker Nodes, where each node is VM. By default, the Kubernetes (k8s) scheduler will deploy workload (pods) across worker nodes based on resource utilization heuristics built into k8s. These heuristics provide optimal scheduling in general, but to align with existing organization policies, we need a way to limit pods to specific nodes.
k8s has a concept of namespaces that provide resource isolation and a mechanism for book-keeping. It is important to note that the isolation provided is logical as a common misconception is that namespace offer security isolation but it does not as pods across namespaces can be deployed on the same VM and could be vulnerable to container escape vulnerabilities etc. Namespaces as-is don't offer isolation between LoBs that align with existing VM based chargeback metrics.
- OpenShift 4.3
- 3 Masters named
master[0-2]for simplicity - 5 Workers named
woker[0-4]for simplicity
This is our sample cluster deployed on IBM Cloud.
RedHat OpenShift on IBM Cloud is abbreviated as ROKS. To learn how to deploy and manage OCP on IBM Cloud, please check this link.

For mapping LoBs to VM's, we will need to use:
Labels allow users to map their organizational structures to in a loosely coupled fashion without requiring clients to store these mappings (more info). For this scenario, we will apply labels to worker nodes. Naming convention and org structure decomposition is beyond the scope of this tutorial, but we will post another blog to help define node labels, namespace naming best practices and topologies for multi-tenancy.
For now, we have 5 nodes defined worker[0-5]. We can use the names as is, or assign more meaningful names to use later for node selection for LoBs or to help make physical locations more visible. e.g. we might want to define what LPAR, zVM instance or CPC a VM was deployed to. We can apply node labels from the GUI:

Here we added 3 node labels:
- purpose : dev
- lpar : LPAR01, LPAR02
- lob : lob1, lob2, lob3
Labels must have singular values for each key so pick only one of each option when applying it to a node.
The
beta.kubernetes.io/arch: s390x,kubernetes.io/arch: s390xandarch: s390xare pre-existing labels. These are really important for multi-arch deployments, which will be a future article. Architecture is irrelevant as this article is valid for any architecture, but its an important label if architecture specific chargeback is the goal.
We will this mapping for LoB -> Projects -> Nodes

Next, we create the 5 Projects in the diagram above:
- lob1-app1
- lob2-app1
- lob3-app1
- lob3-app2
Each LoB can own multiple apps and each app will typically have a Project. It is also possible to have a LoB as a Project, and apps as deployments within that LoB but it would offer less granular control. Having each app as a Project makes it easier to map resources to individual apps, which can be consolidated for an LoB.
You could also use Namespace to do this but Projects are just k8s namespaces with additional annotations that allow for easier multi-tenancy by:
- Having stricter validation than namespaces (i.e. you cannot annotate a project other than a handful of predefined keys meaning you can assert a privileged user or component set that data)
- Projects are actually indirectly created by the server by a request mechanism. Thus you do not need to give users the ability to create projects directly.
- A cluster admin can inject a template for project creation (so you can have a predefined way to set up projects across your cluster).
- The project list is a special endpoint that determines what projects you should be able to see. This is not possible to express via RBAC (i.e. list namespaces means you can see all namespaces). Note that all of this was built in the early days of Kubernetes, and thus may be less important now.
Note: Creating Projects from CLI will allow us to pass in a node selector using the
--node-selectorargument. If we do this using the GUI, we'd need to modify the namespace (not Project, since its immutable) to apply a node-selector.
Command Line:
oc new-project lob1-app1 --node-selector='lpar=LPAR01,purpose=dev,lob=lob1' and repeat for all the Projects from our Mapping diagram below. Ultimately, we will need 4 projects for lob[0-1]-app[0-1].
GUI:
Projects are immutable so we need to change the namespace assigned to it (which is mutable):
- Look for the namespace assigned to the Project (it will have the same name). e.g
lob1-app1 - Add
openshift.io/node-selector: 'lpar=01,vm-id=dev-vm-01'in the YAML. It should look like this: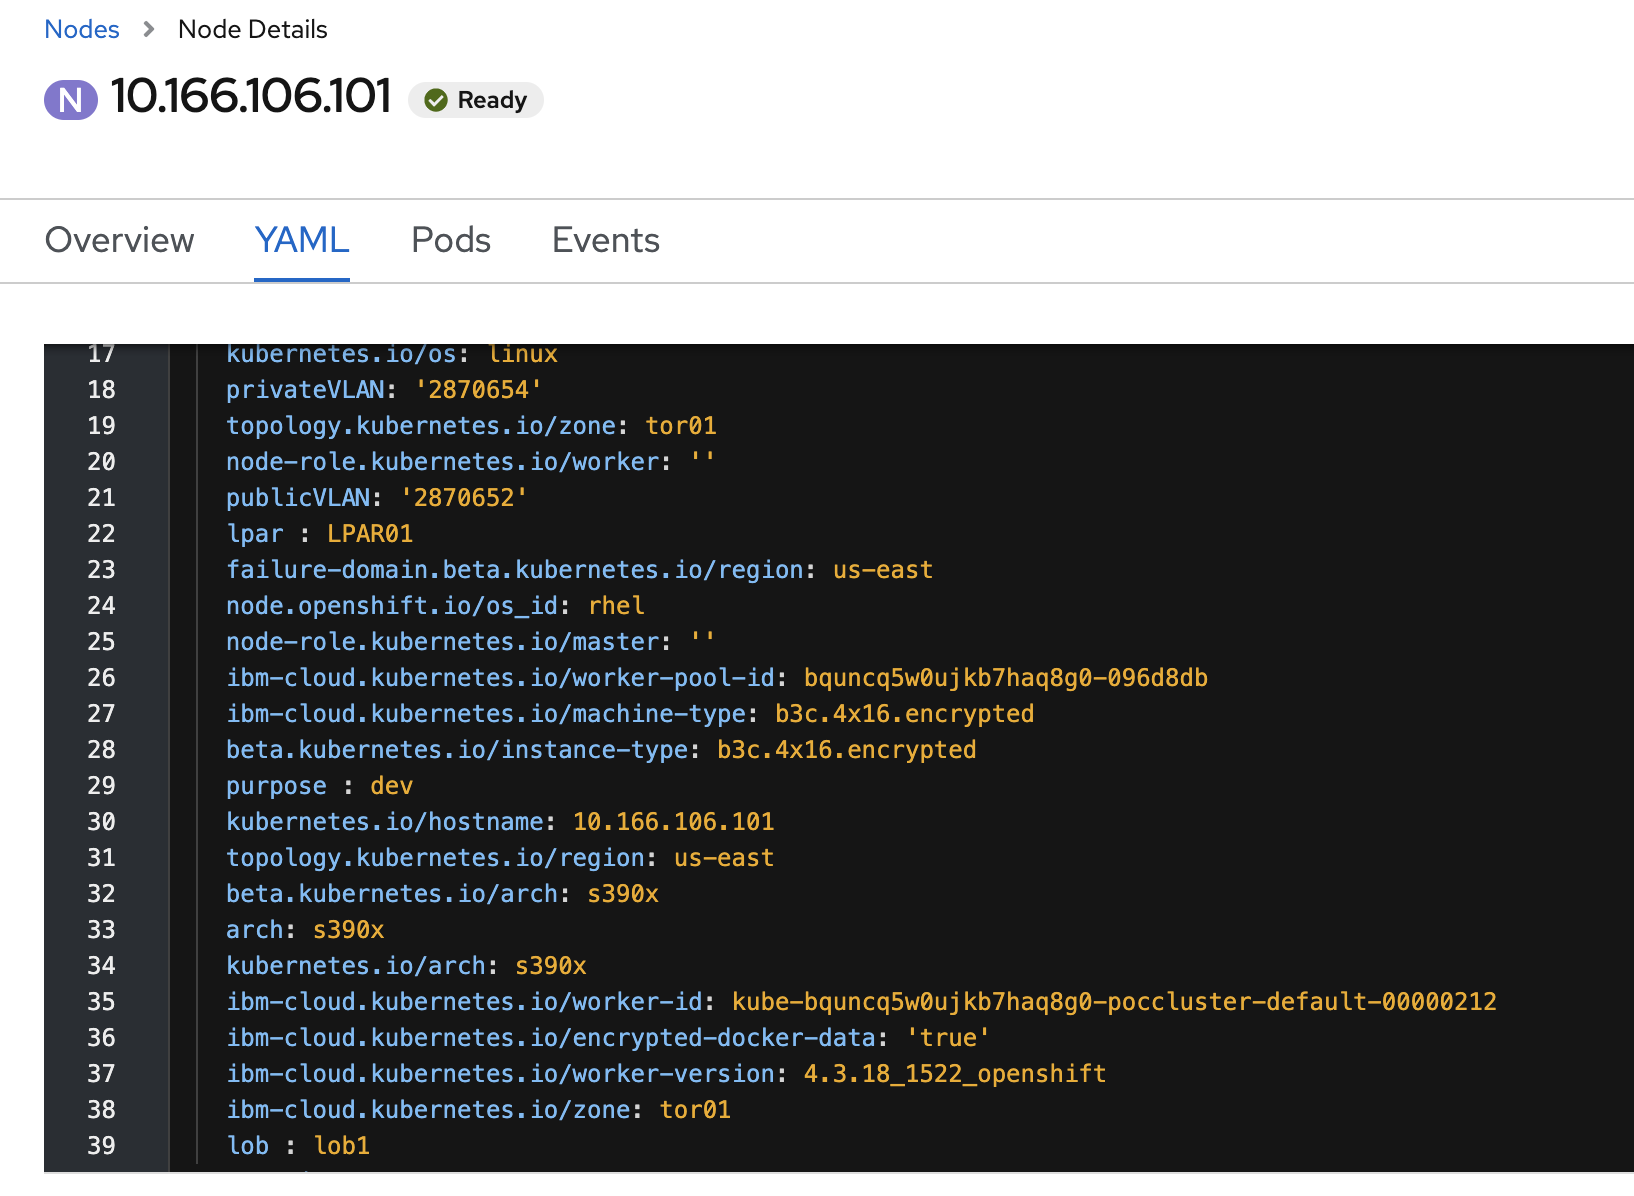 . // FIXME
We do not use Kubernetes Affinities since they do not give us the strict placement policies needed for accurate chargeback. Neither
requiredDuringSchedulingIgnoredDuringExecutionnorpreferredDuringSchedulingIgnoredDuringExecutionmeet our criteria to always run a pod on specific node(s) throughout their lifetime.
Next, create groups (or map from LDAP following these instructions):

We will need a Role (or ClusterRole) and RoleBinding (or ClusterBindings) to map groups to Projects/Namespaces.
In this article we assume you understand basics of RBAC. If not, please read the official k8s documentation on RBAC
kind: ClusterRole
apiVersion: rbac.authorization.k8s.io/v1
metadata:
  name: developer
rules:
  - apiGroups: [""]
    resources: ["pods"]
    verbs: "*"
For this simple tutorial, we'll give the very permissive "*". In production you'll need to use the principle of least privilege and build up from there. This will also need to be repeated for lob2, and lob3 by changing the metadata.namespace field.
We could also create a Role vs a ClusterRole and limit to the lob1/lob2/lob3 namespace but using a ClusterRole allows us to define the permissions only once and then reference it from multiple RoleBindings for individual namespaces.
Next we setup a RoleBinding. This maps roles to objects and users/groups.
apiVersion: rbac.authorization.k8s.io/v1beta1
kind: RoleBinding
metadata:
  name: developer-binding
  namespace: lob1-app1
roleRef:
  apiGroup: rbac.authorization.k8s.io
  kind: ClusterRole
  name: developer
subjects:
  - kind: Group
    name: "lob1-devs"
    apiGroup: rbac.authorization.k8s.io
You could also use serviceaccounts for automated devops pipelines etc:
subjects:
  - kind: Group
    name: system:serviceaccounts:qa
    apiGroup: rbac.authorization.k8s.io
Repeat the RoleBinding for the other 3 namespaces.
We'll focus on user roles and not service accounts for this tutorial.
Users from each LoB will now have the ability to deploy pods only to the Projects their LoB has access to.

RBAC has no default way to list which namespaces a user has access to, but we can write a simple script to do this:
for n in $(oc get ns -o jsonpath='{.items[*].metadata.name}'); do
  echo -n "$n: "
  oc auth can-i get pods -n "$n" --as=[your user name]
done
Simple testing can be done using the --as parameter to the oc cli (docs here).
Another mechanism to enforce node selections for namespaces is to use Admission Controllers. This is a bit of a sledgehammer, as there are easier, less operationally invasive ways to do this above, but we mention it here for completeness. The methods mentioned above are far more flexible and light weight.
If you liked this article and would like to try OpenShift-as-a-Service for free, IBM offers free credits for OpenShift on x86_64 based architectures. If you'd like to try OpenShift on the IBM LinuxONE architec