Do you want to host your Laravel application for FREE and stress free? This guide will take you step by step until your application is hosted on render.com.
Now, let's get started.
You need to click to sign up on Render. It is preferable to sign up with GitHub since you will be using GitHub in the hosting process.
To force Laravel to allow https by default, make sure you App/Provider/AppServiceProvider.php contains the line and block of code below:
public function boot()
    {
        if (env('APP_ENV') == 'production') {
            $this->app['request']->server->set('HTTPS', true);
        }
}Here, you will use Laravel-render-template. So click to create a remote repo.
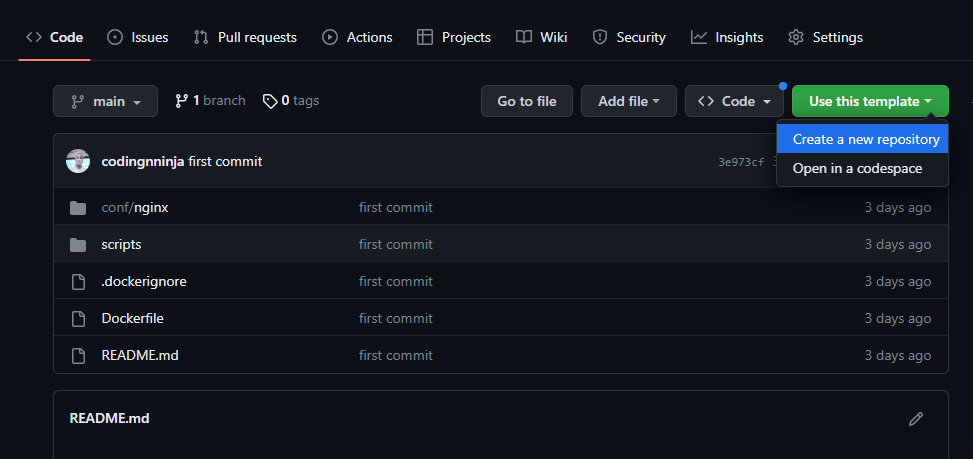
You need to click on use this template and then create a new repository. Fill your repository name and you're done.
It is time to merge the local and remote repo and push everything to the remote repo. In this case, you need to choose the option that fit your need.
Do you still remember the remote repository you created? Well, you will know what to do about it soon.
Run the following commands line by line:
git init
git add .
git commit -m "first commit"
git branch -M main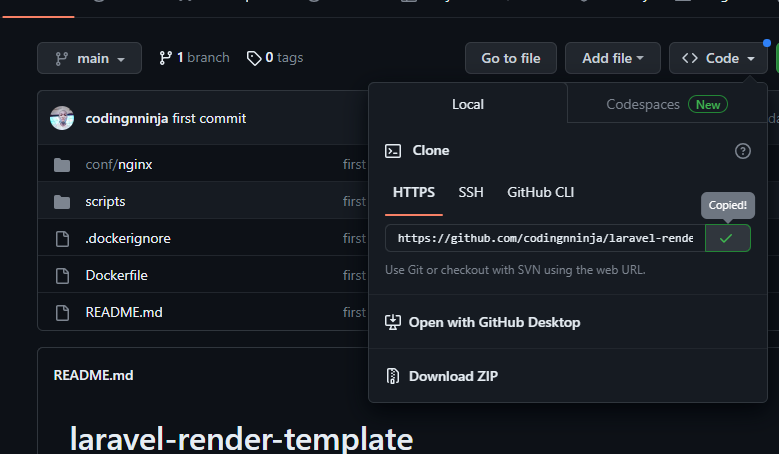
Yeah, it is time to use the url of the repository you created and you can copy it like in the image above. Use it as a replacement for the url in the first command below:
git remote add origin https://github.com/OWNER/REPOSITORY.git
git pull && git push -u origin mainIf you're working on an existing project you want to host, you need the commands below:
git remote add origin https://github.com/OWNER/REPOSITORY.git
git branch -M main
git pull && git push -u origin main
You need to replace the url above with the one you copied from your remote repository.
To do this, you need to reset the remote url in your local repository by running the command below:
git remote set-url origin https://github.com/OWNER/REPOSITORY.git
git remote -v
git add .
git commit -m "first commit"
git pull && git pushClick to create a new web service on Render. Then you will be prompted on what to do next. You see Github and Gitlab logos, and connect account by the right-hand side of your screen.
Click connect account under the Github logo to link your Github account. Choose the repository you want to host after setting up the web service. The image below gives you an insight.

Make sure your Laravel application is already working.
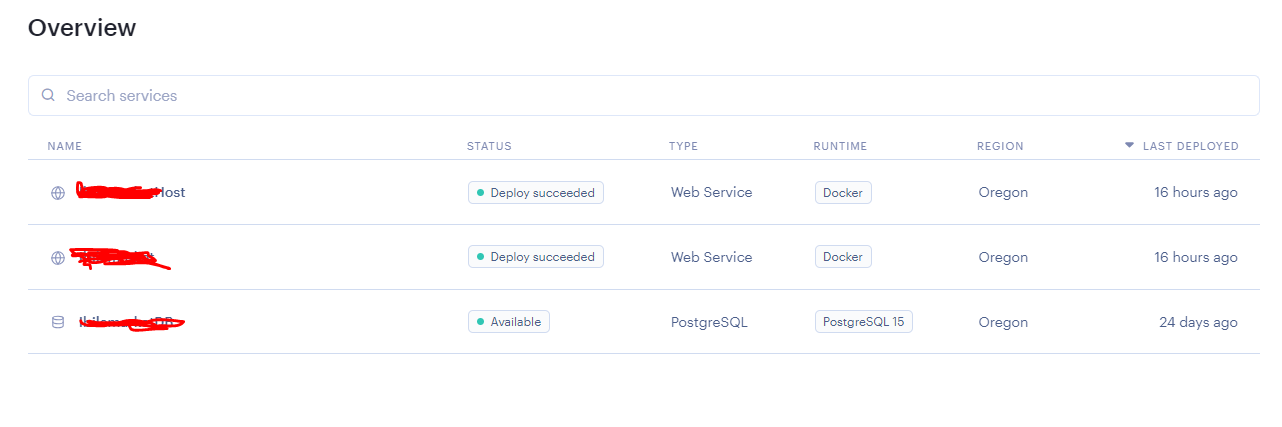
Here, we will add environment variables to the render web service you created the other time. Navigate to the dashboard and you will see all the services you have created just like in the image below:
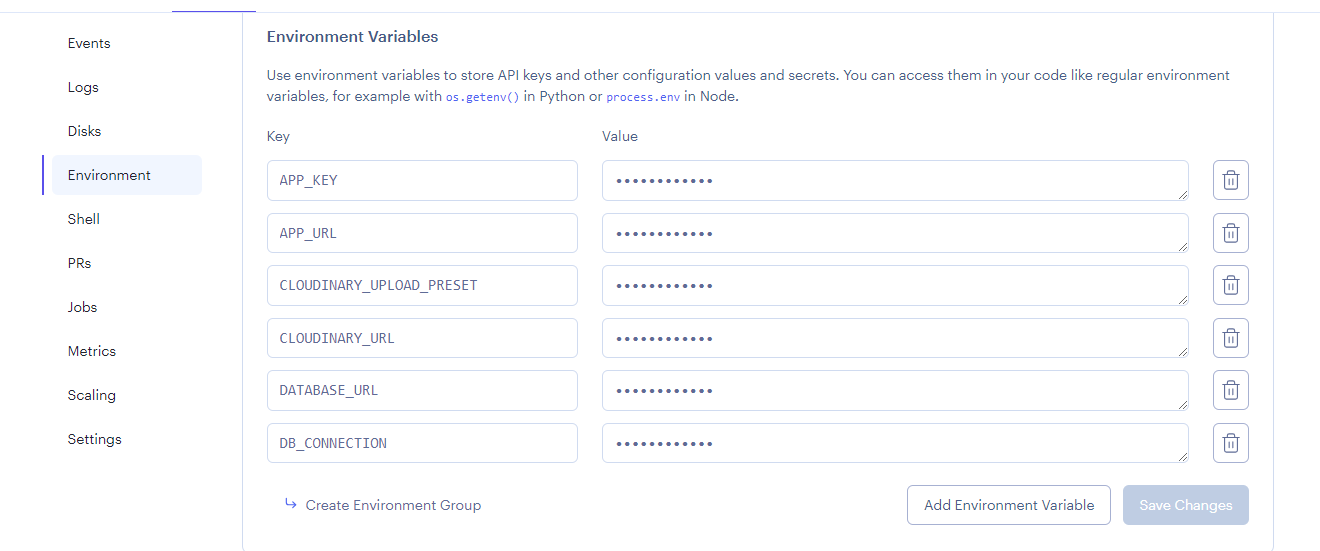
Then, click on the web service you want to host on and navigate to environment. You should see a view that looks like below:
Now, add all the environment variables your application depends on one by one. Let's start with APP_KEY.
Run the code below in the root directory of your Laravel project and copy its output.
php artisan key:generate --showAdd APP_KEY as the key and the generated string as its value.
To use MySQL on render, you need to be a paid user so we're using PostgreSQL in this write up. Create PostgreSQL database service on render.
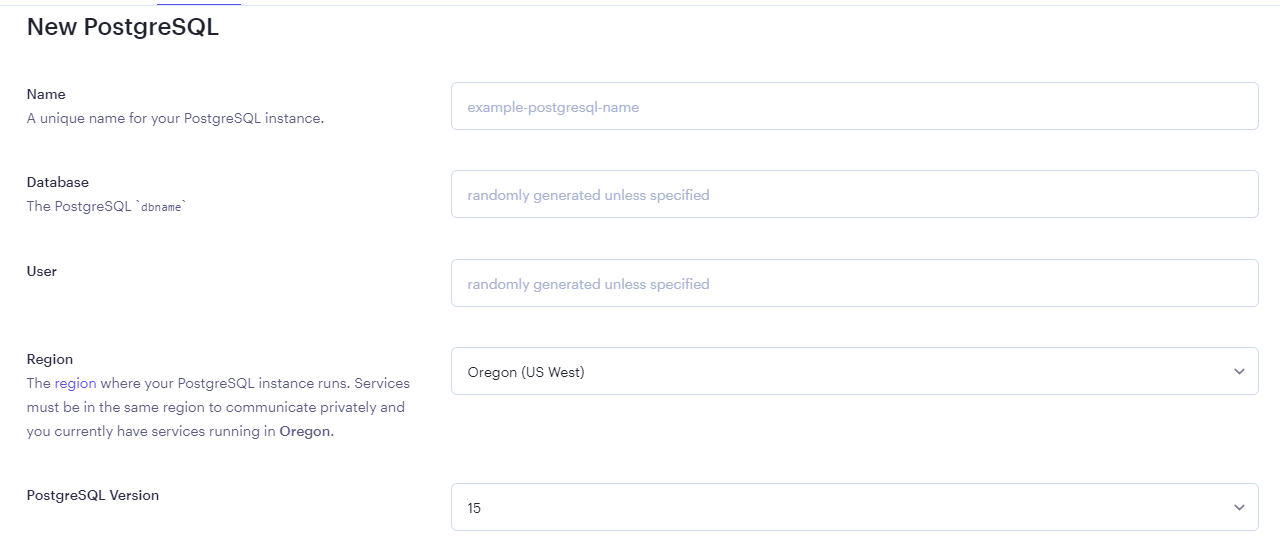
Make sure you enter your preferred name, database name, user name and region. The rest are optional. So look for create database button at the bottom of the page to complete the setup.
Remenber, you can use an external MySQL or ProgreSQL services. You need to follow similar process to set it up.
Note: Make sure the name of your database include something like db to differentiate the services on your dashboard but that is up to you.
When you finished setting up PostreSQL above, you should have copied Hostname, Port, Database, Username, Password because you need to add them to the enviroment as variables.
If you forgot to copy them, you can go back to your dashboard and select your database to copy the information.
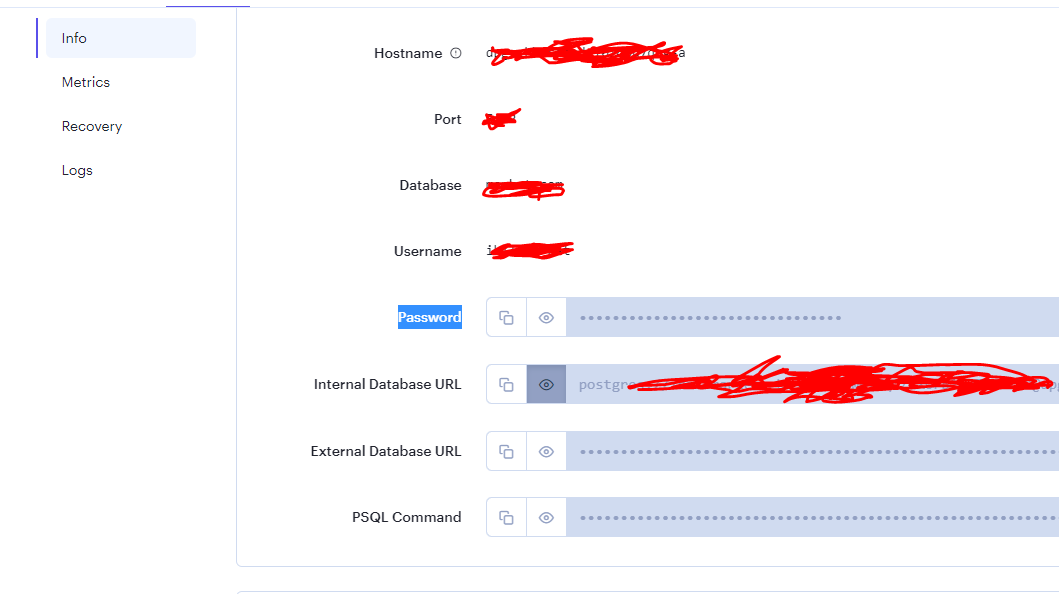
| Key | Value |
|---|---|
| DB_CONNECTION | pgsql |
| Port | 5432 |
| Hostname | your hostname |
| Database | your dbname |
| Username | your username |
| Password | your password |
The keys and values above show how to add environment variables on render.com and the image below also gives some insight.
Now, your application should be working correctly. And don't forget, it is important to keep this your application repository private for security and other reasons.
It contains the following files and folders:
Dockerfilecontains the information to setup our a serve environment.scripts/00-laravel-deploy.shcontains all necessary information to install Laravel and its dependencies. Below is its content:
#!/usr/bin/env bash
echo "Running composer"
composer install --no-dev --working-dir=/var/www/html

echo "Caching config..."
php artisan config:cache

echo "Caching routes..."
php artisan route:cache

echo "Running migrations..."
php artisan migrate --force
We add the above commands because they're the default to install Laravel, dependencies, and run its operations. If you run a certain command after installing a package before it works on your machine, you also need to run the same here.
For example, Laravel-cloudinary package requires it users to publish it to work on their machine. So, if you use Laravel-cloudinary, you also need the command for the serve too. Then, you need to add the command below to the above commands:
echo "Publishing cloudinary provider..."
php artisan vendor:publish --provider="CloudinaryLabs\CloudinaryLaravel\CloudinaryServiceProvider" --tag="cloudinary-laravel-config"conf/nginx-site.confcontains nginx (server) configuration..dockerignorecontains contains the files you don't want to ship with Docker.
- Always check the logs on the server.
- Sometimes, you might be running packages that need update which may affect the application to work properly. So, make it an habit to run
composer updateonce in a while.
- If your database can't connect despite adding all necessary details correctly, then you can hardcode the database connection information into your laravel project.
Navigate to config/database.php to change your default database connection to pgsql.
'default' => env('DB_CONNECTION', 'pgsql')And add database connection details below:
'pgsql' => [
            'driver' => 'pgsql',
            'url' => env('DATABASE_URL'),
            'host' => env('DB_HOST', 'Hostname'),
            'port' => env('DB_PORT', '5432'),
            'database' => env('DB_DATABASE', 'dbname'),
            'username' => env('DB_USERNAME', 'username'),
            'password' => env('DB_PASSWORD', '********'),
            'charset' => 'utf8',
            'prefix' => '',
            'prefix_indexes' => true,
            'schema' => 'public',
            'sslmode' => 'prefer',
        ]
- Click to visit render docs for Laravel
Chat me up on Twitter via Ayobami Ogundiran
![]()
![]()


Laravel is a web application framework with expressive, elegant syntax. We believe development must be an enjoyable and creative experience to be truly fulfilling. Laravel takes the pain out of development by easing common tasks used in many web projects, such as:
- Simple, fast routing engine.
- Powerful dependency injection container.
- Multiple back-ends for session and cache storage.
- Expressive, intuitive database ORM.
- Database agnostic schema migrations.
- Robust background job processing.
- Real-time event broadcasting.
Laravel is accessible, powerful, and provides tools required for large, robust applications.
Laravel has the most extensive and thorough documentation and video tutorial library of all modern web application frameworks, making it a breeze to get started with the framework.
You may also try the Laravel Bootcamp, where you will be guided through building a modern Laravel application from scratch.
If you don't feel like reading, Laracasts can help. Laracasts contains thousands of video tutorials on a range of topics including Laravel, modern PHP, unit testing, and JavaScript. Boost your skills by digging into our comprehensive video library.
We would like to extend our thanks to the following sponsors for funding Laravel development. If you are interested in becoming a sponsor, please visit the Laravel Partners program.
- Vehikl
- Tighten Co.
- WebReinvent
- Kirschbaum Development Group
- 64 Robots
- Curotec
- Cyber-Duck
- DevSquad
- Jump24
- Redberry
- Active Logic
- byte5
- OP.GG
Thank you for considering contributing to the Laravel framework! The contribution guide can be found in the Laravel documentation.
In order to ensure that the Laravel community is welcoming to all, please review and abide by the Code of Conduct.
If you discover a security vulnerability within Laravel, please send an e-mail to Taylor Otwell via taylor@laravel.com. All security vulnerabilities will be promptly addressed.
The Laravel framework is open-sourced software licensed under the MIT license.