Behavioral Cloning Project
The goals / steps of this project are the following:
- Use the simulator to collect data of good driving behavior
- Build, a convolution neural network in Keras that predicts steering angles from images
- Train and validate the model with a training and validation set
- Test that the model successfully drives around track one without leaving the road
- Summarize the results with a written report
My project includes the following files:
- model.py containing the script to create and train the model
- drive.py for driving the car in autonomous mode
- model.h5 containing a trained convolution neural network
- model.json contains the CNN network metadata in json format, it is under same folder of model.h5
- writeup_report.md summarizing the results
My model codes contain two files, one is model.py another is helper.py.
model.py file contains the code for training and saving the convolution neural network, and helper.py file contains all the util methods on image processing, e.g. crop, shear, flip, gmma transition. The file shows the pipeline I used for training and validating the model, and it contains comments to explain how the code works.
Using the Udacity provided simulator and my drive.py file, the car can be driven autonomously around the track by executing
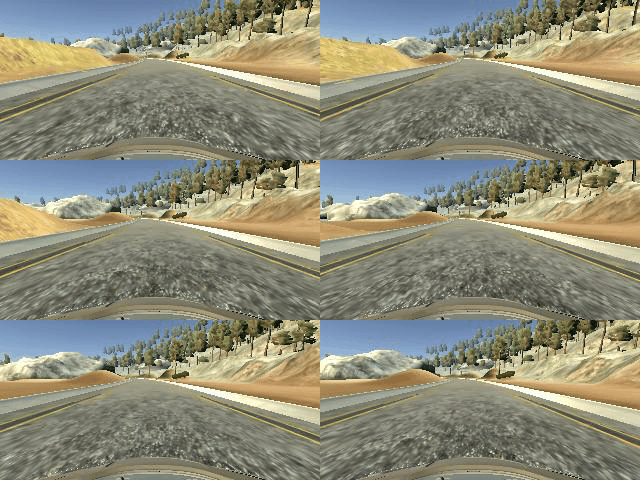
python drive.py model.jsonIf everything goes well, we can see car drive automatically on track1 in Simulator like bellow. Longer driving video can be get from Here
1. Solution Design Approach
The overall strategy for deriving a model architecture was to create a model which can be used by the simulator and drive the car automatically in track1. I tried several rounds before I got the final solution:
- Like in the lecture video, my first step was to use 3 layers full connected convolution neural network, which do help me start. I get my first model, and kick start my car, but it does not works well, drive off road in seconds. I think this is because of network architecture is too simpler, so I move to LeNet.
- Then I tried the LeNet, with same training data I collected from simulator. Little better but still drive off road. I hae no idea why that time.
- After more video and blog/google search, I switch the network to NVIDIA's per its paper. Still not good.
- Finally I realize that I did not have enough training data. Then move on the training data augmentation. I do get lot of inspiration and hints from the internet, tried several image process methods by CV2. All details can be found at the beginning of this write-up.
- One last thing I think is also very important. To make the model training faster, all the incoming camera images are resized to 60x60 in the model. To make this happen and fit different image size from the simulator, I do change the drive.py file which will pre-process the image with crop and re-size before predict in the model.
The final step was to run the simulator to see how well the car was driving around track one. There were a few spots where the vehicle fell off the track, I tried to add more training data by ""only recording that spot many times", and drive off the road, and "only recording drive back the road". All these training steps seems not work well with my laptop keyboard (I have not joystick). But finally after I switch to use the Udacity's training data, the model works fine.
At the end of the process, the vehicle is able to drive autonomously around the track without leaving the road.
2. Final Model Architecture
The final model architecture (model.py lines 19-63) consisted of a convolution neural network with the following layers and layer sizes.
My model is based of NVIDIA's well proofed network architecture. Bellow is the keras summary output of the network:
    ____________________________________________________________________________________________________
    Layer (type)                     Output Shape          Param #     Connected to
    ====================================================================================================
    lambda_1 (Lambda)                (None, 64, 64, 3)     0           lambda_input_1[0][0]
    ____________________________________________________________________________________________________
    convolution2d_1 (Convolution2D)  (None, 32, 32, 24)    1824        lambda_1[0][0]
    ____________________________________________________________________________________________________
    activation_1 (Activation)        (None, 32, 32, 24)    0           convolution2d_1[0][0]
    ____________________________________________________________________________________________________
    maxpooling2d_1 (MaxPooling2D)    (None, 31, 31, 24)    0           activation_1[0][0]
    ____________________________________________________________________________________________________
    convolution2d_2 (Convolution2D)  (None, 16, 16, 36)    21636       maxpooling2d_1[0][0]
    ____________________________________________________________________________________________________
    activation_2 (Activation)        (None, 16, 16, 36)    0           convolution2d_2[0][0]
    ____________________________________________________________________________________________________
    maxpooling2d_2 (MaxPooling2D)    (None, 15, 15, 36)    0           activation_2[0][0]
    ____________________________________________________________________________________________________
    convolution2d_3 (Convolution2D)  (None, 8, 8, 48)      43248       maxpooling2d_2[0][0]
    ____________________________________________________________________________________________________
    activation_3 (Activation)        (None, 8, 8, 48)      0           convolution2d_3[0][0]
    ____________________________________________________________________________________________________
    maxpooling2d_3 (MaxPooling2D)    (None, 7, 7, 48)      0           activation_3[0][0]
    ____________________________________________________________________________________________________
    convolution2d_4 (Convolution2D)  (None, 7, 7, 64)      27712       maxpooling2d_3[0][0]
    ____________________________________________________________________________________________________
    activation_4 (Activation)        (None, 7, 7, 64)      0           convolution2d_4[0][0]
    ____________________________________________________________________________________________________
    maxpooling2d_4 (MaxPooling2D)    (None, 6, 6, 64)      0           activation_4[0][0]
    ____________________________________________________________________________________________________
    convolution2d_5 (Convolution2D)  (None, 6, 6, 64)      36928       maxpooling2d_4[0][0]
    ____________________________________________________________________________________________________
    activation_5 (Activation)        (None, 6, 6, 64)      0           convolution2d_5[0][0]
    ____________________________________________________________________________________________________
    maxpooling2d_5 (MaxPooling2D)    (None, 5, 5, 64)      0           activation_5[0][0]
    ____________________________________________________________________________________________________
    flatten_1 (Flatten)              (None, 1600)          0           maxpooling2d_5[0][0]
    ____________________________________________________________________________________________________
    dense_1 (Dense)                  (None, 1164)          1863564     flatten_1[0][0]
    ____________________________________________________________________________________________________
    activation_6 (Activation)        (None, 1164)          0           dense_1[0][0]
    ____________________________________________________________________________________________________
    dense_2 (Dense)                  (None, 100)           116500      activation_6[0][0]
    ____________________________________________________________________________________________________
    activation_7 (Activation)        (None, 100)           0           dense_2[0][0]
    ____________________________________________________________________________________________________
    dense_3 (Dense)                  (None, 50)            5050        activation_7[0][0]
    ____________________________________________________________________________________________________
    activation_8 (Activation)        (None, 50)            0           dense_3[0][0]
    ____________________________________________________________________________________________________
    dense_4 (Dense)                  (None, 10)            510         activation_8[0][0]
    ____________________________________________________________________________________________________
    activation_9 (Activation)        (None, 10)            0           dense_4[0][0]
    ____________________________________________________________________________________________________
    dense_5 (Dense)                  (None, 1)             11          activation_9[0][0]
    ====================================================================================================
    Total params: 2,116,983
    Trainable params: 2,116,983
    Non-trainable params: 0
3. Attempts to reduce overfitting in the model
At the beginning I used the simulator to generate training data, both training and validation results are above 60%, but during testing drive, the car move off the road quickly. I believe these are from several reasons:
- Training data collected from simulator is small, not big enough
- Training driving is by laptop keyboard which is not so accurate
- I did not do any data augmentation at the beginning
Finally I decided to use Udacity's training data, which seems big enough and very well tagged with correct steering angle.
The model was tested by running it through the simulator and ensuring that the vehicle could stay on the track for hours, the track I tested on is Track 1.
4. Model parameter tuning
The model is based on the well tuned NVIDA's network. We use Adam optimizer and mse loss with a learning rate of 1e-4.
model.compile(optimizer=Adam(learning_rate), loss="mse", )
There are several other parameters which need more tuning, following are the values used in my project , it may not fully optimized: 1. left and right camera steering angle adjustment: 0.2-0.3 (empirical data, get from lecture video) 2. crop image top margin: 30%-35% (remove sky from the image) 3. crop image bottom margin: 0-10% (remove some of the car wind shield part from image) 4. shearing range: 200 (I did not do more tuning on this parameter, but believe increase this value may can help track 2 which has many big turn and U-turn) 5. flip/rotate probability: 50% (empirical data, start in the middle) 6. number_of_epochs = 3-16 7. number_of_samples_per_epoch = 20,032 (64 x 313) 8. number_of_validation_samples = 6,400 (64 x 100)
5. Creation of the Training Set & Training Process
Based on what I tested and tried, training data augmentation are VERY important for the final quality of the model. There are various factors need to be take into consideration:
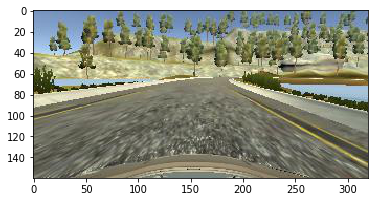
- multiple camera images The source data came from three Camera channels. Data wise the are lot of duplicates. To use all of them definitely can help but will increase the training time. But each camera do provide image from different angles. So finally I decided to randomly pick camera from center, left and right, but with a angle tuning if we select left or right camera. For left camera we add a steering angle, ro right camera we minus a steering angle. Related source code can be found in helper.py 179-191 ln.
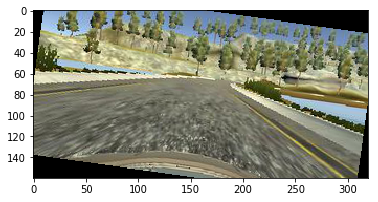
Bellow is one sample of one frame image from the center camera:
- Flip images
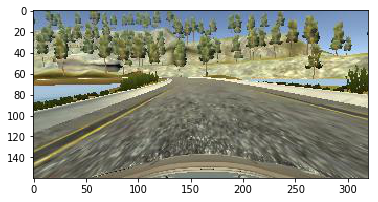
Since the first track training data are all left turn, we need more data on right turning. One way got in the lecture is to flip the image, and update the steering angle = steeringAngel * (-1).
In my implementation, I do not flip all the images which will increase the training time, but we use a probability parameter, flip images with this probability default to 50%.
- Crop images
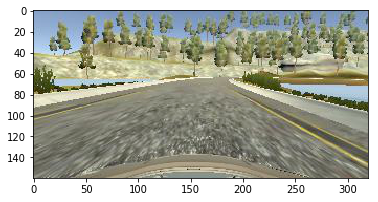
Because the original images from camera includes many features which are related to the road driving, e.g. sky, trees and some other objects out side of the road. We I decided to crop the images to remove some areas which not needed.
- Gamma Transition on Images
We also noticed that images from camera are impacted by the outdoor whether, day and night, or sun shaine or shading. But in our simulator we cannot get these kind of images. So one way is to use python images utils and cv2 to pre-process images with different gamma transition.
Gamma can transform the image with different brightness, which can simulate day and shade very well. To avoid too dark or too bright, we set a limit of range of gamma value
gamma = np.random.uniform(0.4, 1.5)
- Rotate Images
In previous traffic signal classier projects, we learn that some "rotate based image augmentation" also help on training. In this project, I also add some random rotate step during image augmentations. rotation angle is set to smaller than 15 degrees.
angle = np.random.uniform(-rotation_amount, rotation_amount + 1)
- Shearing Images
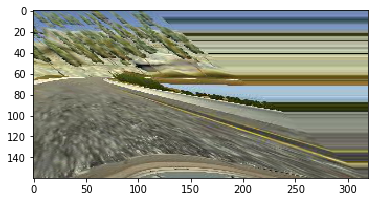
In the UDacity training data, we can see from the cvs log file, majority of the data with a "steering angle = 0", we need to augment more data with "steering angle != 0". Per my test this is one important step which can generate images with different steering angles. This technology can help augment more training data with more "turning". Here in this project, I use the horizontal Image shearing which transform pixels left or right based on cv2 shearing algorithms. Code lines can be found from helper.py l86-108 ln. Shearing image has one parameter which control the horizontal parallel moving pixels, which can be tuned more.
Now our raw image size is about 320 x 160 , we use the range of 200 pixel, when we seek the shearing point, we start from middle +/- this range.
rows, cols, ch = image.shape
dx = np.random.randint(-shear_range, shear_range + 1)
random_point = [cols / 2 + dx, rows / 2]
- Resize Images
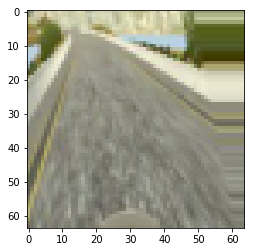
Final images are been resized to 60x60, which is much smaller than the original one, helps lot on shortening the training time. And since we crop the images and only get the area includes road and direction, so the final image still keep the key features from camera.
In this project, the test is straight forward. When the training finished, start the ./drive.py service with the model, then start the simulator in track 1 in autonomous mode, drive several laps see whether it run in the road and not off the track. During my test, I also leave it running for hours and running as expected in the middle of the road and never off the track.
First I tried 3 epoch, the car can run several laps, but eventually (about after one hour) drive off the road; Then I tried to train with 8 epoch, it works great, can run hours and seems can drive forever in track 1; I also tried to train with 16 epoch, which do give better loss rate than 8 epoch. But so far 8 epoch is good enough already.
    19712/20000 [============================>.] - ETA: 2s - loss: 0.0120
    19776/20000 [============================>.] - ETA: 1s - loss: 0.0120
    19840/20000 [============================>.] - ETA: 1s - loss: 0.0120
    19904/20000 [============================>.] - ETA: 0s - loss: 0.0120
    19968/20000 [============================>.] - ETA: 0s - loss: 0.0120
    20032/20000 [==============================] - 177s - loss: 0.0120 - val_loss: 0.0115
To minimize memory usage, we use the Batch discussed in the lecture video. Each Epoch contains many micro-batch, totally one Epoch trains around 20,000 samples, and each micro-batch contains 64 sample/batch. In each batch, images are shuffled and picked up randomly.
    history = model.fit_generator(train_gen,
                                  samples_per_epoch=number_of_samples_per_epoch,
                                  nb_epoch=number_of_epochs,
                                  validation_data=validation_gen,
                                  nb_val_samples=number_of_validation_samples,
                                  verbose=1)
I finally randomly shuffled the data set and put 6400/(20032+6400) = 24.2% of the data into a validation set.
Track2
The model cannot work well in track 2, especially the first big turn, where the car will drive off the road. The reason is our training data are collected from track 1 which does not has big turn.
There are two ways to solve track2
- generalize model algorithms, especially the way to augmentation training data
- collect more data from track 2 and train on the same CNN model
Parameter Tuning
So far we use some empirical data to set the parameter values, some like camera steering angle adjustment, throttle value, flip probabilities, epochs, batch size, if future all can be tuned with more training tryings.
Now the parameters we used can make the car drive in track1 very well. For next step of generalization , there are still many tuning space we can explore.
