Read https://support.google.com/cloud/answer/6158849?hl=en in order to create Project and Oauth consent screen.
While the oauth app is in development mode you need to add the users which can access.

open the https://developers.google.com/oauthplayground/ google playground select a scope, for initial test you can use google Calendar API
https://www.googleapis.com/auth/calendar
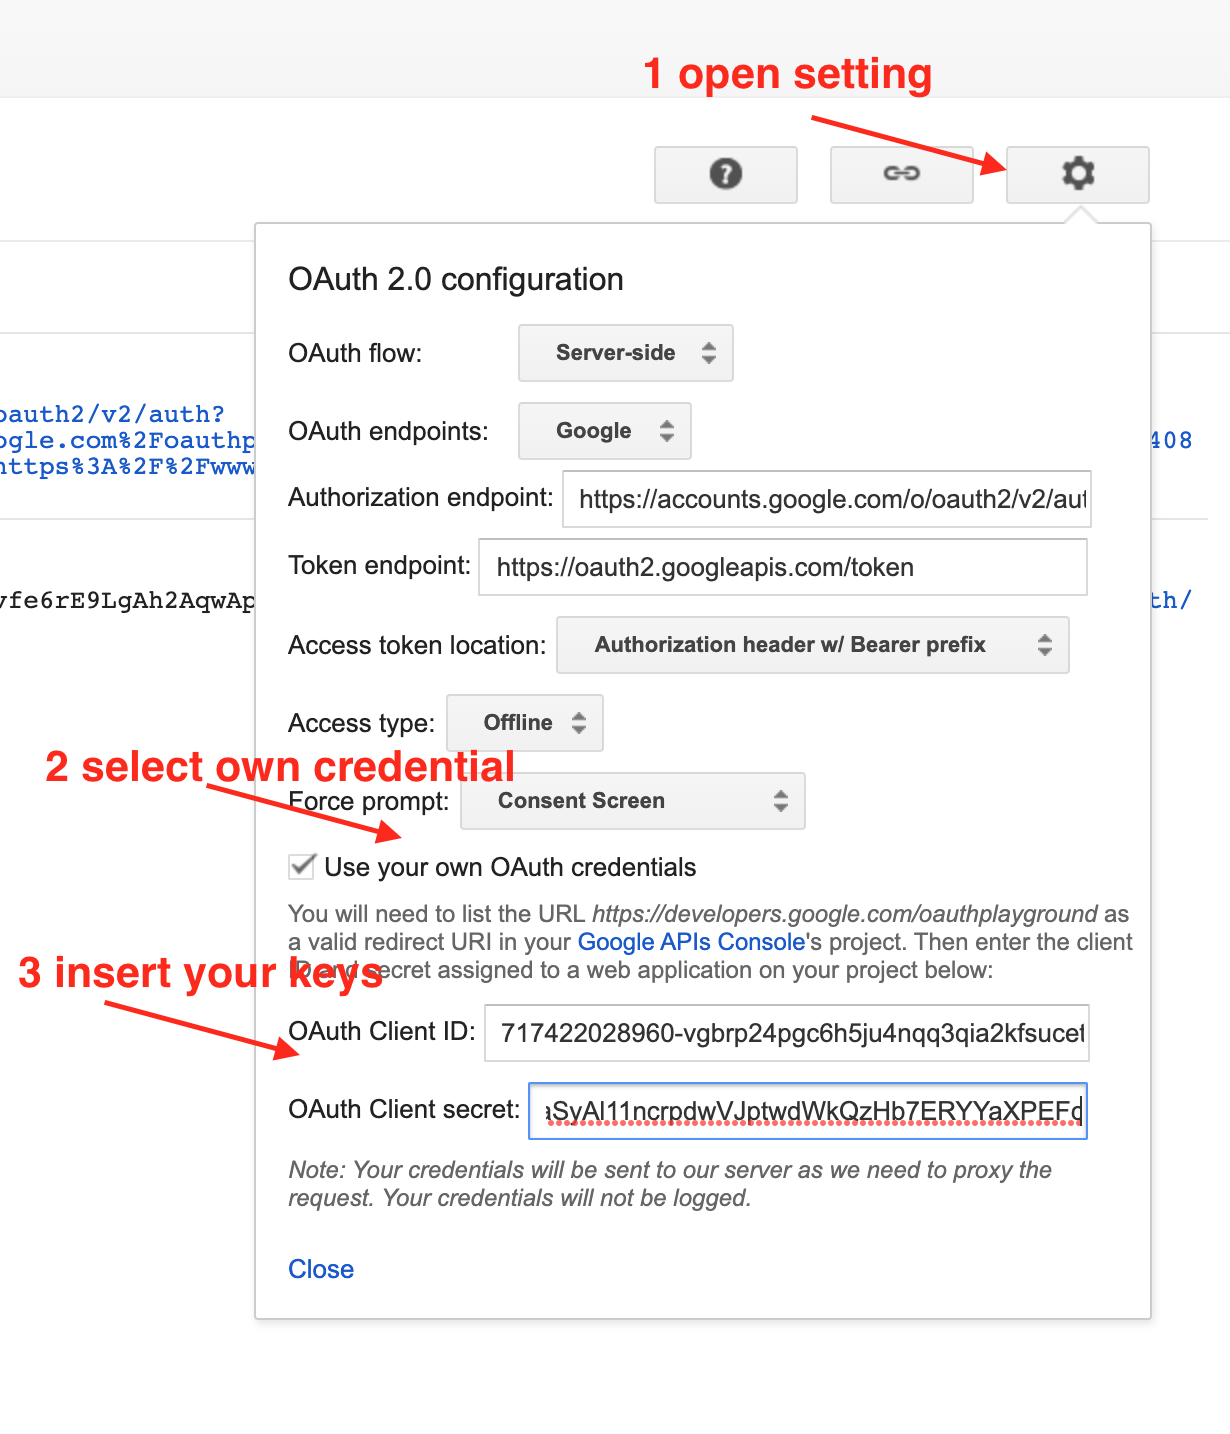
open setting panel and add your keys

click on 'Authorize API' you should see the oauth consent screen. At the end you can access
- Authorization code
- refresh token
- access token
clone https://github.com/donateoa/oauth2-client.git
cd oauth2-client
npm i
ionic serve
you will find the service at http://localhost:8100/
<!--Add google calendar api-->
<script src="https://apis.google.com/js/api.js"></script>
create an object like this:
 googleCalendarApiConfig: {
    clientId: 'your-client-id.apps.googleusercontent.com',
    scope: 'https://www.googleapis.com/auth/your-scope',
    apiKey: 'your-api-key',
    discoveryDocs: ['https://www.googleapis.com/discovery/v1/apis/calendar/v3/rest']
}
replace
- your-client-id with the clientId from google console
- your-api-key with the api key from google console
const { clientId, apiKey, scope, discoveryDocs } = googleCalendarApiConfig;
await gapi.load('client:auth2', async () => {
    this.auth2 = await gapi.client.init({
      apiKey,
      clientId,
      discoveryDocs,
      scope
    });
});
    // Listen for sign-in state changes.
    gapi.auth2.getAuthInstance().isSignedIn.listen(callbackFunction);