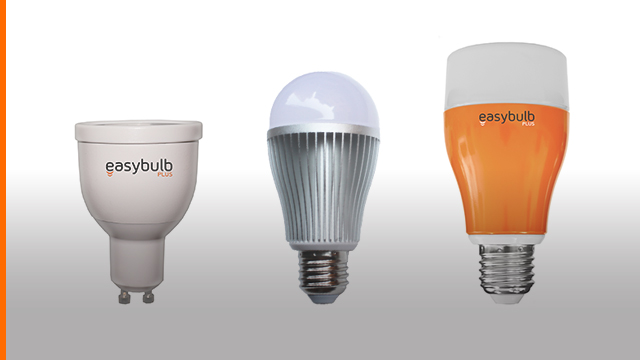
Canny is a $7 (hw components cost) implementation of a controller for the cheap bulbs sold under the brands MiLight, LimitlessLed, Easybulb or any other futlight clone.
It uses a ESP8266 device and a nRF24L01 radio module to directly interface with the compatible bulbs.
Canny pretends to overcome the limitations of these devices by bringing additional features and reliability.
Gateway capabilities:
- Individually control up to 2048 bulbs
Software capabilities:
-
Manual control over bulbs or groups of bulbs
-
Geofence rules
-
Timers
-
Bulbs as notification devices for smartphone calls, others
IoT capabilities:
- Expandable to other usages over the Muzzley platform
Security:
- Additional security to standard milight/easybulb bridge authentication
Canny relies on specific hardware and software requirements.
Hardware:
-
ESP8266 compatible module (amazon link)
-
nRF24L01 radio module (amazon link)
-
some wiring to connect the ESP8266 and nRF24L01 (amazon link)
Software:
-
Arduino.cc IDE (link)
-
Arduino.cc with opened Canny project file (this project).
-
Arduino IDE: Installed support for the ESP8266 board: "Tools -> Board”, selecting the correct ESP module
-
Arduino IDE: Correctly installed library: wifi manager
-
Arduino IDE: Correctly installed library: “MQTT” by Joel Gaelwiler
-
Arduino IDE: Correctly installed library: “arduino json” by Benoit Blanchon
-
Arduino IDE: Correctly installed library: “RF24” by TMRh20
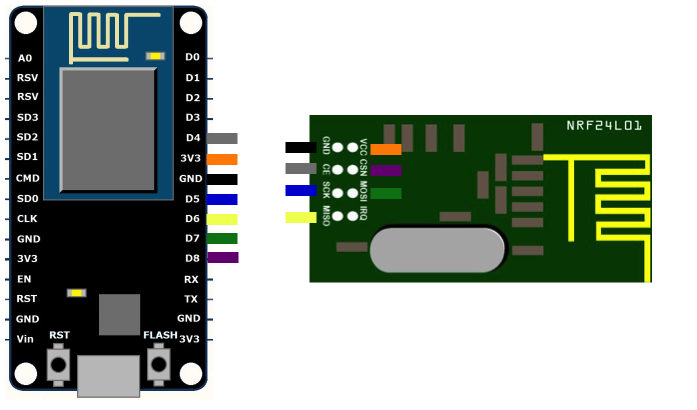
The hardware setup is quite simple if you have a ESP8266 development board with physical pins for IO. All you have to do it connect both hardware modules and power the main board.
- DIAGRAM
The above diagram illustrates the connectivity between the ESP8266 and the nRF24L01 module.
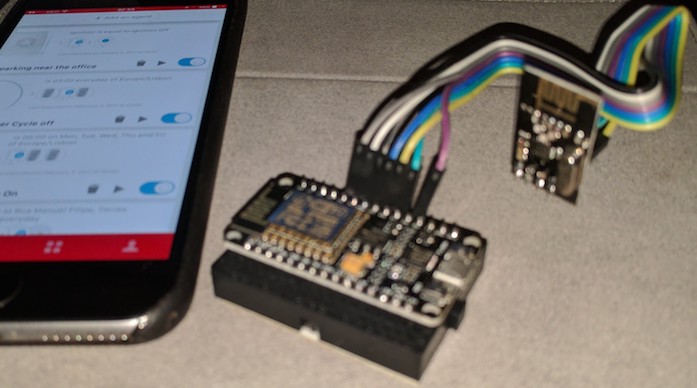
- PICTURE
This step is optional and you should consider it, if you’d like to fork this project and have your own implementation or use Muzzley for business features (example: have your own controlling App).
Otherwise, just proceed to the next step.
-
Increase MQTT buffer size: Update the installed “MQTT” by Joel Gaelwiler library by editing the file “MQTTClient.h” inside the “src” folder from "#define MQTT_BUFFER_SIZE 128” to "#define MQTT_BUFFER_SIZE 512”
-
Open the Canny.ino project into Arduino.cc IDE
-
Compile
-
Push code into arduino
Note: If you have gone through the step “Setup: Muzzley developer account”, you need to update Muzzley’s credentials at canny.ino file. Variables to update: MProfileID, MUUID and MAppToken.
Find the first usage guidelines, once you have deployed the software onto the ESP8266 and you have all the hardware setup done.
For first time you deploy the software into the ESP8266 or if it cannot connect to your WiFi network, it will automatically enter in configuration mode. You should to the following steps:
-
Connect your smartphone to a WiFi network named: “CANNY-SETUP“. Screenshot link.
-
Wait a few seconds until you get a configuration screen. Follow the steps in order to connect your Canny gateway to your local network. Screenshot link.
note: after your configuration, due to a existing bug, you need to manually reset the ESP8266. Just unplug the power cable.
Once you get Canny connected to your local network, you’ll be able to configure and control your home bulbs. Steps:
-
Connect your smartphone to your local WiFi network (important step!).
-
Download and open the Muzzley App. Follow the link: Google Play, App Store or Windows 10 Store
-
Once you’re logged on Muzzley, click the Add Device button and scroll down to the Milight, Easybulb (Canny GW). Screenshot link.
-
Make sure your smartphone is connected to the same network as your Canny GW. Hit the Search button. Note: This is only for setup; you can later control the bulbs from the internet. Screenshot link.
More bulbs: Repeat step 3 for each bulb you’d like to add to the Muzzley app.
After you add a bulb to the Muzzley App you need to pair each entry to a physical bulb. Do the following:
-
On the Muzzley App press the bulb you’ve just added. Screenshot link.
-
You’ll find a pairing button on the top left corner of the screen. Press it. Screenshot link.
-
At the same time: Turn the bulb on (physical switch) and press the “Pair / Unpair” button. Screenshot link.
-
Your light should blink. If not, repeat step 3.
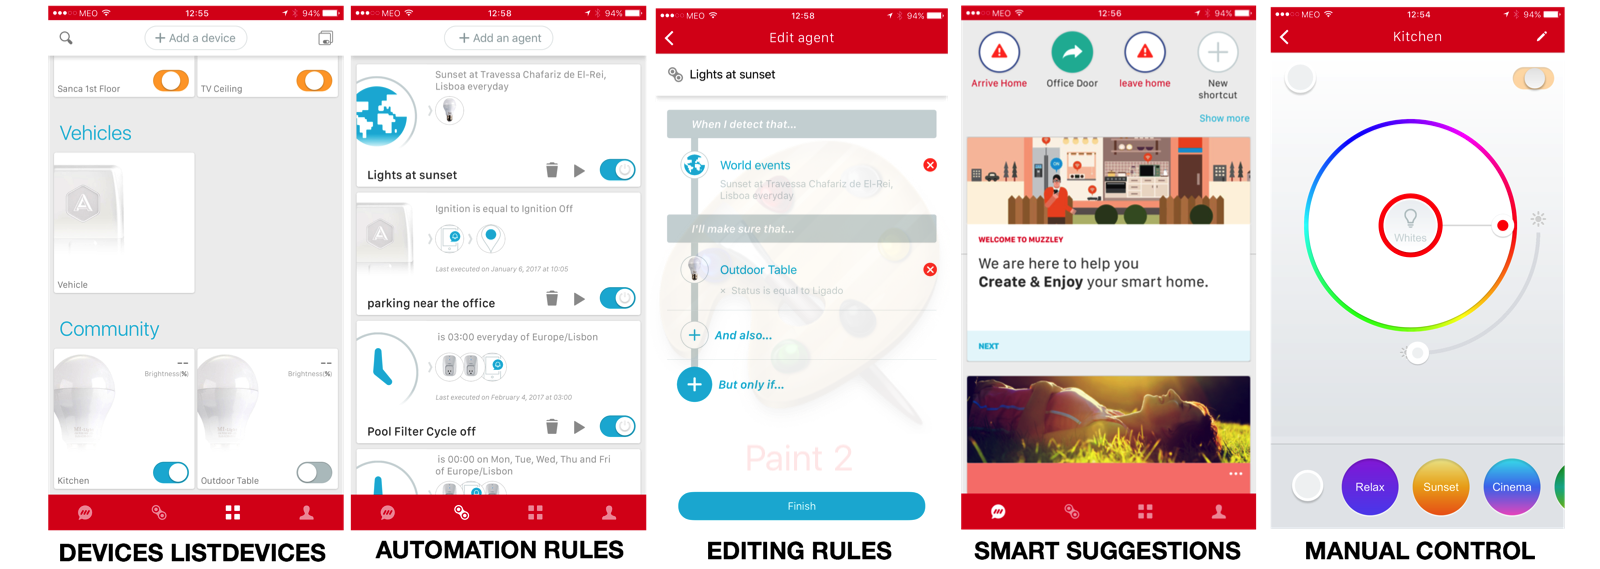
These are some of the features and screenshots of the Muzzley App.
Please send your feedback or pull requests.
Feature improvements:
-
Add hardreset button to clear wifi and paired bulbs configuration
-
Better Support for white only bulbs
-
Store bulbs status to circumvent the protocol unidirectional limitations
-
Pair with remote controls and allow them to control other Muzzley compatible devices
Other project improvements:
- 3D print case
This project uses libraries from other people as well as research made on the milight protocol. Some credits:
-
Henryk Plotz: PL1167 promiscuous reverse engineering over protocol
-
Joel Gaelwiler: MQTT implementation
-
Benoit Blanchon: jSON Parser
Otherwise stated on individual project files, Canny's license is MIT.