This folder contains a Knowledge Mining Solution Accelerator solution that leverages OpenAI model. Specific steps need to be applied and relevant configuration according to reader's needs. CognitiveSearch.UI < Search.UI folder is a .NET Core MVC Web app used a Template UI for querying a search index.
This is an end-to-end solution containing Cognitive Services and the focus of this README file is to prepare the reader into leveraging easily this accelerator.
- Azure subscriptions
- Git bash, WSL or another shell script editor on your local machine; Git version 2.27 or newer required
- Setup a Python environment in your local PC(ideally https://www.anaconda.com/products/distribution)
- Install VSCode (with Azure Functions and Python extension installed)
- Install Visual Studio
- Install Docker
- Install Azure CLI
- OpenAI access: will provide with the key and endpoint to connect to the instructor's Azure OpenAI service. Alternatively, you can utilize your own instance of Azure Open AI.
- Install Postman
In your Azure subscription, create a resource group (please make sure it's
unique using your initials or initial+last_name e.g. fi-openai-workshop or
fismali-openai-workshop).
In the same resource group, deploy an Azure Key Vault instance.
How to create a resource group
How to create a key vault
Important: Add the key vault name that you just created in kvname in the main.parameters.json file
2 Clone the following repo: Sustainability with Openai - Knowledge Mining
Open the paramenters.json file in an editor of your choice and add the relevant values for the following two keys:
- openaiapikey
- openaiapibase
Replace the resource group name you have created in Step 1 in the below command:
az deployment group create --resource-group <resource_group_name> --template-file main.bicep --parameters main.parameters.json
After you execute the deployment command, for the first time you will get the following error which for now you can ignore.

Re-run the Bicep deployment command again one more time.
If you hit the following error, then you have to deploy the Video Indexer function code. Please see step 3 below. Configure tenant setting as per Step 3 and then deploy the Video Index (start-video-indexing) function in Step 4 and re-run the Bicep command again.

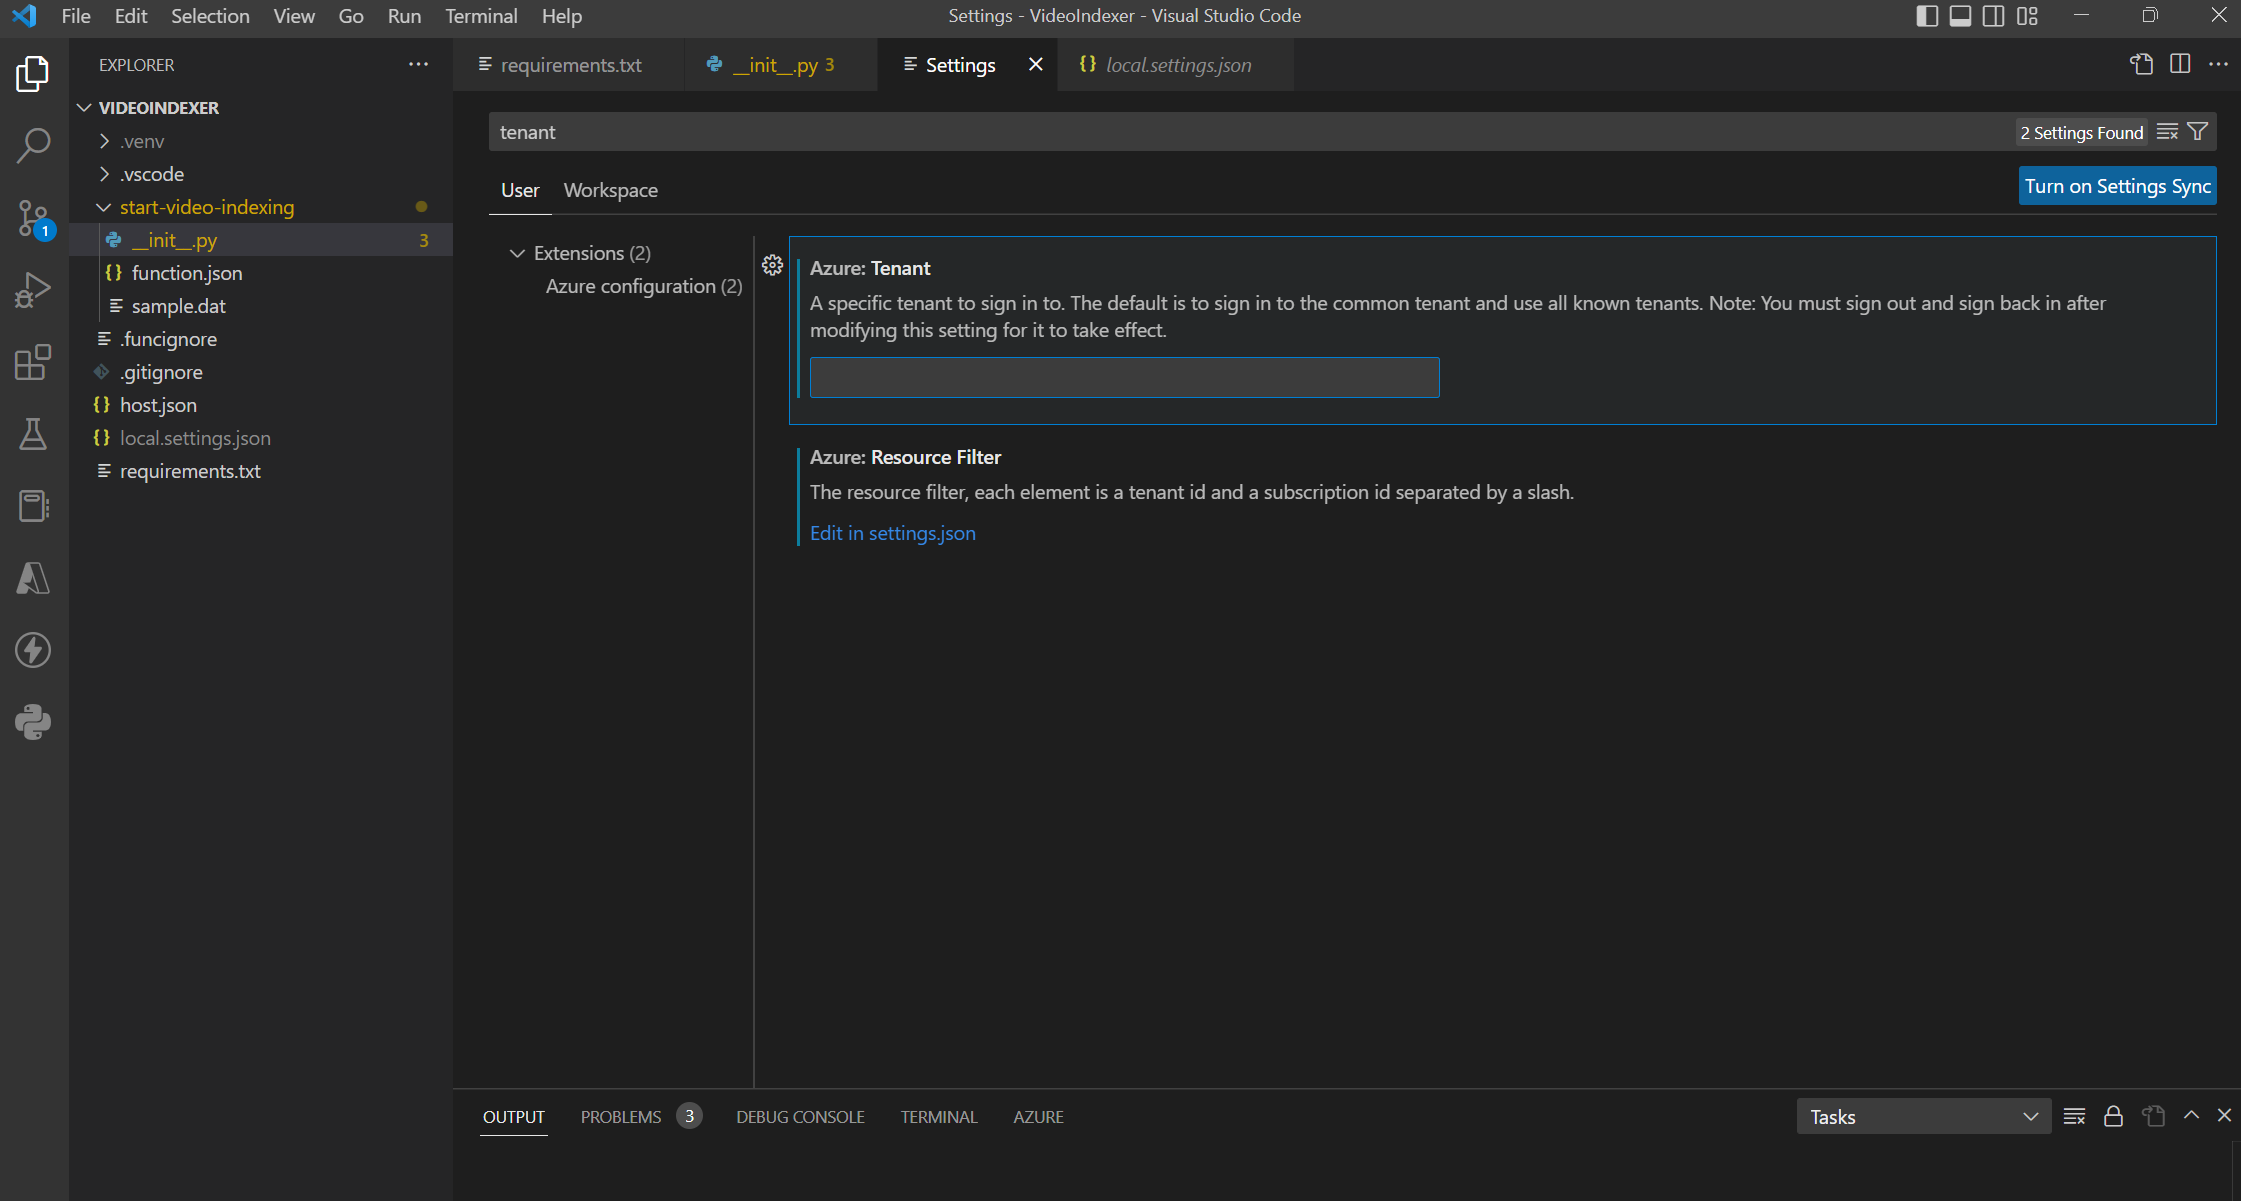
- Open VSCode
- Make sure VSCode is logged into correct tenant.
- Click on the Settings icon (bottom left) and search for 'tenant' and enter the tenant id:

- Open VS Code
- Click on File menu
- Click on Open Folder
- Go to your local directory where you git cloned the repo
- Open the Azure-Functions folder and then select the
VideoIndexerfunction folder. Click Select Folder.- This will open this folder in VSCode
- Right click on the function and click Deploy to Function App and select the Video Indexer function
4b. Now repeat the steps above for the other functions: PDFSplitFunction, OpenAIFunction, SDGSimilarity, VideoIndexerCallback,


- Go to Azure Portal and select the relevant Video Callback function app
- From the left pane, click on Functions then "video-indexer-callback". Click on Code + Test and then Get function URL.
- Copy the URL which includes the function code too then in the Azure Portal go to the Video Indexer function app.
- From the left pane, click on the Configuration tab under Settings and click on New application setting
- Enter "function_url" in the Name field
- Paste the Function URL you copied earlier in the Value field
- Click Ok and then Save
- From the Video Indexer service carry out the following tasks:
- Click on Access Control (IAM)
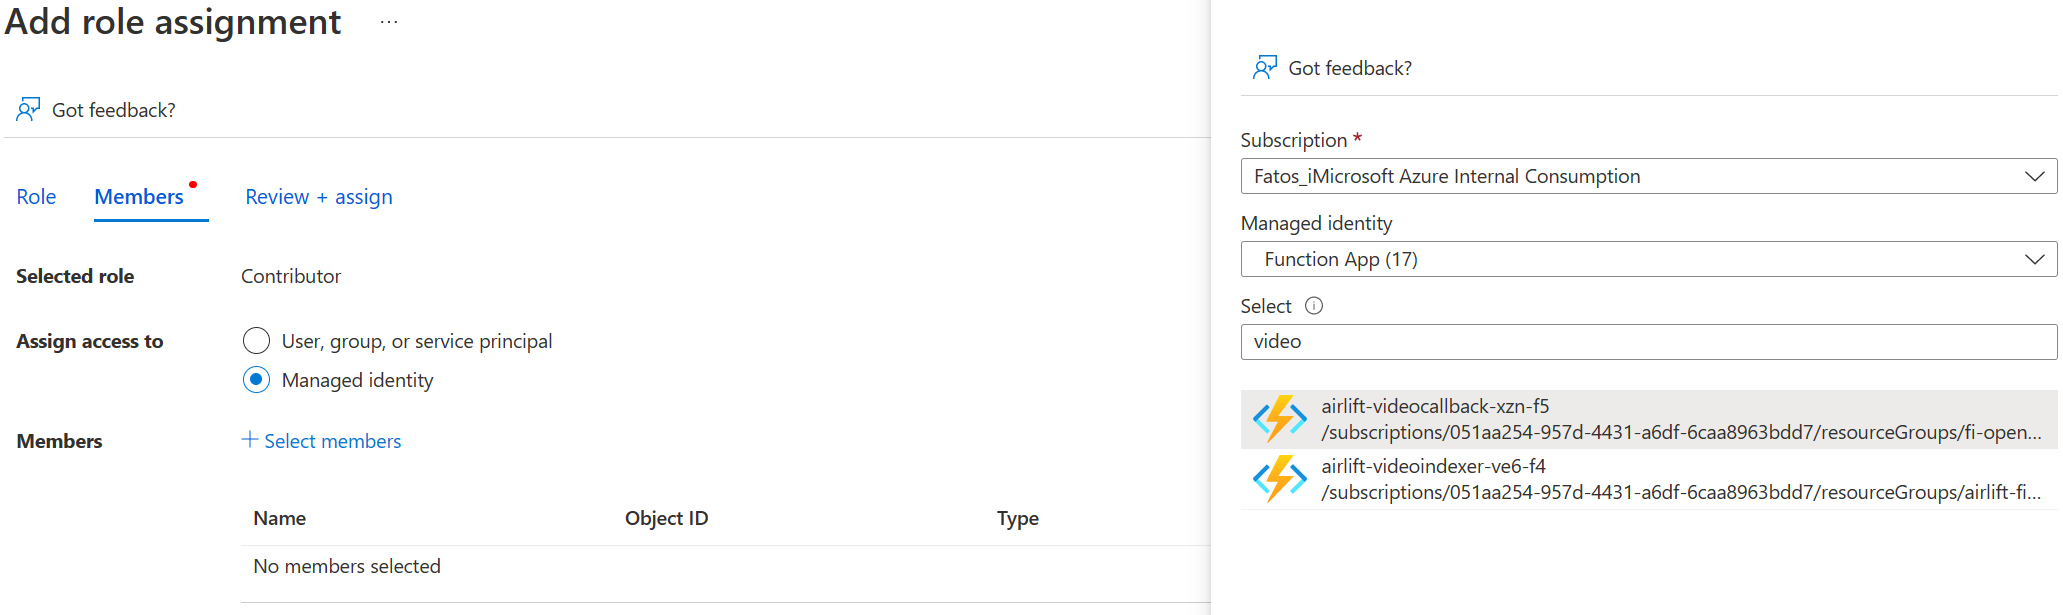
- Then click on Add > Add role assignment
- Click Contributor
- Click Next
- Select Managed Identity
- Click Select members
- Under Managed Identity drop down select Function App
- Find the video index and video call back functions and select both
- Click Select to add them both
- Finally click Review + Assign
-

- Import the Collections json and Environments json file into Postman
In Postman click on the following button Import in the Colleaction tab (on the left side)

Then choose the tab File and from your local folder select sustainability-with-openai-km < Postman-Collections < Search Components.postman_collection
Repeat the step above but for the environment variables and select sustainability-with-openai-km < Postman-Collections < Search Env Params.postman_environment

- Change the environment variables to the corresponding value by looking at the service name and service keys from the resources in the relevant resource group.
Click on the Environments tab on the left and then on the tab that you have just created, Airlift2022 Search Env Params. You need to replace both the INITIAL_VALUE and CURRENT_VALUE with the ones that have been created on your resource group on Azure Portal.
Replace all of the following variables and keys with the ones from the Azure Portal EXCEPT:
- prefix
- env_storage container


Return to Postman and run the Collections requests as instructed below, one-by-one by clicking the Send button. Execute them in this order: 1 --> 2 --> 3 --> 4 --> 9
These requests will create the required Search components, namely:
- 1 data source
- 2 indexes
- 1 skillset
- 1 indexer

-
Go to the git repo folder locally and then on
SearchUI < CognitiveSearc.UIfolder. -
Edit the
appsettings.jsonfile in theCognitive.Search.UIfolder with your favorite text editor. -
Change the key/value pairs the following parameters:
- SearchServiceName
- SearchApiKey
- SearchIndexName
- SearchIndexerName
- StorageAccountName
- StorageAccountKey
- StorageContainerAddress
- AVAM_Account_Id
- AVAM_Api_Key
- AVAM_Account_Location
- AVAM_Resource_Id
-
For ease, you can copy the value from Environment variables in Postman and make sure those match. For the AVAM (Video Indexer bit) you get the values from Azure Portal video indexer resource.

- Open Docker Desktop and make sure it's running
- Open the command prompt and navigate to the sustainability-with-openai-km\Search-UI directory
- Carry out the Docker commands below to build the docker image and push it to your deployed container registry.
Navigate to SearchUI folder and run:
docker build -f Docker\Dockerfile --tag <IMAGE_NAME> .(Note: don't forget the dot '.' at the end of the command)
Also make sure that the <IMAGE_NAME> above is the same value as the dockerName parameter value from the sustainability-with-openai-km\Bicep\main.parameters.json file. Once the docker image is built carry out the following commands to push it.
-
az login--> to login to your azure account -
az account set -- subscription <SUBSCRIPTION_ID> -
az acr login --name <CONTAINER_REGISTRY> -
docker tag <IMAGE_NAME> <CONTAINER_REGISTRY>.azurecr.io/<IMAGE_NAME> -
docker push <CONTAINER_REGISTRY>.azurecr.io/<IMAGE_NAME>
Note: Wait about 15 minutes till everything has been pushed and check weblink to view the accelerator
From the Azure Portal find the App Service and navigate to its URL or click the Browse button. The URL has a .azurewebsites.net suffix.
Open Storage Explorer and upload the PDF document in the data folder from the git cloned repo to the documents container. Refresh the Storage Explorer (click on the three ellipses at the top right and click Refresh). After a few seconds you should see a processed folder with all the individual pages of the original PDF file split into individual PDF files.
Open Storage Explorer and upload the Video file in the data folder from the git cloned repo to the video-knowledge-mining-drop container.
Helpful commands
dir - to navigate between folder while in command prompt
docker container ls -a (list all containers)
docker images [OPTIONS] [REPOSITORY[:TAG]] (list docker images)
docker rm [OPTIONS] CONTAINER [CONTAINER...] (remove container)