This project contains the code to control the LED strips in our Lounge. See how we built them (and how pretty they are) in our blog post (Dutch).
The JavaScript project that generates the patterns for all 960 LEDs in our strips (yes, we control them per pixel. It's very fancy). Each effect is an individual JS file. We're working on organising the project a bit better to make it easier to switch and control the effects. To be continued for sure.
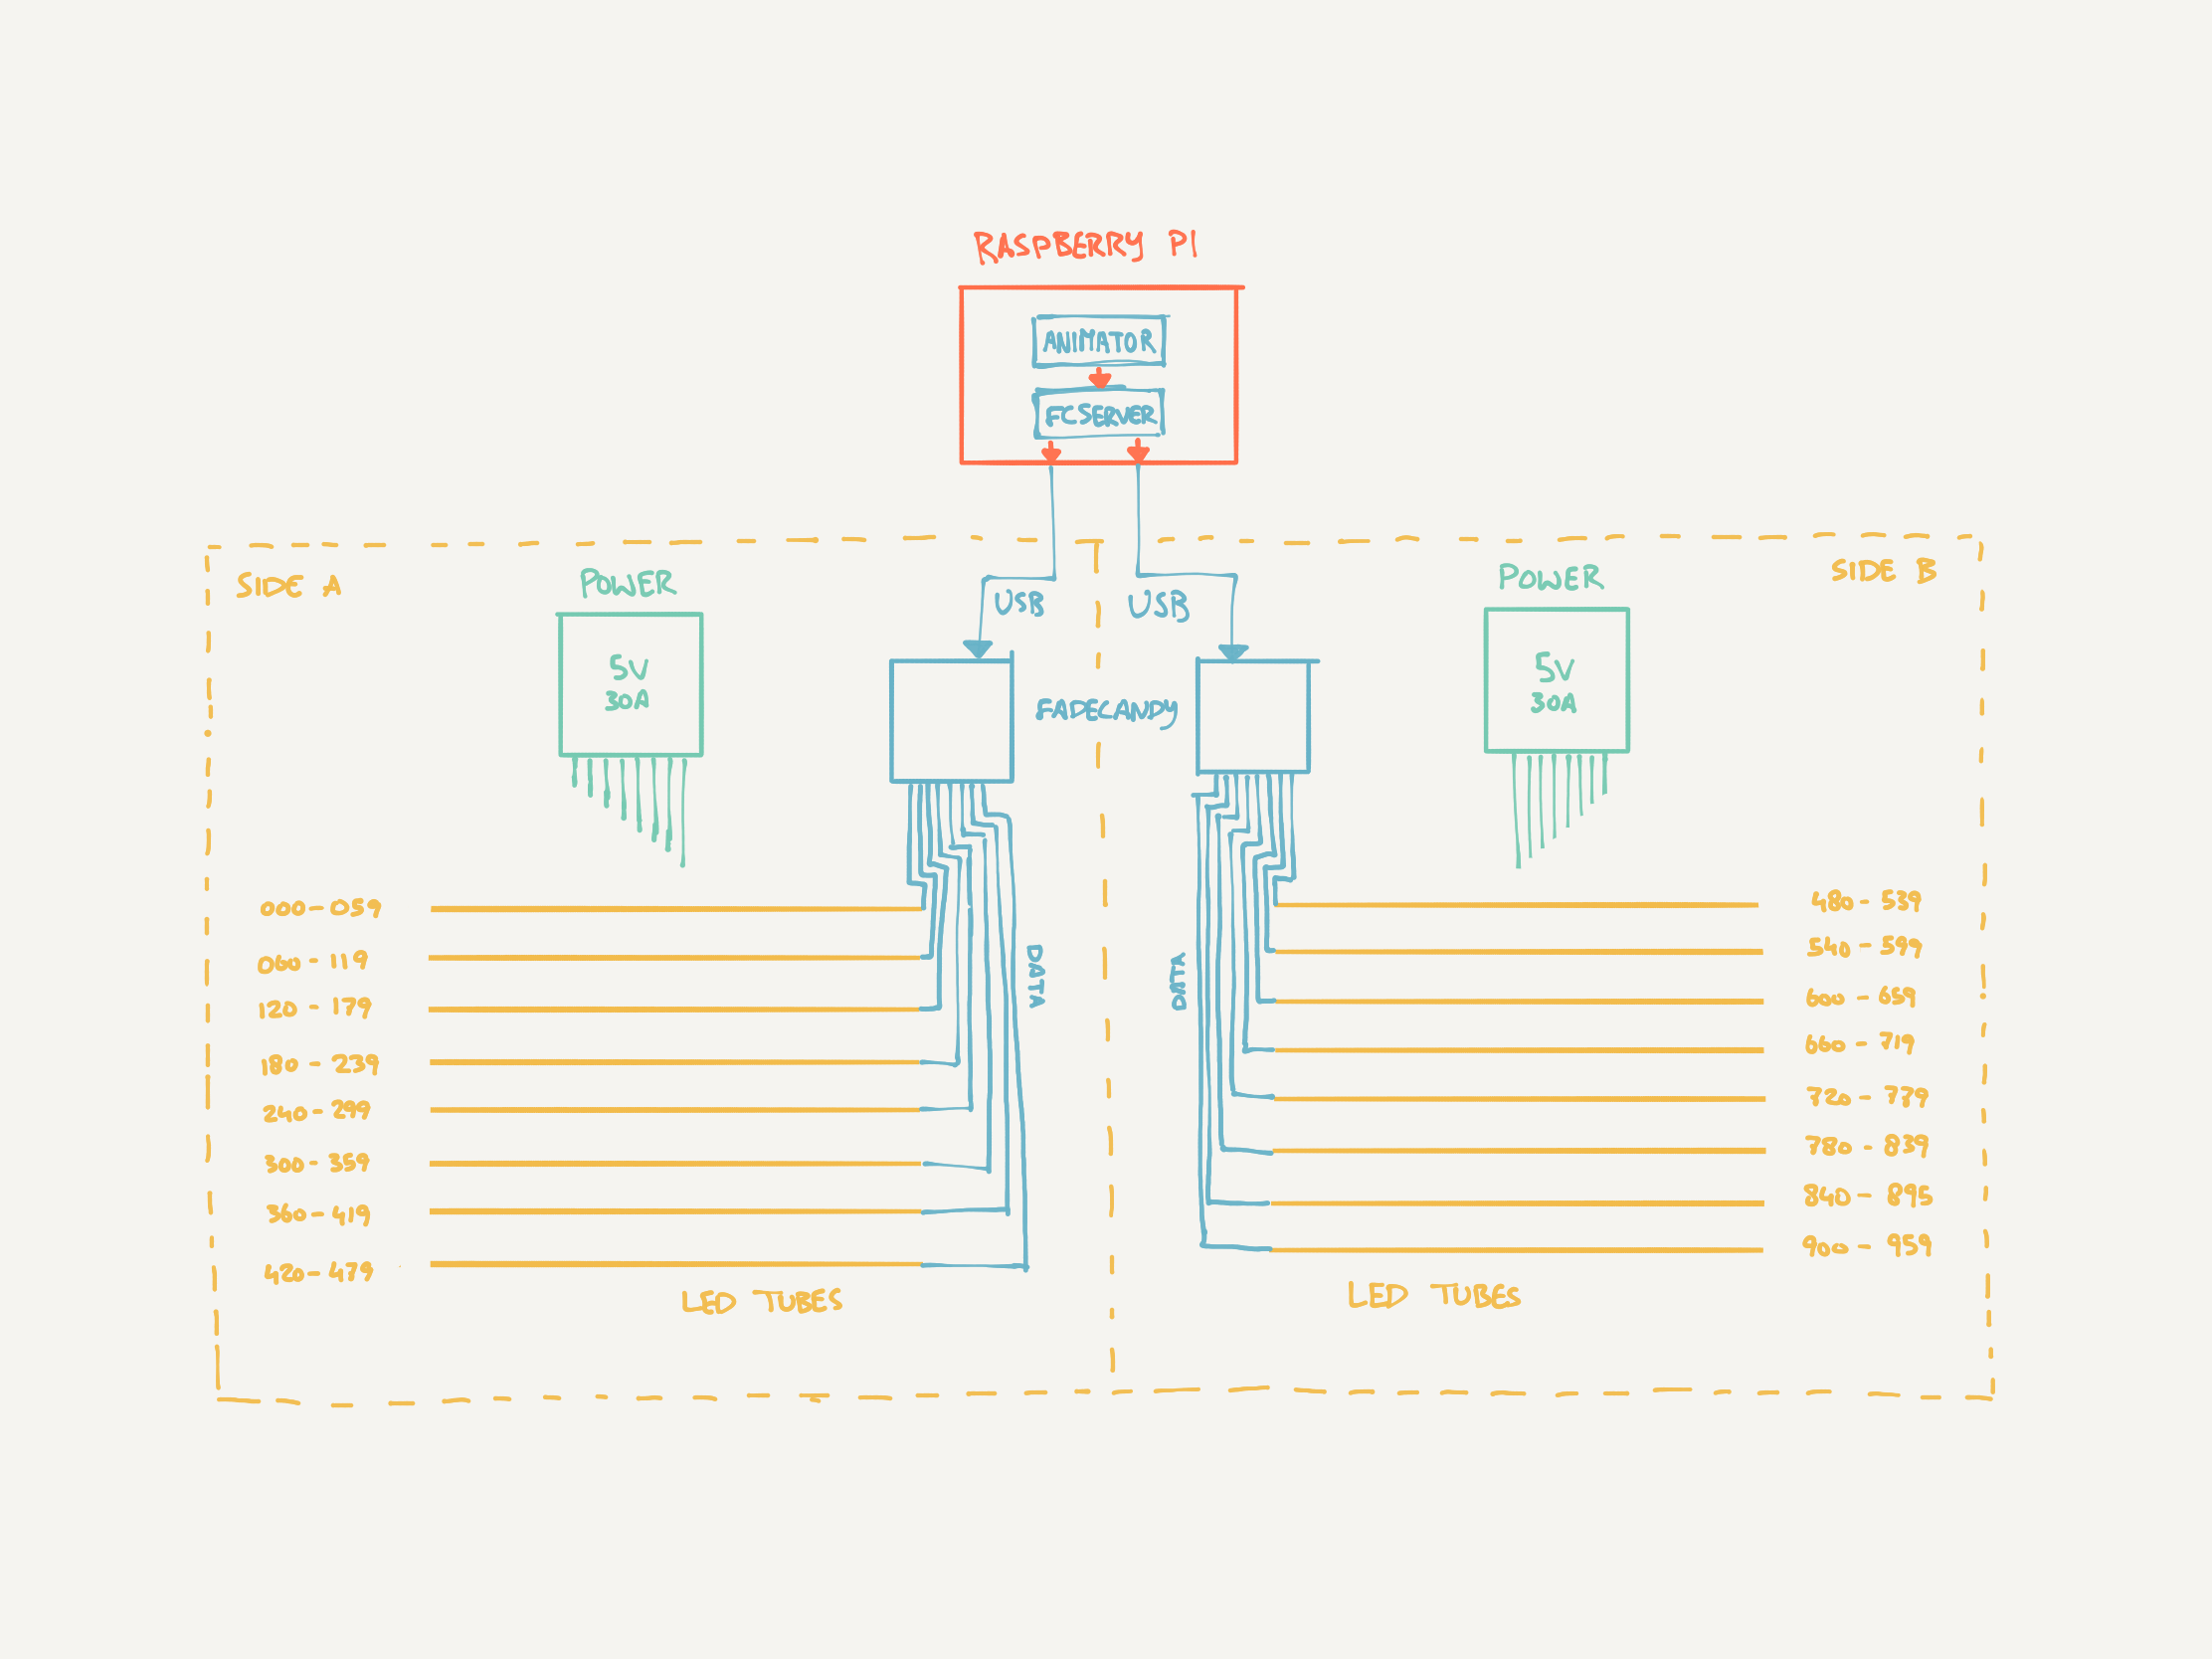
The software for our controller boards. We use two Fadecandy controllers, each controlling 8 strips of 60 LEDs each. They're connected to a Raspberry Pi with USB. You input OPC commands and the server automagically turns it into almost 1000 sparkling lights.
The server.json file contains the config for our specific set-up, like the two controllers and strips with a length of 60 pixels.
These tiny dedicated controller boards control the data signal for eight LED strips. It does some special magic, like tone mapping and dithering, and ensures the timing of the data signal lines up perfectly with the needs of the LED strips. The board has a dedicated output for each strip, which is mapped in the Fadecandy Server.
We use WS2811 LED strips that are connected to Fadecandy controller boards. Each strip has 60 LEDs and we have 16 strips in total. That makes for a total of 960 RGB LEDs.
Warning! This design uses high amperage, which can cause severe injuries or death when not handled properly. Electricity is not a toy, so make sure you know what you're doing, or get help from someone who does. And (obviously) never work on a live circuit.
We use a dedicated power supply for each 'side' of the bars. Our strips use 5V and the maximum draw of each side is 30A. So, that's a 150W PSU on each side for 300W in total. Keep in mind you'll hardly ever really draw that much power: it only happens when you're on full white for all strips (and that's just boring).
To create an animation, all you need to do is create 960 values and send them to fcserver using Open Pixel Control. We're using JavaScript here, but it can be done in a number of languages. Check out the examples in the Fadecandy project repository to select your favourite language!
Since we use the Open Pixel Protocol to control the LED strips, we can use that same protocol to create a virtual preview. This way we can develop the effects locally and see the results immediately.
- Clone the Open Pixel Control repository
- Run
makein the root of the repository to build the simulator - Run
bin/gl_server -l [path to layout]to start the simulator. Replace[path to layout]with the path to theanimator/layouts/strips60x16.jsonfile in this repository - Point your code to
127.0.0.1:7890to send OPC commands to the simulator
We use Balena Cloud to release new versions of this project. That means that deployment (for now) is only possible if you have access to the Balena project.
If you do, it's pretty simple: run balena push dal-lounge-lights and wait for the unicorn to show up.
These LED strips are yours to play with too! See CONTRIBUTING for all the information you need to shine your light. Okay, we'll stop the puns now.
This project is licensed under the GNU General Public License v3.0. See the LICENSE file for details.
This project wouldn't be possible without the amazing open source Fadecandy project. Sadly, the original project by Scanlime is lost to time, but our appreciation still stands.
In related news: lots of thanks to PimentNoir for creating a fork that we can continue to use!
