
Copyright (c) 2022 Digital Asset (Switzerland) GmbH and/or its affiliates. All Rights Reserved. SPDX-License-Identifier: Apache-2.0
Welcome to the Wallet Daml Sample App
The Wallet Sample App is an open-source digital asset wallet powered by Daml smart contracts and Daml/React Javascript library, and deployed in Daml Hub. This app provides developers with a working example of how to implement essential workflows related to digital assets (or tokens) such as asset issuance, airdrop, transfer and atomic swap. We assume the developer already has basic knowledge of Daml.
You can watch the video walkthrough of the application here
You can play around with user functionality in the Wallet Daml Sample App without deploying the app, as it is continuously running at https://wallet.daml.app. To sign in to the app running at https://wallet.daml.app, use your Daml Hub account. You can create a free Daml Hub account, if you don't already have one.
User workflows implemented in Wallet Daml Sample App include the following features
- Creating an asset holding account
- Issuing assets (creating new quantities of an asset in an issuer party account)
- Airdropping assets (creating new quantities of an asset in a non-issuer party account)
- Inviting other users to create their asset holding accounts
- Sending assets to other users (asset ownership transfer)
- Swapping assets (atomic swap - simultaneous transfer of ownership of two assets between two parties) The app is centered around the concepts of asset and asset holding account. To learn about these concepts and their implementation in this app see Wallet Daml Sample App - concepts and their implementation article.
The frontend of the project was bootstrapped with Create React App. However, all Daml specific aspects of the UI client are written in plain TypeScript. The React framework can be easily replaced with any other UI framework.
Prerequisites
- Daml SDK
- Java 11 or higher
- Visual Studio Code
- Node.js
Running the Project Locally
Build Required Files
*The below build steps are also necessary for deploying the app to Daml Hub.
- On Linux or MacOS from the root of the project run
make build
On Windows, which doesn't have make utility, or if for any reason make utility doesn't work on your Linux or MacOS, run the following commands from the project root directory
cd main/User
daml build -o user.dar

cd ../Asset
daml build -o asset.dar

cd ../Account
daml build -o account.dar

cd ../Setup
daml build -o setup.dar

cd ../../triggers
daml build -o triggers.dar
This will generate the .dar files, which include asset.dar, account.dar, user.dar in their respective folders within the main folder, that need to be deployed to the backend Daml ledger. This will also generate setup.dar and triggers.dar files used to initialize the ledger and for off-ledger automation.
- On Linux or MacOS from the project root run
make codegen
On Windows, which doesn't have make utility, or if for any reason make utility doesn't work on your Linux or MacOS, run the following commands from the project root directory
daml codegen js main/Asset/asset.dar main/User/user.dar main/Account/account.dar -o ui/daml.js
The script will generate a daml.js folder in the /ui directory with the JavaScript bindings.
- Regardless of whether you run Linux, MacOS or Windows, navigate to the ui directory from the project root by running
cd uiand then runnpm install
Start Backend Processes
On Linux or MacOS from the project root directory run
./start.sh
This script executes several setup operations, but since this is a shell script, it can only be run on Linux or MacOS. If you're running Windows or if you'd prefer to start the backend process manually, click here.
Please note:
Each time you make changes to the .daml files, you will need to re-run make build, and make codegen and reinstall the packages on the frontend through npm i, so that the frontend packages and dar files are in sync.
Start the Frontend
After running start.sh shell script, the backend of the app is fully functional.
To launch the app GUI, in a separate instance of the terminal cd to the ui directory and run npm start. This should open a browser window with a login screen. If it doesn't, you can manually navigate your browser to http://localhost:3000.
When running locally, the app has the following pre-defined users: "alice", "bob", "charlie", "ron". These users are created by the startup Daml Script in Setup.daml module. When prompted to sign-in to the app UI, type in one of the above user names and hit Enter.
Please note: If you use Node v18 or higher you need to replace the following two lines
"start": "react-scripts start",
"build": "react-scripts build",
in the "scripts" section of the ui/package.json file.
- On Linux or MacOS use
"start": "NODE_OPTIONS=--openssl-legacy-provider react-scripts start",
"build": "NODE_OPTIONS=--openssl-legacy-provider react-scripts build",
- On Windows use
"start": "set NODE_OPTIONS=--openssl-legacy-provider && react-scripts start",
"build": "set NODE_OPTIONS=--openssl-legacy-provider && react-scripts build",
Make sure to save ui/package.json file after editing it and before running npm start.
Starting the Backend Processes Manually
The ./start.sh performs the below operations. On Windows you need to run these operations manually, as described below. On Linux or MacOS you may also prefer to perform these operations manually if you'd like to familiarize yourself with the process of deploying a Daml application.
- Start the Sandox and upload the dar files.
- Start JSON API server.
- Run setup script to allocate parties and create initial contracts (required only for local deployment).
- Start the 4 triggers.
1. Start the Sandbox & Upload the Dar Files
On Linux or MacOS terminal run from the project root directory
make sandbox
On Windows or if you cannot use make utility copy and paste the below command and run it from the project root directory.
daml sandbox --dar main/Asset/asset.dar --dar main/User/user.dar --dar main/Account/account.dar
Leave this terminal running.
2. Start HTTP JSON API Service
On Linux or MacOS in a separate terminal run from the project root directory
make server
On Windows or if you cannot use make utility copy and paste the below command and run it from the project root directory.
daml json-api --config json-api-app.conf
Leave this terminal running.
3. Run Setup Script
Regardless of whether you run Linux, MacOS or Windows, in another terminal run the setup script. This script allocates parties, creates an Example Token asset account and Example Token asset contract.
daml script --dar ./main/Setup/setup.dar --script-name Setup:setup --ledger-host localhost --ledger-port 6865
4. Start 4 Triggers
Make sure to run each trigger in a separate instance of the terminal and leave all these terminals running. The instructions in this step apply regardless of the operating system you're running. For details on why the triggers are needed click here
- From the root directory, start the
sendAssetHoldingAccountInviteTriggerby running the following command in another terminal. This trigger sends an invitation to create an Asset Holding Account for Example Token to new users.
daml trigger --dar triggers/triggers.dar \
        --trigger-name SendAssetHoldingAccountInviteTrigger:sendAssetHoldingAccountInviteTrigger \
        --ledger-host localhost \
        --ledger-port 6865 \
        --ledger-user "admin"
- From the root, in a separate terminal instance, run the below trigger. This trigger allows 'admin' user, which corresponds to the party that is the issuer of the Example Token, to automatically accept airdrop requests for Example Token.
daml trigger --dar triggers/triggers.dar \
             --trigger-name AcceptAirdropRequestTrigger:acceptAirdropRequestTrigger \
             --ledger-host localhost \
             --ledger-port 6865 \
             --ledger-user "admin"
- From the root, in a separate terminal instance, run the below trigger. This trigger allows 'admin' user, which corresponds to the party that is the issuer of the Example Token, to automatically accept invites to create an Asset Holding Account for user's asset. This invite is created as part of a swap workflow when a user swaps his or her asset for an amount of Example Tokens with 'admin'.
daml trigger --dar triggers/triggers.dar \
             --trigger-name AcceptAssetInviteTrigger:acceptAssetInviteTrigger \
             --ledger-host localhost \
             --ledger-port 6865 \
             --ledger-user "admin"
- This trigger allows 'admin' user, which corresponds to the party that is the issuer of the Example Token, to automatically accept a swap proposal created by a user, where the user proposes to swap his or her asset for an amount of Example Tokens with 'admin'.
daml trigger --dar triggers/triggers.dar \
             --trigger-name AcceptSwapTrigger:acceptSwapTrigger \
             --ledger-host localhost \
             --ledger-port 6865 \
             --ledger-user "admin"
Please Note
All the actions in the start.sh shell script are run as background jobs, as they launch processes that need to keep running while the app is being used.
Starting Frontend (not implemented in ./start.sh)
Once the above steps are executed, the backend of the app is fully functional. To start the frontend follow the instructions here.
Trigger Uses
Daml triggers provide automation for certain interactions with the ledger. This project implements 4 triggers, which we need to start. These triggers implement a bot, which provides a party for a human user to swap assets with. When you login as a user to the app frontend for the first time, you automatically receive an invite to create an asset holding account for Example Token (ET). Once you accept the invite, you can request new quantities of the Example Token to be airdropped into your asset holding account. This request is automatically granted. Finally, after creating an asset holding account for a new asset type and after issuing a quantity of this asset into your own account, you can swap this asset for an amount of Example Token. All this functionality demonstrates the workflows implemented in the app without requiring another human user to interact (e.g. trade assets) with.
Deploying the project to Daml Hub
The app is continuously run on Daml Hub by Digital Asset at https://wallet.daml.app. You can play with user functionality in the app run by Digital Asset. To sign in to the app UI at the above URL use your Daml Hub account. You can create a free Daml Hub account, if you don't already have one. You can also deploy your own version of the app on Daml Hub. First create a free Daml Hub account.
To learn how to deploy Daml apps to Daml Hub see Daml Hub Quickstart
Setup Project on Daml Hub
Once logged in, click New Project on the right side of the hub interface.

Follow through the steps displayed in the interface, you will be asked to provide a project name and ledger name.
Uploading Dar Files
Click the ledger, then click upload file

to upload the dar files created in "Build Required Files" step. These include:
- asset.dar
- account.dar
- user.dar
- triggers.dar
Upload UI Zip File
- In addition we need to create
wallet-refapp-ui.zipfile by runningnpm run zipcommand from theuidirectory. This zip file contains the app UI and also needs to be uploaded to Daml Hub.
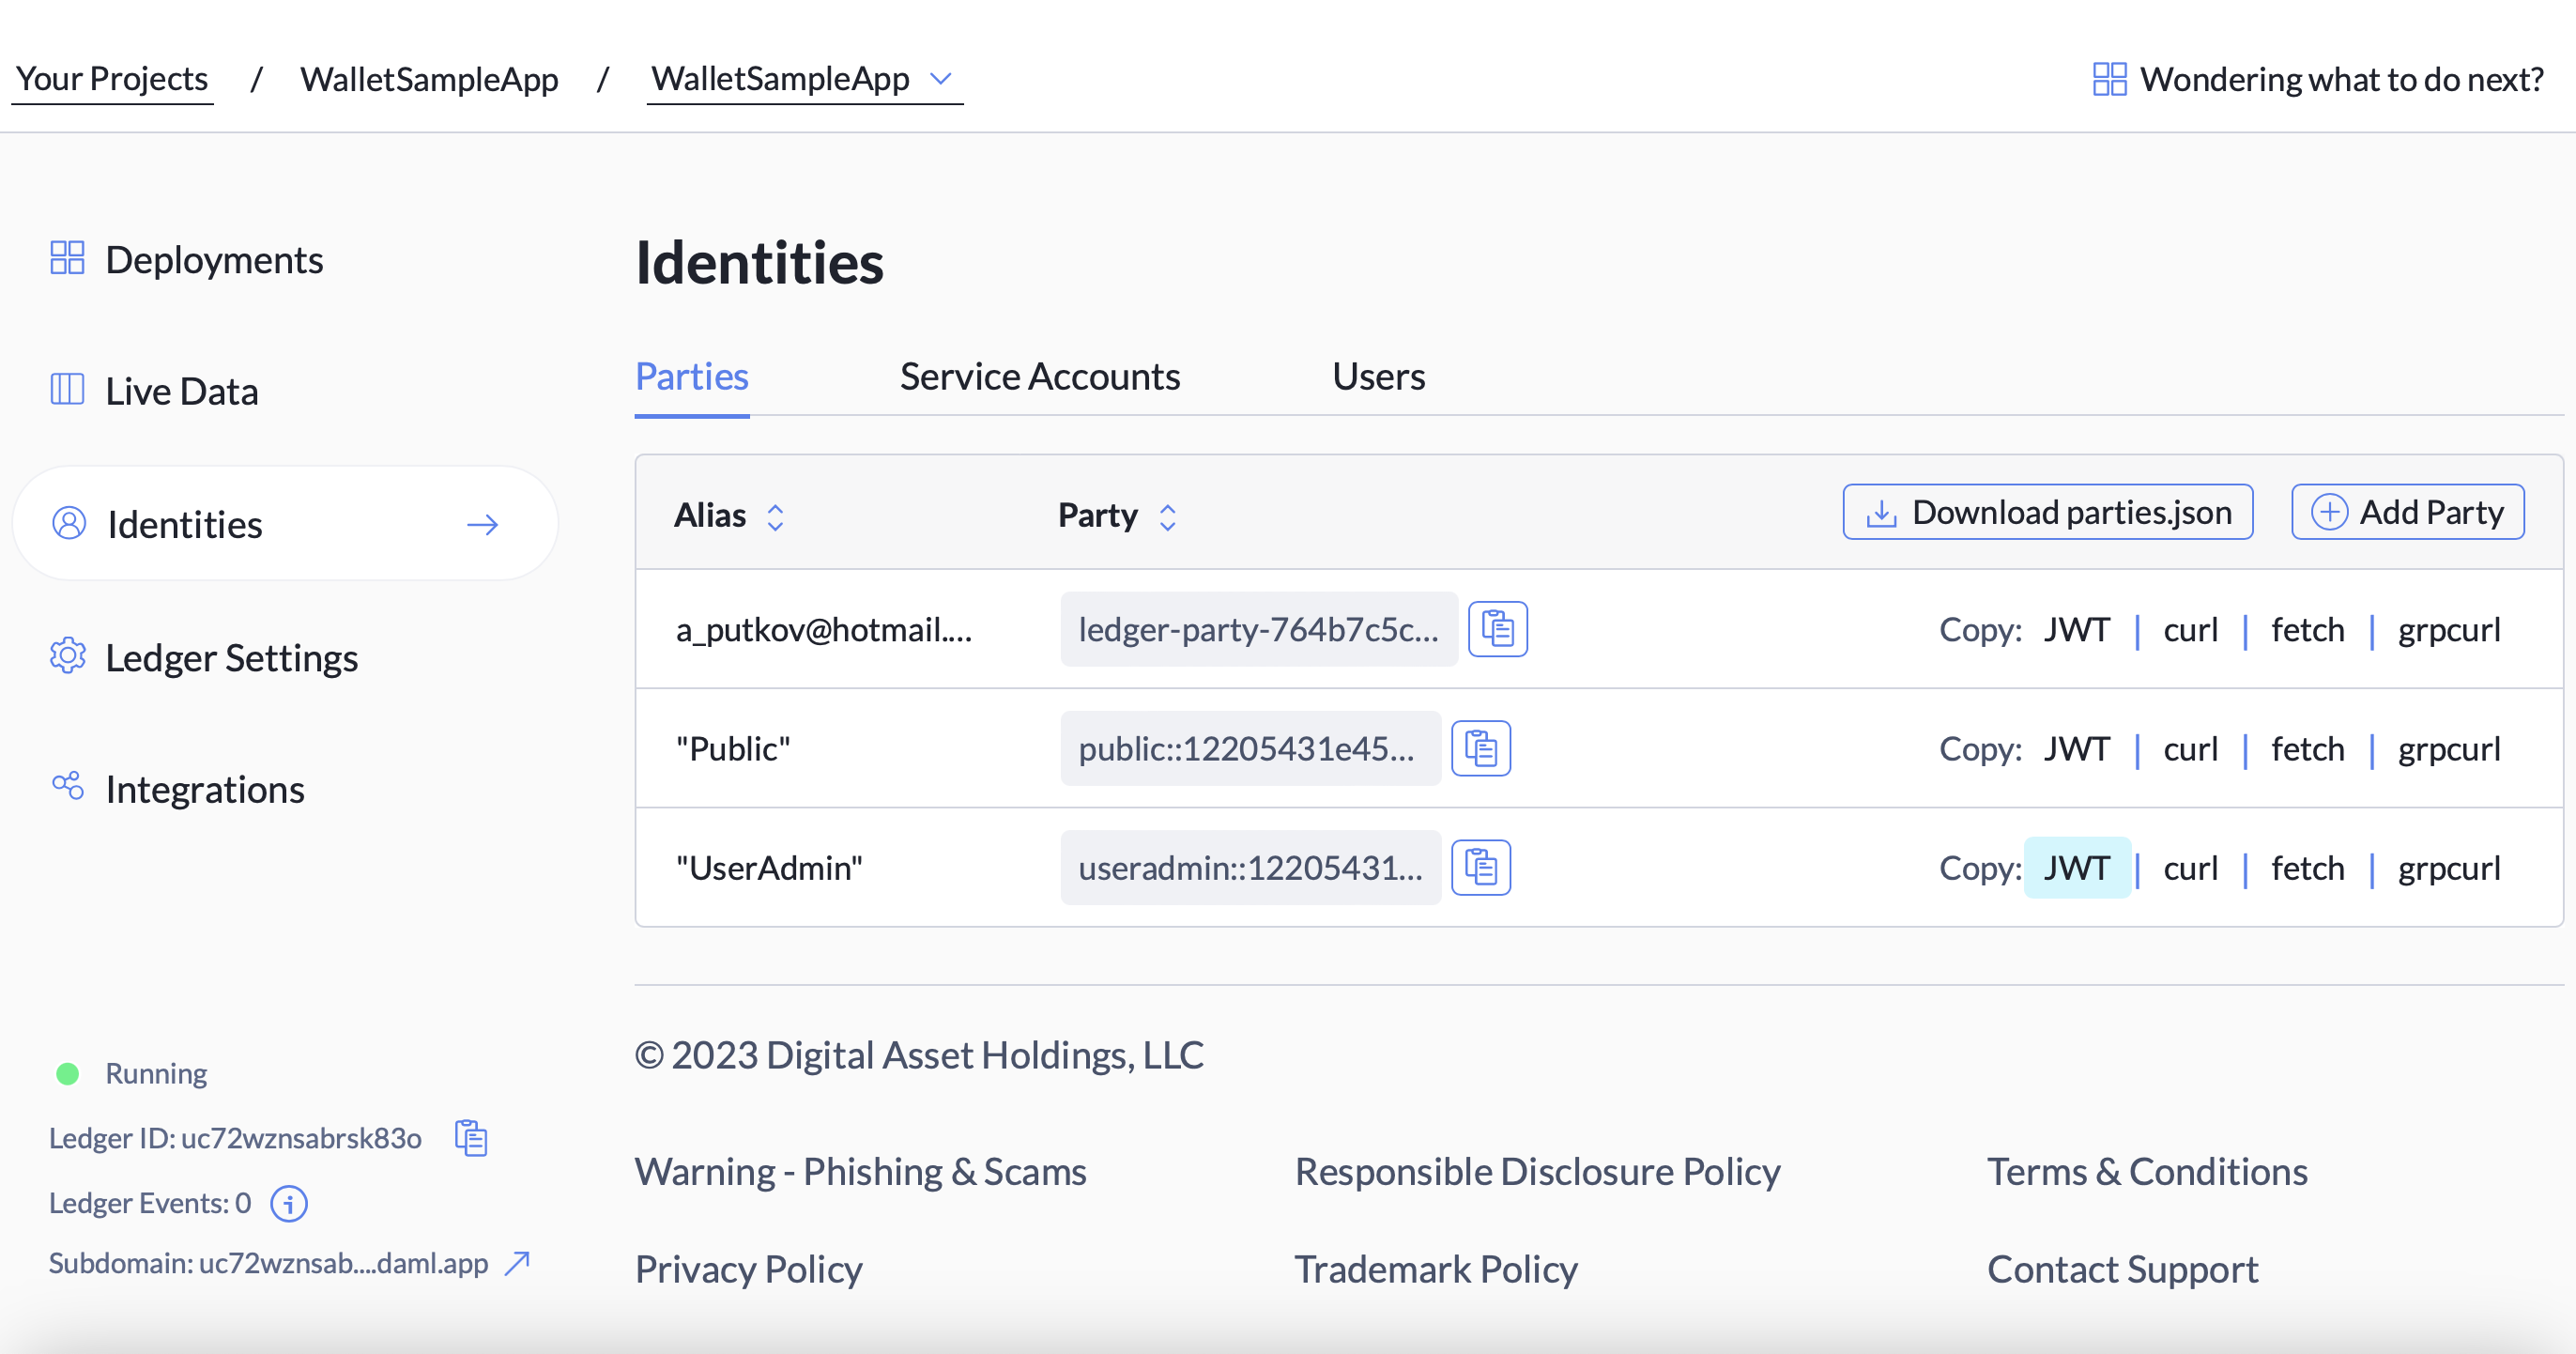
Setup Admin Account from Daml Hub Console
- Setup Admin Account. From the Daml Hub console, click
Identitiesand underDefault Partiesadd theUserAdmin This will be needed so you can run the triggers as the
 UserAdmin

Configure triggers for Daml Hub
From Deployments on the left hand menu,
- click on
triggers.dar>Configure New Instance - Under
Trigger Name, select the first trigger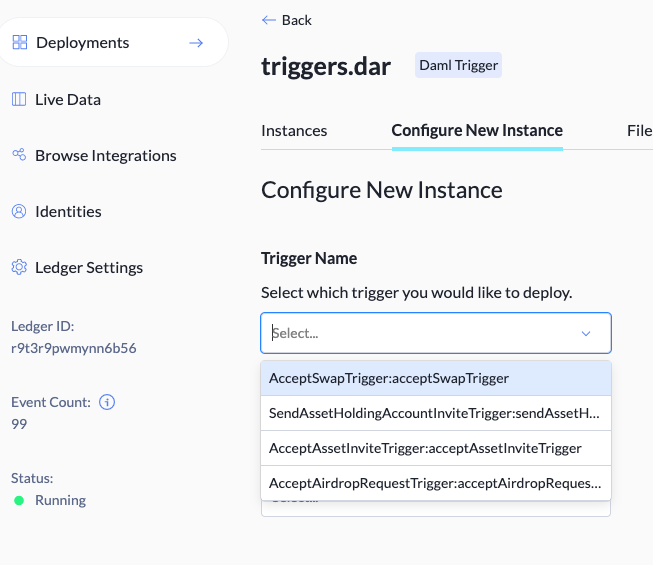
- Under
Party, selectUserAdmin - Click
Deploy Instance, and repeat for all other triggers.

Setup Admin Account on the Deployed App
Before the triggers can run properly, you will need to
- Login to the app using the JWT of the UserAdmin
- On the left hand side menu, click
Create, you will arrive at the asset account creation page - In the
symbolfield, name the assetET, then clickCreateat the bottom to finally create theETasset account.

Once this account is created, other users will be able to receive the automatic ET account asset invitations sent by the triggers, and users will also be able to request airdrops and swap with the UserAdmin.