We are here to build a Car-Buying Experience Application using the OpenSource Electrode platform developed by WalmartLabs.
-
For development on your local machine, please install latest node.js. (Recommended >=6)
-
Use electrode-ignite to start your development environment with the Electrode platform.
npm install -g electrode-ignite- Run the electrode environment checker to ensure your environment is using compatible versions.
ignite check-nodejs- We recommend that you also have a github account, learn how to set it up here.
Let's get started. For the duration of this workshop, we will be creating files and directories under a single working folder walmartlabs-wwc
- First create the working folder:
mkdir walmartlabs-wwc
cd walmartlabs-wwc
When the instructions refers to "go back to the working folder", this will be the folder it refers to.
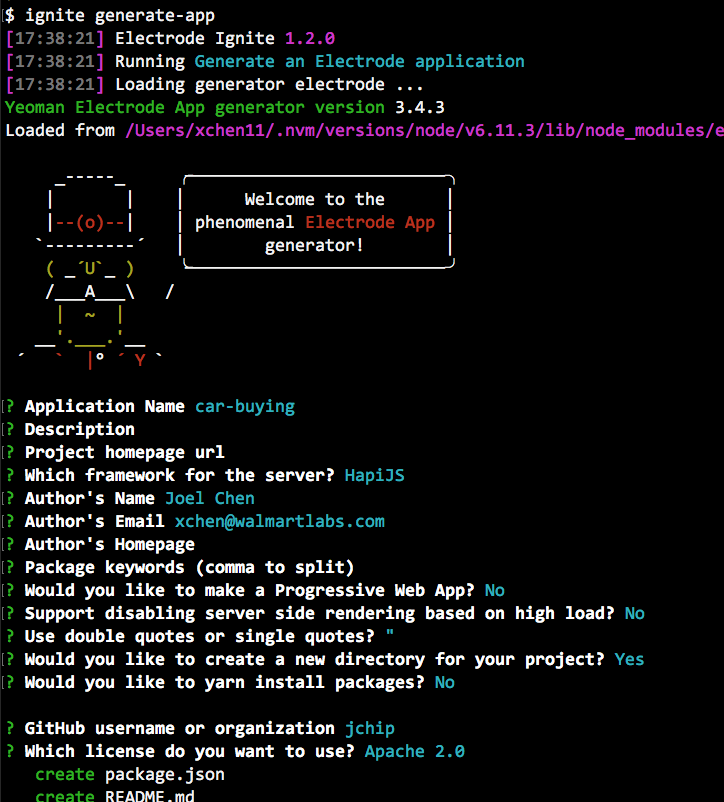
- Let's get started by generating an Electrode app using Ignite:
ignite generate-app-
You will be prompted for information about your app.
- The only information you need to enter is the app name. Enter
car-buyingfor that. - You can press
<Enter>to use the defaults for the rest of the prompts. - Please use
HapiJSas your server framework for this app.
- The only information you need to enter is the app name. Enter
- Try running the app:
cd car-buying
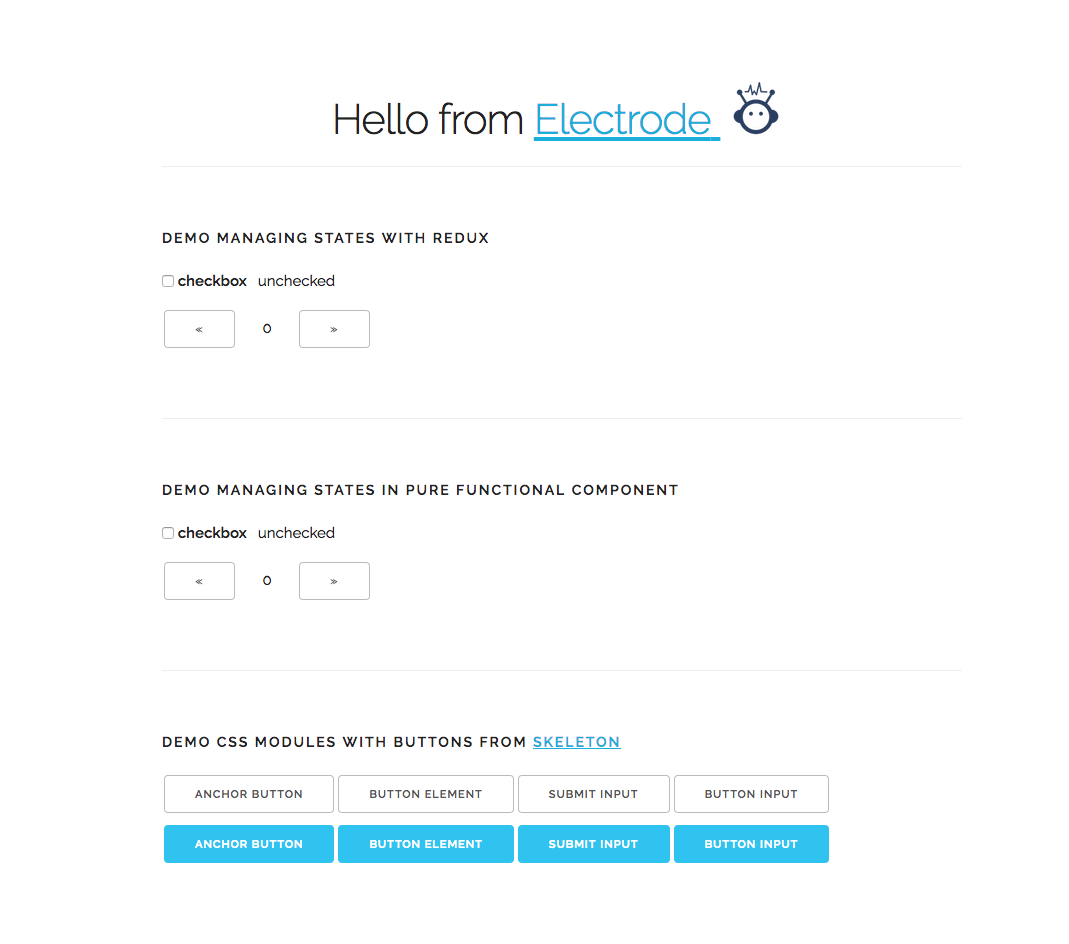
clap dev- You can see your app running on http://localhost:3000/.
- Congratulations on creating your first Electrode application!
The mock server is a simple NodeJS Hapi server that simulates services needed in the car-buying app. It also serves images that are used by the app.
- First go back to your
walmartlabs-wwcfolder. - Clone the server from here.
git clone https://github.com/electrode-io/car-buying-service.gitIf you do not have a git account to clone the repo, you can download a zip for the repo from here.
After cloning the repo, run the following commands to get the server running. You can run these in a separate terminal.
cd car-buying-service
npm install
npm start- You should now have a server running at
http://localhost:8000. - Test that the server is running by calling it with curl.
curl http://localhost:8000It should reply with: Hello! from the car buying service.
The server needs to be running for the duration of the exercise. You can now switch back to your electrode generated app directory.
Note: For windows, you will need to have curl installed separately for the above command.
Please go to your car-buying directory and let's build our car-buying app.
In this app, we will be using the react-modal and react-icons modules for modal dialogs and icons. Please stop the application server and install these two modules:
$ npm install --save react-modal react-iconsWe have combined all the css styles into a single file. You just need create a new file src/client/styles/car-buying.css and copy the following content inside: car-buying.css
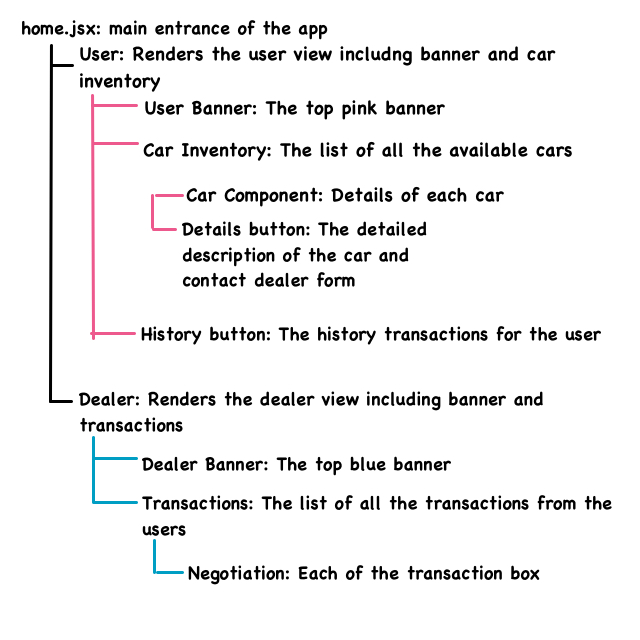
Now, let's start building our car-buying app. Here is the high level description of the structure:
In your project folder, look for the file: src/client/components/home.jsx, replace the contents of that file with: home.jsx.
home.jsxis the main page of your app. It allows the user to pick from buyer or dealer roles. We will return a React component that contains the Buyer and Dealer buttons.
Now, restart your server by clap dev and switch to your http://localhost:3000/, and you can see:
Yay! You've got your home page done.
We now need to create components for the car buyer and dealer role.
-
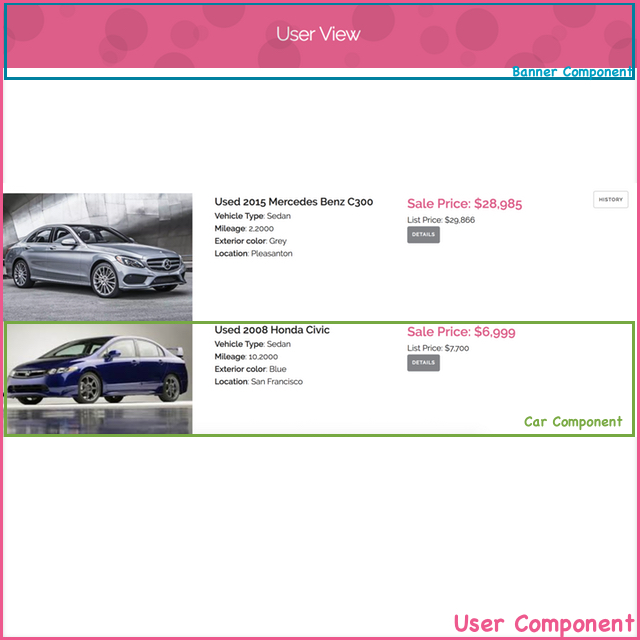
Let's have a quick peek of what the components are going to look like:
-
UserComponent is composed of theUser Bannerand a collection of theCarcomponent as shown below:
Now Let's build!
- Create a file named
user.jsxunder directorysrc/client/components - Copy the following content inside: user.jsx
User Banner serves as a header for the user page.
- Create a file named
banner.jsxunder directorysrc/client/components - Copy the following content inside: banner.jsx
The car inventory is a collection of the Car component, which is used to display information about a car. We will use this component in both User and Dealer components. Create a file named car.jsx under the directory src/client/components, copy the following content inside: car.jsx
- We can now add routes to connect the buttons on the homepage to the appropriate views.
- Modify the
routes.jsxfile undersrc/clientwith the following code.
import React from "react";
import { Router, Route } from "react-router";
import Home from "./components/home";
import User from "./components/user";

export const routes = (
  <Router>
    <Route path="/" component={Home} />
    <Route path="/user" component={User} />
  </Router>
);- Now, the initial User view should be ready for you.
- Restart the server and wait for your app to recompile.
- Open
http://localhost:3000/userand you should see:
Congratulations for building your initial user view!
As you can see above, the user view is supposed to display a list of cars available in the inventory. We will add an API that gets the available inventory from a service.
We will store the vehicles inventory in a file called vehicles.json which is stored under your mock server that we initially set up.
Here is the flow for the data:
- Please create a file called
vehicles.jsundersrc/server/pluginswith content from here. - This file exposes the
/vehiclesendpoint which is used to get the list of vehicles present in the inventory. - Register this plugin in
config/default.jsunderpluginsfield:
"./server/plugins/vehicles": {
  "module": "./{{env.APP_SRC_DIR}}server/plugins/vehicles"
}
{{env.APP_SRC_DIR}}is a special token that the module electrode-confippet will process and replace withprocess.env.APP_SRC_DIRwhen it loads the config.process.env.APP_SRC_DIRis an environment variable Electrode platform sets to either load your code fromsrcduring development or inlibduring production deployment
- Update
src/server/views/index-views.jsxwith the following content:
import ReduxRouterEngine from "electrode-redux-router-engine";
import { routes } from "../../client/routes";
import { createStore } from "redux";
import rootReducer from "../../client/reducers";
import fs from "fs";
import path from "path";

const Promise = require("bluebird");
const readFileAsync = Promise.promisify(fs.readFile);

function storeInitializer(req, vehicles) {
  let initialState = {
    cars: vehicles
  };
  return createStore(rootReducer, initialState);
}

function createReduxStore(req, match) {
  return Promise.all([
    req.server
      .inject("/vehicles")
      .then(res => {
        return JSON.parse(res.payload);
      })
      .catch(() => {
        return {};
      })
  ]).then(([vehicles]) => storeInitializer(req, vehicles));
}

module.exports = req => {
  const app = (req.server && req.server.app) || req.app;
  if (!app.routesEngine) {
    app.routesEngine = new ReduxRouterEngine({ routes, createReduxStore });
  }

  return app.routesEngine.render(req);
};
Notice how we are populating the initial redux store with
createReduxStoreandstoreInitializerfunctions. We are setting the initial state with a list of vehicles to populate the user view. We are calling the/vehiclesapi created in thevehicles.jsplugin created in the previous step. This is the data being populated on the server side. Check out how this data is consumed on the client side insrc/client/app.jsx.
Since we do not have any actions for now, please delete the contents from the file src/client/actions/index.js and update the file src/client/reducers.jsx with:
import { combineReducers } from "redux";

const cars = (store = {}) => {
  return store;
};

export default combineReducers({
  cars
});- Re-start the server and go to
http://localhost:3000/user, you should see:
Electrode is already setup to run tests along with eslint checks. We have already added a basic test for home.jsx.
- Running the command
npm testwill run the tests for you. - We want you to add a test for the
user.jsxcomponent that you just created. - Add a new file
user.spec.jsxundertest/client/components. - You can start by adding a basic test similar to the
home.spec.jsxand refer here for help.
Congratulations! You've finished the main focus of today's workshop. If you have time or want to try it later, you can try some coding on your own :-)
Now, we want you to build the dealer view.
From what we've already learned above on how to fetch the vehicles inventory and displaying it on the car inventory page, we now want to fetch data for transactions page.
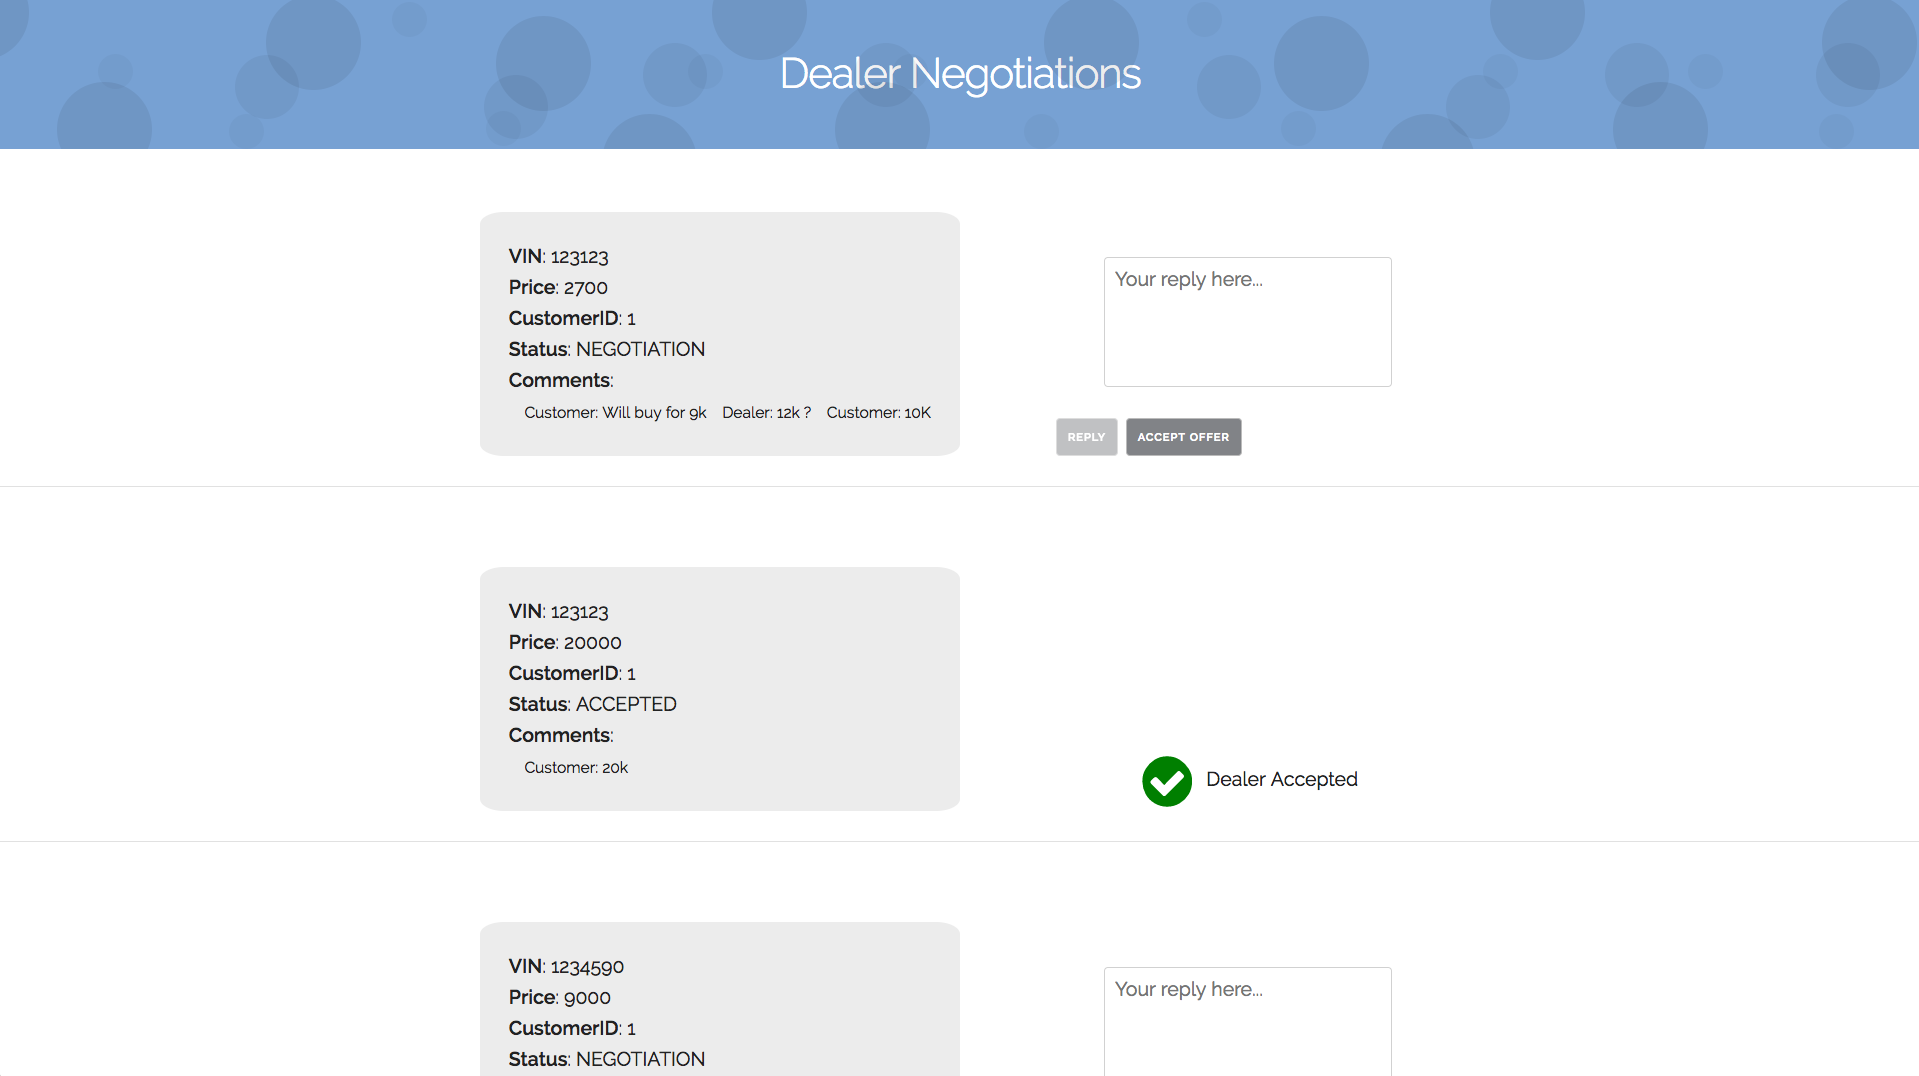
- Here is what you will build:
And here is what you need to do:
- Add a
transactions.jsfile under server's plugins, you will have APIs to get, create, and update transactions. These APIs will call the mock server endpoints similar to thevehiclesplugin. API endpoints available in the mock server are:
| Path | Method | Purpose |
|---|---|---|
| /transactions | GET | Return all transactions in record. |
| /get-negotiations | GET | Return all transactions of type Negotiation. |
| /create-transaction | POST | Create a new transaction. |
| /update-transaction | POST | Update a transaction. |
- Add views under
src/client/componentsthat display our transactions loaded from the service. - Make sure the data is populated on the server side, before the view is rendered, similar to how vehicles was populated in the
storeInitializerfunction.
Wow you are doing a great job! If you still have time, let's move on to some challenges. :-)
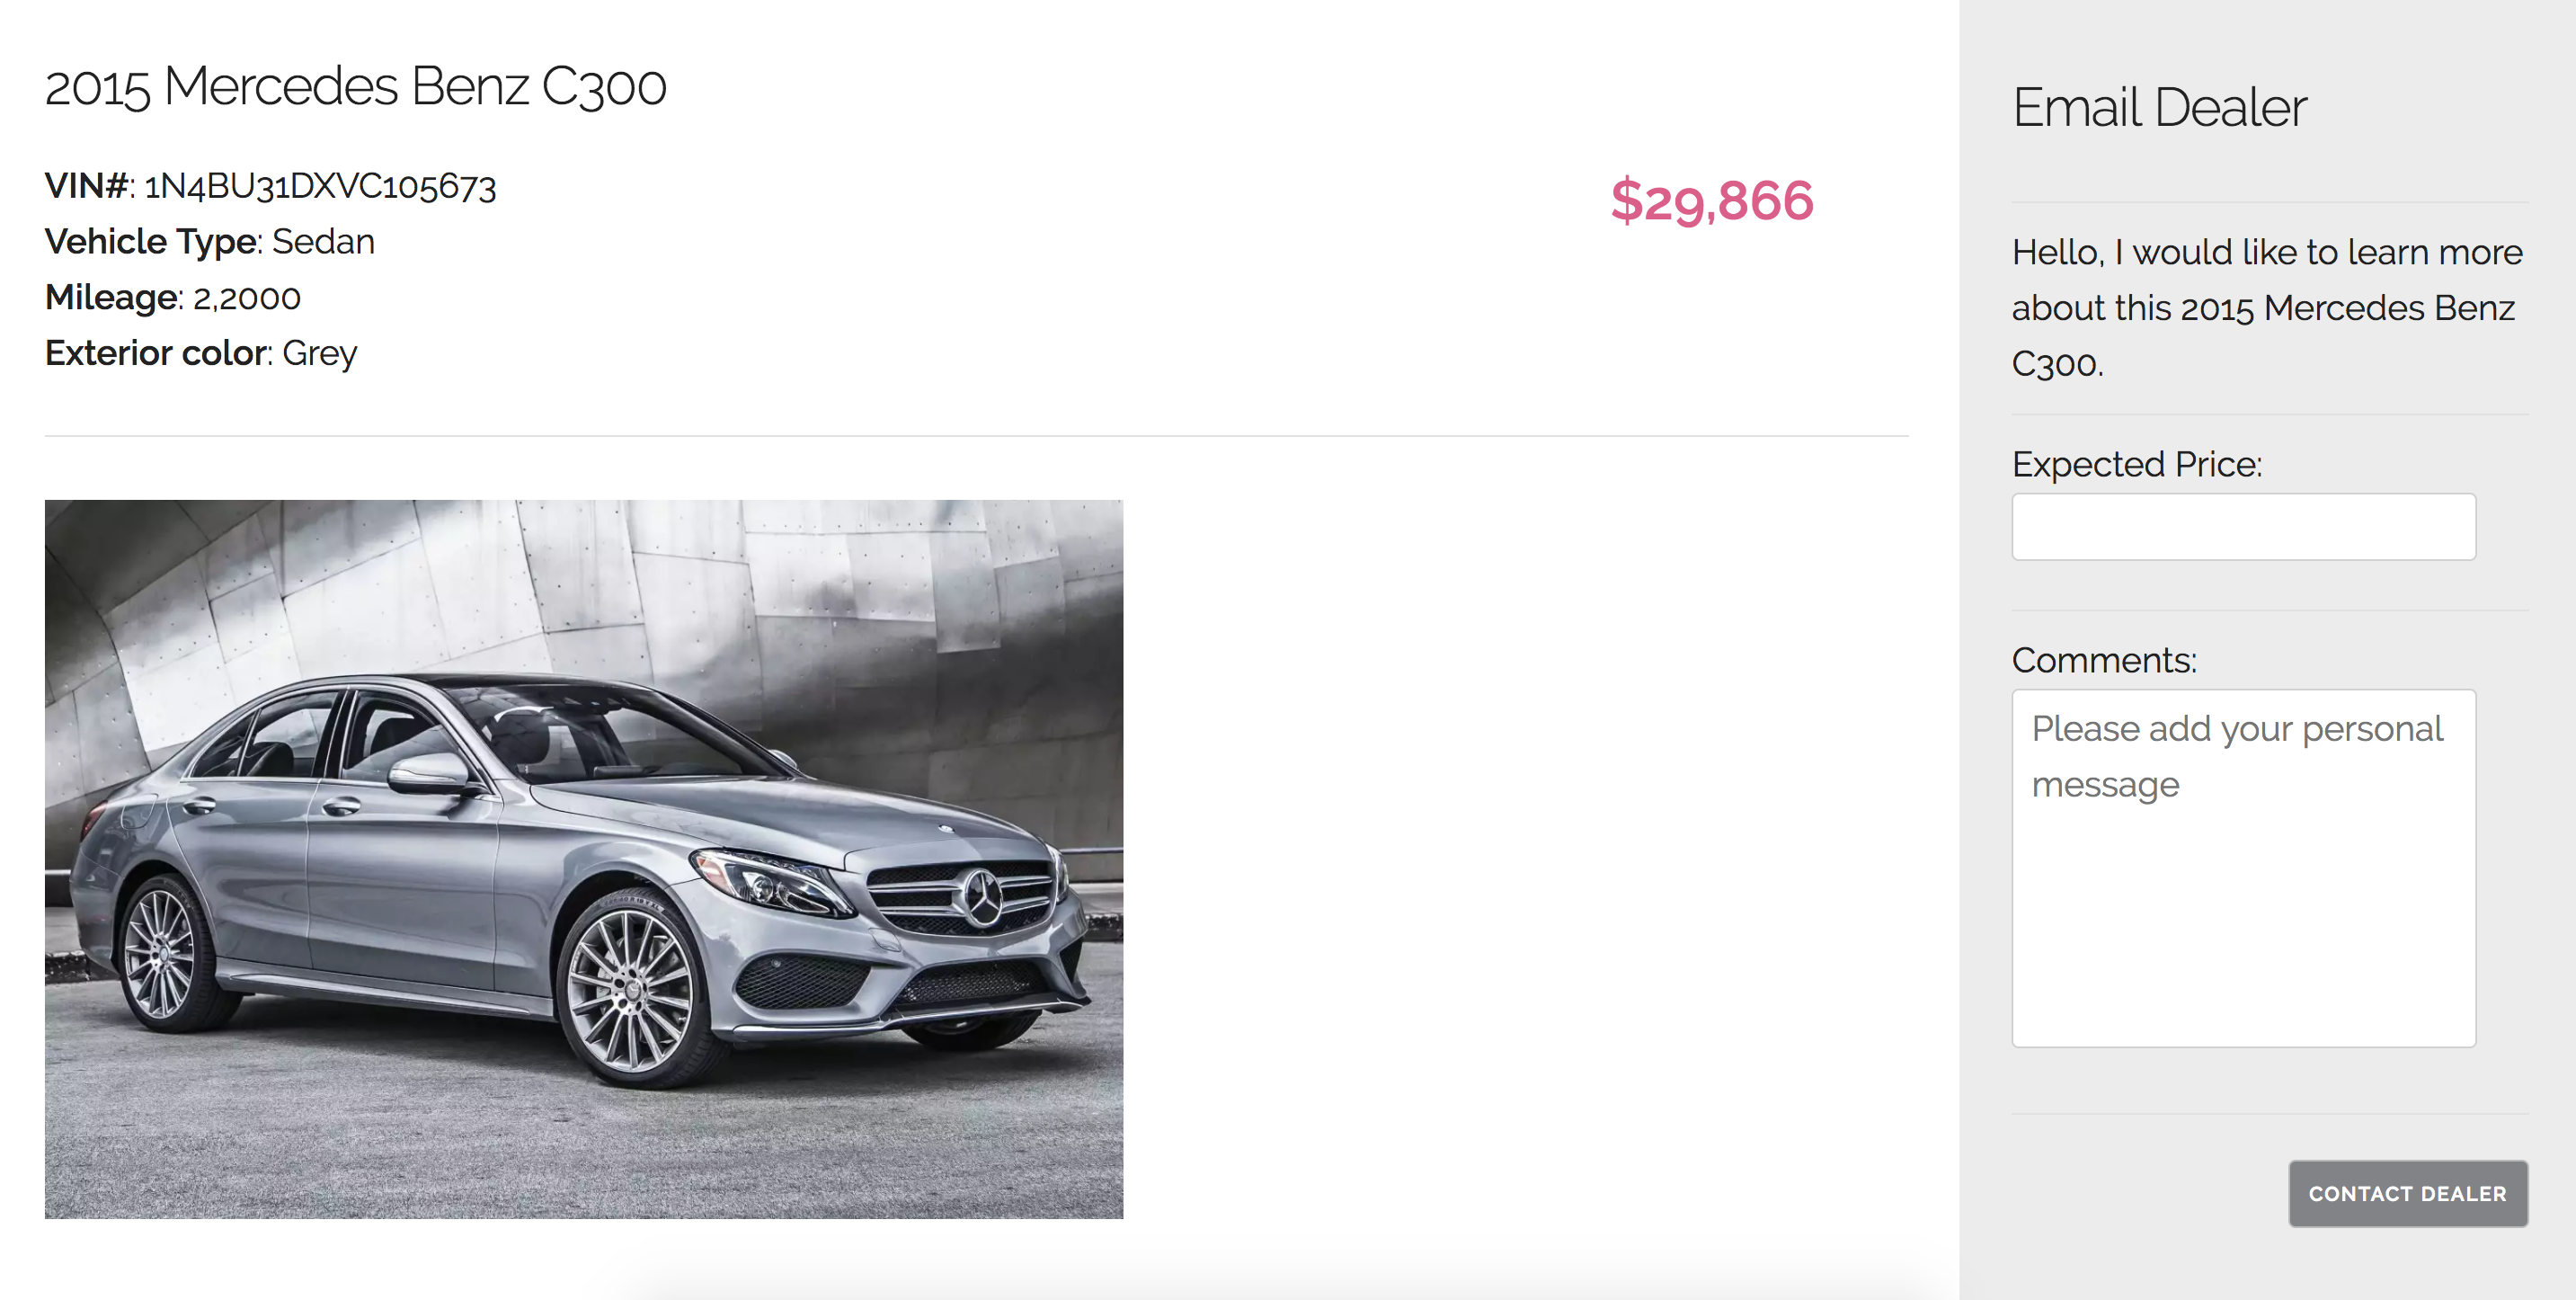
If you switch to user view at http://localhost:3000/car-details, you will realize the Details button is not working yet.
Here is what we want to display:
Let's add a route for car details and build the view above!
When you run npm test a coverage report is generated for you. You can view it under the coverage folder. A detailed coverage report will be included as an index.html file under coverage/client/<HeadlessChrome>/lcov-report/. Please go ahead and add tests for components that lack coverage.
Again, thank you so much for joining this workshop with Electrode today. We are happy to have you here to code together. We have created a complete version of the car-buying app here if you are interested in checking it out!

