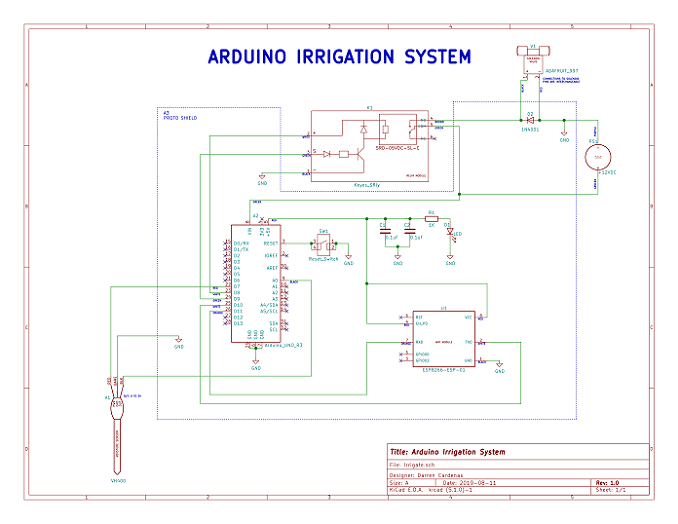
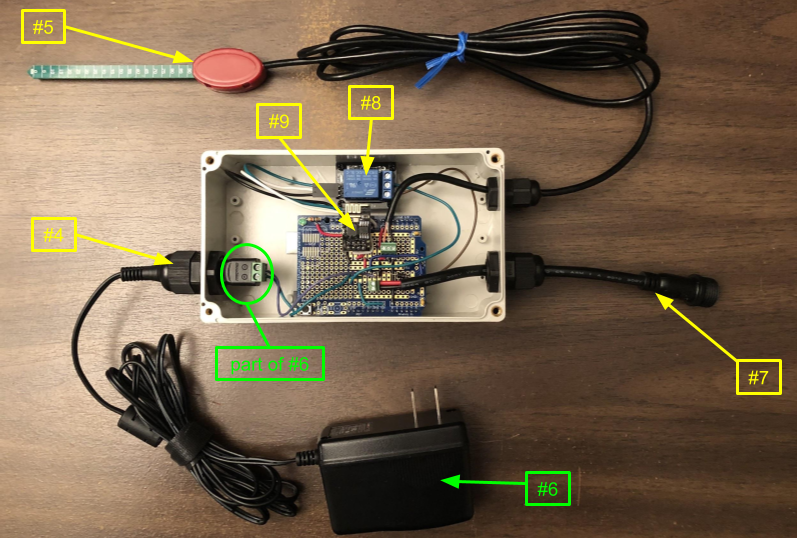
This project contains code, schematics, build plans, and 3D models to construct an automated garden watering system. The main components of the system are an Arduino Uno Rev3 microcontroller board, a soil moisture sensor, and a water solenoid valve. The water solenoid valve is connected to a garden hose and a suitable watering device, such as a sprinkler or sprayer. I used an old garden hose with holes drilled into it.


At a set time interval, the Arduino checks the moisture sensor for a minimum value. If the reading is below the minimum value, the water valve is opened for a period of time. The moisture readings are sent via email and text message. The readings are also saved to a publicly viewable IoT website to store data and generate graphs.


- Allows customizable intervals for soil moisture checks and watering
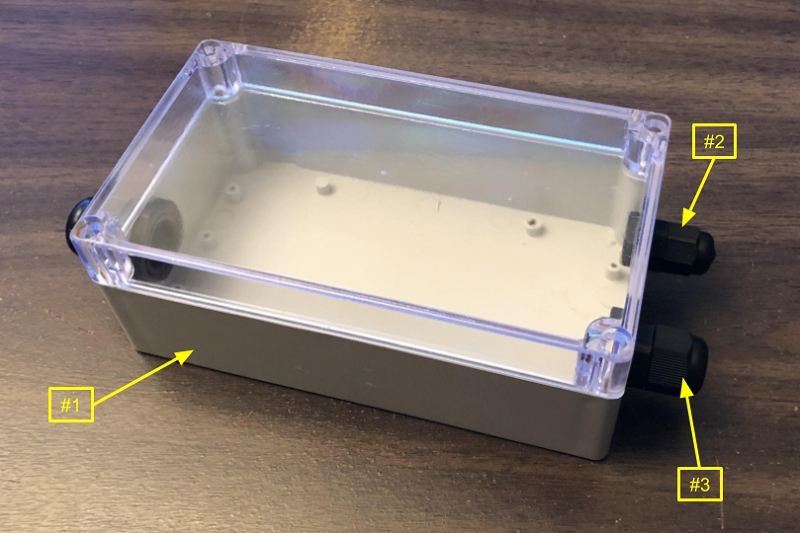
- Leverages waterproof enclosures and cabling
- Sends email and text message (SMS) status updates
- Provides data monitoring via website
- Supports WiFi data transmission using an ESP8266 module
- Powered by a single +12VDC source

Developed in Arduino IDE 1.8.9.

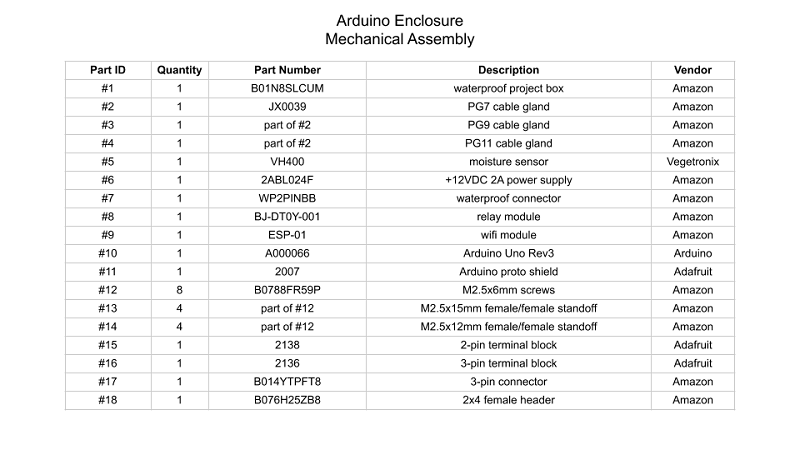
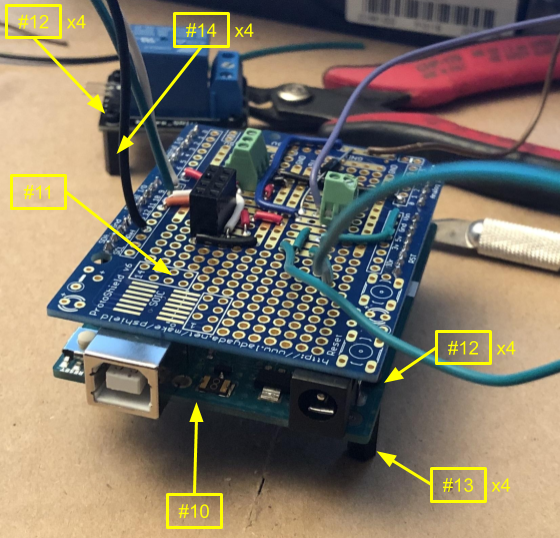
I used screw terminal blocks and a 2x4 female header to allow for easy disassembly.

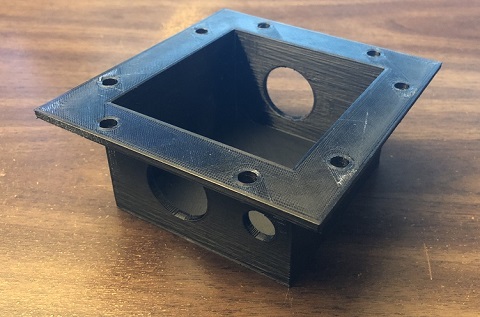
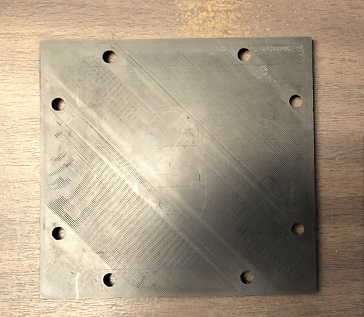
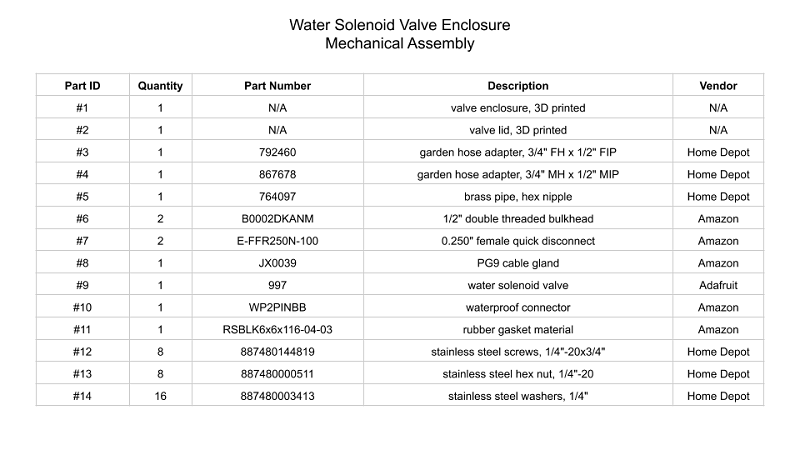
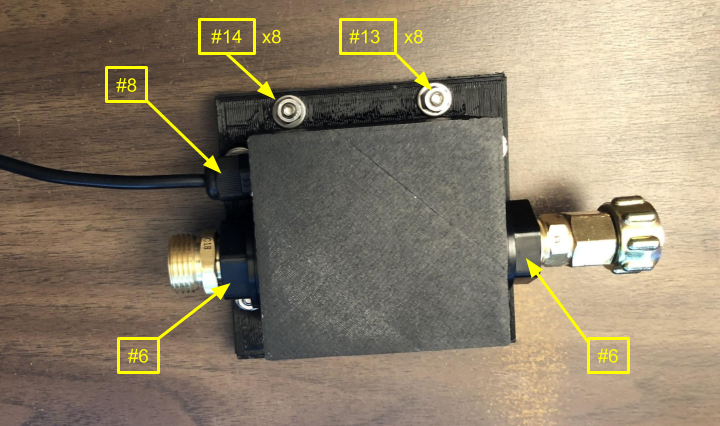
I designed a custom waterproof enclosure to house the water solenoid valve. I used PETG filament and 0.3mm layer height. Enclosure was printed with 10% infill and supports. Lid was printed with 50% infill and no supports. I cut a square using gasket material and punched holes for stainless steel screws.
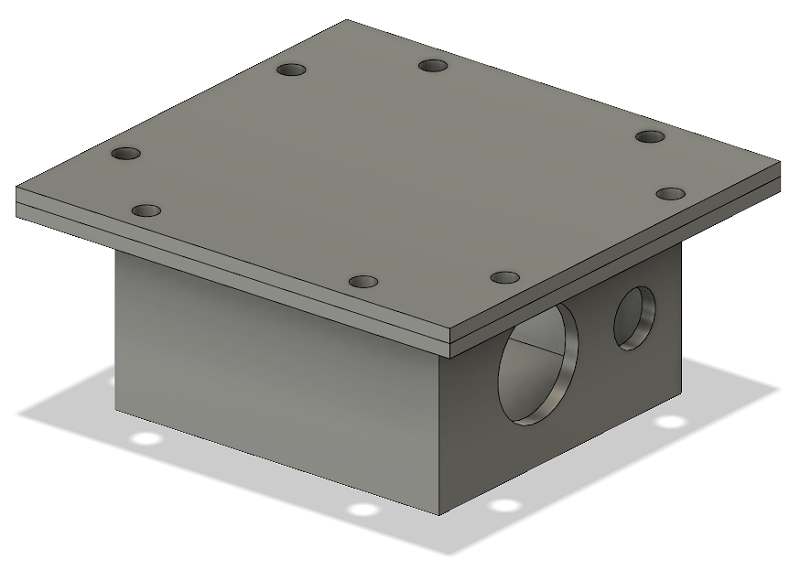
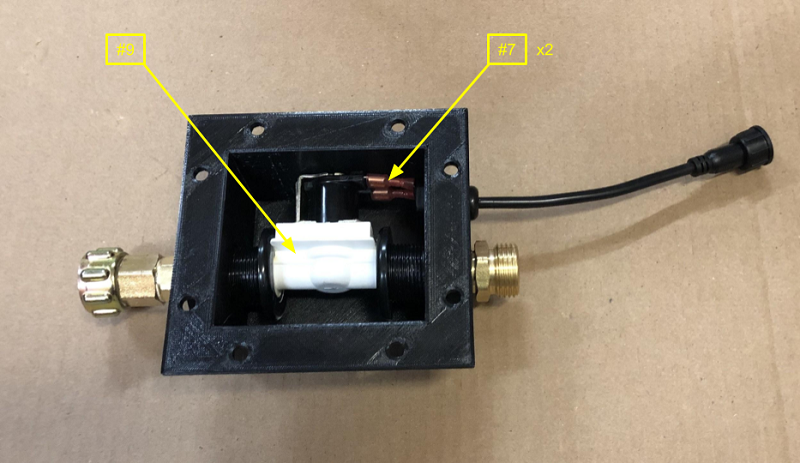
To install the solenoid valve, insert the bulkhead adapters into the enclosure first. Then, connect the valve to one of the bulkhead adapters by turning the adapter from outside of the enclosure. After tightening the first adapter, there should be enough clearance to attach the second adapter. Then install the bulkhead rubber washers and locknuts. The pipe fittings require teflon tape or thread sealant for leak-proof operation.

Adafruit provides excellent instructions for the initial set up of the Arduino proto shield. Install screws and standoffs on the Arduino and relay module. Then use some kind of adhesive to bond the standoffs to the inside of the enclosure. I used acrylic cement.

- Update the code to include your SSID name/password, ThingSpeak Write API key, and SMTP2GO username/password.
- Update the email sender and recipient lists in the code.
- Update the moisture check interval and watering period in the code.
- Update the MOISTURE_MAX value in the code by taking readings with the sensor blade fully submerged in water.
- Update the MOISTURE_THRESHOLD value in the code with your desired value.
- Ensure water pressure going to the water solenoid valve is at least 3PSI.
- The water solenoid valve is uni-directional. Confirm water flow will be in the correct direction.