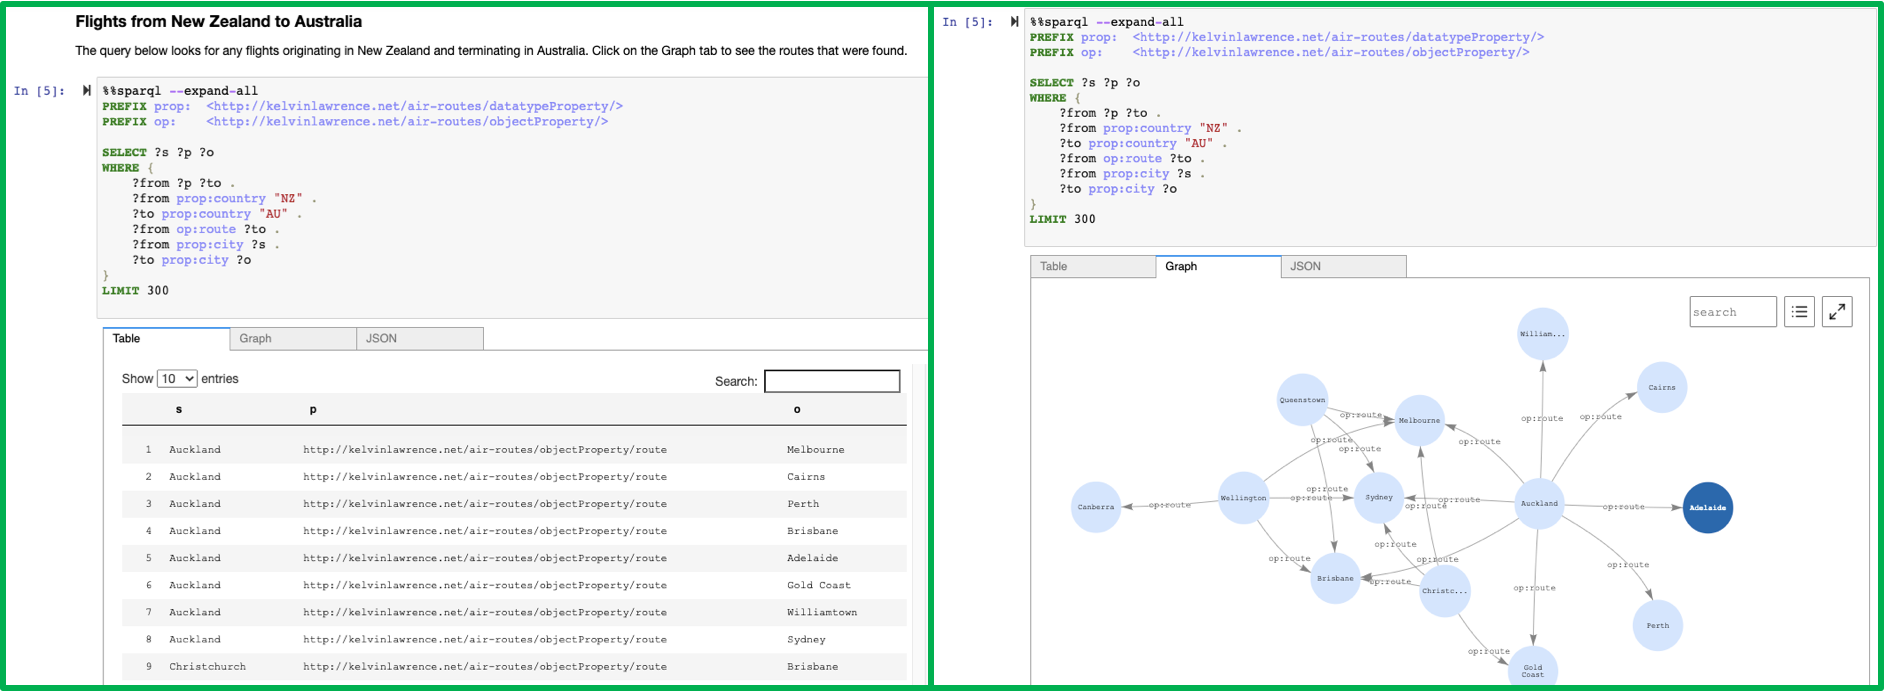
The graph notebook provides an easy way to interact with graph databases using Jupyter notebooks. Using this open-source Python package, you can connect to any graph database that supports the Apache TinkerPop or the RDF SPARQL graph model. These databases could be running locally on your desktop or in the cloud. Graph databases can be used to explore a variety of use cases including knowledge graphs and identity graphs.
Instructions for connecting to the following graph databases:
| Endpoint | Graph model | Query language |
|---|---|---|
| Gremlin Server | property graph | Gremlin |
| Blazegraph | RDF | SPARQL |
| Amazon Neptune | property graph or RDF | Gremlin or SPARQL |
We encourage others to contribute configurations they find useful. There is an additional-databases folder where more information can be found.
%%sparql - Executes a SPARQL query against your configured database endpoint.
%%gremlin - Executes a Gremlin query against your database using web sockets. The results are similar to what the Gremlin console would return.
%%graph_notebook_config - Sets the executing notebook's database configuration to the JSON payload provided in the cell body.
%%graph_notebook_vis_options - Sets the executing notebook's vis.js options to the JSON payload provided in the cell body.
%%neptune_ml - Set of commands to integrate with NeptuneML functionality. Documentation
TIP 👉 There is syntax highlighting for both %%sparql and %%gremlin queries to help you structure your queries more easily.
%gremlin_status - Obtain the status of Gremlin queries. Documentation
%sparql_status - Obtain the status of SPARQL queries. Documentation
%load - Generate a form to submit a bulk loader job. Documentation
%load_ids - Get ids of bulk load jobs. Documentation
%load_status - Get the status of a provided load_id. Documentation
%neptune_ml - Set of commands to integrate with NeptuneML functionality. You can find a set of tutorial notebooks here.
Documentation
%status - Check the Health Status of the configured host endpoint. Documentation
%seed - Provides a form to add data to your graph without the use of a bulk loader. both SPARQL and Gremlin have an airport routes dataset.
%graph_notebook_config - Returns a JSON payload that contains connection information for your host.
%graph_notebook_host - Set the host endpoint to send queries to.
%graph_notebook_version - Print the version of the graph-notebook package
%graph_notebook_vis_options - Print the Vis.js options being used for rendered graphs
TIP 👉 You can list all the magics installed in the Python 3 kernel using the %lsmagic command.
You will need:
- Python 3.6.1-3.6.12
- Jupyter Notebook 5.7.10
- Tornado 4.5.3
- A graph database that provides a SPARQL 1.1 Endpoint or a Gremlin Server
# pin specific versions of Jupyter and Tornado dependency
pip install notebook==5.7.10
pip install tornado==4.5.3

# install the package
pip install graph-notebook

# install and enable the visualization widget
jupyter nbextension install --py --sys-prefix graph_notebook.widgets
jupyter nbextension enable  --py --sys-prefix graph_notebook.widgets

# copy static html resources
python -m graph_notebook.static_resources.install
python -m graph_notebook.nbextensions.install

# copy premade starter notebooks
python -m graph_notebook.notebooks.install --destination ~/notebook/destination/dir

# start jupyter
jupyter notebook ~/notebook/destination/dir
In a new cell in the Jupyter notebook, change the configuration using %%graph_notebook_config and modify the fields for host, port, and ssl. For a local Gremlin server (HTTP or WebSockets), you can use the following command:
%%graph_notebook_config
{
  "host": "localhost",
  "port": 8182,
  "auth_mode": "DEFAULT",
  "iam_credentials_provider_type": "ROLE",
  "load_from_s3_arn": "",
  "ssl": false,
  "aws_region": "us-east-1"
}
To setup a new local Gremlin Server for use with the graph notebook, check out additional-databases/gremlin server
Change the configuration using %%graph_notebook_config and modify the fields for host, port, and ssl. For a local Blazegraph database, you can use the following command:
%%graph_notebook_config
{
  "host": "localhost",
  "port": 9999,
  "auth_mode": "DEFAULT",
  "iam_credentials_provider_type": "ROLE",
  "load_from_s3_arn": "",
  "ssl": false,
  "aws_region": "us-east-1"
}
You can also make use of namespaces for Blazegraph by specifying the path graph-notebook should use when querying your SPARQL like below:
%%graph_notebook_config

{
  "host": "localhost",
  "port": 9999,
  "auth_mode": "DEFAULT",
  "iam_credentials_provider_type": "ENV",
  "load_from_s3_arn": "",
  "ssl": false,
  "aws_region": "us-west-2",
  "sparql": {
    "path": "blazegraph/namespace/foo/sparql"
  }
}
This will result in the url localhost:9999/blazegraph/namespace/foo/sparql being used when executing any %%sparql magic commands.
To setup a new local Blazegraph database for use with the graph notebook, check out the Quick Start from Blazegraph.
Change the configuration using %%graph_notebook_config and modify the defaults as they apply to your Neptune cluster:
%%graph_notebook_config
{
  "host": "your-neptune-endpoint",
  "port": 8182,
  "auth_mode": "DEFAULT",
  "iam_credentials_provider_type": "ENV",
  "load_from_s3_arn": "",
  "ssl": true,
  "aws_region": "your-neptune-region"
}
To setup a new Amazon Neptune cluster, check out the AWS documentation.
When connecting the graph notebook to Neptune, make sure you have a network setup to communicate to the VPC that Neptune runs on. If not, you can follow this guide.
If you are running a SigV4 authenticated endpoint, ensure that the config field iam_credentials_provider_type is set
to ENV and that you have set the following environment variables:
- AWS_ACCESS_KEY_ID
- AWS_SECRET_ACCESS_KEY
- AWS_REGION
- AWS_SESSION_TOKEN (OPTIONAL. Use if you are using temporary credentials)
See CONTRIBUTING for more information.
This project is licensed under the Apache-2.0 License.

