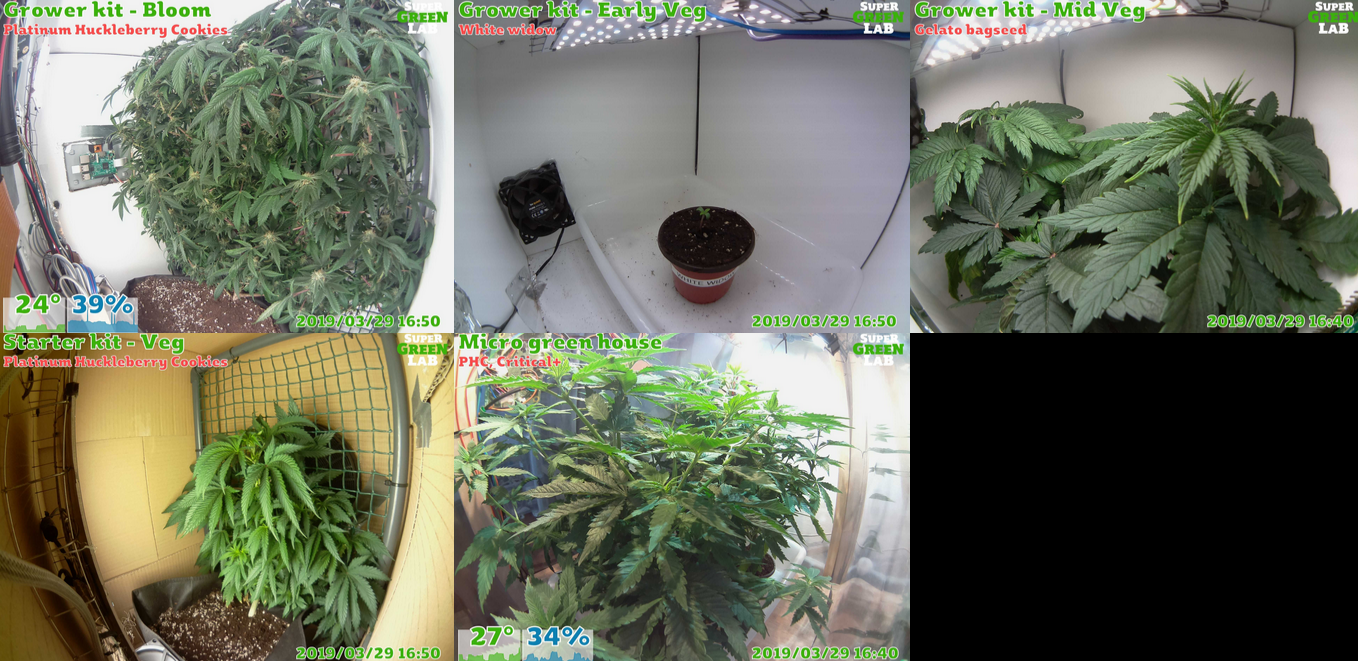
- SuperGreenTimelapse
- Features
- Hardware requirements
- Quickstart
- View live over http
- One more thing:
- Subscribe our youtube channel:)
Build a remote camera with a raspberryPI and webcam, and always have an eye on your growth.
See live action: https://live.supergreenlab.com/ (auto updates every 10 minutes)
- Live(-ish) secured webcam
- Take a picture every X minutes
- Upload to dropbox app folder
- Produce a timelapse video with extra image interpolation for better smoothness
- RaspberryPI + Wifi (optional, most rpi have integrated wifi now)
- Camera, I got those for the wide angle lens, but that's only for small spaces (this is the one used for the pic above).
- Power supply
The problem that arises when you want to take timelapses is that taking pictures every 10 minutes takes a lot of space. And having a raspberrypi running 24/24 and storing big amounts of data on an SD card is looking for trouble:P
So what seems to be a good solution is to upload everything to dropbox.
It also allows to view the latest pic online, which actually makes it some sort of cloud live camcorder. Good times.
There's a little setup to do on dropbox's side. For obvious security purpose you have to let dropbox know that he needs to create a space and access for our program.
Got to the app creation page, and choose: Dropbox API -> App folder -> SuperGreenTimelapse.
Now scroll to the Generated access token section, and click the Generate button below. Copy-paste the long id that looks like vrB4PlxSQpsAAAAAAAC1SvJJbXi08sdjlkaWWfalk25iX4GAqsfk67rkM0sM0uyC, we'll need that in the next step.
The most straight forward way to setup everything up is by using our custom raspbian image.
We'd recommend using something like Etcher for that.
This tutorial might help if you've never done that.
Then you'll first want to put the sd card in your real computer (ie not the raspberrypi), and mount it like any usb key.
The directory you'll see contains a bunch of files of great interests:
- wpa_supplicant.conf
- timelapse_dropbox_token
- timelapse_uploadname
- timelapse_name
- timelapse_strain
- timelapse_controllerid
Edit the wpa_supplicant.conf file, you'll have to enter your wifi credentials there.
Copy/paste this (don't forget to replace the values SSID and PASSPHRASE between ""):
ctrl_interface=/run/wpa_supplicant
update_config=1

network={
        ssid="SSID"
        psk="PASSPHRASE"
}
Edit the timelapse_dropbox_token file and put the token, be sure not to have any spaces or empty lines.
Edit the timelapse_uploadname and put the name of the folder you want all pictures to be stored in. For example SpaceTomatoes.
The content of timelapse_name will be placed at the top left of the pictures.
timelapse_strain right under, some sort of a subtitle.
For now this only works with the SuperGreenController, let me know if you're interested, I'll put more here:)
(this is not up-to-date)
First follow the raspberryPI quickstart guide if you have never done that before.
Always good to upgrade after a fresh install:
sudo apt-get update && sudo apt-get upgrade -y
Install or upgrade to the latest binary with the following command:
sudo curl https://github.com/supergreenlab/SuperGreenTimelapse/releases/download/PreRelease/timelapse -o /usr/local/bin/timelapse
sudo curl https://raw.githubusercontent.com/supergreenlab/SuperGreenTimelapse/master/watermark-logo.png -o /home/pi/watermark-logo.png
sudo chmod +x /usr/local/bin/timelapse
Now setup the cron job that will call our timelapse every 10 minutes:
echo "*/10 * * * * pi DBX_TOKEN=[ Insert your dropbox token here ] NAME=[ Insert a name here ] /usr/local/bin/timelapse 2>&1" >> /etc/crontab
The */10 means "every 10 minutes".
To change the settings later, don't repeat the command, but open the file instead nano /etc/crontab, the line above should be the last in the file.
The watermark on the picture is located at /home/pi/watermark-logo.png, you can change to whatever you want. Keep it to support us :P
All timelapses are stored on your dropbox's root in the Apps/SuperGreenTimelapse/ directory.
The latest picture taken is named latest.jpg.
Creating the timelapse requires go to the Apps/SuperGreenTimelapse/ directory in your Dropbox folder, then start the create_timelapse.sh script.
curl -O https://raw.githubusercontent.com/supergreenlab/SuperGreenTimelapse/master/create_timelapse.sh
chmod +x create_timelapse.sh
./create_timelapse.sh [ The name of one of the timelapses ]
This will take a while to process. What it does is take each pics, create 4 versions to interpolate with composite then creates a video with all pics with ffmpeg.
The video will be written as [ The name ].mp4.
I remember some gotchas there, but I can't recall them, please post issues, or directly at r/SuperGreenLab.
First thing is to get a hosting solution.
Then install docker.
Then, run this command as root on your server:
docker run -d -p 80:80 -p 443:443 -e 'DBX_TOKEN=[ Insert your dropbox token here ]' --restart=always supergreenlab/supergreenlive
And now navigating to http://[ your hosting IP or domain ]/[ The name you chose ] will show the latest pic.
Those are really live (in my office right now):
And the veg boxes (there's two stacked on top of each other):
Btw the these 3 boxes use only 72w dispatched on 6 led panels, 4 in bloom, 2 in veg, the whole setup is controlled by only one controller :) Ventilations are independantly controlled too.


