Adventures With Wood is a full stack web application that gives users a platform to view, create and share projects in wood. The intention of the site is to provide a simple, intuitive, visually appealing and user-friendly platform for users to share wood-inspired projects and interact with the community. The intended target audience is anyone with an interest in wood, DIY and making things. The target audience will mostly span across men and women from young adults to older generations.
The application implements user authorisation and full CRUD functionality, allowing users to create, update, read and delete projects stored in a relational database management system. Users can also like projects and be part of the site community by adding comments to projects.
The site also features a back-end admin dashboard that allows a superuser to review user comments, as well as monitor, edit, delete projects, posts and categories.
Link to the live site - https://adventureswithwood.herokuapp.com/
- Portfolio Four
- User Experience UX
- Features
- Technologies Used
- Testing
- Setup and Deployment
- Credits
This project was created for Portfolio Project Four submission for the Full Stack Software Development Higher National Diploma at Code Institute. Amongst other assessment criteria, the project had to be built using HTML, CSS, JavaScript, Python and Django and feature full CRUD functionality and user authorisation. The project also had to be planned and designed using Agile methodologies.
- To get inspiration for DIY wooden projects
- To view all projects and posts
- To view details or projects and posts
- To view the most popular projects
- To be able to register/sign up to the site
- To comment on and like projects
- To log in to the site
- To create new Projects and Posts
- To update/edit/delete their projects/posts
- Provide a stable and enjoyable user experience that encourages interaction and participation.
- The platform should be accessible, welcoming and appealing to new users.
- Content should be high quality and well structured.
- Provide fully responsive application with straightforward navigation
- Ensure only authenticated and valid users have access to CRUD functionality
Agile methodology was used to plan and design the Adventures with Wood application. User stories were created on GitHub and added to the board in the TODO section. They then moved across the board into IN PROGRESS when they were being actioned, and then into the DONE section when they were completed. This helped greatly in tracking progress and organising and allocating work.
Database scheme was drawn up using App Diagrams.net. The scheme was used to plan the database models and fields. It also helped to display the relationships between the models and how they interact. Adventures With Wood consists of four custom models and one generic - Project, Post, Category, Comment and User. I did not include Keywords or Userlevels in my final design. I added Category type field(Project/Post) after my initial design.

In terms of project management, user stories are an integral part of the software development creative process. Adventures With Wood consists of 22 user stories.
A full list of user stories can be found in the Adventures with Wood GitHub Project Board.
The Adventures with Wood app features a simple and user friendly design. Balsamiq was used to do some wireframe mock ups for the homepage and projects/posts pages.
-Index.html wireframe

-Projects.html wireframe

Site structure is one that users will be quite familiar with a top navigation bar. However, some content is hidden / restricted to users who are not logged in. The main pages / templates of Adventures With Wood include - the home page, projects lists, posts lists, project details, post details, update project, update post, delete project/post page templates. Site users can freely and easily browse the various pages using the site navigation bar which is visible at the top of each page. The nav bar options automatically change depending on whether a user is signed in or not to allow for easy and intuitive site navigation.
Adventures With Wood uses Google Fonts for the site typography. The specific fonts are Antic. Antic is clear but defined with a clear, functional form.
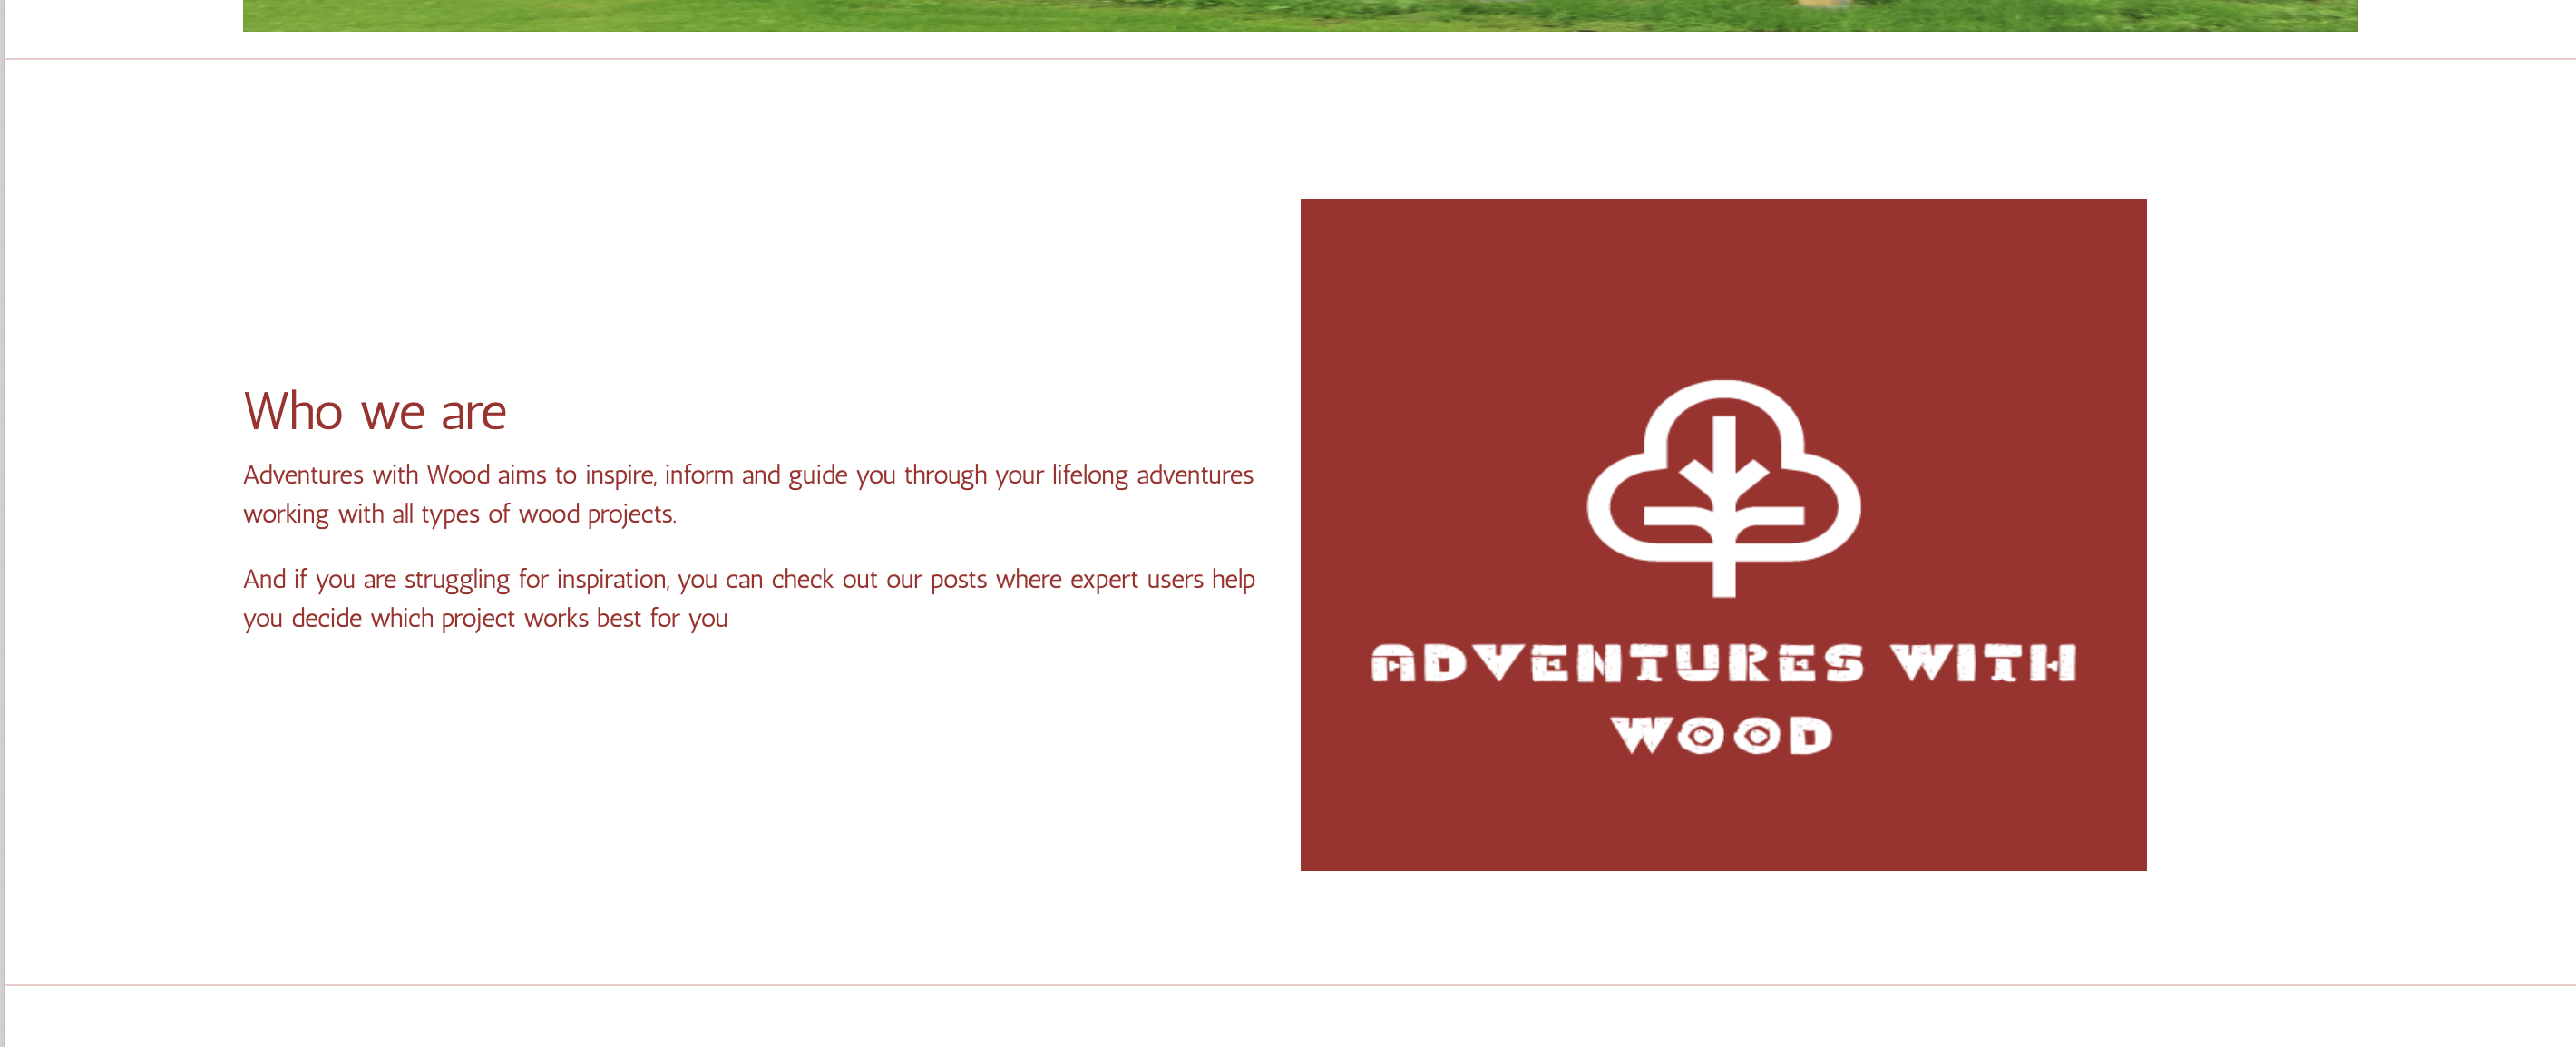
The homepage is the first page of the site that a user will see when they navigate to the Adventures With Wood URL. It's designed to be eye catching to users and to quickly summarise the intention of the site. It is also a central location for all users to view projects.
- Nav bar and Carousel

-
Who We are
-
Most Popular Projects
Site navigation is present at all times on every page of the site in the form of header nav bars. These navigational elements change depending on whether a user is logged in or not. Non logged in users only have viewing access to projects and posts. They are unable to comment or like a project. These elements are also fully responsive and the header collapses to become a mobile menu on small screen sizes.
- Navigation Bar - Not Logged in - Full

- Navigation Bar - Logged in - Full

- Navigation Bar - Mobile

The homepage Carousel section is the large eye-catching section which is just beneath the navigation bar. The carousel is only displayed on the homepage. It is used to catch the users attention, and to clearly showcase the general topic of the site. It features a large, colourful full screen image and a centralised text box with the project title. It auto scrolls but users also have the option of clicking left or right using the arrows on the image. If users click on an image, they are brought to the Project details page for that project.
- Carousel

The homepage Introduction section is a brief introductory text paragraph that explains the purpose of the site and 'Who We Are' and how to use it to new users.
- Who We are

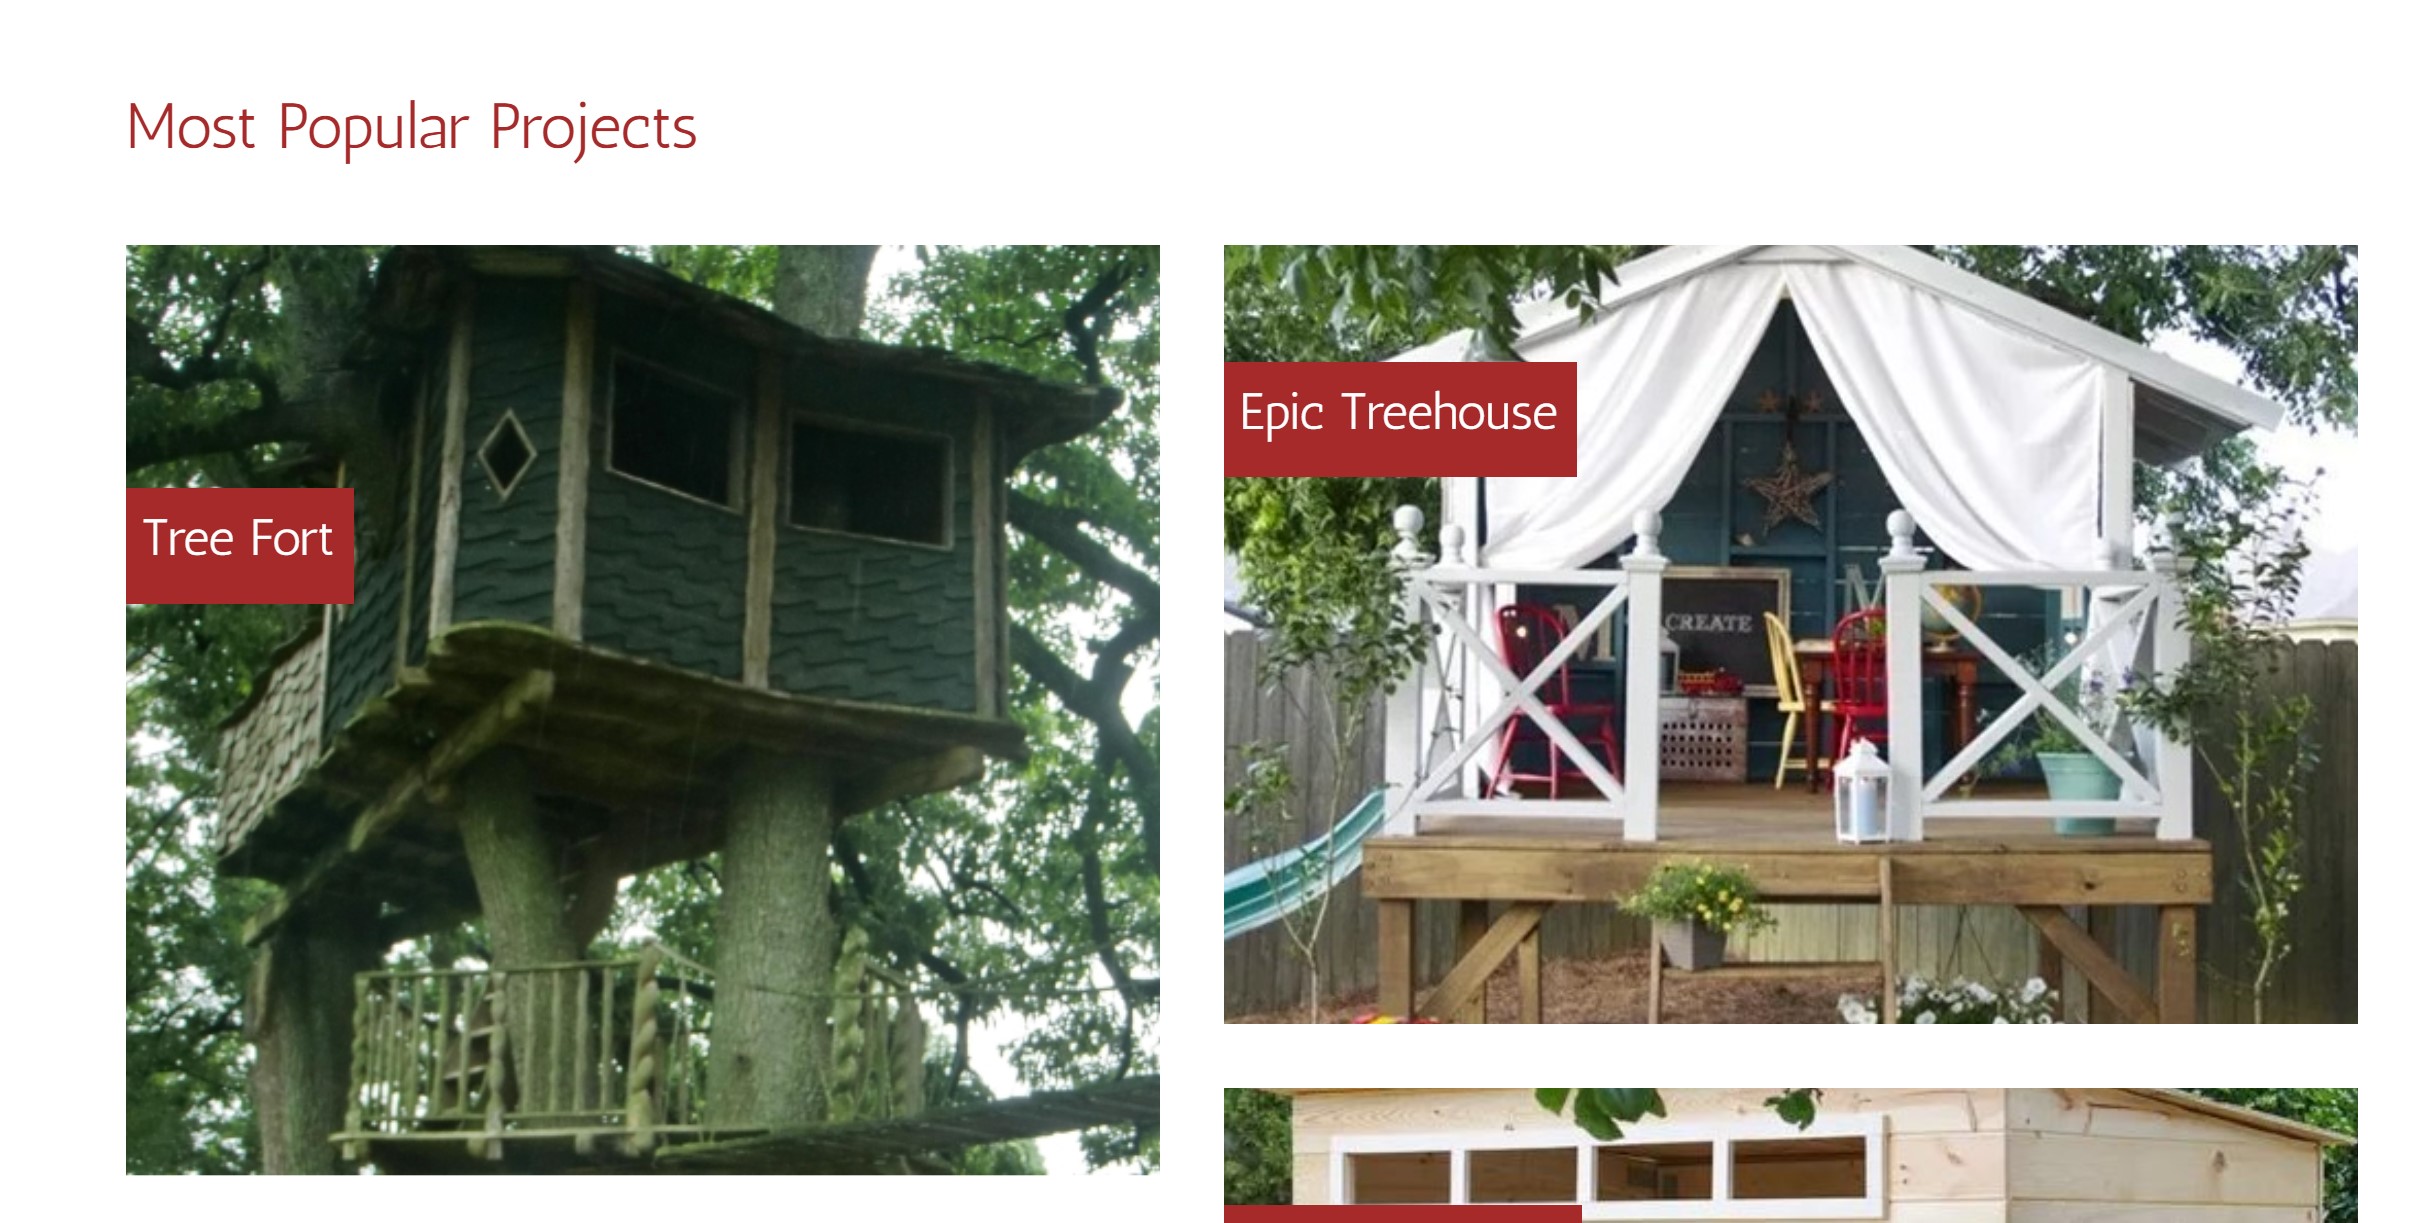
The most popular projects feature is another method used to draw in the site visitor and get engagement with the site. This area of the homepage is ordered by projects with the most likes. The list highlights the top three projects.
- Most Popular Projects

The project page is a template used to display the summary of a project. Each published project has a summary page. These pages are available for all users to view, including non-logged in users. The main purpose of the page is to display the brief project overview. Users will generally navigate to a full project page by clicking on the project from the project card either on the home page via the Carousel or Most Popular Projects or the projects page. As the user has now shown a specific interest in the project, all the information about the project is displayed on the details page.
- Projects Page

The posts page is a template used to display the summary of a post. Each published post has a summary page. These pages are available for all users to view, including non-logged in users. The main purpose of the page is to display the brief post contents. Users will generally navigate to a full post page by clicking thru from this page. As the user has now shown a specific interest in the post, all the information about the post is displayed on the details page.

The project details page is a template used to display the full information on a project. Each published project has a details page. These pages are available for all users to view, including non-logged in users. The main purpose of the page is to display the project tools, materials and instructions. Users will generally navigate to a full project page by clicking the view project button on the project card either on the home page or the projects page. As the user has now shown a specific interest in the project, all the information about the project is displayed here.
- Project Details

The post details page is a template used to display the full information on a post. Each published post has a details page. These pages are available for all users to view, including non-logged in users. The main purpose of the page is to display the full post contents. Users will generally navigate to a full post page by clicking thru from the Posts page. As the user has now shown a specific interest in the post, all the information about the post is displayed here.
- Post Details

A logged user can add a like and remove their own like from a project on that project's page. Each project features a heart icon at the bottom of the project that can be clicked to like it. It can also be clicked again to remove a like from the project. When a project is liked by a user, the icon changes to a red heart. Unregistered users cannot like a project. A user who is not logged in only sees how many likes it has. Clicking the icon is disabled for an unregistered user and has no effect.
- Like Project

- Unlike Project

At the bottom of each project details page there is a comments section for users to post comments. Logged in users can use the comment form to post a comment to that particular project. Comments are listed from the most recent at the top to the oldest at the bottom. The username of the comment author is displayed as well as the date and the body of the comment.
-Project Comments

The project comment form is what the user uses to post a comment on a project. This comment form is only visible to logged in users. The comment form comprises of one text body field for the comment and a submit button. The author and "created on" date are assigned automatically.
- Comments

- Comment Form

- Comment Form Submitted Message

The built-in validation is used to validate the comment form. The form is checked for required fields and passwords require a level of difficulty. A notification appears on the users screen to advise them about the failure. The user can then rectify their mistake and submit the form again. When the comment form is filled out correctly the form submits successfully, and the page is refreshed.
- Form Validation: Field Required

- Form Validation: Password

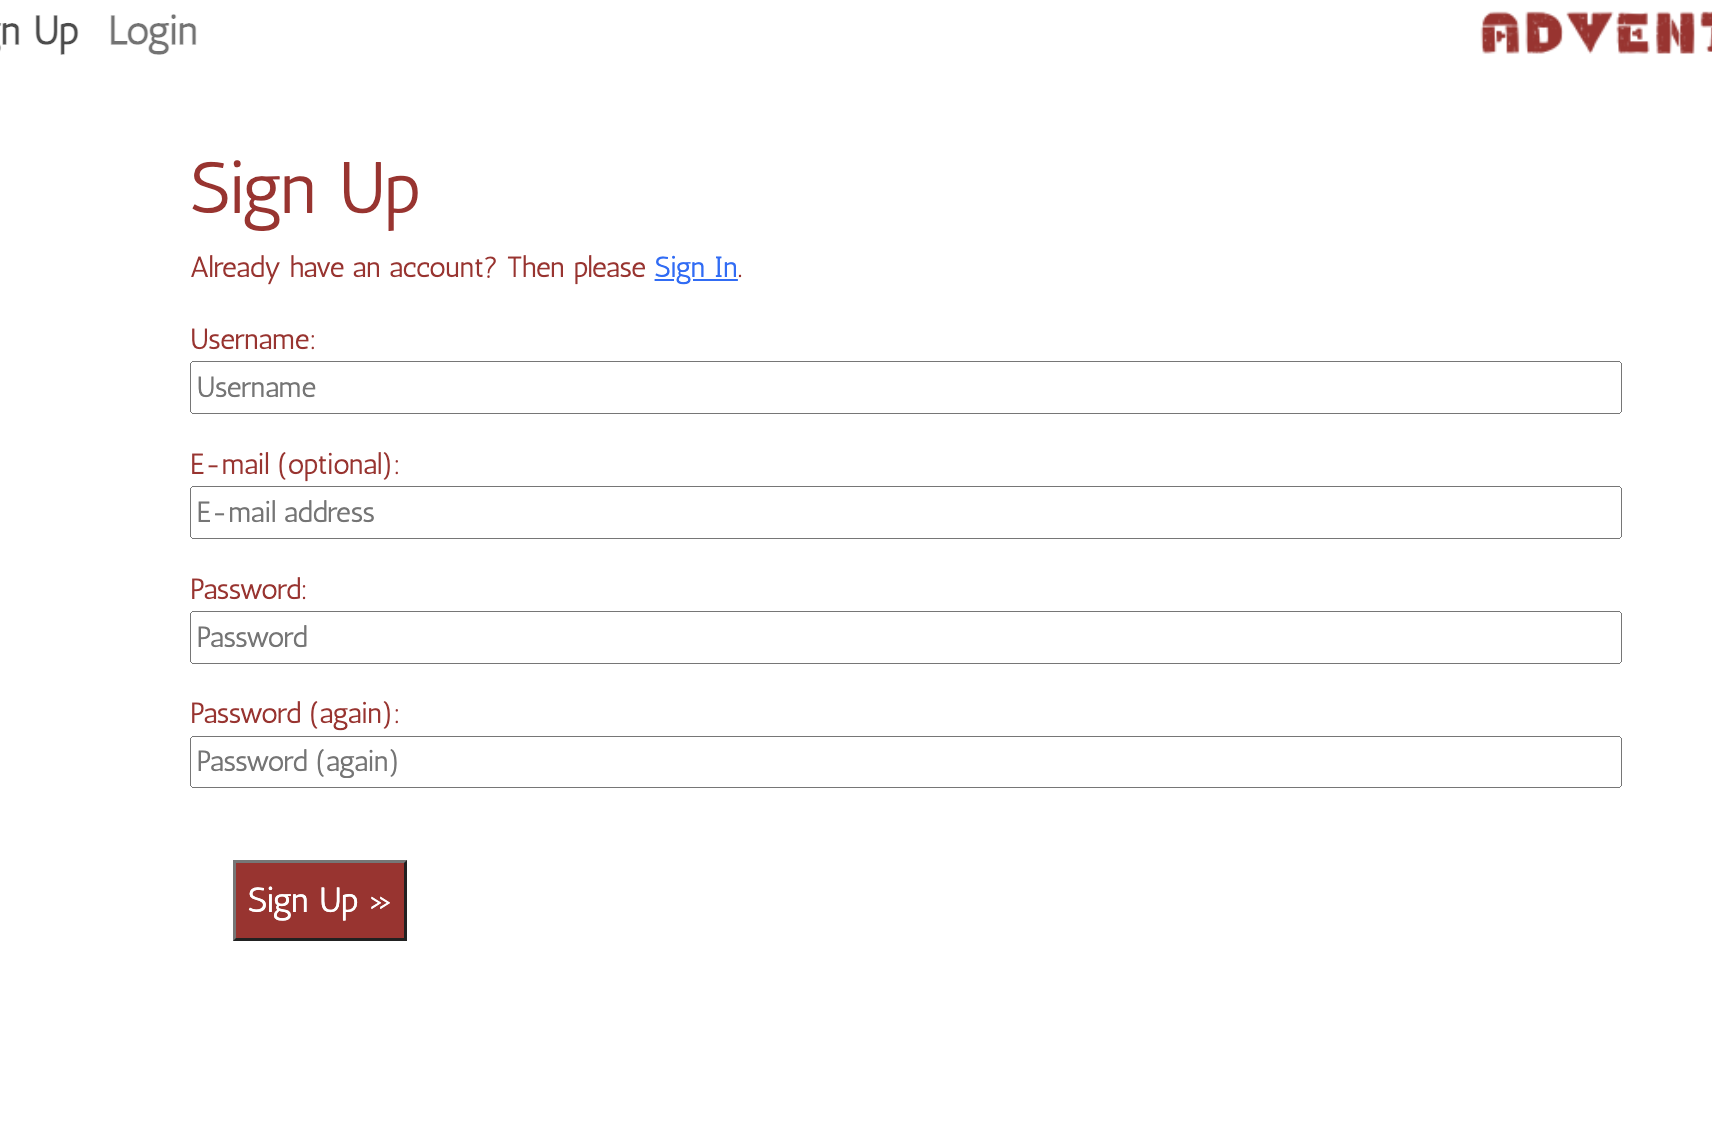
A user can navigate to the sign-up page via the site navigation bars if they are not logged in. The Adventures With Wood sign up page is a built-in template from the Django Allauth Package. Allauth provides the basic functionality for the user authorisation used in Adventures With Wood. However, the basic allauth template have been customised and styled to match the site design. Once a user submits the form correctly, they are redirected back to the homepage as a logged in user. For each action, they are notified of that action: via a message at the top of the page. These messages can be removed by clicking on the X.
-
Sign Up Form
-
Sign Up Notification


A user can navigate to the Sign in page via the site navigation bars if they are not already signed in. As with the Sign-Up page, it's a built-in form. The styling of the sign in page is very similar to the rest of the user authorisation pages. The colour scheme and layout are consistent, but the form and page heading are different. Once the sign in form is submitted correctly the user is redirected to the homepage as a logged in user.
- Sign In Form

- Sign In Notification

A user can navigate to the Sign Out page via the site navigation bars if they are logged in. They are prompted on this page to confirm if wish to log out. Upon confirmation the user is logged out and redirected to the homepage. If they click on Cancel, they are brought back to the previous page.
- Sign Out Confirmation Page

- Sign Out Notification

The Create template form is a page which features a project/post form to enable users to submit a project/post to the Adventures With Wood site. This page is only visible to logged in users and appears in the navigation menu. The page features similar styling to the rest of the site for consistency. It uses SummerNote so that users can add formatting to their new project/posts.
- Project Create Form

- Post Create Form

When a user submits a project/post successfully, a message appears at the top of the page confirming the submission of the project/post.
- Project Submission Notification

- Post Submission Notification

The Update project/post page is available to logged in users. The Update option appears below the summary on the list page and details page. When the Update option is clicked, the user is navigated to the edit project page. The page styling and content is exactly the same as the create page. The only difference is the form is prefilled out with the content. The user can then use this form to edit the content and submit the amendments to overwrite the previous content.
- Update Project Form

- Update Post Form

If a user successfully submits the update form the page is refreshed. A message is displayed to the user which confirms the successful form submission. The user is redirected to the list page for projects/posts.
- Update Project Notification

- Update Post Notification

A user can delete their project or post easily from the relevant list page or details page. This option is only visible to the author of the project or post. If a user clicks on delete, a delete confirmation is displayed seeking confirmation from the user for deletion. The user has the option to cancel the delete by clicking the cancel button or to confirm deletion by clicking the delete button. If the user clicks the cancel button the user is reverted back to the previous page. If the user clicks the delete button the project/post is deleted from the database and the page is refreshed showing it removed from the list.
- Delete Option

- Delete Confirmation Page

If a user confirms the deletion of a project or post, a notification is displayed to the user at the top of the page. This notification confirms the deletion of the project. The user can hide this notification by clicking the x icon.
- Delete Confirmation Notification

The 403 page is triggered when a user navigates to a site URL which they don't have permission to access. This could be because of a number of reasons, mainly if they are not logged in or not the author of a particular project or post. An example is if they manually typed in .../delete when on a project or post page. Only the author of the project/post can update/delete it.
- 403 Page

I believe the Adventures With Wood site has a lot of potential for expansion in the future. The basic functionality is there for the MVP but there are many features I would like to add in the future.
I would like to add an admin area for administrators so they wouldn't have to log into the Django admin area. The basic concept would be to have an admin navigation option on the main site navigation bar that is only visible to users with admin privileges. Navigating to this page would open a dashboard for administrators to view the basic site stats like number of posts and comments and new users. They would also be able to execute basic tasks and actions like approving comments and adding a featured project. This page would have to be secured and hidden from other site users.
Another feature that would improve the site would be a customisable user profile section. In this section a user would be able to edit their profile. They would also be able to add a profile picture/avatar. This would greatly improve the social element of the app and the overall user experience.
Another future feature I would like is a notification option where users can sign up to email notifications when there is activity on the site(new project/post/comment on their work).
The Adventures With Wood site currently features category fields which don't have any usable functionality. These fields were originally intended to group projects together to be displayed in project category lists/sections.
In the future I would like a user to be able to use the search bar field on the nav bar to search for specific projects, posts, categories or keywords. Submitting this field would then return a search results page with a list of any matching results. This would be a better experience for the user rather than having to manually scroll through each page.
I did plan to include the ability to print out the project instructions so they could be more useable outdoors etc.
I did plan to add enhanced form validation above the built-in ones. Validation for typos, numbers instead of letters, etc
- HTML5 - Provides the basic content and structure for the site.
- CSS3 - Provides the styling for the site.
- Python - Provides the functionality for the site.
- JavaScript - Provides the timeout functionality for the messages/notifications
- Git - Provides the version control system for the site.
- Bootstrap - Bootstrap is a free and open-source CSS framework directed at responsive, mobile-first front-end web development. It contains HTML, CSS and JavaScript-based design templates for typography, forms, buttons, navigation, and other interface components.
- Django - Django is a free and open-source, Python-based web framework that follows the model–template–views architectural pattern.
- GitHub - An internet hosting service used for version control. Used to host the Adventures With Wood repository and for the project board used for project management and user stories.
- GitPod - A cloud development environment used as the primary site code editor.
- Heroku - A cloud platform used to host the Adventures With Wood full stack application.
- Cloudinary - A cloud-based video and image management platform used to store the site images.
- Slack - An online instant messaging program used for site feedback and guidance from the Code Institute community.
- App Diagrams - An online diagram software used for the database schemas.
- Google Chrome Dev Tools - A set of web developer tools built directly into the chrome browser. Used for responsiveness tests and further testing.
- Google Fonts - A web-based font service by Google used to supply the site typography.
- Lighthouse - An open-source automated testing tool used for site tests.
- Responsive Design Checker - An online testing tool used for responsive site testing.
- Am I Responsive - An online testing tool used for responsive site testing.
- Wave Web Accessibility Evaluation Tool - An online suite of evaluation tools used to test the site for accessibility.
This is a list of the Python / Django libraries used in this project.
- asgiref - A standard Python library to allow for asynchronous web apps and servers to communicate with each other.
- cloudinary - A Python package allowing integration between the application and Cloudinary.
- dj-database-url - A Django utility to utilise the DATABASE_URL environment variable to configure the Django application. Used with PostgreSQL.
- dj3-cloudinary-storage - A Django package that facilitates integration with Cloudinary storage.
- Django - A python package for the Django framework.
- django-allauth - An integrated set of Django applications addressing user authentication, registration and account management.
- django-crispy-forms - A Django package that provides tags and filters to control the rendering behaviour of Django forms.
- django-summernote - A Django package to allow for the embedding of the summernote text editor into Django.
- gunicorn - A Python WSGI HTTP Server for UNIX.
- oauthlib - A generic, spec-compliant, thorough implementation of the OAuth request-signing logic for Python 3.6+.
- psycopg2 - A PostgreSQL database adapter for Python.
- PyJWT - A Python library that allows for encoding and decoding of JSON Web Tokens (JWT).
- python3-openid - A set of Python packages to support use of the OpenID decentralized identity system.
- pytz - A Python package for world timezone definitions, modern and historical.
- requests-oauthlib - A Python package for OAuthlib authentication support for Requests.
- sqlparse - A non-validating SQL parser for Python.
The testing approach is as follows:
- Manual testing of user stories
- Automated testing
- I want to get inspiration for DIY wooden projects
| Step | Expected Result | Actual Result |
|---|---|---|
| Navigate to https://adventureswithwood.herokuapp.com/ | Home page main body loads with carousel, site introduction and most popular projects | Works as expected |
- As a user, I can view all projects
| Step | Expected Result | Actual Result |
|---|---|---|
| Navigate to https://adventureswithwood.herokuapp.com/projects | All projects should be visible | Works as expected |
- As a user, I can view all posts
| Step | Expected Result | Actual Result |
|---|---|---|
| Navigate to https://adventureswithwood.herokuapp.com/posts | Posts page main body loads with all Posts displayed | Works as expected |
- As a site user I want to be able to view the most popular Projects
| Step | Expected Result | Actual Result |
|---|---|---|
| Navigate to https://adventureswithwood.herokuapp.com/ and scroll down to most popular Projects section | Projects with likes appear in three panels on homepage | Works as expected |
- As a user, I want to be able to view details of a particular project
| Step | Expected Result | Actual Result |
|---|---|---|
| Navigate to https://adventureswithwood.herokuapp.com/ and click on project image on carousel or most popular projects section | click on any picture to be brought to details page | Works as expected |
| Navigate to https://adventureswithwood.herokuapp.com/projects/ and click on a project to see project details page | User can see projects displayed and click on any picture to be brought to details page | Works as expected |
- As a user, I want to be able to view details of a particular post
| Step | Expected Result | Actual Result |
|---|---|---|
| Navigate to https://adventureswithwood.herokuapp.com/posts/ and click on a post to see post details page | User can see posts displayed and click on any picture to be brought to details page | Works as expected |
- As a site user, I can log in
| Step | Expected Result | Actual Result |
|---|---|---|
| Navigate to https://adventureswithwood.herokuapp.com/accounts/login/ and submit user details | User is logged in | Works as expected |
- As a site user, I want to be able to create a new Project
| Step | Expected Result | Actual Result |
|---|---|---|
| Navigate to https://adventureswithwood.herokuapp.com/accounts/login/ or click on Login nav link and submit user details | User is logged in | Works as expected |
| Navigate to https://adventureswithwood.herokuapp.com/project_create or click on Create New Project nav link | Create New Project Form is displayed | Works as expected |
| Enter details on Create New Project Form page then click submit | New project is created | Works as expected |
- As a site user, I want to be able to create a new Post
| Step | Expected Result | Actual Result |
|---|---|---|
| Navigate to https://adventureswithwood.herokuapp.com/accounts/login/ or click on Login nav link and submit user details | User is logged in | Works as expected |
| Navigate to https://adventureswithwood.herokuapp.com/post_create or click on Create New Post nav link | Create New Post Form is displayed | Works as expected |
| Enter details on Create New Post Form page then click submit | New post is created | Works as expected |
- As a site user, I can view comments on an individual project
| Step | Expected Result | Actual Result |
|---|---|---|
| Navigate to https://adventureswithwood.herokuapp.com/Projects/ | Projects page loads | Works as expected |
| Click on Projects card for more information | Projects detail page loads with comments section at the bottom of the page | Works as expected |
| Logged in users can fill out the comment form and click submit button | Comment is submitted for approval | Works as expected |
-
As a site user, I can comment on projects ------------ | ------------ | ------------ | Navigate to https://adventureswithwood.herokuapp.com/accounts/login/ or click on Login nav link and submit user details | User is logged in | Works as expected | Navigate to https://adventureswithwood.herokuapp.com/Projects/ | Projects page loads | Works as expected | Click on Projects card for more information | Projects detail page loads with comments section at the bottom of the page | Works as expected | Logged in users can fill out the comment form and click submit button | Comment is submitted | Works as expected |
-
As a site user, I want to be aware of logged in status
| Step | Expected Result | Actual Result |
|---|---|---|
| Navigate to any page and check nav bar | Logged in users see sign out link | Works as expected |
| Navigate to any page and check nav bar | Unauthenticated users see nav bar with Sign Up and Sign In options | Works as expected |
- As a site user, I want to be able to update one of my projects
| Step | Expected Result | Actual Result |
|---|---|---|
| Navigate to https://adventureswithwood.herokuapp.com/accounts/login/ or click on Login nav link and submit user details | User is logged in | Works as expected |
| Navigate to https://adventureswithwood.herokuapp.com/projects or navigate to project details page of specific project they want to update | Logged in user that is also author of that project will see Update option under project summary | Works as expected |
| Click on Update | Project Update form will be displayed with pre-filled content shown | Works as expected |
| Click on Submit | Project updates will be submitted, and confirmation message shown | Works as expected |
- As a site user, I want to be able to update one of my Posts
| Step | Expected Result | Actual Result |
|---|---|---|
| Navigate to https://adventureswithwood.herokuapp.com/accounts/login/ or click on Login nav link and submit user details | User is logged in | Works as expected |
| Navigate to https://adventureswithwood.herokuapp.com/posts or navigate to post details page of specific post they want to update | Logged in user that is also author of that post will see Update option under post summary | Works as expected |
| Click on Update | Post Update form will be displayed with pre-filled content shown | Works as expected |
| Click on Submit | Post updates will be submitted, and confirmation message shown | Works as expected |
- As a site user, I want to be able to Delete one of my projects
| Step | Expected Result | Actual Result |
|---|---|---|
| Navigate to https://adventureswithwood.herokuapp.com/accounts/login/ or click on Login nav link and submit user details | User is logged in | Works as expected |
| Navigate to https://adventureswithwood.herokuapp.com/projects or navigate to project details page of specific project they want to delete | Logged in user that is also author of that project will see Delete option under Project summary | Works as expected |
| Click on Delete | Project Delete Confirm Page will be displayed | Works as expected |
| Click on Confirm | Project will be deleted, and confirmation message shown | Works as expected |
- As a site user, I want to be able to Delete one of my posts
| Step | Expected Result | Actual Result |
|---|---|---|
| Navigate to https://adventureswithwood.herokuapp.com/accounts/login/ or click on Login nav link and submit user details | User is logged in | Works as expected |
| Navigate to https://adventureswithwood.herokuapp.com/posts or navigate to post details page of specific post they want to delete | Logged in user that is also author of that post will see Delete option under post summary | Works as expected |
| Click on Delete | Post Delete Confirm Page will be displayed | Works as expected |
| Click on Confirm | Post will be deleted, and confirmation message shown | Works as expected |
- As a site admin, I can create a project or post in the backend to manage site content
| Step | Expected Result | Actual Result |
|---|---|---|
| Navigate to https://adventureswithwood.herokuapp.com/admin logged in as superuser | Admin dashboard is displayed | Works as expected |
| Click on Project add + button | Project add form is presented to user in backend | Works as expected |
| Fill out form with relevant details and click save | New project is added to database | Works as expected |
| Navigate to https://adventureswithwood.herokuapp.com/admin logged in as superuser | Admin dashboard is displayed | Works as expected |
| Click on Post add + button | Post add form is presented to user in backend | Works as expected |
| Fill out form with relevant details and click save | New post is added to database | Works as expected |
- As a site admin, I can update a project or post in the backend to manage site content
| Step | Expected Result | Actual Result |
|---|---|---|
| Navigate to https://adventureswithwood.herokuapp.com/admin logged in as superuser | Admin dashboard is displayed | Works as expected |
| Click on Project table button | Project list is displayed | Works as expected |
| Click on Project you want to update | Project details are displayed | Works as expected |
| Update details and click save | Project is updated to database | Works as expected |
| Navigate to https://adventureswithwood.herokuapp.com/admin logged in as superuser | Admin dashboard is displayed | Works as expected |
| Click on Post table button | Post list is displayed | Works as expected |
| Click on Post you want to update | Post details are displayed | Works as expected |
| Update details and click save | Post is updated to database | Works as expected |
- As a site admin, I can delete a project or post in the backend to manage site content
| Step | Expected Result | Actual Result |
|---|---|---|
| Navigate to https://adventureswithwood.herokuapp.com/admin logged in as superuser | Admin dashboard is displayed | Works as expected |
| Click on Project table button | Project list is displayed | Works as expected |
| Click on Project you want to delete | Project details are displayed | Works as expected |
| Click delete | Project is deleted from database | Works as expected |
| Navigate to https://adventureswithwood.herokuapp.com/admin logged in as superuser | Admin dashboard is displayed | Works as expected |
| Click on Post table button | Post list is displayed | Works as expected |
| Click on Post you want to delete | Post details are displayed | Works as expected |
| Click delete | Post is deleted from database | Works as expected |
- As a site admin, I can remove comments so that I can filter out objectionable comments
| Step | Expected Result | Actual Result |
|---|---|---|
| Navigate to https://adventureswithwood.herokuapp.com/admin logged in as superuser | Admin dashboard is displayed | Works as expected |
| Click on Comments table | A list of all comments is displayed | Works as expected |
| Select the comment(s) for removal | Comment is selected | Works as expected |
| Select "delete selected comments" from dropdown menu and click "go" | Confirm delete notice appears | Works as expected |
| Click "Yes, I'm sure" | Comment(s) deleted | Works as expected |
- As a site admin, I can create categories to organise site content
| Step | Expected Result | Actual Result |
|---|---|---|
| Navigate to https://adventureswithwood.herokuapp.com/admin logged in as superuser | Admin dashboard is displayed | Works as expected |
| Click on Category Add+ button | Category add form is presented to user in backend | Works as expected |
| Fill out form with relevant details and click save | New category is added to database | Works as expected |
- As a site admin, I can update categories to organise site content
| Step | Expected Result | Actual Result |
|---|---|---|
| Navigate to https://adventureswithwood.herokuapp.com/admin logged in as superuser | Admin dashboard is displayed | Works as expected |
| Click on Category table | Category list appears | Works as expected |
| Click on Category you wish to update | Category name and type fields appear | Works as expected |
| Make updates and click save | Updated category is saved to database | Works as expected |
- As a site admin, I can delete categories to organise site content
| Step | Expected Result | Actual Result |
|---|---|---|
| Navigate to https://adventureswithwood.herokuapp.com/admin logged in as superuser | Admin dashboard is displayed | Works as expected |
| Click on Category table | Category list appears | Works as expected |
| Select Category(s) you wish to delete | Category(s) are selected | Works as expected |
| Select "delete selected categorys" from dropdown menu and click "go" | Confirm delete notice appears | Works as expected |
| Click "Yes, I'm sure" | Category(s) deleted | Works as expected |
- As a site owner, I want the user to come to a custom 403 error page tha explains in simple language what has gone wrong if they enter a URL that they don't have permission to access
| Step | Expected Result | Actual Result |
|---|---|---|
| Navigate to an Update page by adding ".../update" to post/project url | Reroute to a customised 403 page | Works as expected |
- As a site owner, I want the user to come to a custom 404 error page tha explains in simple language what has gone wrong if they enter a URL that does not exist
| Step | Expected Result | Actual Result |
|---|---|---|
| Navigate to a url that does not exist | Reroute to a customised 404 page | Works as expected |
Automated testing was done using the Django's TestCase module.
The website was tested using Google Chrome Developer Tools Toggle Device Toolbar to simulate viewports of different devices.
The website was tested on the following devices:
- MacBook Pro with macOS 13.2
- MS Surface Pro Windows 10
- Samsung s20 with Android v13
When the Adventures With Wood site was first tested with the W3C HTML Markup Validation Service it showed two errors and some info messages. The errors were missing alts for images. The info messages were all related to a stray semi-colon and a stray / after hr.

- Projects Page

- Posts Page

- Sign Up Page

The Adventures With Wood CSS stylesheet has been assessed using the W3C CSS Validation Service by direct input. Unfortunately there were two errors shown for grid template areas proj1 and proj2. I removed the offending references and the site passed the test.

I used the new Code Institute Python Linter to test all of the Adventures With Wood python code files.
Passed without error
Has two max line length errors
Passed without error
Passed without error
Passed without error
Passed without error
Passed without error
Three automated tests were set up in the file tests.py to test views: Home, Project and Post. All tests passed.
- Google Chrome

- Apple Safari

- Mozilla Firefox

- Microsoft Edge

Site was developed on an Apple MacBook using iOS v13.2
- Windows 10 PRO


| Bug | Cause | Outcome |
|---|---|---|
| Images were showing up tiny on Projects page | Missing semi-colon in CSS file | Resolved |
| All users were able to access CRUD functions | Didn't have authentication set up across the site | Resolved |
| When updating project or post, crash occurred if you didn't add new image | Image already in DB wasn't returned back when saving | Used request.files to pull image in and then sent back when saved. Resolved |
There are no unresolved bugs that I am aware of!
In GITHUB:
Once the repository has been created using the Code Institute student template....
-
Install Django and supporting libraries.
- Django and gunicorn --> pip3 install 'django<4' gunicorn
- Supporting libraries --> pip3 install dj_database_url psycopg2
- Cloudinary libraries --> pip3 install dj3-cloudinary-storage
-
Create a requirements file --> pip3 freeze --local > requirements.txt
-
Create your project: in this case adventures-with-wood
-
Create an app using command --> python3 manage.py startapp APP_NAME
-
Add it to installed apps --> INSTALLED_APPS = [ … 'APP_NAME', ]
-
Save file and migrate changes using command --> python3 manage.py migrate
-
Run server to test
-
Commit and push changes to github
- Create Heroku Account
- In Heroku dashboard: go to Create new app.
- Give your app a unique name.
- Select region --> EUROPE
- Click create App.
- Go to Database App/Resources/ Add-ons and search and click 'Heroku Postgres'.
- Go to the Settings tab, scroll down to Config Vars and select Reveal Config Vars and copy text.
IN GITPOD...
- Create env.py file on top of level directory.
- Import os library
- set environment variables --> os.environ["DATABASE_URL"] = "Paste in Heroku DATABASE_URL Link"
- Add in a secret key --> os.environ["SECRET_KEY"] = "Make up your own randomSecretKey"
IN HEROKU ...
- Add secret Key to config vars --> SECRET_KEY, “randomSecretKey”
IN GITPOD / IN SETTINGS.PY
- Reference env.py file --> import os import dj_database_url
if os.path.isfile("env.py"): import env
-
Remove the secret key and replace it with the following variable--> SECRET_KEY = os.environ.get('SECRET_KEY')
-
Comment out the DataBases section --> DATABASES = { 'default': { 'ENGINE': 'django.db.backends.sqlite3', 'NAME': BASE_DIR / 'db.sqlite3', } }
-
Add new database section --> DATABASES = { 'default': dj_database_url.parse(os.environ.get("DATABASE_URL")) }
-
In the terminal, save files and make migrations --> python3 manage.py migrate
GETTING STATIC AND MEDIA FILES STORED ON CLOUDINARY...
-
Create a cloudinary account, and copy the CLOUDINARY_URL from the dashboard.
-
Add url to env.py --> os.environ["CLOUDINARY_URL"] = "cloudinary://************************"
BACK IN HEROKU ...
-
Paste Cloudinary URL to Heroku Config Vars --> Add to Settings tab in Config Vars e.g. COUDINARY_URL, cloudinary://************************
-
In config vars, add DISABLE_COLLECTSTATIC, 1. This will be rmeoved before final deployment.
IN GITPOD / SETTINGS.PY
-
Install Cloudinary libraries --> INSTALLED_APPS = [ …, 'cloudinary_storage', 'cloudinary', …, ]
-
Tell Django to use Cloudinary to store media and static files --> STATIC_URL = '/static/'
STATICFILES_STORAGE = 'cloudinary_storage.storage.StaticHashedCloudinaryStorage' STATICFILES_DIRS = [os.path.join(BASE_DIR, 'static')] STATIC_ROOT = os.path.join(BASE_DIR, 'staticfiles')
MEDIA_URL = '/media/' DEFAULT_FILE_STORAGE = 'cloudinary_storage.storage.MediaCloudinaryStorage'
-
Link file to templates --> TEMPLATES_DIR = os.path.join(BASE_DIR, 'templates')
-
Change template directory to templates array --> TEMPLATES = [ { …, 'DIRS': [TEMPLATES_DIR], …, ], }, }, ]
-
Add heroku hostname to ALLOWED_HOSTS--> ALLOWED_HOSTS = ["PROJ_NAME.herokuapp.com", "localhost"]
IN GITPOD...
-
Create 3 new folders: media, static and templates
-
Create procfile and add code --> web: gunicorn PROJ_NAME.wsgi
-
In terminal --> Add, Commit and Push
IN HEROKU ...
- Deploy manually --> Github as deployment method, on main branch
IN GITPOD / ENV.PY
- Set DEVELOPMENT variable to 0!
- Add a few more settings--> X_FRAME_OPTIONS = 'SAMEORIGIN'
- Without this, the summer note editor would no longer work when we deploy the project. This is due to Cross-Origin Resource Sharing, which tells the browser which resources are permitted to be loaded.
- Save, add and commit as "deployment commit", and push to github.
IN HEROKU...
-
In reveal config vars, remove DISABLE_COLLECTSTATIC environment variable.
-
Go to deploy tab, scroll down to the end and deploy our branch!
-
Your app has been deployed to heroku!
You can Fork the Repository. This makes a copy of the original repository on our Github account so you can make changes without affecting the original repository.
- Log into GitHub and locate the GitHub repository you want.
- Click on the "Fork" button which is in the top right corner.
- You will now have a copy of the original repository in your GitHub account.
- Log into GitHub and locate the GitHub repository you want.
- Under the repository name, click "Code" button which will produce a dropdown menu.
- Where it says Clone, copy the link below.
All content that was copied from other sites such as Instructables https://www.instructables.com/ has been credited on the relevant page itself on the site.
Readme structure adapted from/inspired by:
- Matthew Hurrell https://github.com/Matthew-Hurrell/viva-la-nacho/blob/main/README.md
- John Constant https://github.com/johnConstant/CI_PP4_Projects_site/blob/main/README.md
- Stephanie Crocker https://github.com/stephaniecrocker91/for-the-love-of-food/blob/main/README.md
Images were sourced on Google from various sites including Instructables and Pinterest. Creative commons images were used where possible.
The site logo/placeholder image was created using Canva https://www.canva.com/
I used the "I think therefore I blog" walk through project as a starting point and template. I created a blog like page that presented projects and posts. I added to the base code with custom views, models, html and CSS. I used the JS script for message timeouts from that blog and modified it for my own requirements.
I watched a good few of Codemy videos for Django blog building https://www.youtube.com/watch?v=m3efqF9abyg
The home page carousel was from bootstrap docs https://getbootstrap.com/docs/4.0/components/carousel/
I got the idea for the MOST POPULAR projects in this CI PP4 project by John Constant https://ci-pp4-recipe-site.herokuapp.com/