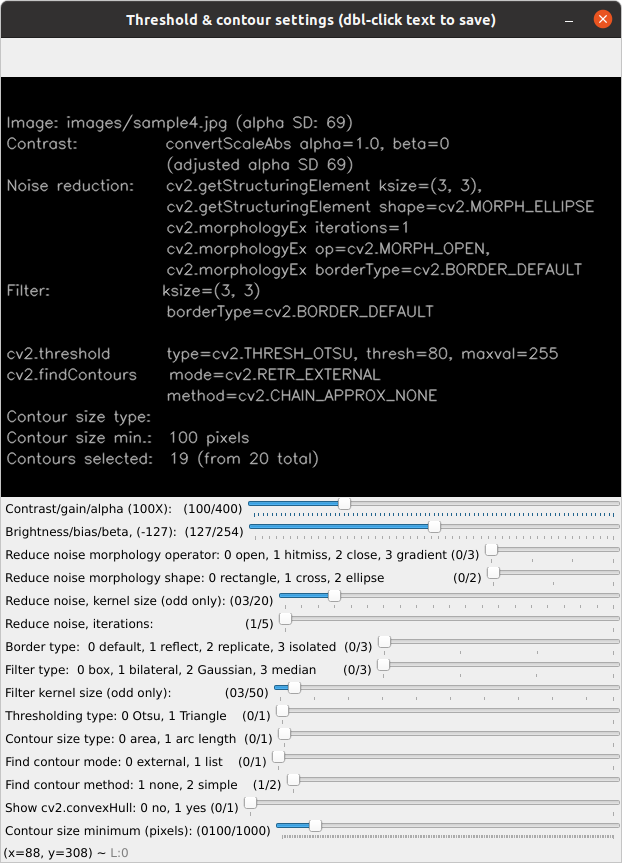
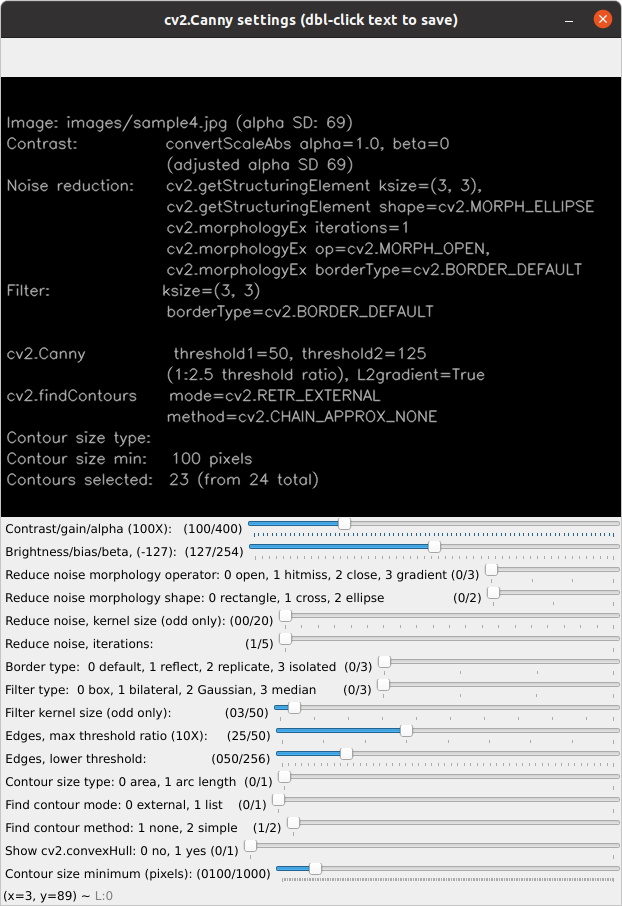
A set of Python utilities to easily explore OpenCV parameters involved in drawing contours for object and shape detection on Linux platforms. A variety of parameter values can be adjusted with OpenCV trackbars (see figures below). Live image updates are displayed in multiple windows for each processing step leading to object detection.
An updated version that runs on Linux, Windows, and macOS platforms with a tkinter GUI is available at: https://github.com/csecht/opencv-contour-utility2'
A utility is also provided to explore parameters for automatic histogram equalization.
All processing steps are conducted on grayscale representations of the input file. A text file of selected settings and the resulting image file of sized contours overlaid on the original color or monochrome image can be saved. Image file samples are provided in the images folder.
Project inspired by code from Adrian Rosebrock: https://pyimagesearch.com/2016/03/28/measuring-size-of-objects-in-an-image-with-opencv/
The intention is to help OpenCV users understand the pertinent parameters and value ranges needed to identify objects.
Development environment was Linux Ubuntu 20.04.
The module edge_it.py uses Canny edge detection, cv2.Canny, as the basis to identify contours.
The module thresh_it.py uses thresholding, cv2.threshold, as the basis to identify contours.
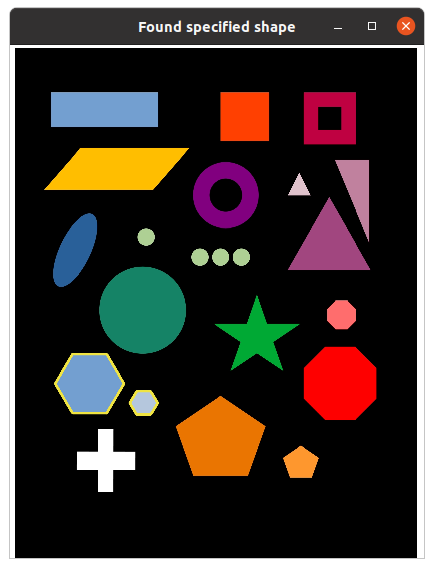
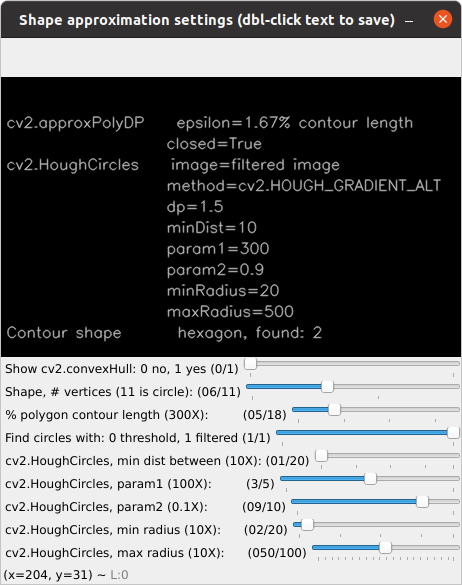
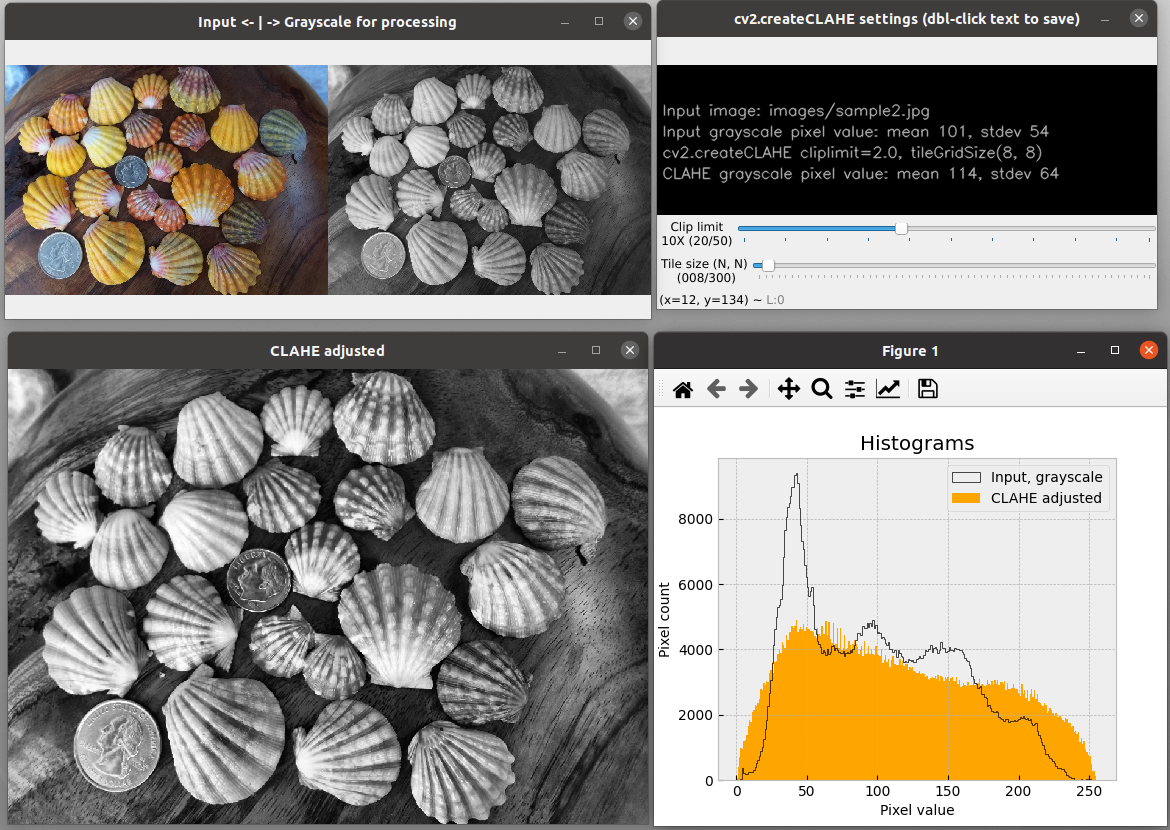
The module shape_it.py, also uses thresholding, but adds detection of specific shapes with the functions cv2.approxPolyDP() for polygons and cv2.HoughCircles() for circles. Shape detection works with the threshold trackbar set. When circle shapes are selected ("Shape" trackbar position #11), however, then the user chooses either the filtered or threshold image which bypasses the use of cv2.findContours(). Using the sample4.jpg file as input provides a good example of parameter settings needed to detect various shapes. Using sample2.jpg and selecting circle shapes, with all other sliders at their default settings, impressively detects two coins in a group of seashells.
The module equalize_it.py does not involve contours, but explores parameters for automatic histogram equalization as an optional pre-processing step for object detections. Equalization is done with cv2.createCLAHE. CLAHE is a contrast-limited adaptive histogram equalization method. Live updates of the CLAHE histogram are controlled by slide bars for the clipLimit and tileGridSize parameter values. All processing is carried out on a grayscale version of the input file. The grayscale equalized image can be saved to use as input for edge_it.py, thresh_it.py, or equalize_it.py. For most contour operations, however, the contrast and brightness controls provided in the these modules should be sufficient.
Be aware that CLAHE works best on images that have a full range of pixel values across the image, as in sample2.jpg (shells). In other words, it does not work well with images that have large areas of similar colors, as in sample1.jpg (pills), sample3.jpg (rummikub), or sample4.jgp (shapes). Nonetheless, this module can be fun to play with. Live histogram updating may be less responsive with larger image files.
Slightly more responsive versions for updating histograms with trackbars are equalize_tk.py for Linux systems and equalize_qt.py for all systems. equalize_tk.py uses a tkinter GUI. equalize_qt.py uses a PyQt5 GUI, which may require installation: pip3 install -U pyqt5. If equalize_it.py does not show histograms plots on your system, try one of the other equalize_* modules.
A known issue is that, while equalize_it.py should work on all systems, some Linux installations may not show histograms. If that's the case, then try equalize_tk.py or equalize_qt.py. The problem may be with the specific version of the required python packages.
From within the program's folder, use one of these Terminal or Command Prompt command formats, depending on your system. Note that with no input argument, as in the first example, the default sample1.jpg from the images folder is used for input. Three sample input files are provided in the images folder.
   python3 -m edge_it

   python3 -m thresh_it --input images/sample2.jpg

   python3 -m equalize_it -i images/sample2.jpg

   python3 -m  shape_it -i images/sample4.jpg
List command line options, ex: python3 -m thresh_it --help
   Explore Image Processing Parameters.
   optional arguments:
     -h, --help            show this help message and exit
     --about               Provide description, version, GNU license.
     --input PATH/FILE, -i PATH/FILE
                           Path to input image (PNG or JPG file).
     --scale X, -s X       Factor to change displayed image size (default: 1.0).
Basic information, author, version, license, etc.: python3 -m thresh_it --about
All windows, except for Settings, can be dragged to resize. In Ubuntu Linux, windows automatically size to easily fit on the screen. For larger images, therefore, you may want to use the --scale (or -s) command line option to reduce window sizes. The scale option does not change the export size of any saved image files.
The Esc or Q key will quit any running module (except if "Histograms" window in equalize_it.py is currently selected; then just select one of the other windows to use a Quit key). From the command line, the usual Ctrl-C will also exit a module.
Sample image files are provided in the images folder:
- sample1.jpg (pills, 800x600 692 kB),
- sample2.jpg (shells, 1050x750, 438 kB),
- sample3.jpg (rummikub, 4032x3024, 2.94 MB)
- sample4.jpg (shapes, 1245x1532, 137 kB)
Python 3.7 or later, plus the packages OpenCV and Numpy. Additionally, Matplotlib, and it's dependency Pillow, are needed only with
the equalize_*.py modules; tkinter (included with Python 3.7 and above) is required with equalize_tk.py.
This program was developed in Python 3.8.
For quick installation of the required Python PIP packages: from the downloaded GitHub repository folder, run this command
pip install -r requirements.txt
Alternative commands (system dependent):
python3 -m pip install -r requirements.txt
Waiting for user comments.
All screenshots are from a Ubuntu Linux platform.
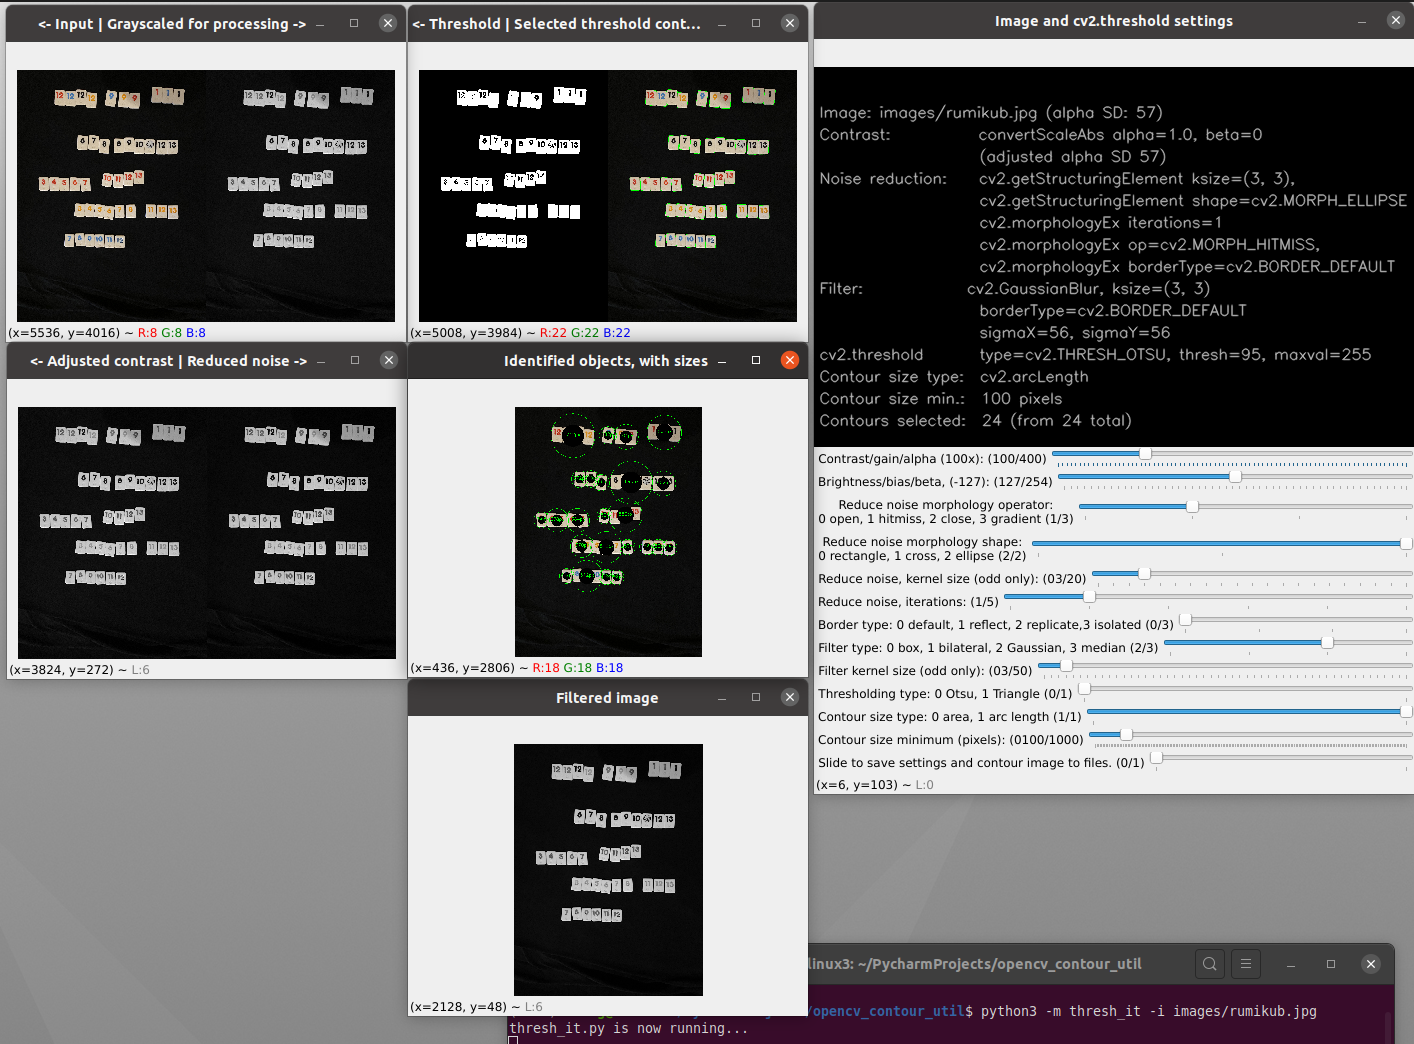
Opening windows for thresh_it.py with the sample3.jpg input file.
(Note: As of 25/02/2023 all contour and identification marking are now yellow, not green. )
All available threshold parameters and trackbars.
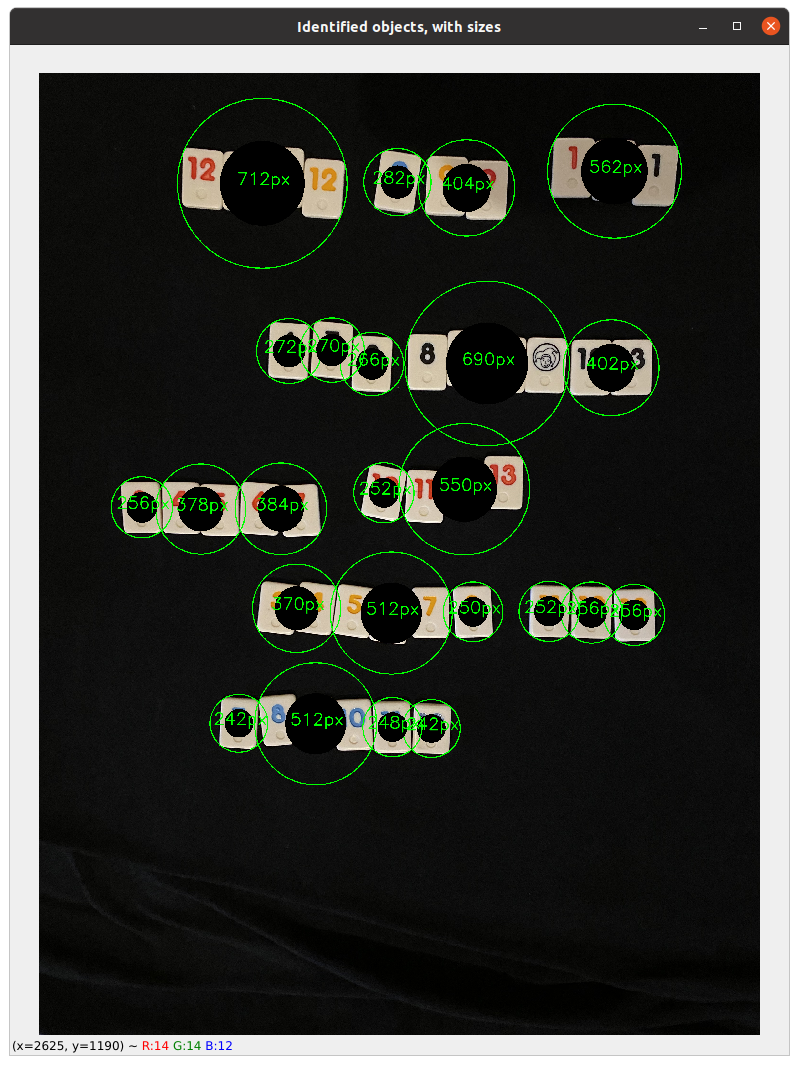
Expanded window for identified threshold objects and their comparative pixel sizes with default thresh_it.py settings. Input file is sample3.jpg.
All available Canny edges parameters and trackbars.
Identified hexagon shapes in sample4.jpg are outlined in yellow with shape_it.py. If the convexHull option is selected, then only hulls will be outlined, in blue.
Shape approximation parameters used to identify hexagons.
Histograms and CLAHE windows will live update with CLAHE parameter sliders.
Source of sample1.jpg image file: Adrian Rosebrock at https://pyimagesearch.com/2016/03/28/measuring-size-of-objects-in-an-image-with-opencv/
Source of sample2.jpg image file: http://sunrisekauai.blogspot.com/2012/06/new-group-of-sunrise-shells.html
All other image files are from the author, C.S. Echt.
