TiDB Dashboard is a GUI interface to control a TiDB cluster via PD HTTP APIs. TiDB Dashboard can be integrated into PD, as follows:

This repository contains both Dashboard HTTP API and Dashboard UI. Dashboard HTTP API is placed in pkg/ directory, written in Golang. Dashboard UI is placed in ui/ directory, powered by React.
TiDB Dashboard can also live as a standalone binary for development.

The easiest way to use or play with TiDB Dashboard is to build PD which integrates a recent TiDB Dashboard inside.
- Required: Go 1.13+ (please refer to PD README for details).
-
Clone PD:
git clone https://github.com/pingcap/pd
-
Build PD server (which includes TiDB Dashboard by default):
cd pd make pd-server -
Start PD server with TiDB Dashboard enabled (both UI and API):
bin/pd-server
-
Dashboard UI is available at http://127.0.0.1:2379/dashboard.
Dashboard can also exist as a standalone binary. You may want this form in the following scenarios:
- You want to develop TiDB Dashboard.
- You want to use the most recent version of TiDB Dashboard.
- Your PD does not include the built-in TiDB Dashboard.
A standalone TiDB Dashboard Server contains the following components:
- Core Dashboard API server
- Swagger API explorer UI (optional)
- Dashboard UI server (optional)
-
Required: Go 1.13+
-
Optional: Node.js 12+ and yarn if you want to build the UI.
IMPORTANT: TiDB Dashboard uses packages from GitHub Packages. You need to configure the
~/.npmrcin order to install these packages.

To build a dashboard server that only serves Dashboard API:
# under Dashboard directory:
make server
# make runTo build a dashboard server that serves both API and the Swagger API UI:
# under Dashboard directory:
make # or more verbose: SWAGGER=1 make server
# make run
You can visit the Swagger API UI via http://127.0.0.1:12333/dashboard/api/swagger.

Note: You need Node.js and yarn installed in order to build a full-featured dashboard server. See Requirements section for details.
# under Dashboard directory:
make ui  # Build UI from source
SWAGGER=1 UI=1 make server
# make run
This will build a production-ready Dashboard server, which includes everything in a single binary.
You can omit the make ui step if the UI part is unchanged.
You can visit the Dashboard UI via http://127.0.0.1:12333/dashboard.

If you want to develop Dashboard UI, the recommended workflow is as follows:
-
Build Dashboard API Client
Dashboard API Client is auto-generated from the Swagger spec, which is auto-generated from the Golang code. These code is not included in the repository. Thus, if you build UI for the first time (or backend interface has been changed), you need to build or rebuild the API client:
# under Dashboard directory:
make swagger_client
The command above internally generates the Swagger spec first and then generates the Dashboard API client.
-
Build and Run Dashboard API Server
Please refer to the Build Standalone Dashboard Server section. You must keep the Dashboard API backend server running for UI to work.
-
Start React Development Server
# under Dashboard directory:
cd ui
npm start
By default, the development UI will connect to local Dashboard API service at http://127.0.0.1:12333. Alternatively you can change the behaviour by specifying env variables:
REACT_APP_DASHBOARD_API_URL=http://127.0.0.1:23456 npm start
Currently the development server will not watch for Golang code changes, which means you must manually rebuild the Dashboard API Client if back-end code is updated (for example, you pulled latest change from the repository).
By default, the session secret key is generated dynamically when the server starts. This results in invalidating
your previously acquired session token. For easier development, you can supply a fixed session secret key by
setting DASHBOARD_SESSION_SECRET in the environment variable or in .env file like:
DASHBOARD_SESSION_SECRET=aaaaaaaaaabbbbbbbbbbccccccccccddThe supplied secret key must be 32 bytes, otherwise it will not be effective.
Note: the maximum lifetime of a token is 24 hours by default, so you still need to acquire token every 24 hours.
-
Acquire a token first through
/user/loginin the Swagger UI. -
Click the "Authorize" button in the Swagger UI, set value to
Bearer xxxxwherexxxxis the token you acquired in step 1.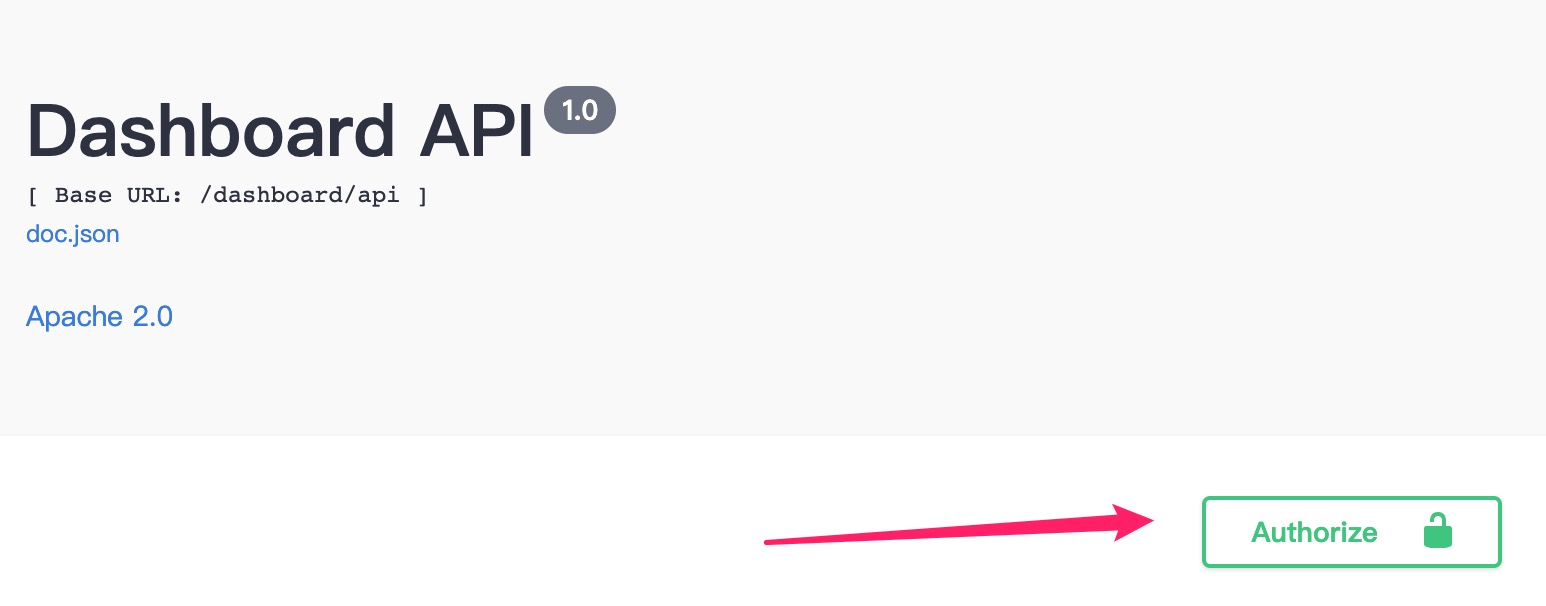

Simply modify ui/.github_release_version. The assets will be released automatically after your change is merged
to master.