This Project utilizes On-Chain Chainlink Price Feeds to demonstrate how to build a simple Prediction Game using Solana. This project works on both Solana Devnet and Testnet.
⚠️ Disclaimer: The code used in sample application comes from Chainlink community members and has not been audited. The Chainlink team disclaims and shall have no liability with respect to any loss, malfunction, or any other result of its deployment. By electing to deploy this template you hereby acknowledge and agree to the above.
View Demo · Report Bug · Request Feature
Table of Contents
To deploy this project locally, follow these simple steps.
-
Install Node.js 14 or higher. Run
node --versionto verify which version you have installed:node --version
-
Set up
yarnpackage manager.npm i -g yarn
-
Set up
ghon your machinenpm install -g gh
-
Fork and clone the repo
gh repo fork https://github.com/smartcontractkit/solana-prediction-game.git --clone
-
Set up Solana CLI
-
Run
solana --versionto make sure the Solana CLI is installed correctly.solana --version
-
Set up Vercel
- To install the latest version of Vercel CLI, run this command:
npm i -g vercel
- To quickly start a new project, run the following commands:
cd solana-prediction-game    # Change directory to the project
vercel          # Deploy to the cloud
- Finally, connect your Git repository to Vercel and deploy with git push.
- To install the latest version of Vercel CLI, run this command:
-
Set up wallet
We recommend using a Phantom wallet for this project, but you can use others, namely: Solfare, Glow, and Slope. Warning: DO NOT share your Secret Recovery Phrase with anyone! If someone has access to your secret phrase, they will have access to your wallet
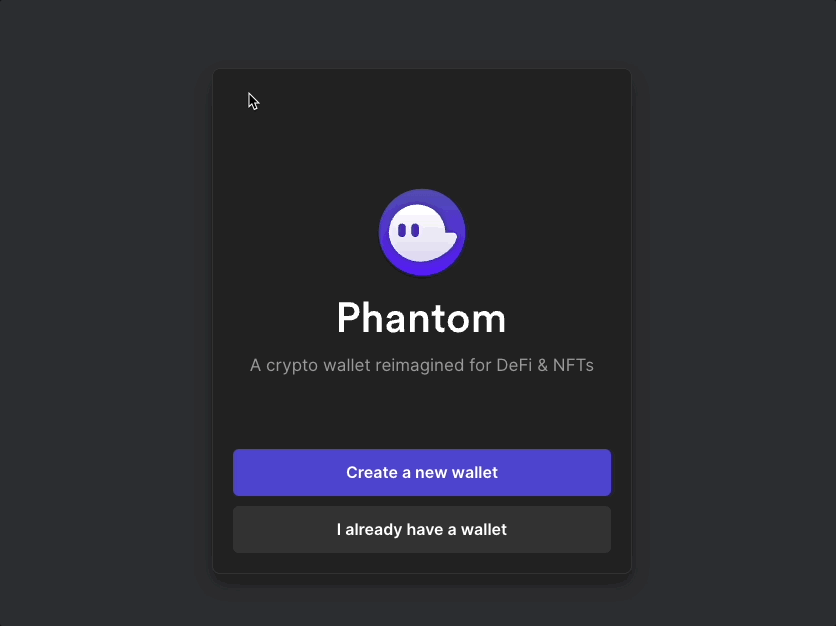
- Set up Phantom wallet extension:
- Visit https://phantom.app/download and select your browser type. Follow the steps in your respective extension store to add Phantom to your browser. After installing, you should see Phantom start-up in a new tab.
- If you are a brand new Solana user, select "Create New Wallet" and create a password. If you are an existing Solana user, you can follow the steps here to migrate your existing wallets to Phantom.
- Store your "Secret Recovery Phrase" in a safe and secure location, it is the only way to recover your wallet. Whoever has access to this phrase has access to your funds. There is an integration with 1Password for the safe storage of your secret recovery phrase.
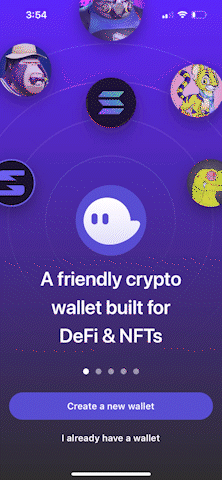
- Set up Phantom mobile app.
- Visit https://phantom.app/download and select the app marketplace according to your device type (iOS/Android). You will be redirected to the Phantom application on your device app store, follow the steps to download and install the application on your device. After installing, open the app and you should see the Phantom onboarding screen to set up a new wallet.
- If you are a brand new user, select "Create a new wallet" and enable the device authentication (which may vary according to the device type) to protect your wallet from unauthorized access. If you are an existing Solana user, you can select "I already have a wallet" and enter your seed phrase to restore your wallets.
- You can add additional security, e.g: enabling bio-metric security or face recognition, in Settings (Upper left corner), Security & Privacy.
-
Switch to Solana Devnet
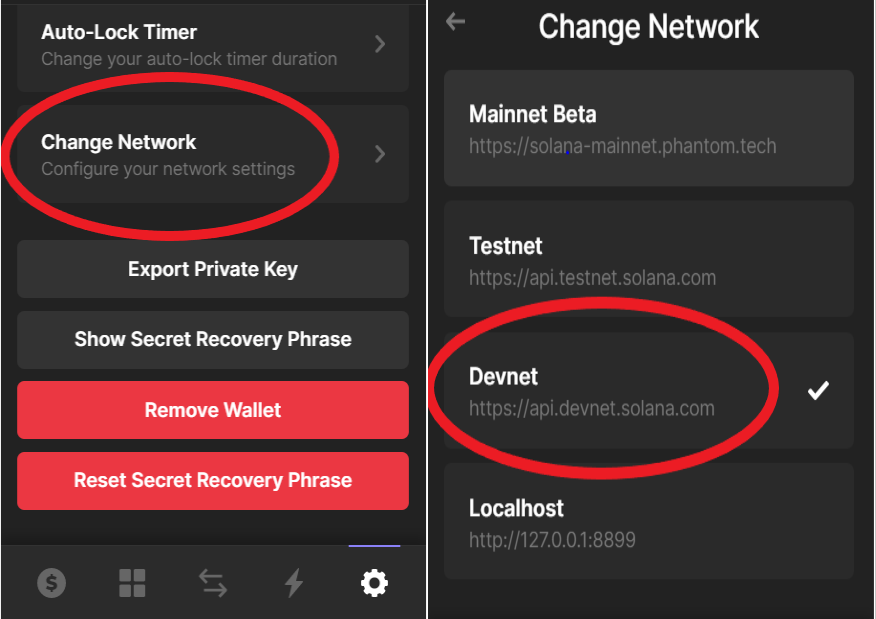
- Open your Phantom Wallet, click on the gear icon in the bottom right-hand corner, scroll to Change Network and click on Devnet.
-
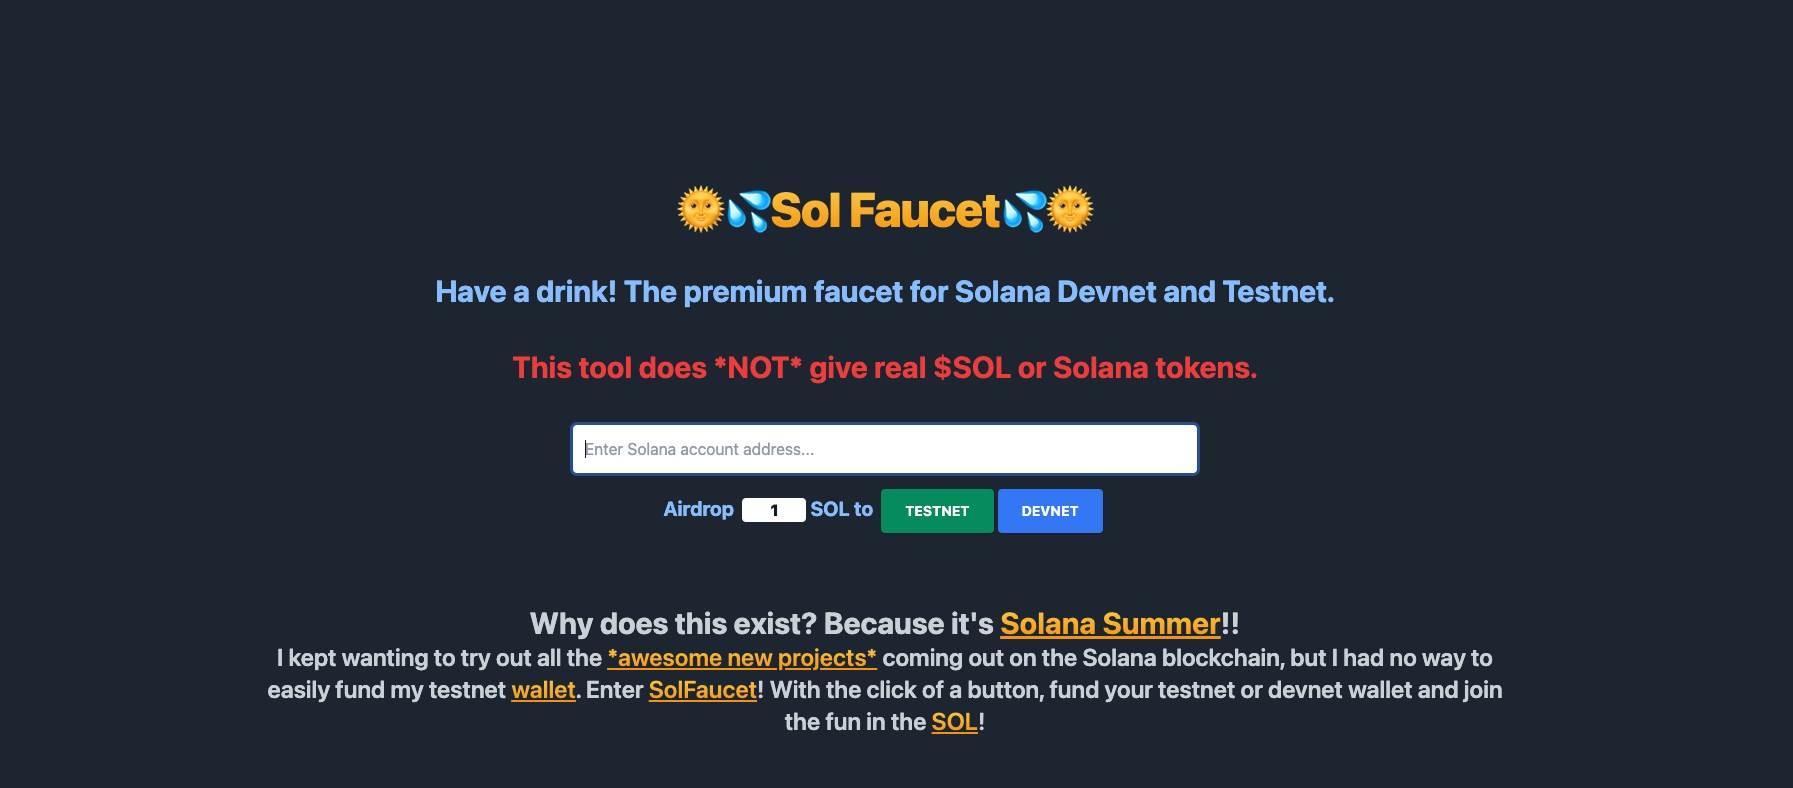
Airdrop yourself Devnet Solana Tokens.
- Open the faucet: https://solfaucet.com/
- Copy your Phantom Wallet address
- Paste your wallet address into the text field and then click 'DEVNET' to send the Solana token
- Set up Phantom wallet extension:


- Change to the project directory
cd solana-prediction-game - Run
cp .env.example .env - Install NPM packages
yarn
- Download a wallet extension on your browser, preferably Phantom. Follow the instructions to set up your wallet.
- You need an Escrow account to hold and pay out Solana to your users. There are two ways to acquire this:
- Copy your private key from your Wallet. In this example, we will be using Phantom.
- Head to the Phantom browser extension menu
- Create a new account
- Select the menu and pick
Security and Privacy - Then
Export Private Key - Enter your password.
- Finally copy the contents to
WALLET_PRIVATE_KEY=in.env
- Create a temporary Solana wallet via
solana-keygen. Alternatively, if you have an existing wallet that you want to use, locate the path to your keypair file and use it as the keypair for the rest of this guide.Copy the contents of the array insolana-keygen new --outfile ./id.json
./id.jsontoWALLET_PRIVATE_KEY=in.env
- Copy your private key from your Wallet. In this example, we will be using Phantom.
- Set up MongoDB database
- Set up a MongoDB account via the following tutorial: Create MongoDB Account.
- Set up MongoDB cluster. Create Cluster
- Set up MongoDB User. Create User
- After the account has been set up get the connection URL via this tutorial: Get MongoDB Connection Uri
- Copy connection URI string to
MONGODB_URI= - Copy the database name to
MONGODB_DB=
- Generate a random API key:
https://generate-random.org/api-key-generatorand copy it toAPI_SECRET_KEY= - Finally, run the following command to start the application:
yarn development

The application shows you how to set up a simple game that allows its users to do the following:
- Users can connect to their Solana wallet of choice (Solfare, Phantom etc.).
- Users can stake Solana based on predefined predictions
- The predictions state if the price of blockchain token pair will rise or fall below or above a certain price within a certain time frame (1hr).
- Users get a notification if they win the prediction.
- Users are rewarded with double their stake if their predictions are correct and allowed to withdraw these funds to their wallets.
- Users can view the top 5 users based on the percentage of predictions won.

System design

Image of the File Structure
The major folders for the application are as follows:
.github- This contains the application's GitHub actions](https://docs.github.com/en/actions)](https://docs.github.com/en/actions)api- This contains the Vercel serverless functions that act as our backend.models- This contains Mongoose Schemaslib- This contains the MongoDB connectionsrc- This contains thecreate-react-appfilesconfig-overrides.js- This file overrideswebpackconfigurations forreact-app-rewired
-
How to set up anchor provider in node.js backend
const anchor = require("@project-serum/anchor"); const chainlink = require("@chainlink/solana-sdk"); const provider = anchor.AnchorProvider.env(); // set up provider anchor.setProvider(provider); -
How to set up a custom anchor provider to use in serverless functions
const solanaWeb3 = require("@solana/web3.js"); const anchor = require("@project-serum/anchor"); export class Wallet { constructor(payer) { this.payer = payer } // Asynchronous function that allows for signing a single transaction async signTransaction(tx) { tx.partialSign(this.payer); return tx; } // Asynchronous function that allows for signing a multiple transactions async signAllTransactions(txs) { return txs.map((t) => { t.partialSign(this.payer); return t; }); } // This returns the public key of the wallet get publicKey() { return this.payer.publicKey; } } // Create a wallet for the prediction owner const secret = Uint8Array.from(process.env.WALLET_PRIVATE_KEY.split(',')); const wallet = new Wallet(solanaWeb3.Keypair.fromSecretKey(secret)); // connection to solana cluster node const connection = new solanaWeb3.Connection(solanaWeb3.clusterApiUrl(process.env.REACT_APP_SOLANA_CLUSTER_NETWORK), 'confirmed'); // creation of a new anchor client provider without use of node server & id.json const options = anchor.AnchorProvider.defaultOptions(); const provider = new anchor.AnchorProvider(connection, wallet, options); // set up provider anchor.setProvider(provider); -
How to set up get data feeds based on token pair address using a custom anchor provider
- [How to set up a Solana wallet adapter](https://github.com/solana-labs/wallet-adapter#set up)
- How to set up a custom wallet adapter modal and button with Chakra-UI
-
How to transfer Solana tokens to a public address triggered by a user on the browser (User to an Escrow account)
import { WalletNotConnectedError } from '@solana/wallet-adapter-base'; import { useConnection, useWallet } from '@solana/wallet-adapter-react'; import { Keypair, SystemProgram, Transaction } from '@solana/web3.js'; import { useCallback } from 'react'; export const SendOneLamportToEscrowAddress = () => { const { connection } = useConnection(); const { publicKey, sendTransaction } = useWallet(); const sendSolana = useCallback(async () => { const network = process.env.REACT_APP_SOLANA_CLUSTER_NETWORK; // if user is not connected to wallet, show error if (!publicKey) throw new WalletNotConnectedError(); // get public key from escrow account address const escrowPubKey = Keypair.generate(process.env.REACT_APP_WALLET_PUB_ADDRESS).publicKey; // get latest block hash from cluster const latestBlockHash = await connection.getLatestBlockhash(); // create transaction to show latest block hash and user address is paying for transaction on solana const transaction = new Transaction({ feePayer: publicKey, blockhash: latestBlockHash.blockhash, lastValidBlockHeight: latestBlockHash.lastValidBlockHeight }); // add program to transaction transaction.add( SystemProgram.transfer({ fromPubkey: publicKey, toPubkey: escrowPubKey, lamports: 1 * LAMPORTS_PER_SOL }) ); // send transaction and return tx signature const signature = await sendTransaction(transaction, connection).catch(err => { throw new Error('ailed to get transaction signature') }) // confirm transaction was sent await connection.confirmTransaction({ blockhash: latestBlockHash.blockhash, lastValidBlockHeight: latestBlockHash.lastValidBlockHeight, signature: signature, }); return signature; }, [connection, publicKey, sendTransaction]); return ( <button onClick={sendSolana} disabled={!publicKey}> Send 1 lamport to a random address! </button> ); } -
How to transfer Solana tokens from an escrow account(account with known private key) to a public address (Escrow to User) NB: this is to be done on the backend to ensure your Wallet Secret Key is unexposed.
async function SendOneLamportToUserAddress(withdrawAddress, amount) { // connect to solana cluster const connection = new Connection(clusterApiUrl("devnet"), "confirmed"); // get public key of bet owner address const toPubkey = new PublicKey(withdrawAddress); // get escrow account key pair from private key const secret = Uint8Array.from(process.env.WALLET_PRIVATE_KEY.split(',')); const escrowKeyPair = Keypair.fromSecretKey(secret); // create transaction to transfer funds from escrow account to bet owner address const transaction = new Transaction().add( SystemProgram.transfer({ fromPubkey: escrowKeyPair.publicKey, toPubkey, lamports: LAMPORTS_PER_SOL * amount, }) ); // sign transaction with escrow account key pair return sendAndConfirmTransaction( connection, transaction, [escrowKeyPair] ) .then(async (response) => { // return transaction id for confirmation on https://explorer.solana.com/tx/[transactionId] return { transactionId: response }; }) .catch(error => { console.error("error", error); }) } -
How to save metadata on the Solana for transactions. Memo Program
-
Install
bs58npm package, bs58 is a JavaScript component to compute base58 encoding. This encoding is typically used for cryptocurrencies such as Bitcoin. bs58yarn add bs58
-
Save and read data from the Solana network
const web3 = require('@solana/web3.js');
var bs58 = require('bs58');
let keypair;
const memoProgramId = "MemoSq4gqABAXKb96qnH8TysNcWxMyWCqXgDLGmfcHr"; //
const memoProgramKey = new web3.PublicKey(memoProgramId);
const programId = new web3.PublicKey("7bAt59dk7gSgxTG4pqMFKGuPcvV541NT9k1MnkbahFsm");
let connection;


const establishConnection = async () =>{
    let rpcUrl = web3.clusterApiUrl('devnet')
    connection = new web3.Connection(rpcUrl, 'confirmed');
    console.log('Connection to cluster established:', rpcUrl);
}

const connectWallet = async () => {
    let secretKey = Uint8Array.from(process.env.WALLET_PRIVATE_KEY.split(','));
    keypair = web3.Keypair.fromSecretKey(secretKey);
    console.log('keypair created: ' + keypair.publicKey.toString());
}

saveData = async (data) => {
    let transferTransaction = new web3.Transaction();

    transferTransaction.add(new web3.TransactionInstruction({
        programId: memoProgramId,
        keys: [{
            pubkey: keypair.publicKey,
            isSigner: true,
            isWritable: false,
        }],
        data: Buffer.from(JSON.stringify(data))
    }))

    const transcationHash =  await web3.sendAndConfirmTransaction(
        connection,
        transferTransaction,
        [keypair]
    );

    return transcationHash;
}

readTransaction = async (signature) => {
    const transaction = await connection.getTransaction(signature);
    return transaction.transaction.message.instructions[0].data;
}

saveReadData = async () => {
    const signature = await saveData({
        amount: 1,
        isWon: true,
        ROI: 2,
    });

    console.log(signature);

    const b58Address = await readTransaction(signature);
    const dataAsUint8Arr = bs58.decode(b58Address);
    const jsonString = new Buffer.from(dataAsUint8Arr).toString('utf8');
    const data = JSON.parse(jsonString);

    console.log(data);
}

initConnection = async () => {
    await establishConnection();
    await connectWallet();
}

initTestReadSaveData = async () => {
    await initConnection();
    await saveReadData();
}

initTestReadSaveData();
-
Majorly act as our backend, providing an API to manipulate data from our MongoDB database and initiate transactions between our escrow account and users. These files are located in the /api folder.
Explore More about serverless functions »
To automate the creation of predictions and getting results of bets, we introduced GitHub actions to initiate cron jobs that periodically run serverless functions. These files are located in .github/workflows folder and are written as .yaml files.
To read more about cron jobs with Vercel functions »
Learn how to write cron expressions »
Learn more about GitHub actions »
-
MongoDB is a document database used to build highly available and scalable internet applications. With its flexible schema approach, it allows us to quickly set up database schemas located in the
modelsfolder to storepredictions,betsandusers. -
Mongoose is Object Data Modeling (ODM) library for MongoDB and Node. js. It manages relationships between data, provides schema validation, and is used to translate between objects in code and the representation of those objects in MongoDB.
-
Mongoose allows us to connect to our MongoDB cluster quickly and easily using a cached connection. How to set up a Cached Mongoose Connection »
-
MongoDB is a document database used to build highly available and scalable internet applications. With its flexible schema approach, it allows us to quickly set up database schemas located in the
modelsfolder to storepredictions,bets, andusers. -
Mongoose is Object Data Modeling (ODM) library for MongoDB and Node.js. It manages relationships between data, provides schema validation, and is used to translate between objects in code and the representation of those objects in MongoDB.
-
Mongoose allows us to connect to our MongoDB cluster quickly and easily using a cached connection. How to set up a Cached Mongoose Connection »
- Store data on-chain to ensure integrity and rigidity of bets and predictions.
Contributions are what make the open-source community such an amazing place to learn, inspire, and create. Any contributions you make are greatly appreciated.
If you have a suggestion that would make this better, please fork the repo and create a pull request. You can also simply open an issue with the tag "enhancement". Don't forget to give the project a star! Thanks again!
- Fork the Project
- Create your Feature Branch (
git checkout -b feature/AmazingFeature) - Commit your changes (
git commit -m 'Add some AmazingFeature') - Push to the Branch (
git push origin feature/AmazingFeature) - Open a Pull Request