A micro-CRM to help Code For Denver discover leads and manage its outreach to nonprofits.

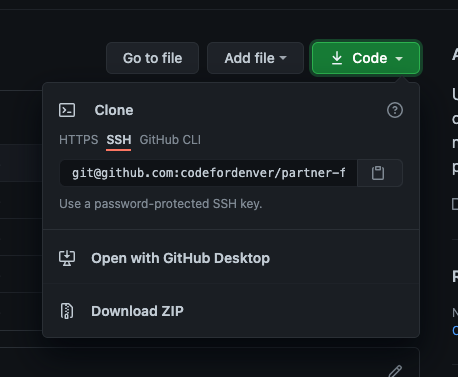
- Go to the project's github page.
- Find the green "Code" button
- Click the clipboard icon to copy a link to the git repo.
- In a terminal, navigate to the directory where you want to create the project folder and clone the repo:
git clone <git-repo-name>

There are two methods for setting up your local machine for development. If you are planning on working on the backend, or want to use docker compose to work on the frontend, follow Using Docker Compose. If you want to just work on the frontend, and do not want to use docker compose, follow Running Frontend Only.
- Install Docker and Docker-compose.
- Run the database, api, and frontend in docker containers using compose.
docker-compose up --build -d
- Check the containers are running
docker ps
- you should see something like

- you should see something like
- Try connecting to the database with psql:
to exit psql, type
docker exec -it partner-finder_postgres_1 psql -U cfd_partner_finder
select * from leads limit 5;
\q - Check that the api works with curl:
- try the healthcheck endpoint:
curl http://localhost:8000/healthcheck - get an access token to use other api endpoints:
curl --location --request POST 'http://localhost:8000/login' \
--header 'Content-Type: application/json' \
--data-raw '{
    "username": "user@gmail.com",
    "password": "password"
}'
- get a list of leads:
curl --location --request GET 'http://localhost:8000/leads' \
--header 'Authorization: Bearer <insert your token here>'
- try the healthcheck endpoint:
- Check that the react app is running:
- in a browser, go to http://localhost:1234
- You should see a login page. Use the following credentials for development:
- username:
user@gmail.com - password:
password
- username:

If you only plan to work on the frontend and do not want to use docker compose, we also have the backend running on a development server. In this case, you will need to have @galbwe set up a user account for you to log in with. Follow these steps to get up and running:
- Email galbwe92@gmail.com requesting credentials for the development server.
- Once your credentials are set up,
cdto thefrontenddirectory. - Install dependencies by running
yarn - Start the app with
yarn dev
You should see a login screen where you can test your credentials.
The backend generates swagger documentation. This is a webpage that lets you make interactive api calls to test out the rest api before using it in your code. To run the swagger docs locally, make sure the api docker service is running. Check the api logs for a bearer token that you can use to authenticate on the swagger page. If you ran docker compose with the -d flag, you can get the logs with docker compose logs api.
Now look for bearer tokens that let you authenticate as a normal user and as an admin:
api_1       | [2021-08-11 01:05:47 +0000] [19] [INFO] To authenticate as user@gmail.com, include this header with the request:
api_1       |   Authorization: Bearer eyJhbGciOiJIUzI1NiIsInR5cCI6IkpXVCJ9.eyJ1c2VybmFtZSI6InVzZXJAZ21haWwuY29tIiwiZXhwaXJlcyI6IjIwMjEtMDgtMTJUMDE6MDU6NDcuNTM0NDgzKzAwOjAwIiwiYWRtaW4iOmZhbHNlfQ.41xKVHDz0ONRiWx-fWqifVvDBSzCN6vPmmf4ZWV0H3g
api_1       | [2021-08-11 01:05:47 +0000] [19] [INFO] To authenticate as admin@gmail.com, include this header with the request:
api_1       |   Authorization: Bearer eyJhbGciOiJIUzI1NiIsInR5cCI6IkpXVCJ9.eyJ1c2VybmFtZSI6ImFkbWluQGdtYWlsLmNvbSIsImV4cGlyZXMiOiIyMDIxLTA4LTEyVDAxOjA1OjQ3LjU2NTExNCswMDowMCIsImFkbWluIjp0cnVlfQ.NNUMN92roOU44DKXcnstBUK_vpRfg57RYJyBMCuSdmQ
Copy only the value of the header, that is, the part that looks like
Bearer eyJhbGciOiJIUzI1NiIsInR5cCI6IkpXVCJ9.eyJ1c2VybmFtZSI6InVzZXJAZ21haWwuY29tIiwiZXhwaXJlcyI6IjIwMjEtMDgtMTJUMDE6MDU6NDcuNTM0NDgzKzAwOjAwIiwiYWRtaW4iOmZhbHNlfQ.41xKVHDz0ONRiWx-fWqifVvDBSzCN6vPmmf4ZWV0H3g
Now in a web browser, navigate to http://localhost:8000/apidocs . You should see a page that looks like this:

Click on the green "Authorize" button with the lock icon, paste the bearer token you copied into the login form, and click "Authorize".

To send a request to any of the endpoints, click on one of the colored boxes, then click "Try it out" in the upper right corner. This lets you edit the request parameters and body through a form. You can send the request and view the response with the "Execute" button.

To access the api documentation page without docker compose, go to https://cfd-partner-finder-api.xyz/apidocs/ . This will allow you to view the available api endpoints. By clicking on one of the endpoints, you should also be able to view the request parameters and the shape of the api response.
In order to use the swagger docs interactively, you will need a set of login credentials for the development server. See Running Frontend Only.
Once you have credentials, you will need to get your bearer token. One way to do this is to run the frontend in development mode on localhost:1234 by running yarn dev in the frontend directory. Once you have done this and successfully submitted the login form, open developer tools in your browser (command + option + J on macOS, or right click and select "inspect")
Once dev tools are open, go to the "Application" tab:

In the side panel, under "Local Storage", select http://localhost:1234. You should see a key called partnerFinderToken in the right pane, along with a bearer token.

Now in the docs page, click the green "Authorize" button near the top right corner. You will be prompted to enter an Authorization header. Enter Bearer <your token> and submit the form.
You should now be able to send api requests to the backend by clicking the "Try it out" button and entering request parameters.
We use prettier to consistly format our javascript and eslint as a linter. To run them, make sure you are in the frontend directory, then run
yarn formatto runprettier, andyarn lintto runeslintyou'll need to commit your formatting changes. It's fine to put them in their own commit, or if you want to include them in a recent commit that has not been pushed to the remote yet, you can usegit commit --amend.
We have github actions that will check that backend code is in the correct format and abides by PEP8 standards. You will need to run a formatter and a linter on your code before committing in order for your changes to be accepted. In the backend/scripts, directory, there are scripts called lint.sh and format.sh for doing this. You can run them directly from the backend directory:
cd backend
source venv/bin/activate
chmod +x scripts/*.sh
./scripts/format.sh
./scripts/lint.sh
After running lint.sh, you should see an output of 0 if everything is okay. Otherwise flake8 will output lines that need to be changed.
Once you've made formatting and linting changes, make a commit with a message like lint and format and add it to your PR. It is helpful to PR reviewers if you keep your formatting changes in their own commit because they can potentially make it harder to read your other code changes.
You'll need a python virtual environment in the backend directory. Make sure you have python 3.7 or up installed. Ideally 3.9 since that is what is used in the rest api. You can check the version with python --version
Change into the backend directory then do python -m venv venv. This should create a venv directory.
Next you'll want to activate the virtual environment with source venv/bin/activate.
Then install requirements with pip install -r requirements.txt
You should also need to set some environment variables so alembic can send queries to the locally running database. Create a .env file with touch .env, then add these lines to it:
export FLASK_APP=api/app:app
export FLASK_ENV=development
export POSTGRES_PASSWORD=password
export POSTGRES_USER=cfd_partner_finder
export POSTGRES_DB=cfd_partner_finder
export POSTGRES_HOST=localhost
export POSTGRES_PORT=5432
export SECRET_KEY=supersafe
export PYTHONPATH="${pwd}"
Now source the environment variables: source .env
Finally, you can create a new migration by doing alembic revision -m "<description of migration>". This should create a new file under the versions directory.
We run a postgres instance in AWS RDS. A simple method for connecting to the instance is with the psql command line tool. There is a script called backend/database/psql.sh that will run psql for you with arguments taken from environment variables. We will read these environment variables from a file called .env-prod. Please use this exact filename because it is already in .gitignore. Follow these steps to get into a psql session:
- create a file called
backend/.env-prodif it does not already exist - the contents of
backend/.env-prodshould look like this:export POSTGRES_PASSWORD=<insert password here> export POSGRES_DB=<insert db here> export POSTGRES_USER=<insert user here> export POSTGRES_HOST=<insert host here> - contact a project maintainer (galbwe) for the values of the environment variables above
- source the environment variables to make them accessible in your terminal:
source backend/.env-prod - Run the database connection script:
./backend/database/psql.sh - You will be prompted for a password. It is the same as the
POSTGRES_PASSWORDenvironment variable. - The prompt should change to show psql. You can now run some sql commands to check that the connection worked:
\dt  -- list tables
SELECT count(*) FROM leads;
SELECT * FROM leads LIMIT 5;
Postman is a web client for testing out REST apis. See here to view and export postman requests for this project. You will also need to install postman, import the collection, and then run the api on localhost to use postman in development.
- Make sure python 3 is installed on your system
- from the project root directory, change to the data analysis directory
cd ./data_analysis
- Create a virtual environment
python3 -m venv --prompt data_analysis venv
- You should see a newly created folder called
venv
- You should see a newly created folder called
- Activate the virtual environment
source venv/bin/activate- Your terminal prompt should change to display
(data_analysis)on the left while the virtual environment is active.
- Your terminal prompt should change to display
- Upgrade the virtual environment's installation of pip
pip install --upgrade pip
- Install dependencies
pip install -r requirements.txt
- Run a jupyter server:
jupyter notebook - You should see a file system open in a web browser. If not, go to http://localhost:8888/tree
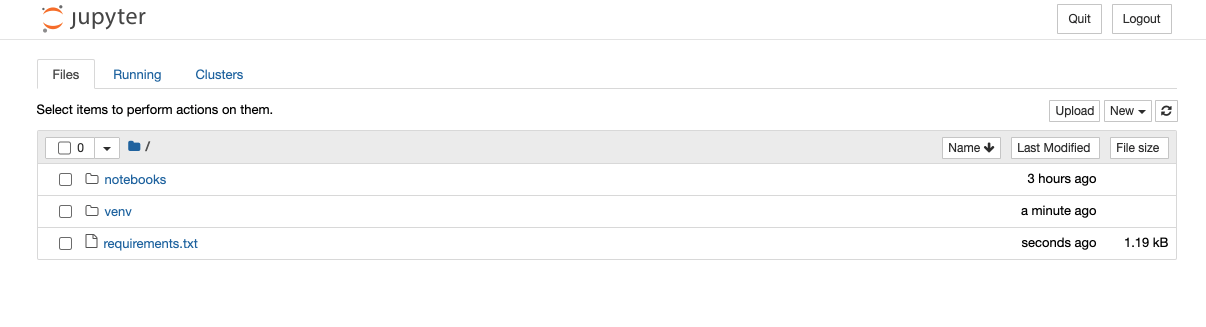
- Click on
notebooks, and thenbusinesses.ipynb. You should now see a notebook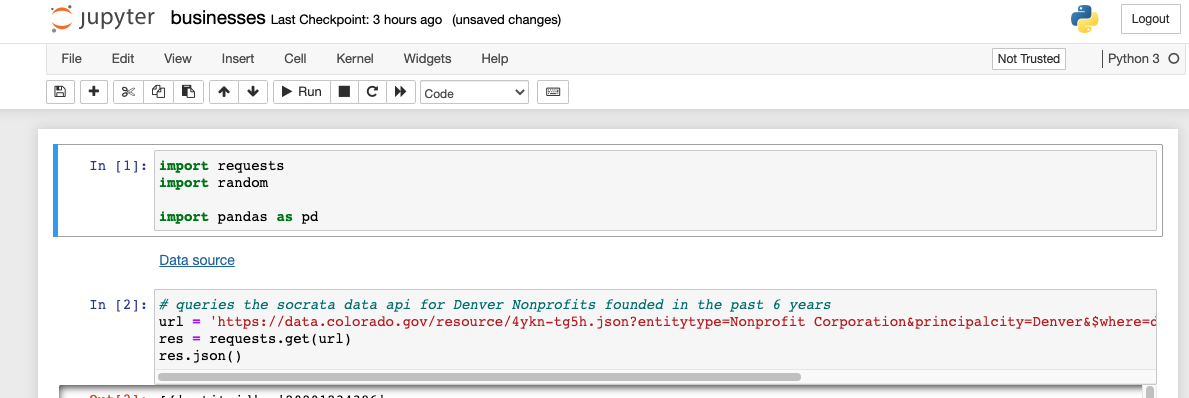
- When you are done, stop the jupyter server with
Ctrl+Cand deactivate the virtual environment withdeactivate.


This is the current manual process for building and deploying the rest api:
- Set the
AWS_PROFILEenvironment variable - Update the version number in
backend/scripts/build.sh - Run
build.shto build a docker image and push it to dockerhub - Open a PR to update the version number in the github repo
- Use the
backend/scripts/ssh-serverscript to start an ssh session in an ec2 instance - update the version number in
partner-finder/start.sh - Pull the docker image from dockerhub
- stop and remove the running container with
sudo docker container stop <container name>andsudo docker container rm <container name>you can get the container name by runningsudo docker ps - start a new container with the updated api with
sudo ./start.sh
This is the current manual process for building and deploying the frontend:
- Create a
.envfile in thefrontenddirectory. Make sure it has the following contentsAPI_HOST='http://cfd-partner-finder-api.xyz:8888' - Update the version number in
frontend/scripts/build.sh - Run
./scripts/build.shto build a docker image and push it to dockerhub - Use the
backend/scripts/ssh-serverscript to start an ssh session in the ec2 instance - Update the version number in
partner-finder/frontend.sh - Pull the docker image from dockerhub
- stop and remove the running container with
sudo docker container stop <container name>andsudo docker container rm <container name>you can get the container name by runningsudo docker ps - start a new container with the updated frontend with
sudo ./frontend.sh
- Socrata API
- Dataset with registered business entities in Colorado. It can be filtered to return only nonprofits.
- Colorado Nonprofit Association
- Website with nonprofit members registered with Colorado Nonprofit Association.
- Twitter?
- LinkedIn?
This is a Code For Denver project. For more about the organization, see https://codefordenver.org/
Code for Denver has a discord server and runs online meetups roughly every two weeks. This project has a channel called #partner-finder on the discord server. The project also has a weekly standup at 6pm MT. Typically a link to a google hangout is shared in the discord channel. If you would like to join, but do not have access to the channel, please email galbwe92@gmail.com expressing your interest to participate.