Generates Fritzing components matching your particular stripboard.
Inspired by Robert P Heller's project having a similar aim: https://github.com/RobertPHeller/fritzing-Stripboards
pip install fritzing-stripboard
You can also install the in-development version with:
pip install https://github.com/coddingtonbear/fritzing-stripboard/archive/master.zip
fritzing-stripboard /path/to/board.yaml /path/to/output/part.fzpz
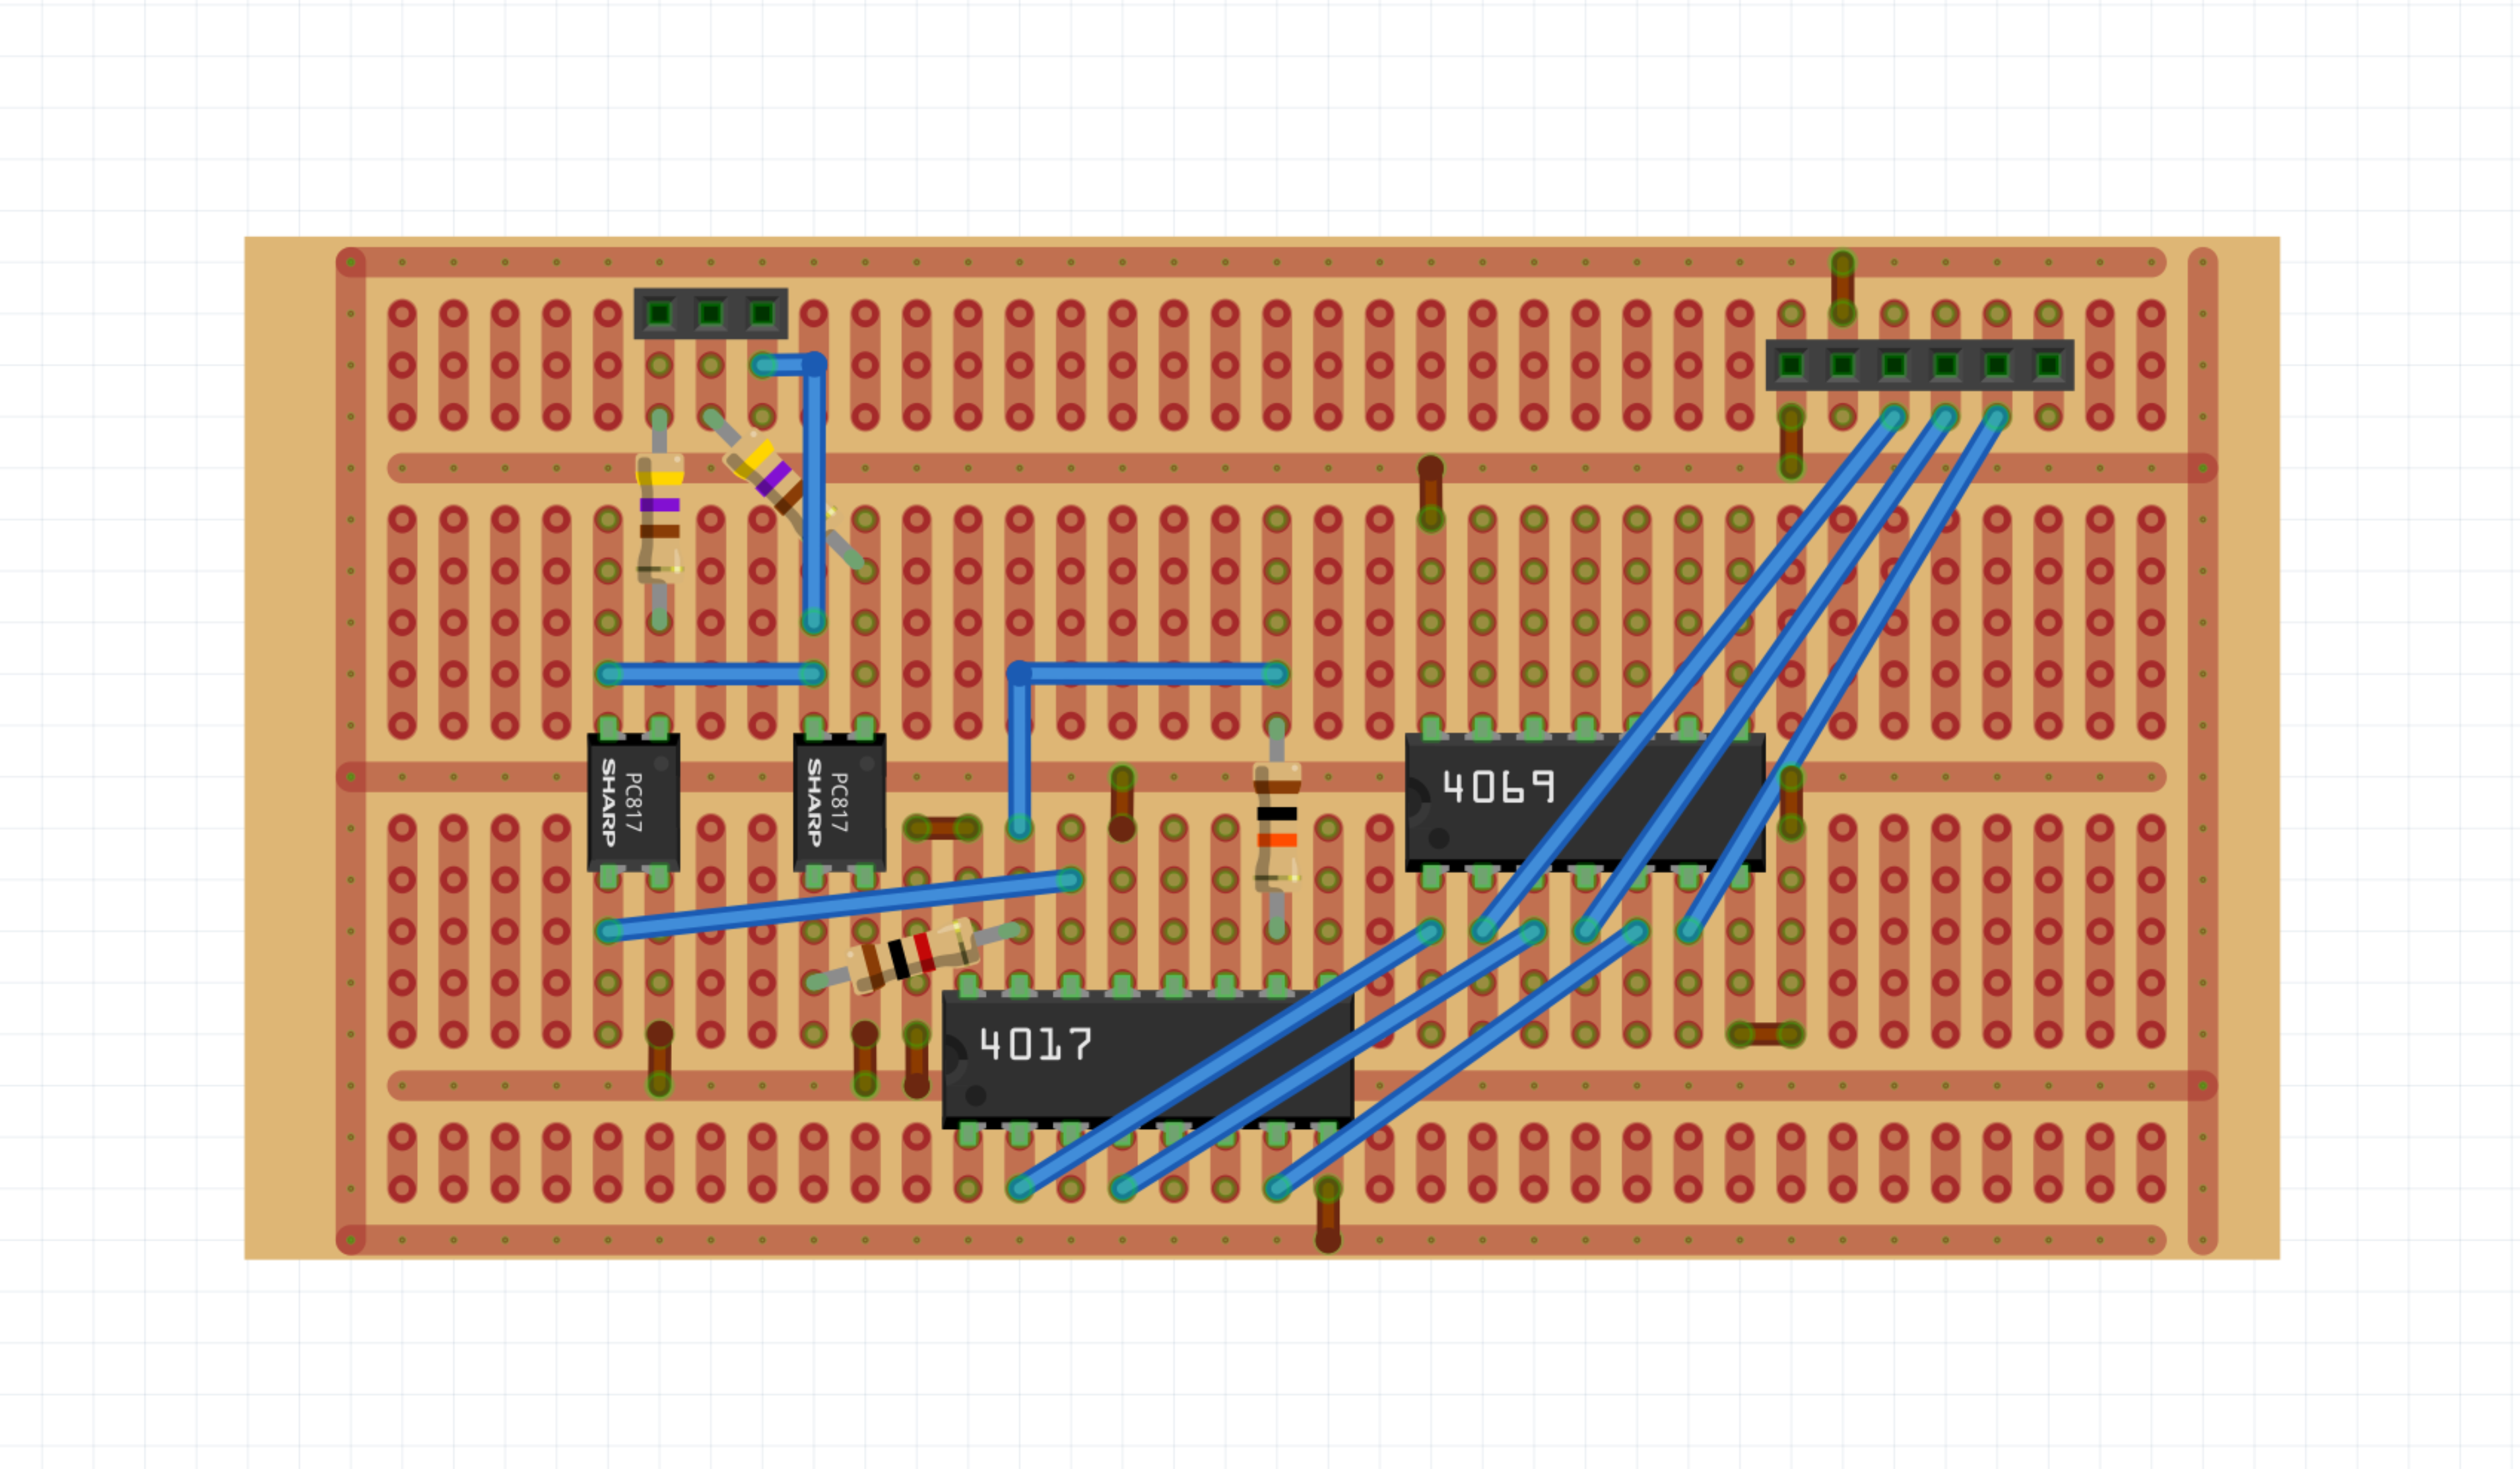
While digging through my project supplies, I happened across a large collection of stripboards that look like this:
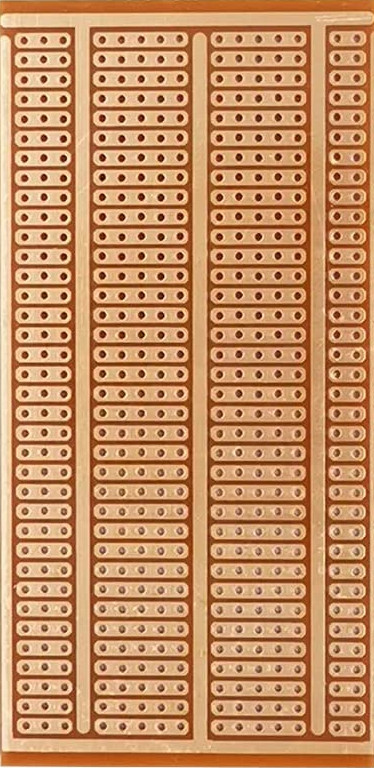
Although there are stripboards available online for Fritzing, none quite looked like this. Luckily, though, generating a Fritzing part for this board can be done easily with just a little bit of yaml:
meta:
title: 3-5-5-2 Board with Solid Bus
label: 3-5-5-2
width: 50.5
height: 100.5
board:
- grid:
components:
- shared_bus:
- bus: A1:T1
- bus: E1:E36
- bus: Q1:Q36
- shared_bus:
- bus: A37:T37
- bus: T2:T37
- bus: A2:A37
- bus: K2:K37
- drilled_rows: B2:D36
- drilled_rows: F2:J36
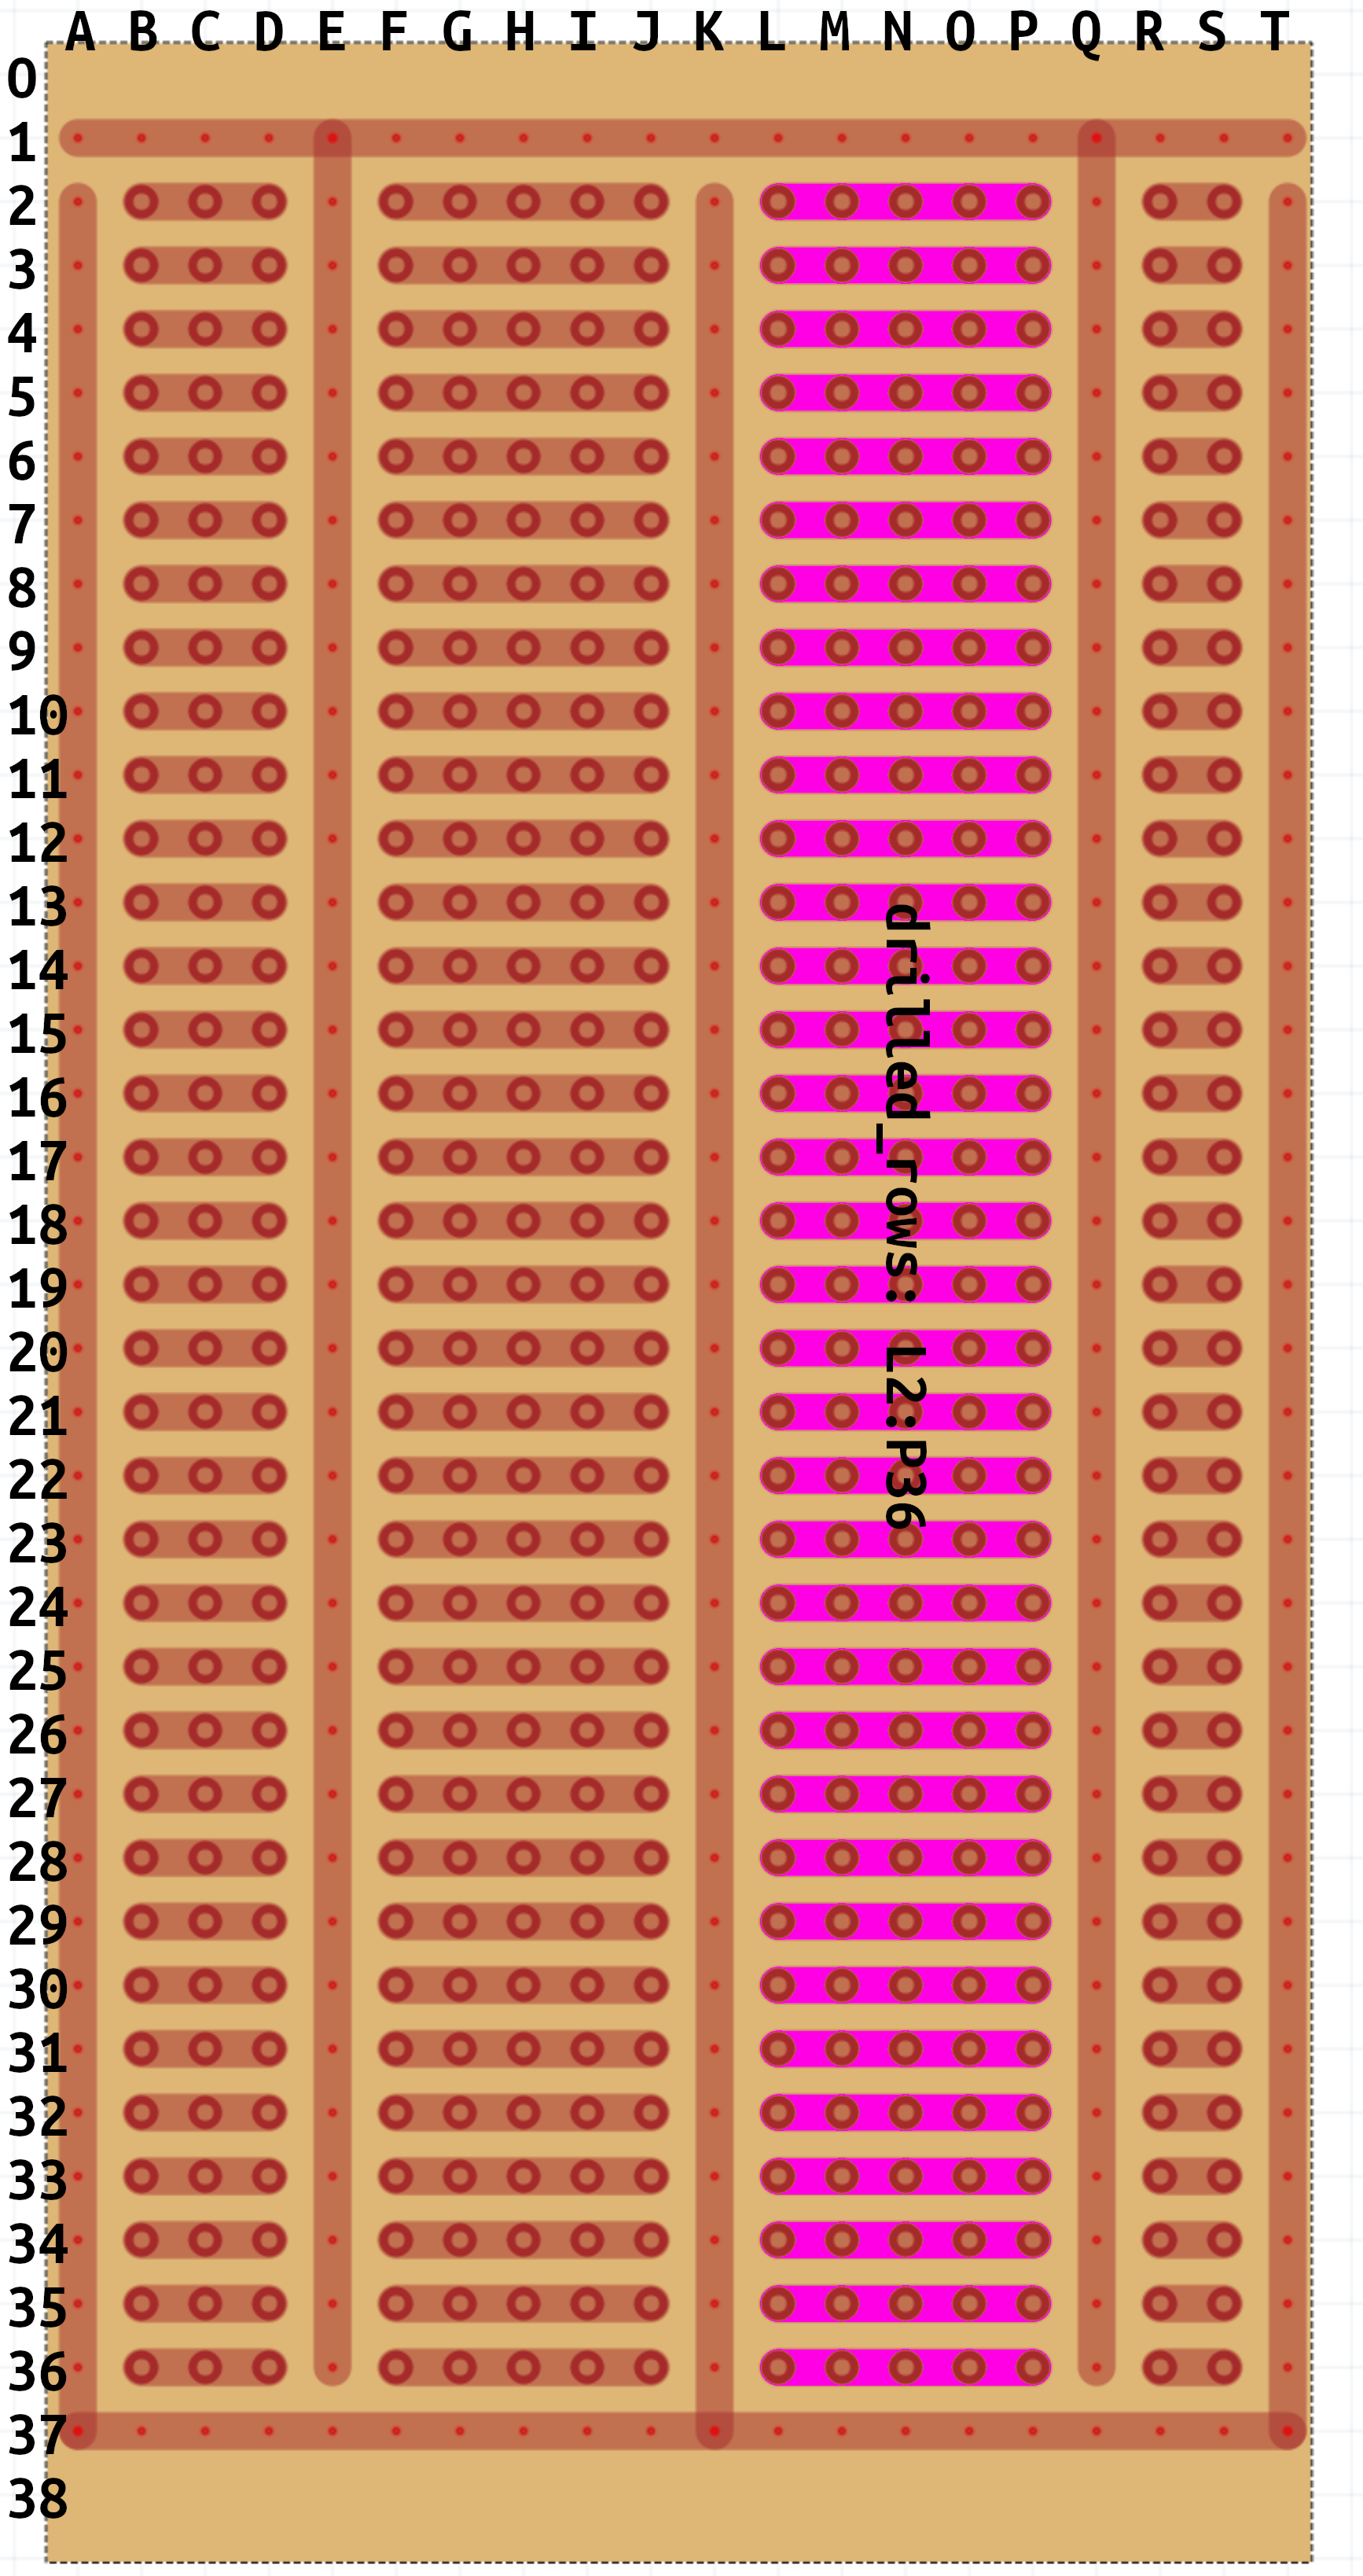
- drilled_rows: L2:P36
- drilled_rows: R2:S36
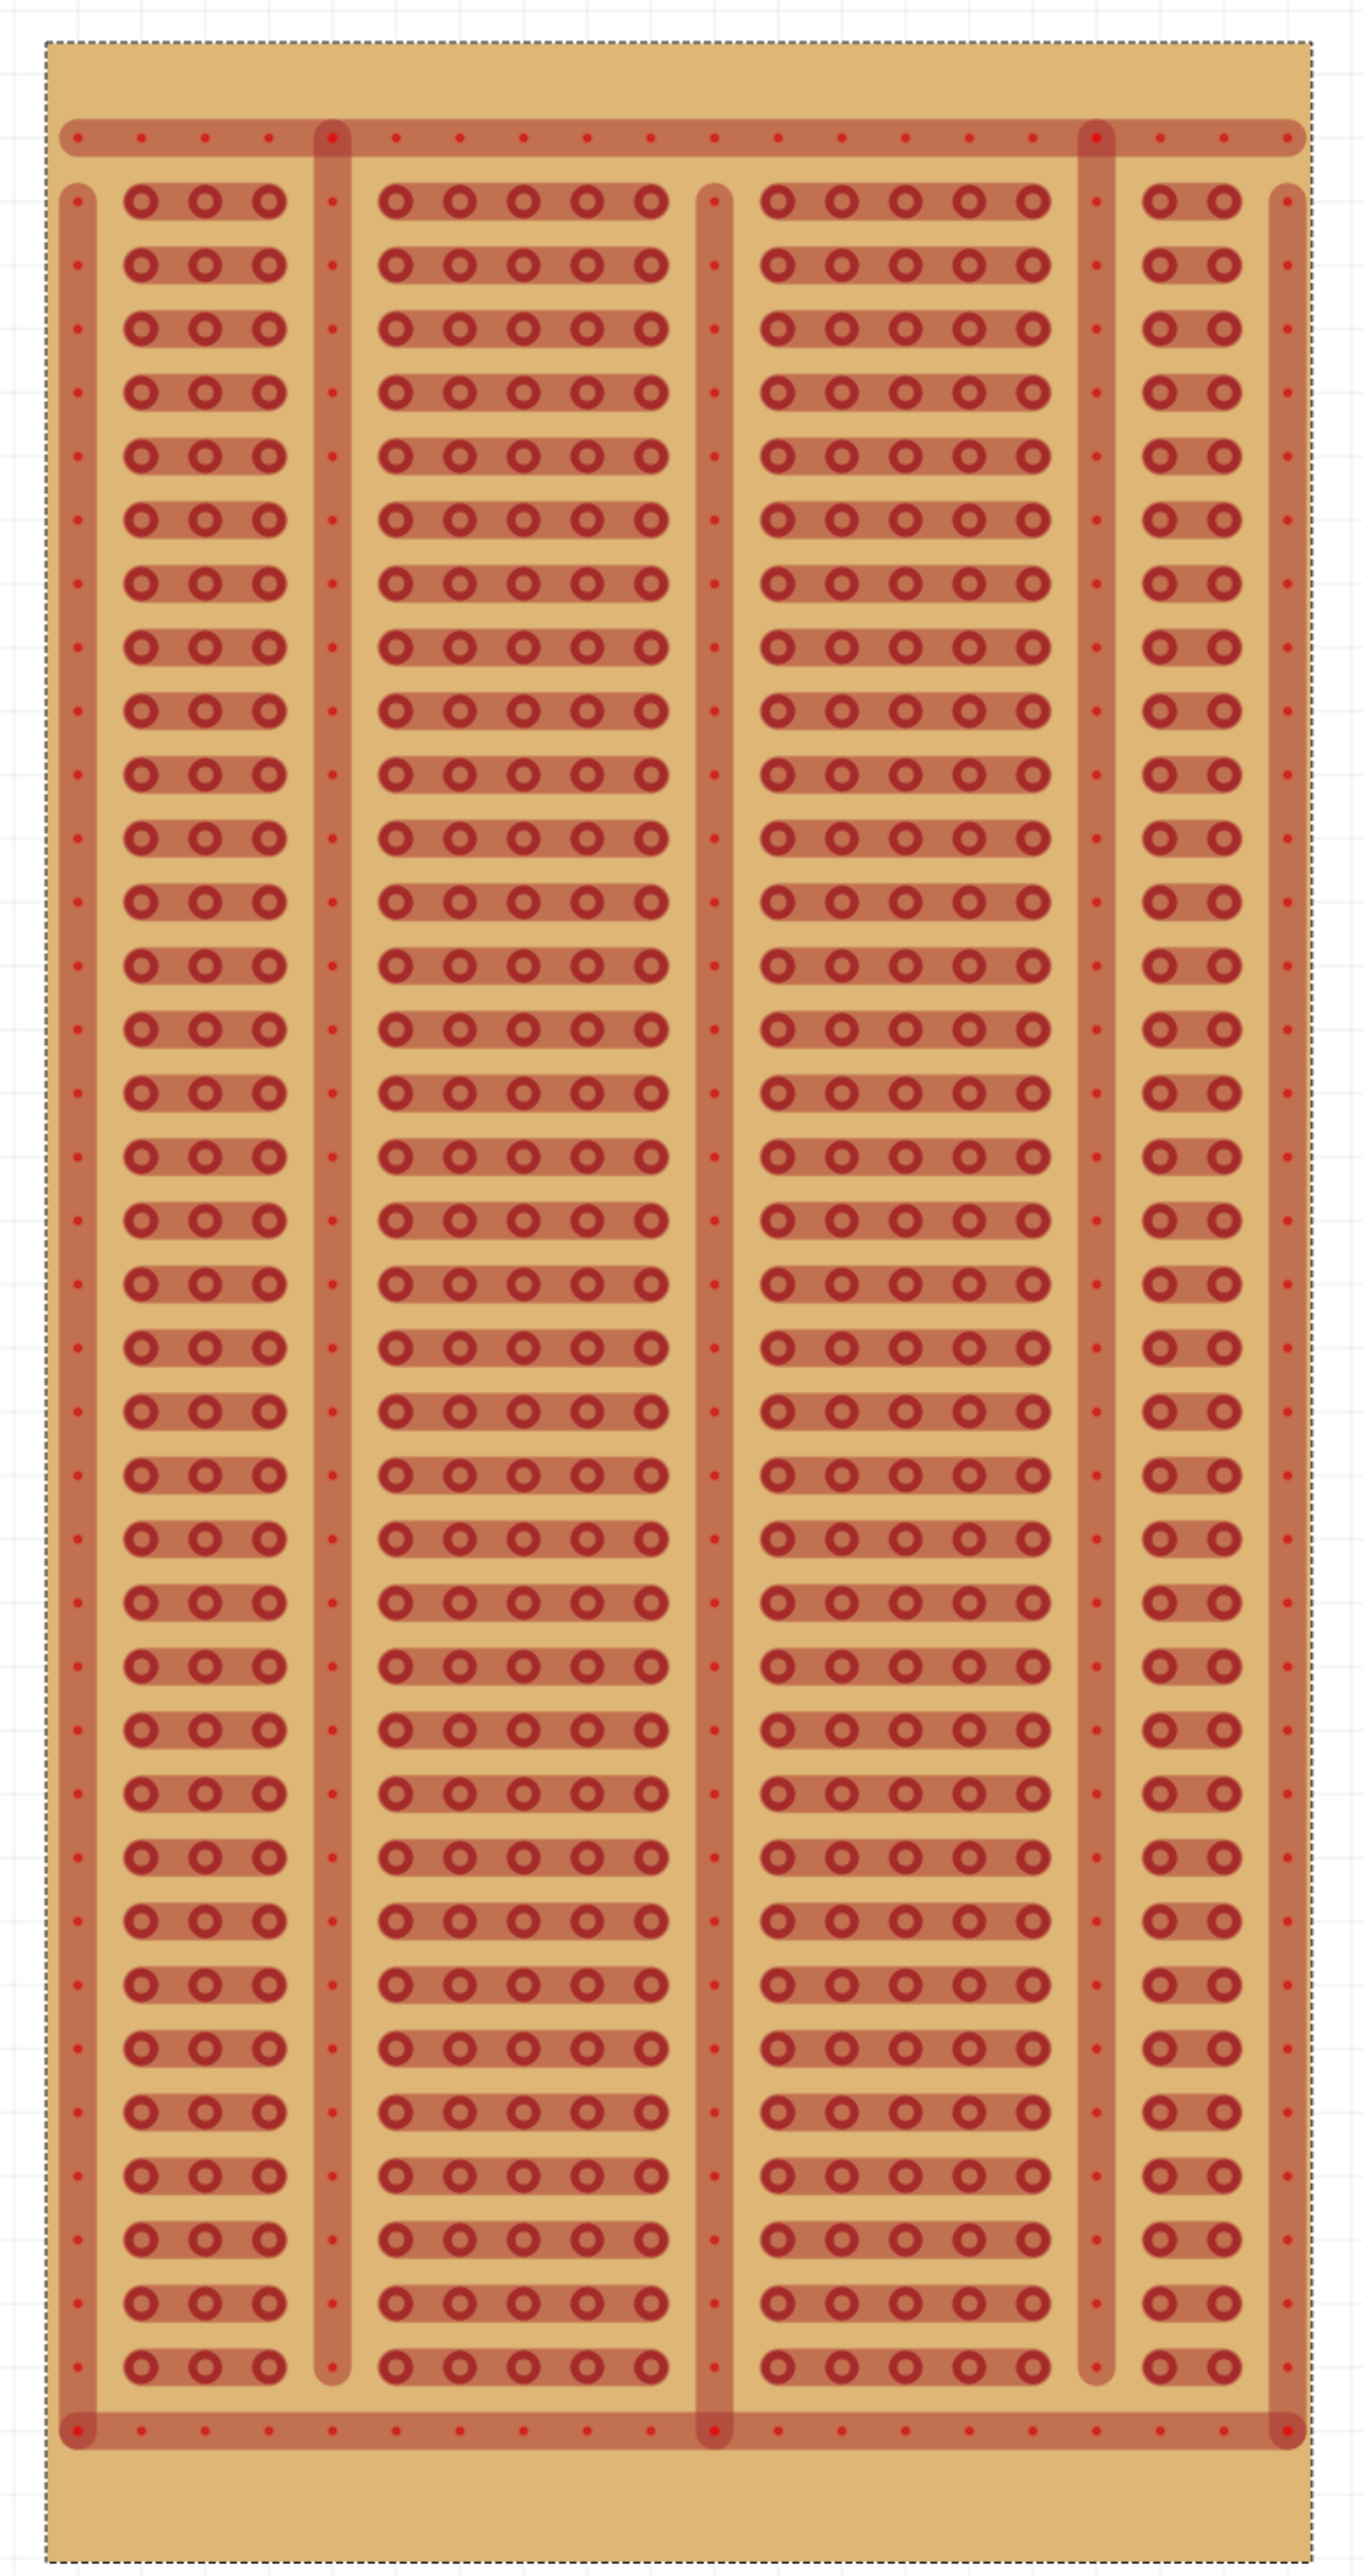
The above will generate a board that looks like:
Definitions for boards use excel-like grid square ranges for defining where new bus (trace) or drilled hole elements should appear:

Grid supports a handful of properties including:
components: A list of "Components" described below in "Components".meta: An optional object containing any of the following keys:origin: The position at which the grid is positioned, relative to the upper-left corner, in millimeters. By default:[0, 0].pitch: The pitch of grid elements in millimeters. By default:2.54.back: Whether there is copper only on one side of the board. In such a case, you need to install your ICs on the side without printed traces. You can describe your stripboard's grid as you see it, but it will be mirrored when generated. Note: When using this, you will also want to setoriginto be the upper-right corner of your grid instead of leaving it unset. By default:False.
These create a line or a line of drilled holes. For example,
bus is used for creating this:
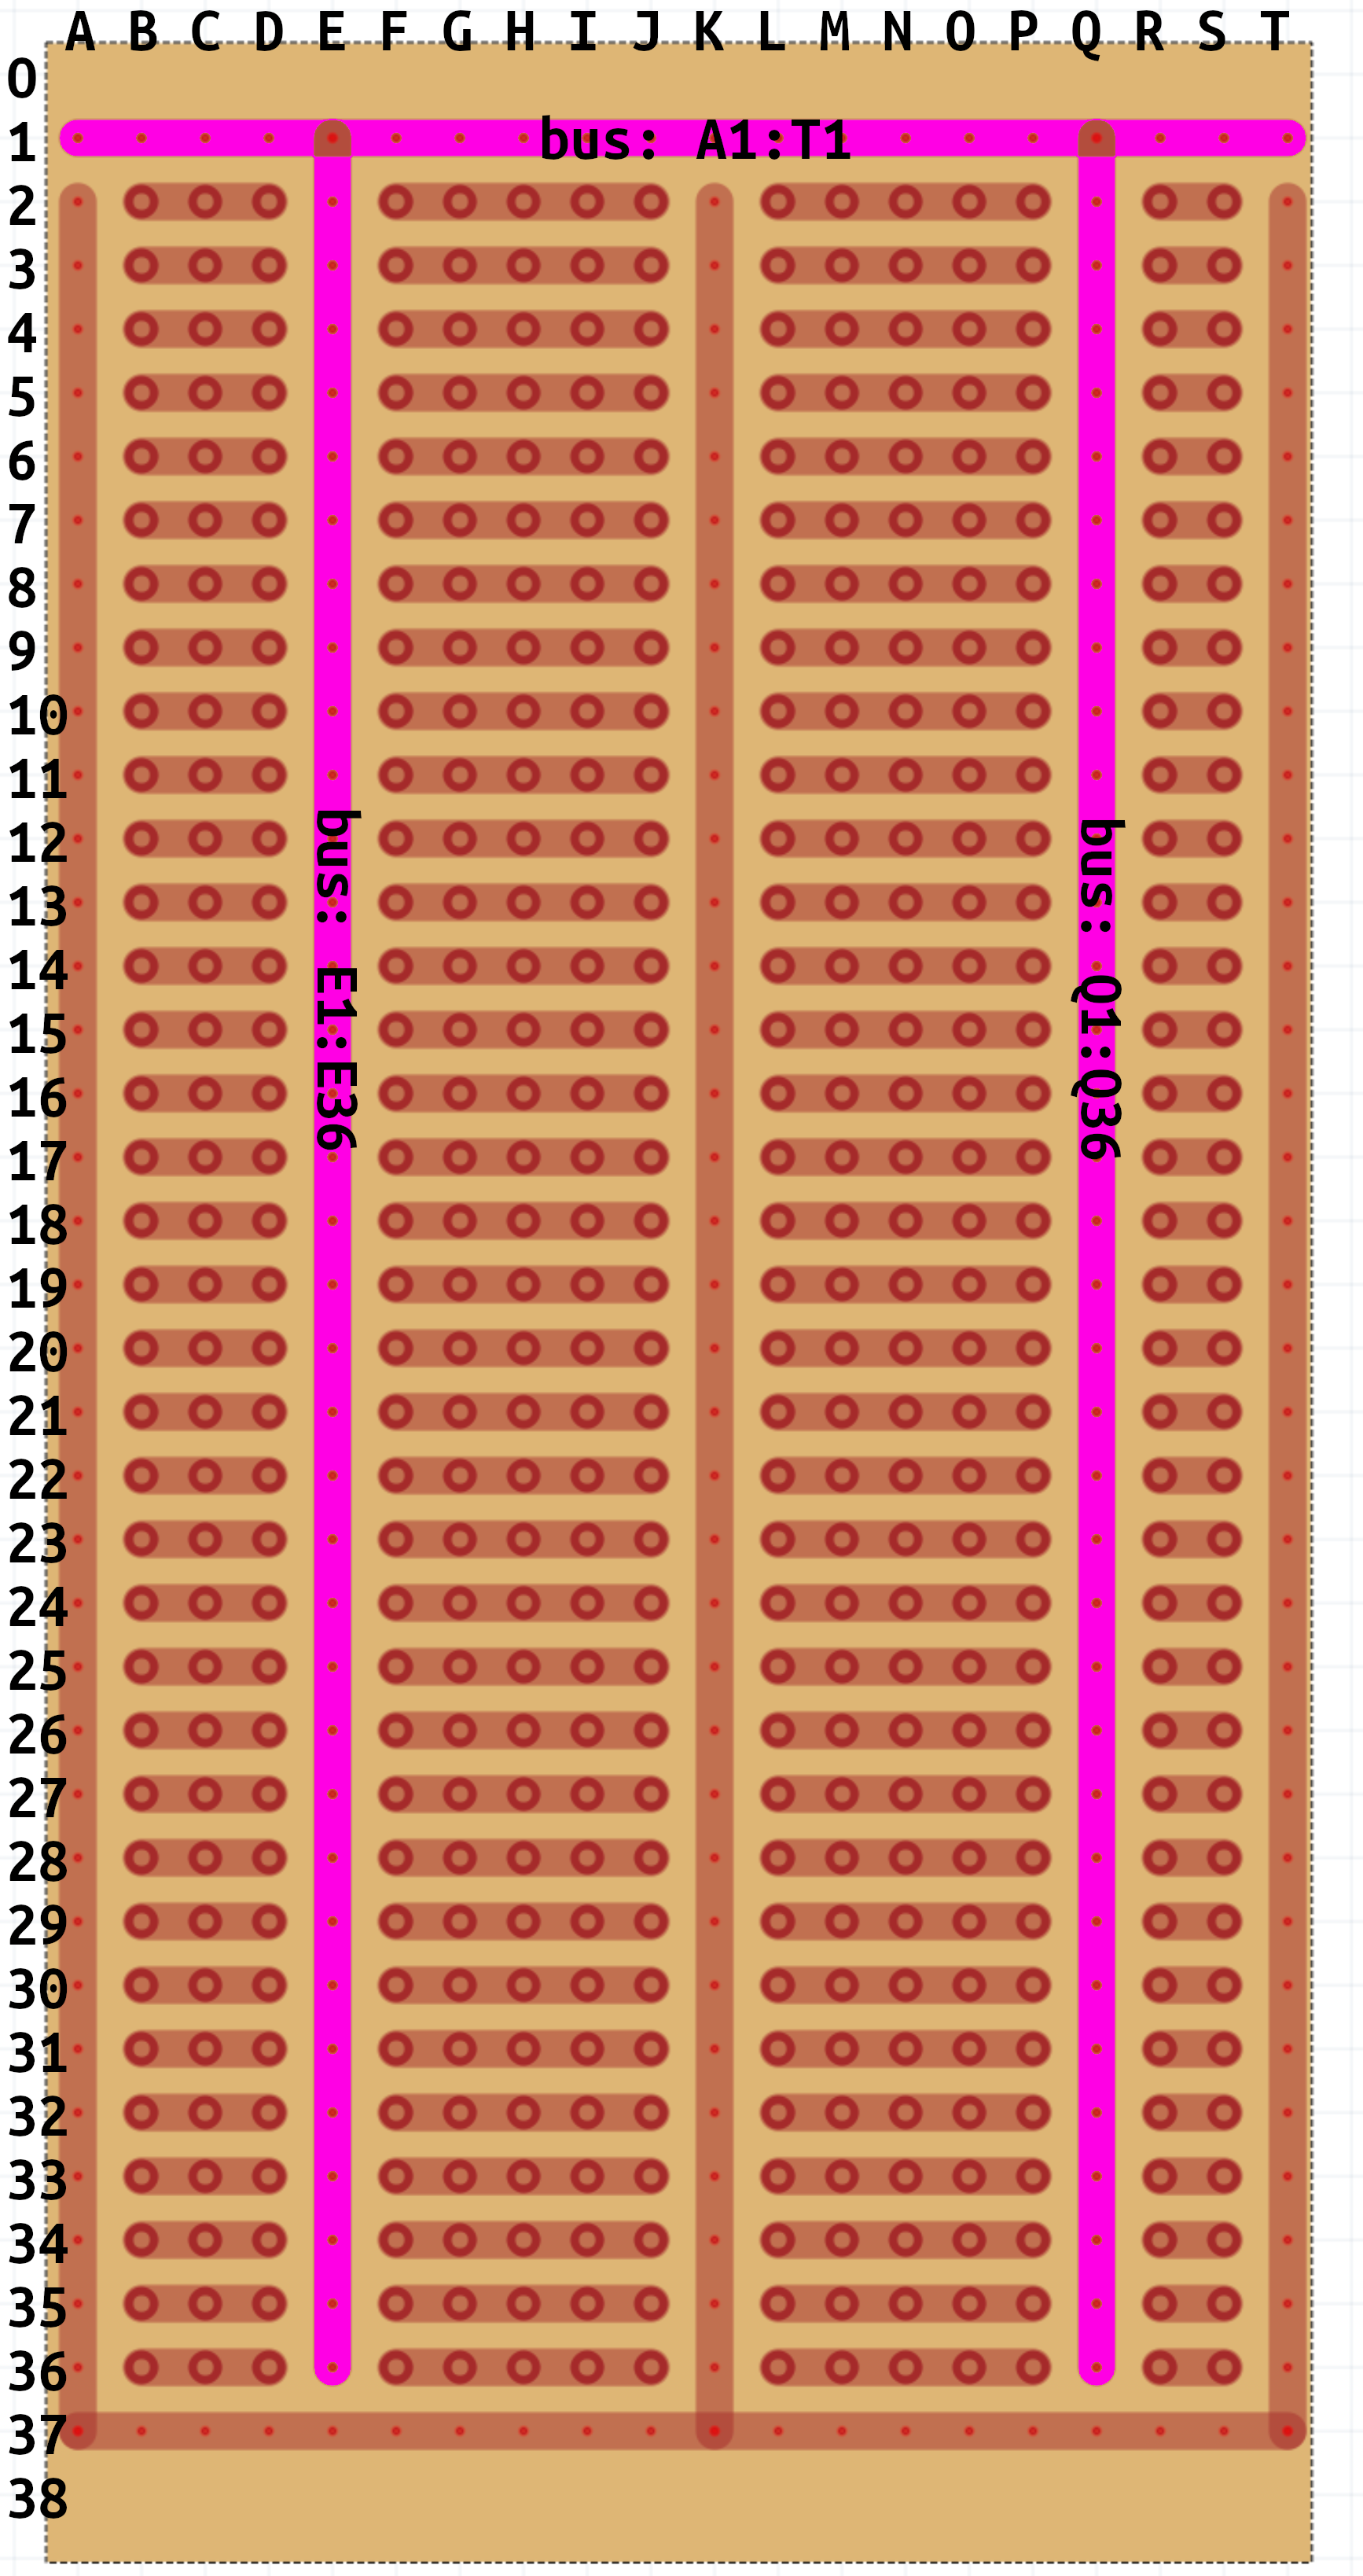
Each bus or drilled range will be assigned its own "bus"
(a.k.a. "net") unless wrapped by shared_bus as you've seen in the
example above.
These create an array of rows or columns. For example,
drilled_rows is used for creating this:
Each row or column of the range will be assigned its own "bus"
(a.k.a. "net") unless wrapped by shared_bus.
bus and drilled ranges by default each get their own bus. If your
stripboard has a more complex layout (like in the example), you can
use this 'component' for causing all components below it to share
the same bus.
See BoardMetadata for a full list of properties.