TLDR: SNES/SFC controller support on arcade machines!
Click here for a demo video of a Capcom CP Solder used to play Street Fighter Zero 3
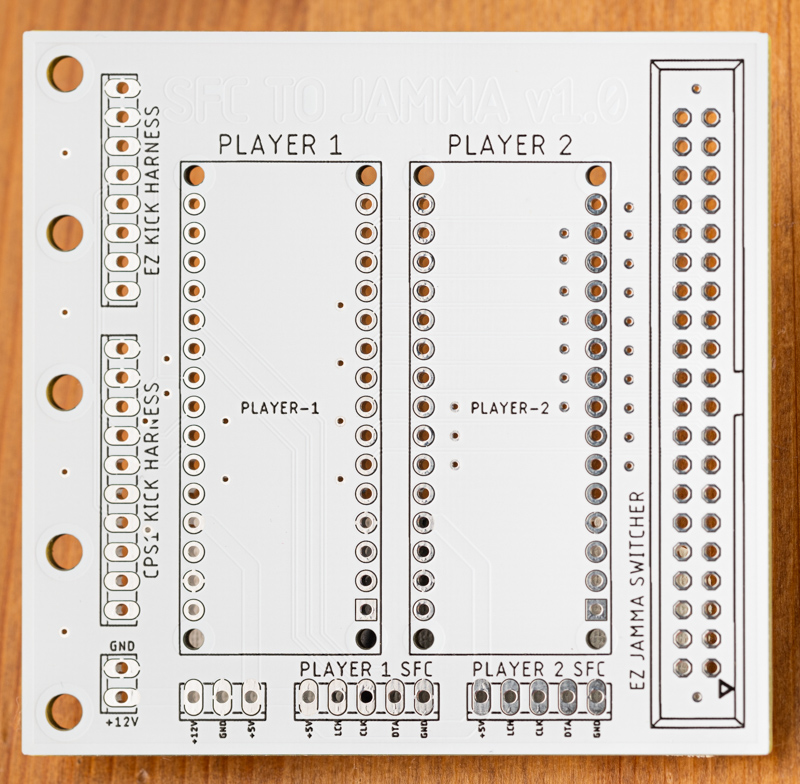
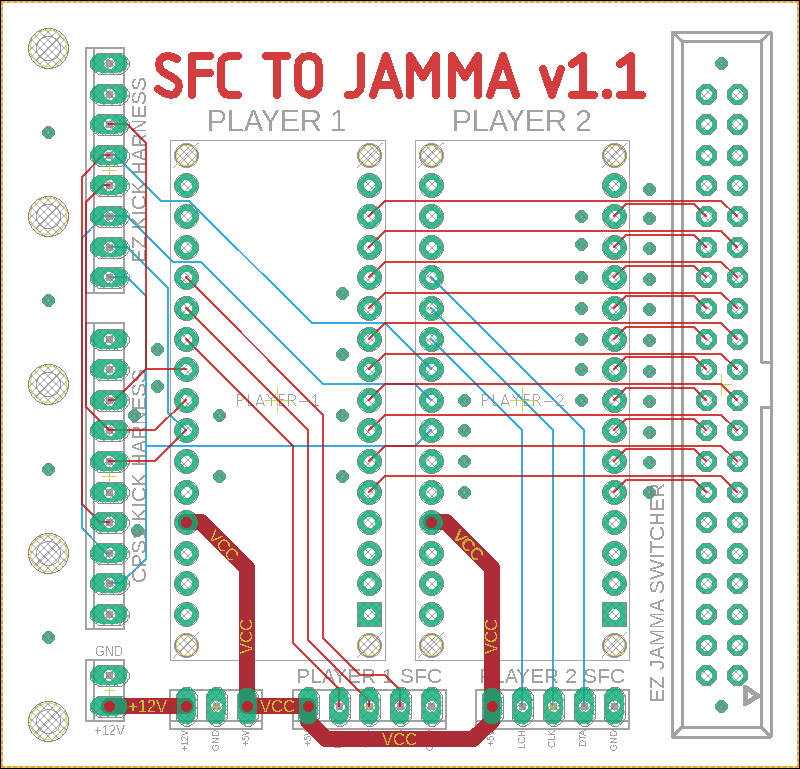
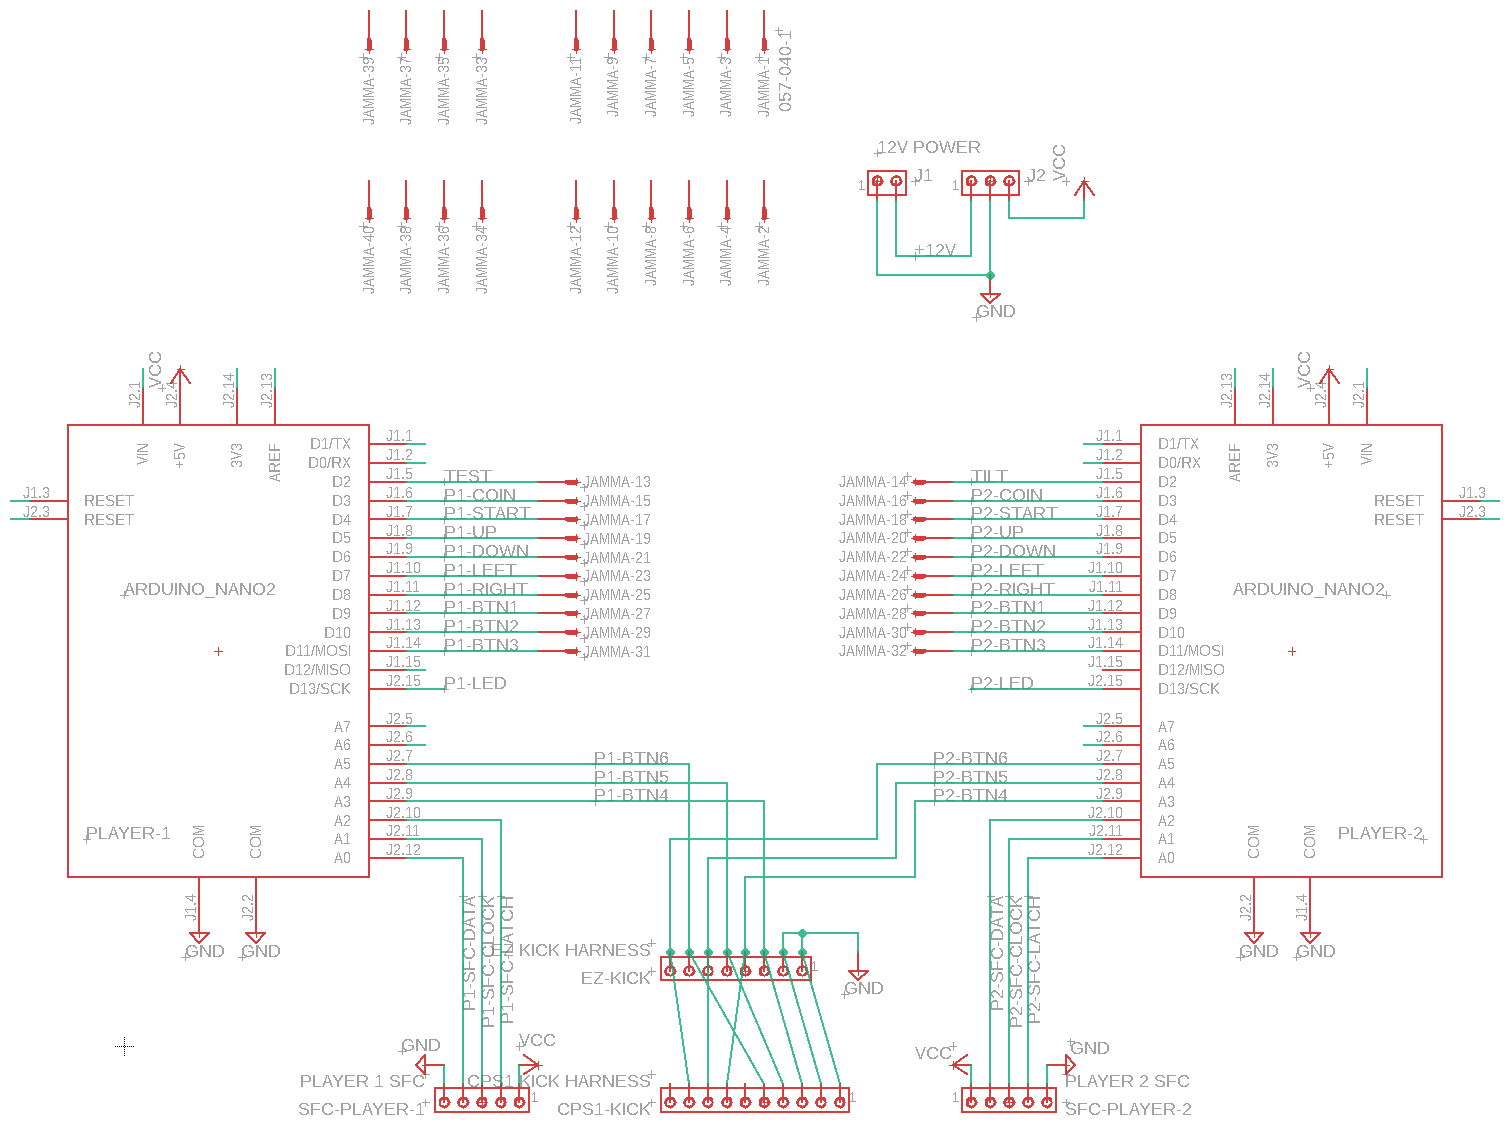
This repository contains the Eagle CAD files as well as the Arduino Nano source code to interface a Super Famicom (SFC) or Super Nintendo (SNES) controller with an Arcade Cabinet JAMMA interface via a 40-pin ribbon cable.
The 40-pin ribbon cable pinout is based on the pinout used by the EZ Switchers by RiddledTV. The EZ 4-way Switcher and EZ 8-way Switcher provide both a JAMMA edge and 40-pin output connectors with the intent of having two cabinets wired into the same arcade board for head-to-head gameplay. I abused this fact to instead use the 40-pin cable for a secondary set of user input controls.
Because the wiring on the JAMMA interface and 40-pin interface are tied directly together, the Arduino Nano can also read input from the arcade's input panel, and then forward this information over the Arduino Nano's USB interface back to a PC, such as using it for gamepad emulation. This can be useful for running a PC through an arcade cabinet, and forwarding the input controls from the cabinet back into the PC.
On Player 1, hold SELECT + START for two seconds to toggle TEST / SETTINGS button. This is set as a toggle rather than a momentary press because some games like Soul Edge require the button to remain held while in the settings menu.
On Player 2, hold SELECT + START for two seconds to toggle TILT button. P1 and P2 Arduino Nanos run on the same code, which is why this is also a held toggle function.
Press SELECT + UP to select Profile 1 Press SELECT + DOWN to select Profile 2
| SNES | NES | Profile 1 | Profile 2 |
|---|---|---|---|
| SELECT | SELECT | Insert Coin | Insert Coin |
| START | START | Player Start | Player Start |
| A | Button 5 (MK) | Button 6 (HK) | |
| B | A | Button 4 (LK) | Button 4 (LK) |
| X | Button 2 (MP) | Button 3 (HP) | |
| Y | B | Button 1 (LP) | Button 1 (LP) |
| L | Button 3 (HP) | Button 2 (MP) | |
| R | Button 6 (HK) | Button 5 (MK) |
- Nintendo Super NES Controller: SNS-005
- Nintendo Super Famicom Controller: SHVC-005
- Nintendo Super NES Score Master: SNSP-026
- NTT Data Key Pad: NDK10 (1)
- Brook Gaming Wingman SNES Converter: ZPP005Q
- 8BitDo Retro Receiver for SNES
- Capcom CP Soldier: CP-S01CAN
- HORI Fatal Fury 2 Commander Controller: HSG-07
- HORI Fighting Commander: HSJ-14
- Hudson Soft Super Joycard: HC-691
- Asciiware AsciiPad: AS-131-SP
- Asciiware Super Advantage: 4910
- Asciiware Fight Stick: AS-9981-SF
- STD SN ProPad: SV-334
- STD SN ProgramPad: SV-337
- Triax Turbo Touch 360
- Tyco Super NES Power Plug: 1286
- Konami Hissatsu Command Controller: RU-009
- High Frequency Clear Turbo Controller for SNES
- FC2 Slim
- Hyperkin Retron 2 Controller: M05932
(1) The NTT Data Key Pad will always have bit 14 pressed (outside of the normal buttons). The four high bits are used to identify the type of device plugged into a controller port, with value 0h being a normal controller. This has a value of 2h, and it most likely used by the accompanying hardware to identify itself and tell the software to do extra querying on the controller to read its additional buttons.
- Nintendo Controller: NES-004
- Nintendo NES MAX: NES-027
- 8BitDo N30 2.4g Wireless Gamepad: 81BC
- Brook Gaming Wingman SNES Converter: ZPP005Q
To use this board with a PC, allowing SNES/SFC or JAMMA input as a PC gamepad, you'll need a couple of utilities installed and configured on your PC.
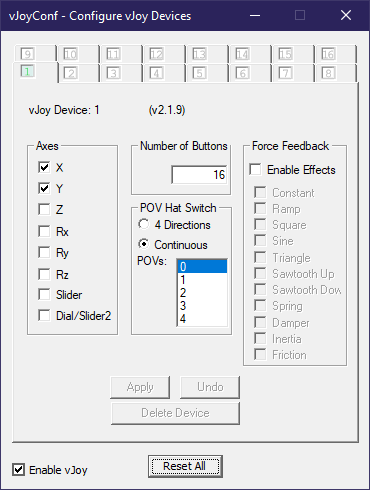
- Download and install vJoy
- Make sure that "Enable vJoy" is selected
- Uncheck all but "X" and "Y" from Axes
- Set the number of buttons to 16
- Set "POVs" to "0" in the "POV Hat Switch" panel
- Unchecked "Enable Effects" in the "Force Feedback" panel
- Click the "Apply" button
- Download and run vJoySerialFeeder
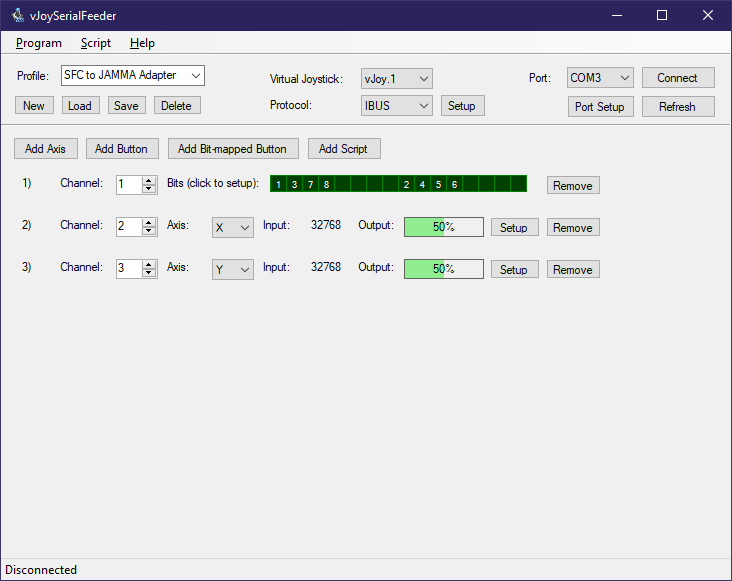
- Set "Virtual Joystick" to "vJoy.1"
- Set "Protocol" to "IBUS"
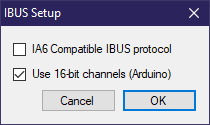
- Click the "Setup" button next to "IBUS" and enable "Use 16-bit channels (Arduino)"
- Set "Port" to the COM port your Arduino Nano is registering to on your PC
- Click "Add Bit-mapped Button" once and "Add Axis" twice to add the three channels this board provides
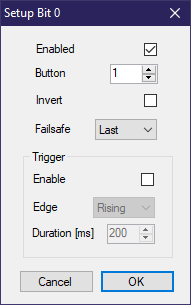
- Set the "Bits" channel to "1", and configure the individual buttons as: 1, 3, 7, 8, nc, nc, nc, nc, 2, 4, 5, 6, nc, nc, nc, nc
- Set the axis channels to 2 for X, and 3 for Y
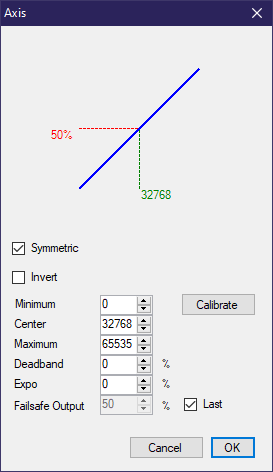
- In each axis channel, click their "Setup" button and set: Minimum=0, Center=32768, Maximum=65535
- Once everything is configured click on the "Connect" button to activate the interface
