Check out all of our GitHub Actions: https://actions.cicirello.org/
| GitHub Actions |  |
|---|---|
| Build Status | |
| Source Info |   |
| Contributors |   |
| Support |
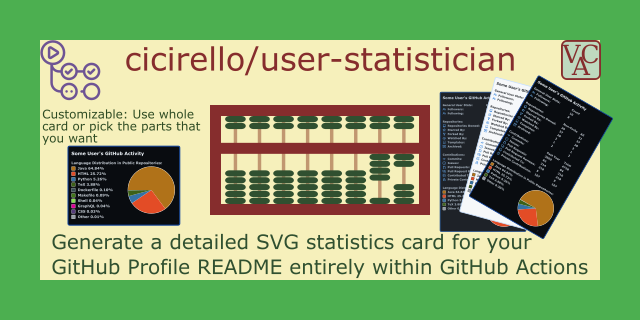
The cicirello/user-statistician GitHub Action generates a detailed visual summary of your activity on GitHub in the form of an SVG, suitable to display on your GitHub Profile README. Although the intended use-case is to generate an SVG image for your GitHub Profile README, you can also potentially link to the image from a personal website, or from anywhere else where you'd like to share a summary of your activity on GitHub. The SVG that the action generates includes statistics for the repositories that you own, your contribution statistics (e.g., commits, issues, PRs, etc), as well as the distribution of languages within public repositories that you own. The user stats image can be customized, including the colors such as with one of the built-in themes or your own set of custom colors. You can also pick and choose which sections of the card to include, as well as the order of appearance of the sections; and you can choose to hide individual stats.
The user-statistician action runs entirely here on GitHub.
To use it, you just need to set up a workflow in your GitHub
Profile repository (or technically any repository that you own) on a schedule (daily
should be sufficient), and then add a link to the image in your README. The action
handles committing and pushing the generated image to the repository.
Features: The features of the cicirello/user-statistician GitHub Action include the following:
- Generates detailed stats for your GitHub Profile README all in a single SVG.
- Ability to generate separate SVGs for the individual categories of stats if you prefer.
- Highly customizable (color themes, custom colors, section ordering, custom title).
- International with option to generate SVG in 30 languages.
- Runs entirely here on GitHub.
- Updates the SVG on a schedule of your choice (e.g., daily), rather than
on-demand when someone views your profile, which has the following advantages:
- The SVG is simply served when requested, avoiding the delay associated with waiting for API queries to gather the data to generate the SVG.
- The API queries associated with generating the SVG happen once per cycle of your configured schedule, regardless of how frequently your profile is visited, decreasing system load.
Show Your Support: If you find the user-statistician action useful,
please consider starring the repository; and if you use it for your profile
README, please consider either linking the image to this repository, or
otherwise sharing how it was generated with your profile visitors.
The remainder of the documentation is organized into the following sections:
- Quickstart
- Example Workflows and Image Samples: This section includes workflows to get you started using the action, as well as sample images.
- The Stats: This documents all of the statistics included in the SVGs that the action generates.
- Inputs: Documentation of all of the inputs to the action, their default values, and the effects they have on the behavior of the action.
- Outputs: Documentation of outputs of the action.
- All Possible Action Inputs: This section provides a workflow that summarizes all of the action's inputs along with their default values.
- Built With: A list of the tools, etc used to develop this action.
- Blog Posts: A selection of blog posts about the GitHub Action.
- Support the Project: Ways that you can support the project.
- Contributors: Information for potential contributors.
- Contributing a Translation: Detailed instructions for contributing a language translation for a new locale, the most common type of contribution to this project.
See the Quickstart directory for ready-to-use workflows and quickstart instructions.
This section provides example workflows demonstrating various features of the action, as well as samples of the corresponding images that they generate. If you would like to see live examples, in addition to the detailed examples below, then you can check out my GitHub profile, as well as my personal website, both of these are updated nightly. The GitHub stats card on my GitHub profile uses the built-in dark theme, and all other settings are the defaults, and is generated by this workflow file. The stats card on my personal website uses a set of custom colors to match the color palette of my website, and is generated by this workflow file.
There are also several ready-to-use workflows and quickstart instructions in the Quickstart directory.
This first example uses all of the default inputs (see Inputs section for details of available inputs). Specifically, it uses the default color theme (a light theme), and includes all available statistics in the image and the default title. The action commits and pushes the image by default as well.
name: user-statistician

on:
  schedule:
    - cron: '0 3 * * *'
  workflow_dispatch:

jobs:
  stats:
    runs-on: ubuntu-latest

    steps:
    - uses: actions/checkout@v4

    - name: Generate the user stats image
      uses: cicirello/user-statistician@v1
      env:
        GITHUB_TOKEN: ${{secrets.GITHUB_TOKEN}}
This example workflow runs on a schedule (every day at 3am) and also includes
the workflow_dispatch event so that you can run it manually if desired.
See GitHub's documentation for details
on schedule syntax
and workflow_dispatch.
The actions/checkout@v4 step is required because the action generates the stats image
for the owner of the checked out repository, and it is also for the commit and push
functionality. Additionally, the GITHUB_TOKEN must be passed via an environment
variable to cicirello/user-statistician (see
the GITHUB_TOKEN: ${{secrets.GITHUB_TOKEN}}) in order to be able to query
GitHub's GraphQL API. The default permissions of the GITHUB_TOKEN are sufficient
for the API queries as well as (in most cases) for pushing the image to your
repository. If you are running this in a repository with branch
protection rules that require either reviews or checks, then see the section
below on Protected branches with required checks.
The default behavior of the language distribution chart is to explicitly list all languages that individually make up at least 1% of the code in your public repositories, with low percentage languages combined into an "Other". The language distribution chart is intended to be equivalent to the language charts that GitHub generates for each repository, but by combining all of the repositories that you own.
Assuming that you use the default image filename and path, then you can insert the image into your README with the following markdown:
Although not required, it is appreciated if you instead link the image to this repository so that others know how you generated it, with the following markdown:
[](https://github.com/cicirello/user-statistician)Here is a sample of what this will produce:

This example shows how to change colors to the dark theme, as well as disabling the title.
name: user-statistician

on:
  schedule:
    - cron: '0 3 * * *'
  workflow_dispatch:

jobs:
  stats:
    runs-on: ubuntu-latest

    steps:
    - uses: actions/checkout@v4

    - name: Generate the user stats image
      uses: cicirello/user-statistician@v1
      with:
        colors: dark
        include-title: false
      env:
        GITHUB_TOKEN: ${{secrets.GITHUB_TOKEN}}
Here is a sample of what this will produce:

Example 3: Dark-dimmed theme with custom title, some hidden stats, an animated language chart, and including all languages in language distribution chart
This example shows the dark-dimmed theme, uses a custom title, includes all
languages in language distribution chart, and hides
several statistics (joined, mostStarred, mostForked, followers, following,
and private). Note by hiding joined, mostStarred, mostForked, followers,
and following that the action will automatically hide the header row for the
"General Stats and Info" section since we've hidden all of the non-zero
stats from that section. If someone were to sponsor me, or if I was to
sponsor someone else, then the "General Stats and Info" section will show up the next time
generated since this sample didn't hide the sponsors or sponsoring counts.
If we want to guarantee that this entire section is hidden, we could instead
specify "general" among the "keys" we pass to hide-keys.
name: user-statistician

on:
  schedule:
    - cron: '0 3 * * *'
  workflow_dispatch:

jobs:
  stats:
    runs-on: ubuntu-latest

    steps:
    - uses: actions/checkout@v4

    - name: Generate the user stats image
      uses: cicirello/user-statistician@v1
      with:
        colors: dark-dimmed
        custom-title: My GitHub Statistics
        hide-keys: joined, mostStarred, mostForked, followers, following, private
        max-languages: 100
        animated-language-chart: true
      env:
        GITHUB_TOKEN: ${{secrets.GITHUB_TOKEN}}
Here is a sample of what this will produce:

If you would rather have separate SVGs for each type of GitHub stats (repository
stats, contribution stats, and language distribution), then you can accomplish this
by running the action multiple times in a single workflow. This example does this.
Note that you must use the image-file input to give each of the SVGs its own
filename in this case, which will likewise change the markdown needed to insert
the images into your readme.
name: user-statistician

on:
  schedule:
    - cron: '0 3 * * *'
  workflow_dispatch:

jobs:
  stats:
    runs-on: ubuntu-latest

    steps:
    - uses: actions/checkout@v4

    - name: Generate the languages distribution
      uses: cicirello/user-statistician@v1
      with:
        image-file: images/languages.svg
        hide-keys: general, contributions, repositories
      env:
        GITHUB_TOKEN: ${{secrets.GITHUB_TOKEN}}

    - name: Generate the contributions stats
      uses: cicirello/user-statistician@v1
      with:
        image-file: images/contribs.svg
        hide-keys: general, languages, repositories
      env:
        GITHUB_TOKEN: ${{secrets.GITHUB_TOKEN}}

    - name: Generate the repositories stats
      uses: cicirello/user-statistician@v1
      with:
        image-file: images/repos.svg
        hide-keys: general, contributions, languages
      env:
GITHUB_TOKEN: ${{secrets.GITHUB_TOKEN}}All of the above examples used the major release tag
for the user-statistician step
(i.e., uses: cicirello/user-statistician@v1):
    - name: Generate the user stats image
      uses: cicirello/user-statistician@v1
      env:
        GITHUB_TOKEN: ${{secrets.GITHUB_TOKEN}}
The advantage to this is that you will automatically get all non-breaking changes and bug fixes without the need to alter your workflow. If you prefer to use a specific release, just use the SemVer of the release that you wish to use, such as with the following:
    - name: Generate the user stats image
      uses: cicirello/user-statistician@v1.22.0
      env:
        GITHUB_TOKEN: ${{secrets.GITHUB_TOKEN}}
If you do use a specific release, then we recommend configuring GitHub's Dependabot in your repository. Dependabot can be used to monitor dependencies, including GitHub Actions, and generates automated pull requests to update versions. The PRs it generates includes the text of release notes and ChangeLogs giving you the opportunity to decide whether to upgrade the version.
The default permissions of the GITHUB_TOKEN are sufficient for pushing
to a protected branch, provided that the branch protection hasn't been
configured with required reviews nor with required checks. If your
GitHub profile repository does have a branch protection rule with
required reviews or required checks, there are a couple solutions.
Not Recommended: First, you could create a personal access token (PAT)
with necessary permissions, save it as a repository secret, and use the PAT
with during the actions/checkout step
(see actions/checkout's documentation).
However, we do not recommend doing so.
If anyone else has write access to the repository, then they can potentially
create additional workflows using that PAT. This is probably reasonably safe
since it is probably rare to have collaborators on ones profile repository.
However, we still do not recommend this approach, as you must have had a reason
to put the required checks in place. If you decide to go this route anyway, note
that the user-statistician action will still only need the GITHUB_TOKEN and not
the PAT.
Recommended: The second (and recommended) approach to dealing with a
protected branch with
required checks is to set up a dedicated branch for generating the stats image.
This is actually what we are doing in this repository to generate the samples.
Our main branch is protected with required checks, after all this is a development
project repository and not a profile repository. We have a separate branch, samples,
that is protected, but does not have any required checks. The GITHUB_TOKEN
is sufficient to push to this branch.
Here is how you can do something similar if your profile repository has
required checks on its main branch. First, create a branch, perhaps called stats.
The special stats branch does not need to be kept up to date with main. In fact,
once you create the stats branch, you can delete everything from that branch (e.g.,
you'll notice that the samples branch of this repository only has an "images"
directory). Next, create or modify a workflow in your main (or default) branch
that checks out the dedicated stats branch (see the modified actions/checkout
step) as follows:
name: user-statistician

on:
  schedule:
    - cron: '0 3 * * *'
  workflow_dispatch:

jobs:
  stats:
    runs-on: ubuntu-latest

    steps:
    - uses: actions/checkout@v4
      with:
        ref: stats   # Or whatever you named your dedicated branch

    - name: Generate the user stats image
      uses: cicirello/user-statistician@v1
      env:
        GITHUB_TOKEN: ${{secrets.GITHUB_TOKEN}}
Since the image is now in a different branch than your README, you also need to modify the markdown used to insert the image into your profile README to refer explicitly to that branch as follows:
The relative link in the example above is relative to the branch
of the README that the viewer is viewing, so we can go up one level
with .. and then into the branch where our SVG resides.
A version that links the image to this repository so that others know how you generated it is as follows:
[](https://github.com/cicirello/user-statistician)The statistics displayed in the image are organized into categories. The stats
card can be customized to hide either individual statistics, or entire categories
if desired. Details of each category follows. Note that the "Key" is what you need if
you are using the hide-keys input to either hide individual statistics or
entire categories (see the Inputs section).
The key to hide this entire category is: general. The statistics include the
following.
| Key | Statistic | Details |
|---|---|---|
joined |
Year Joined | the year user joined GitHub |
featured |
Featured repository | user optionally selects this with an input |
mostStarred |
Most starred repository | name of repo |
mostForked |
Most forked repository | name of repo |
followers |
Followers | simple count |
following |
Following | simple count |
sponsors |
Sponsors | simple count |
sponsoring |
Sponsoring | simple count |
The Repositories category in the image includes two columns with data summarizing information about the public non-forks that you own, as well as all public repositories that you own, including forks.
The key to hide this entire category is: repositories.
The statistics include the following.
| Key | Statistic | Details |
|---|---|---|
public |
My Repositories | simple count |
starredBy |
Starred By | simple count |
forkedBy |
Forked By | simple count |
watchedBy |
Watched By | number watching your repositories |
templates |
Templates | number of your repositories that are templates |
archived |
Archived | number of your repositories that you have archived |
The Contributions category in the image includes two columns with data summarizing information about your contributions during the past year, as well as totals over all years. The contribution counts are as reported by the GitHub GraphQL API. For details of how GitHub counts contributions, see GitHub's documentation. The contribution data included is all public. This is true even of the "Private Contributions" entry on the stats image, as the "restrictedContributionsCount" returned from the query executed by the action will only be non-zero if you have opted in to sharing private contributions via GitHub's profile settings. You can also hide the "Private Contributions" entry (see the Inputs section) regardless of your GitHub settings, or any of the other entries. Each statistic will also auto-hide if the count is 0.
The key to hide this entire category is: contributions.
The contributions statistics in the image include the following.
| Key | Statistic | Details |
|---|---|---|
commits |
Commits | simple count |
issues |
Issues | simple count |
prs |
Pull Requests | simple count |
reviews |
Pull Request Reviews | simple count |
contribTo |
Contributed To | number of repositories owned by others that you have contributed to |
private |
Private Contributions | number of private contributions if you have shared them via your GitHub settings |
Note that due to limitations in the available data from the GitHub GraphQL API, the
"Total" column for contribTo on the generated SVG is deliberately blank.
Please note that GitHub's "restrictedContributionsCount" (which is your private contributions count) doesn't distinguish the type of contributions, so we cannot simply add these to the specific counts by type.
The key to hide the language distribution section of the card is: languages.
The default behavior of the language distribution chart is to explicitly list all languages that individually make up at least 1% of the code in your public repositories, with low percentage languages combined into an "Other". The language distribution chart is intended to be equivalent to the language charts that GitHub generates for each repository, but by combining all of the repositories that you own. The percentages are based on file sizes. You can also configure the number of languages to explicitly list (see the Inputs section).
Here are a few questions that we anticipate you might have:
Why file sizes? Well, that is what GitHub uses for the language charts within repositories, and that is the data that GitHub's API makes available to us.
Why are some of my languages missing? There are a variety of reasons that a language might not be represented. GitHub uses Linguist to detect the language of each file in your repositories. There are several reasons that it might exclude either individual files from the analysis, or entire languages. You can find the full list in Linguist's documentation. Among Linguist's default exclusions are languages classified as "data" and "prose", as well as generated code, vendored code, and documentation. Some languages that GitHub classifies as "data" are XML, JSON, GraphQL, among others. Markdown is among the languages classified as "prose". To see how GitHub has classified languages, look at Linguist's languages.yml.
Can I include languages that Linguist excludes? Yes, you can. GitHub's Linguist
enables you to configure Linguist on a per-repository basis
via a .gitattributes file. In fact, we've done this very thing on this repository
to tell Linguist to include GraphQL (e.g., see our .gitattributes).
Can I exclude files or languages that Linguist includes? Yes, you can. With this, again
see Linguist's override documentation. For example, Linguist
excludes documentation by default, but perhaps
you have documentation that is not in one of the paths that Linguist normally
treats as documentation. You can use your repository's .gitattributes file
to mark files or directories as documentation (likewise for vendored code, generated code,
etc). For an example of this, see the .gitattributes of one of our other repositories where we direct
Linguist to treat a directory as documentation.
Can I exclude entire repositories from the language stats? Yes, the action has an input for that. See Inputs section.
All inputs include default values, and are thus optional provided the defaults are relevant to your use-case.
The image-file input is the name of the file (including path relative to the
root of the repository) for the user statistics image that is generated
by the action. It defaults to image-file: images/userstats.svg. The action
will create any directories that don't already exist, as necessary. The image is
an svg.
The include-title controls whether or not the user statistics card
includes a title. It defaults to true. If you'd rather not have a
title in the image, then just pass include-title: false (actually, anything
other than true, case insensitive, will be treated as false).
If you include a title in the user statistics image, the default title is of the form "Your Name's GitHub Activity", where "Your Name" is the public name of the owner of the repository that is using the action. Although note that in the case where the API query returns a null name, then the fallback behavior is to use the user id in its place.
You can customize the title using the custom-title input. For example,
custom-title: Hello GitHub will set the title accordingly. Be aware that
the image width is fixed, and is not resized based on title length. Note that
if you pass a custom title with the custom-title input and also pass
include-title: false, then the conflicting input values will be resolved in
favor of the include-title: false.
This input controls the font size of the title. The default is small-title: false,
which is a font size of 18px (the font size of the rest of the text in the SVG is 14px).
The default should be a good choice in most cases. However, depending upon the
length of a custom title, or if you use the default title but have a long name, or if
your chosen locale leads to a lengthy title, then
you might consider using a smaller size for the title. If you pass
small-title: true, then it will decrease the font size of the title to 16px.
If you want to feature a repository in the General Stats and Info section, you can use this input to do so. For example, although the action includes the Most Starred and Most Forked repositories in that section by default, perhaps there is another repository that you are particularly proud of, or which you feel is a better representative of your overall work. The default is nothing featured since it is impossible to predict what you would want here. To use, just pass the name of the repository via this input. Note that the action doesn't attempt to validate whether this repository actually exists.
This input is the maximum number of languages to explicitly include in
the language distribution chart. The default is max-languages: auto, which
will explicitly show all languages that make up at least 1% of the code in your
public repositories (excluding forks). All other languages will be combined
into an "Other". You can also specify the number of languages explicitly.
For example, max-languages: 5 will explicitly include the 5 languages with the
highest percentages, and will then combine all other languages into an "Other".
Although if your repositories contain 5 or less languages, then "Other" will
not be listed. If you want to explicitly include all languages that occur
in your repositories, then just pass a high integer value, such as with
max-languages: 100.
This input is a list of repositories to exclude entirely from the language distribution chart. The default is an empty list. To exclude one or more directories from the language distribution chart, pass a comma or space separated list of the repository names. The following example will exclude repositories named "repo1" and "repo2":
    - name: Generate the user stats image
      uses: cicirello/user-statistician@v1
      with:
        language-repository-exclusions: repo1, repo2
      env:
        GITHUB_TOKEN: ${{secrets.GITHUB_TOKEN}}
If you have many repositories to exclude, you might consider specifying the list
with a multiline YAML string, such as the following example (the > is one of
YAML's ways to specify a multiline string):
    - name: Generate the user stats image
      uses: cicirello/user-statistician@v1
      with:
        language-repository-exclusions: >
          repo1
          repo2
          repo3
      env:
GITHUB_TOKEN: ${{secrets.GITHUB_TOKEN}}This input can be used to enable animation of the languages pie chart.
This feature is disabled by default. You can enable it with: animated-language-chart: true.
If enabled, the pie chart will rotate continuously.
If you enable the language chart animation using the animated-language-chart input,
then you can control the speed of the animation with the language-animation-speed
input. The default is a full rotation in 10 seconds. Perhaps you want
a slower rotation, such as 20 seconds, then you can pass: language-animation-speed: 20.
Or perhaps you want a faster rotation, such as 5 seconds,
then you can pass: language-animation-speed: 5. The input must be an integer.
This input control whether an icon is displayed in the top left and top right corners
surrounding the title. It also controls which icon is displayed. First, if you
disable the title altogether with include-title: false (see earlier), that also
disables the icon, regardless of how you set top-icon. The options for this input
include default, none, or one of the named icons in the following table. The
default is top-icon: default (explained in table below).
top-icon |
meaning |
|---|---|
default |
Use theme-defined icon (see colors docs below) or GitHub Octocat if custom colors are used |
none |
Disables the icon altogether |
bat |
A bat, such as for use around Halloween |
github |
The GitHub Octocat, from Octicons |
pumpkin |
A pumpkin, such as for use around Halloween |
Setting top-icon to a named icon from the list above overrides whatever icon is
specified as the default by your chosen theme (see below).
The colors input enables you to either select from a set of
built-in color themes, or to define your own set of custom colors.
At the present time, there are nine built-in themes that are based
on GitHub's color palette and themes of the same names. If you want to
know the specific colors used in each of these,
see the source in src/Colors.py. Also see
the Example Workflows and Image Samples
section of this readme for a few samples.
The default is colors: light. You can change to a different color theme
by just passing its name (e.g., colors: dark). Here is a list of the
currently supported built-in themes, along with the default icon (see the documentation of top-icon above):
| Theme Name | Default top-icon |
Dark or Light? |
|---|---|---|
batty |
bat |
light |
dark |
github |
dark |
dark-colorblind |
github |
dark |
dark-dimmed |
github |
dark |
dark-high-contrast |
github |
dark |
dark-tritanopia |
github |
dark |
halloween |
pumpkin |
dark |
halloween-light |
pumpkin |
light |
light |
github |
light |
light-colorblind |
github |
light |
light-high-contrast |
github |
light |
light-tritanopia |
github |
light |
Note that at the present time a couple of these are identical. For example,
light, light-colorblind, and light-tritanopia are currently identical
because the part of GitHub's color palettes from which these themes derive
do not differ. They have been included as valid values for the colors input
to the action for consistency.
If you have a specific set of colors that you'd like to instead use, you
can pass a list of colors (space or comma separated). The list should include
at least 4 colors in the following order: background color, border color,
icon color, title color, and (optionally) text color. If only 4 colors are specified,
then all text will use the title color. If you pass more than 5 colors, the extras
are ignored. If you pass less than 4 colors, then the default light theme will
be used. Here is an example: colors: '#f6f8fa #c8e1ff #0366d6 #24292e #24292e'.
This example happens to be the light theme. Because # has special meaning to
YAML (it is used for comments), you must either put quotes around the input value
as shown in this example, or you can escape each # individually. The colors in this
list can be specified either with hex (as in the example above), or with any
named colors that are recognized by SVG, or some combination of the two. Here is an
example with named colors: colors: black yellow green white white. Notice that you
don't need quotes around the input if none of the colors are specified by hex.
The action does not do any validation of the colors that you pass. If you pass invalid color names or invalid hex color values, then the image generated will be incorrect. The color values that you specify are inserted verbatim into the appropriate places within the SVG.
This input is the radius of the border of the SVG. The default is border-radius: 6.
This input controls whether or not the SVG has a border. The default is true.
This input is used to set the minimum width of the SVG. The action
will auto-adjust the width as necessary based on the length of the
title, the length of the section headings, and names of languages in
the language distribution chart. This includes factoring in the specific
headings, labels, etc associated with the chosen locale. The
default, image-width: 0, directs the action to strictly base the width
of the SVG on its content. You only need to use this input if you desire
to set a fixed width that is larger.
The action automatically hides any statistics with a value of 0. For example,
if you have no pull requests, the action automatically will hide the pull requests
entry from the image rather than listing it as 0. Otherwise, all supported statistics
are shown by default. If you wish to hide any regardless of whether it has a value of 0,
then just pass a list of the "keys" corresponding to those you want to hide.
The list can be either space or comma separated.
If you want to hide an entire group, including the relevant column headings, then you
can pass the "key" for the category itself. Alternatively, if you
list all of the keys for the elements
of that group, then the entire group, including column headings, will be hidden.
For example, hide-keys: followers following sponsors sponsoring private will hide
the "Followers", "Following", "Sponsors", and "Sponsoring" counts from
the "General Stats and Info" section, and thus will also eliminate the column
headings for that entire section, and this will
also hide the "Private Contributions" item from the "Contributions" section.
Another way of accomplishing the same thing is to use the "key" for the category
such as: hide-keys: general private.
See earlier in the section The Stats for the keys needed for this input. The keys are case sensitive.
This input enables customizing the order of the stats categories on the card.
The categories are indicated by their keys, just like in the hide-keys input.
The default is: category-order: general, repositories, contributions, languages.
You can change the order by passing the list in a different order. For example,
perhaps you want the language chart right after the repositories stats section.
You can do that with: category-order: general, repositories, languages, contributions.
This input provides another way of controlling which sections appear on the
card. For example, if all you want are the repositories stats and the languages
chart, you can do that
with: category-order: repositories, languages without using the hide-keys
input. These two inputs also work in combination. If you use hide-keys
to hide a category that you include in the category-order input, that category
will be hidden despite being in the category-order.
This input is an ISO 639-1 (two character) or ISO 639-2 (three character) language code for the
language used in names of statistics, section and column headings, and default title on the user
stats card. The default is locale: en, which is English. If an unsupported locale is passed, then the
action will use the default of "en". The following locales are currently supported:
| locale code | language |
|---|---|
| hy | Armenian |
| id | Bahasa Indonesia |
| bn | Bengali |
| nl | Dutch |
| en | English |
| fi | Finnish |
| fr | French |
| de | German |
| hi | Hindi |
| hu | Hungarian |
| it | Italian |
| ja | Japanese |
| ko | Korean |
| lt | Lithuanian |
| ml | Malayalam |
| no | Norwegian |
| or | Odia |
| fa | Persian |
| pl | Polish |
| pt | Portuguese |
| ro | Romanian |
| ru | Russian |
| sat | Santali |
| sr | Serbian |
| es | Spanish |
| sv | Swedish |
| tl | Tagalog |
| th | Thai |
| tr | Turkish |
| uk | Ukrainian |
If you are interested in contributing a new locale, see the section Contributing a Translation for detailed instructions for doing so.
This input enables you to control what happens if the action fails for some reason (e.g., error communicating with the GitHub GraphQL API, etc). Note that in all of our testing so far, this has not happened yet. But as software developers, we all know that anything that can go wrong, will go wrong eventually.
The default is fail-on-error: true, which means that if
an error occurs it will cause the workflow to fail. The rationale
for this default is that the failed workflow will lead to a
GitHub notification so that you know something went wrong.
If you'd rather just let it quietly fail, to most likely correct
itself during the next run, then pass fail-on-error: false
(actually anything other than true will be treated as false).
The commit-and-push input controls whether the action commits
and pushes the generated image upon creation. It defaults to
commit-and-push: true. If the user stats image has changed since
last commit, then as long as you are not running this in a detached
head state (such as on a pull request event), the action will commit
and push the new user stats image. If you are in a detached head
state, such as if you were to run this during a pull request
(not sure why you would), then the action will simply and quietly
skip the commit/push without issuing an error.
If your branch is protected with either required reviews or required
checks, then the push will fail with an error. Whether this also
fails your workflow depends on how you have set
the fail-on-error input. See the earlier discussion for what you
can do if you wish to use the action in a repository with
that has configured required reviews or required checks:
Protected branches with required checks.
The author of the commit is set to the github-actions bot.
The commit-message input enables customizing the commit message. The
default is commit-message: 'Automated change by https://github.com/cicirello/user-statistician'.
The action has only the following action output variable.
If the input fail-on-error is set to false, then in addition to
quietly failing (i.e., not failing the workflow run), the output exit-code
will be set to a non-zero exit code that may be useful in debugging the
issue. If the input fail-on-error is set to true (the default), your
workflow run won't have the opportunity to check the exit-code output.
However, the exit-code and a descriptive error message will still be
logged in the workflow output. In either case, if you believe that the
failure is a bug, please include this in any bug reports.
The workflow here shows all possible inputs, with their default
values, and also shows how to access the action's exit-code
output if desired.
name: user-statistician

on:
  schedule:
    - cron: '0 3 * * *'
  workflow_dispatch:

jobs:
  stats:
    runs-on: ubuntu-latest

    steps:
    - uses: actions/checkout@v4

    - name: Generate the user stats image
      id: statsStep # Only needed if you want to check the exit-code
      uses: cicirello/user-statistician@v1
      with:
        image-file: images/userstats.svg
        include-title: true
        custom-title: '' # Defaults to title pattern described earlier
        small-title: false
        featured-repository: '' # Defaults to nothing featured
        max-languages: auto
        language-repository-exclusions: '' # None excluded
        animated-language-chart: false
        language-animation-speed: 10
        top-icon: default
        colors: light
        border-radius: 6
        show-border: true
        image-width: 0
        hide-keys: '' # None hidden
        category-order: general, repositories, contributions, languages
        locale: en
        fail-on-error: true
        commit-and-push: true
        commit-message: 'Automated change by https://github.com/cicirello/user-statistician'
      env:
        GITHUB_TOKEN: ${{secrets.GITHUB_TOKEN}}

    - name: Check exit code if desired
      run: |
        # Note that if you set fail-on-error to true, you'll
        # never actually get here if an error occurs. But if you
        # set fail-on-error to false, then instead of failing the
        # workflow, the action will output the exit code that would
        # have failed the workflow and you can check it here.
echo "exitCode = ${{ steps.statsStep.outputs.exit-code }}"The user-statistician action uses the following:
- Python (implemented almost entirely in Python);
- The cicirello/pyaction Docker container image, which includes the GitHub CLI installed on a python:3-slim base image (see pyaction's GitHub repository);
- The GitHub CLI;
- GitHub GraphQL API;
- GitHub Octicons for the icons in the stats image;
- JSON for managing the various language translations; and
- We started with our template repository for GitHub Actions implemented in Python: cicirello/python-github-action-template.
Here is a selection of DEV.to blog posts about the user-statistician:
- Hacktoberfest 2023 Contributors Wanted: Additional Translations for the user-statistician GitHub Action, posted on DEV on September 30, 2023.
- Hacktoberfest Progress Update: Translation Contributions Still Welcome, posted on DEV on October 12, 2022.
- Hacktoberfest Language Translation Contributors Wanted for the user-statistician GitHub Action, posted on DEV on September 30, 2022.
- Halloween Themes for the user-statistician GitHub Action, posted on DEV on September 28, 2022.
- Configuring GitHub's Linguist to Improve Repository Language Reporting, posted on DEV on August 31, 2022.
- The user-statistician GitHub Action mentioned in Awesome-README, posted on DEV on August 25, 2022.
- Progress and Lessons Learned Internationalizing the user-statistician GitHub Action, posted on DEV on October 13, 2021.
- Hacktoberfest Participants Help Us Internationalize the user-statistician GitHub Action, posted on DEV on September 29, 2021.
- Generate a GitHub stats SVG for your GitHub Profile README in GitHub Actions, posted on DEV on July 29, 2021.
You can support the project in a number of ways:
- Starring: If you find the
user-statisticianaction useful, consider starring the repository. - Linking or Sharing: If you use it to generate an SVG for your GitHub Profile README, consider either linking the image back to this repository, or otherwise sharing how you generated the stats SVG.
- Reporting Issues: If you find a bug or have a suggestion for a new feature, please report it via the Issue tracker.
- Contributing Code: If there is an open issue that you think you can help with, submit a pull request.
- Sponsoring: You can also consider becoming a sponsor.
If you would like to contribute to the project, please start by reading our Contributing Guidelines and our Code of Conduct. After reading the contributing guidelines and code of conduct, fork the repository, create a feature branch in your fork, make your changes, and submit a pull request. Please note that every pull request must be associated with an issue that it addresses. If there is a change that you would like to propose that doesn't already have an issue, please submit an issue first.
The most common type of contribution to this project has been language translations. Here is step-by-step guidance on how to contribute a translation.
- Is there an open issue for the language you want to contribute? If so, and if nobody is assigned to it, comment on the issue expressing interest, and I will assign you to it (e.g., so we don't have multiple people working on the same thing). If there isn't an open issue for it, then submit an issue for a feature request for the language. Then comment on your new issue indicating if you are interested in contributing the translation (e.g., so I know the difference between just a request for a language vs a request with offer to contribute it). I'll then assign you to it.
- Fork the repository, and create a branch in your fork for your proposed translation.
- Find the ISO 639-1 two-character language
code for the language. Some
languages have both a two-character code and a three-character code in the table at that link.
In those cases, we are going with the two-character code. But there are some languages that
only have a three-character ISO-639-2 code, and in those cases we'll use the three-character
code. For example, one of the currently supported languages is Santali, whose code is
sat. - In the src/StatConfig.py file, look for the set
supportedLocalesand add a string for the locale code alphabetically. - Next, within the directory src/locales, create a JSON file named with the locale
code (in all lowercase) and file extension
.json. For example, the English version is inen.json. You might consider starting with a copy of the file for a different language that you also know, and then editing the various strings. - Don't change any of the key fields, since those are used internally.
- Translate the
"titleTemplate", the first mapping you see in each of the JSON files. The{0}that you see in a title template string is a placeholder for where the user's name will go. The"titleTemplate"is required to have that someplace, or else the test cases will fail. - Translate the
"categoryLabels", which are the headings of each of the sections of the SVG, as well as the column headings within those sections. The categories that don't have columns should just havenullfor the column headings as you will see in any of the existing JSON files. - Translate the
"statLabels", which are the labels for each individual statistic on the SVG. - Run the unit tests locally. The test cases will verify that there are strings associated with
all required keys for all locale codes, although they obviously won't verify that the translations
are correct. To run the unit tests locally, from the root of the repository,
execute:
python -B -m unittest tests/tests.py. Note that for the tests to include your locale, as well as for the Action itself to include your locale, the code for it must be in thesupportedLocalesset within src/StatConfig.py. See the earlier step on this. - Despite what the pull request template indicates, you do not need to update the README to document the new locale code. We'll do that later at the time a new release is made that includes your new locale. The reason not to document it at the time of your PR is that all changes to the README from the default branch go live immediately on GitHub's Marketplace, which may confuse users into believing the new locale is available before it actually is.
This GitHub action is licensed under the MIT License. If you contribute to the project, you agree that your contributions are likewise licensed through the MIT License.