This subdirectory holds the source code for our CRM.
Our product can be deployed either to Heroku or any other host.
The product is created using the MERN tech stack, hence the following libraries are used:
- React w/ FluentUI component library
- Express
- Node.js
- NPM
Typescript is the primary development language, and the application is compiled with webpack. To begin developing, run npm i in the root directory.
-
Head over to https://www.mongodb.com/atlas/database
-
Login to Mongodb Atlas by clicking the sign in button(hilighted in red)
2.1 Or, create a new account by clicking the try free button(hilighted in blue). Please note that logging in with google account is also available.

- The webpage will be redirected to the home page after signed in
- Click on the "Build a Database" button in the middle of the home page, or at the top right of the home page if at least 1 server is existed in the account

- Choose the prefered database plan, server provide, and the server location
- Setup the server name in the cloud provider selection page

- Wait 1-3 minutes while the server is being created

- Click the "connect" button after the database is generated

-
add a connection IP address:
9.1 click on the "Add Current IP address" button if the application is going to be hosted by the current device
9.2 if the application is going to be hosted by the other device, click on the "Add a Different IP address" and fill in the host device's IP address
-
Create a database user if not existed, then proceed onward by clicking "Choose a connection method"

- Click on the "Connect your application" button

-
make sure the driver is "Node.js" version "4.0 or later"
-
copy and note down the connection string. Please note that the connection string should start with username:password(created in [10]).
13.1 eg. if the user name is "Test" and the password is "12345" then the connection string should start with mongodb+srv://Test1:12345@....

this connection string is required to deploy the application
- Log into Heroku and create an app for the deployment.

- Navigate to the settings page to add Config Vars.
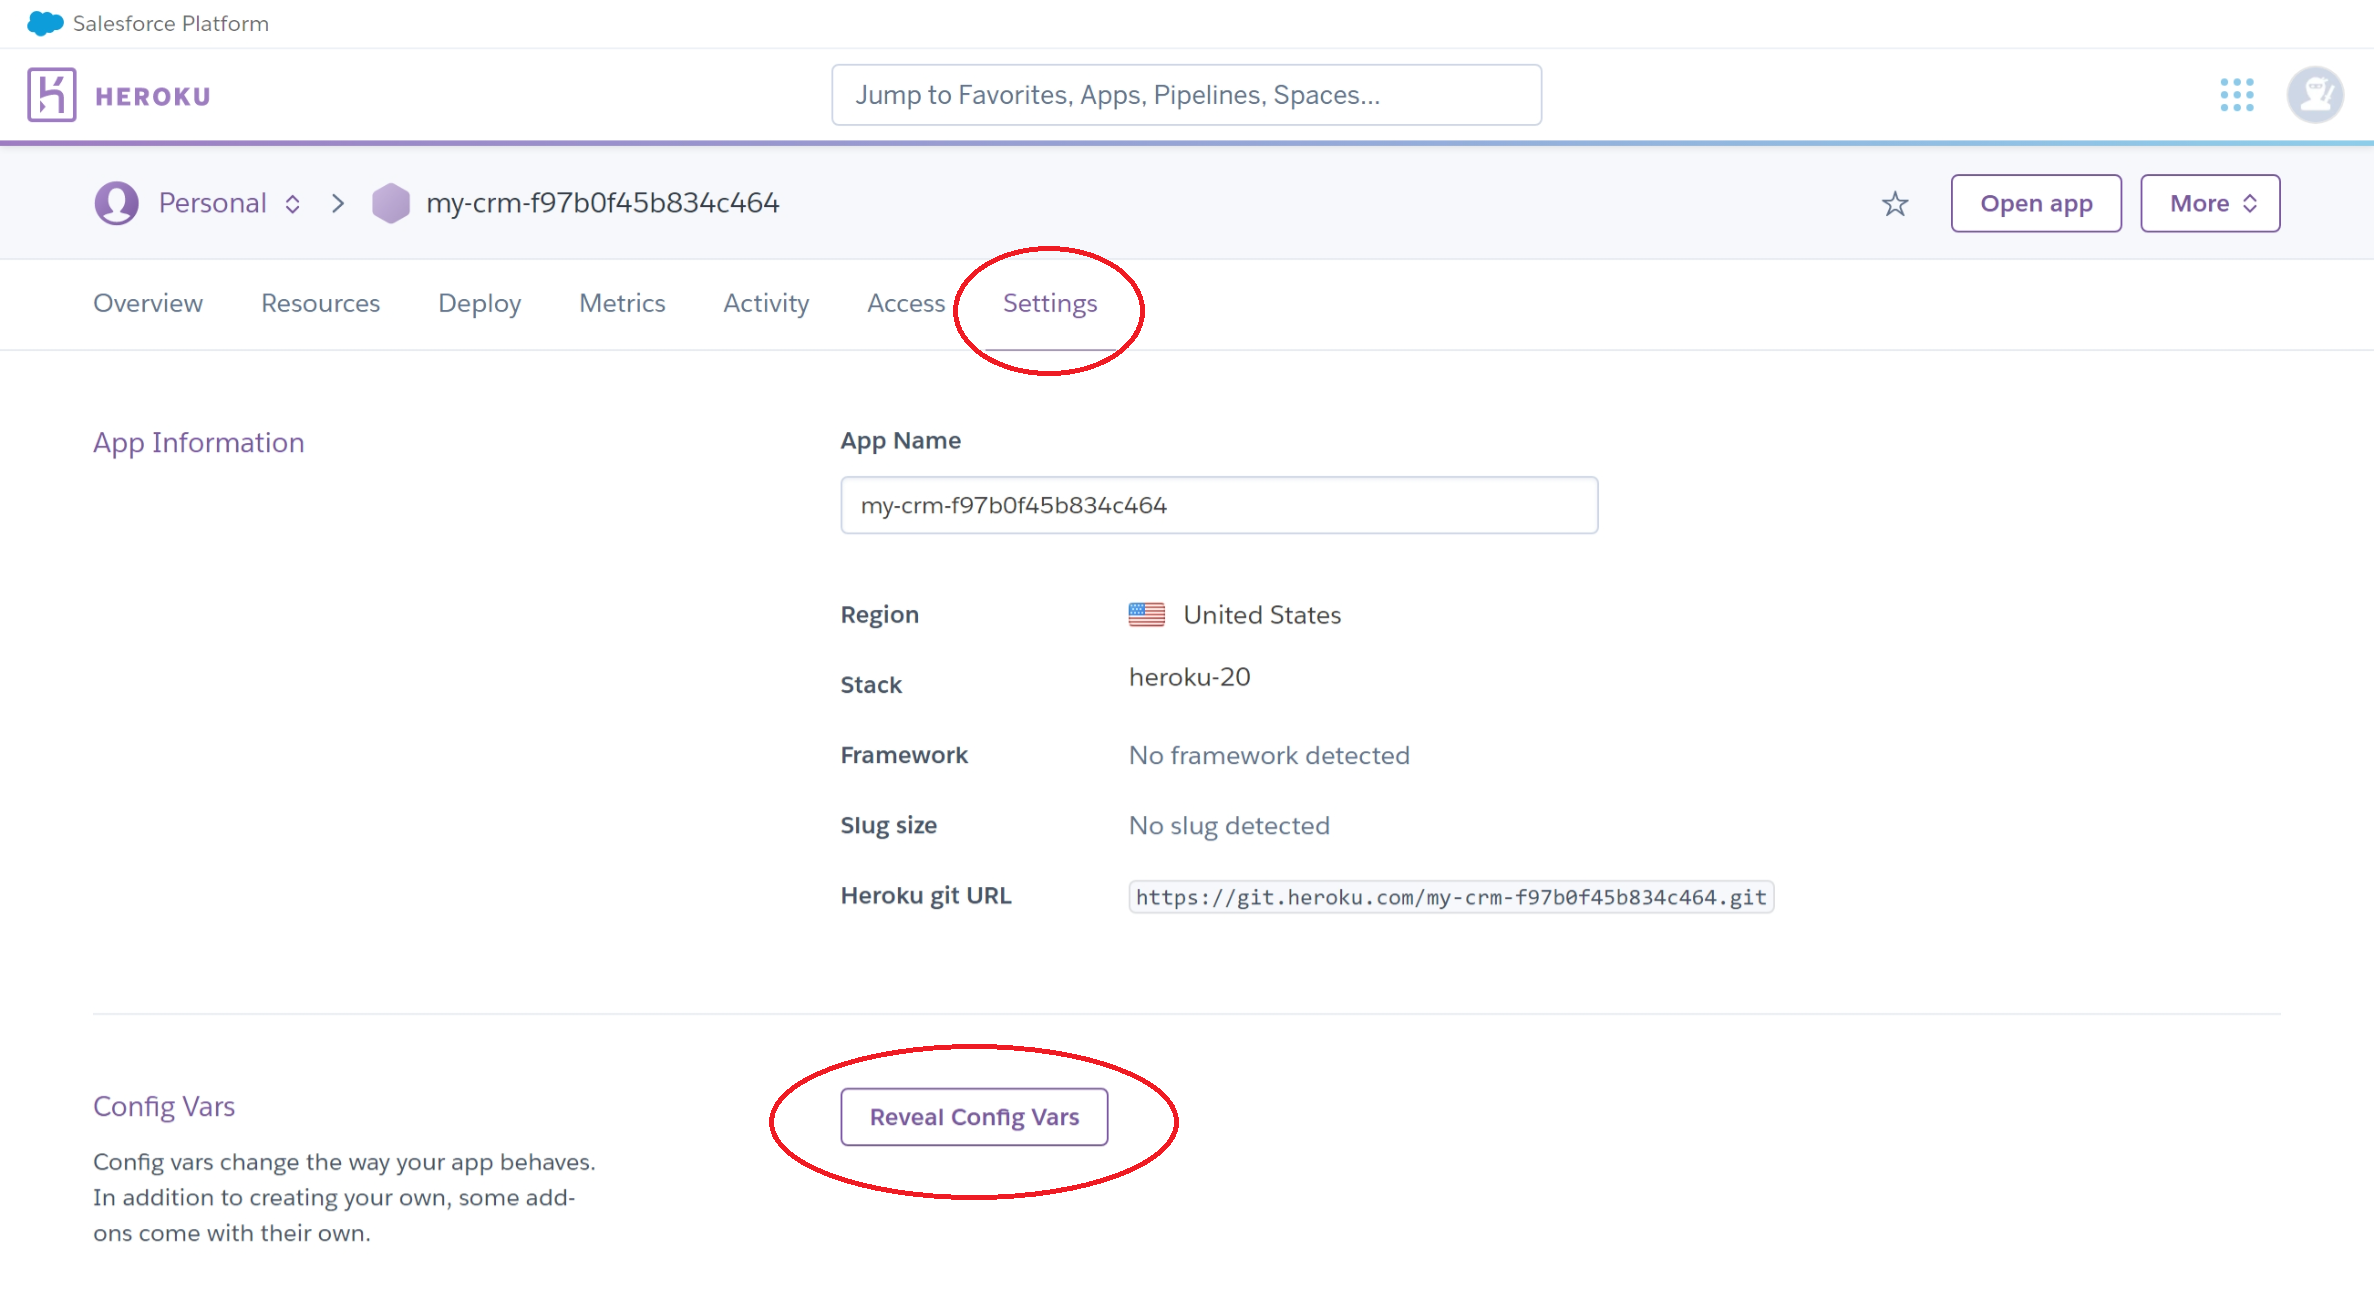
- The following Config Vars are required:


| Key | Value meaning |
|---|---|
DB_STRING |
The MongoDB connection string to your database. |
SECRET_KEY |
Our server uses AES-256 to encrypt user session tokens, so it requires a 32-byte secret key to function. The server process expects the key to be encoded in Base64. You can easily generate a key by running crypto.randomBytes(32).toString('base64') in Node.js. |
 4. Finally clone our source code repository and choose a deployment method most appropriate for you to push to Heroku. The existing Procfile will automatically use the Config Vars added earlier to configure the server.

- Clone the repository
git clone https://github.com/chomosuke/IT-PROJECT-PorkBellyPro.git cd IT-PROJECT-PorkBellyPro - Install dependencies
npm install - Build monorepo
npm run build
First choose a secret key to be used with encryption on the server.
The server uses the AES256 encryption algorithm so the key must be 32 bytes long.
Use the -s or --secret command line argument to provide the key in base64 encoding.
One easy way to obtain a secret key is using Node's own crypto API to generate one:
crypto.randomBytes(32).toString('base64');
- With default port 80
npm start -- -s <secret> -c mongodb://... - With a specific port
npm start -- -s <secret> -c mongodb://... -p <port>
This codebase has a linter set up to automatically run upon Git commit. If your code fails to commit and you see a line like
npm ERR! Lifecycle script `lint:nofix` failed with error:
in your console, this means the linter spotted code style errors. Fix them before committing your changes. Small errors may be automatically fixable with
npm run lint
so try that first.