| page_type | description | name | languages | products | urlFragment | |||
|---|---|---|---|---|---|---|---|---|
sample |
A sample mobile application written in React-Native to connect BLE (Bluetooth Low-Energy) medical devices to Azure IoT Central. |
IoT Central CPM |
|
|
iotc-cpm-sample |
Continuous Patient Monitoring Sample
A sample application written in React-Native to connect BLE (Bluetooth Low-Energy) devices to Azure IoT Central.
Android
iOS
What is this?
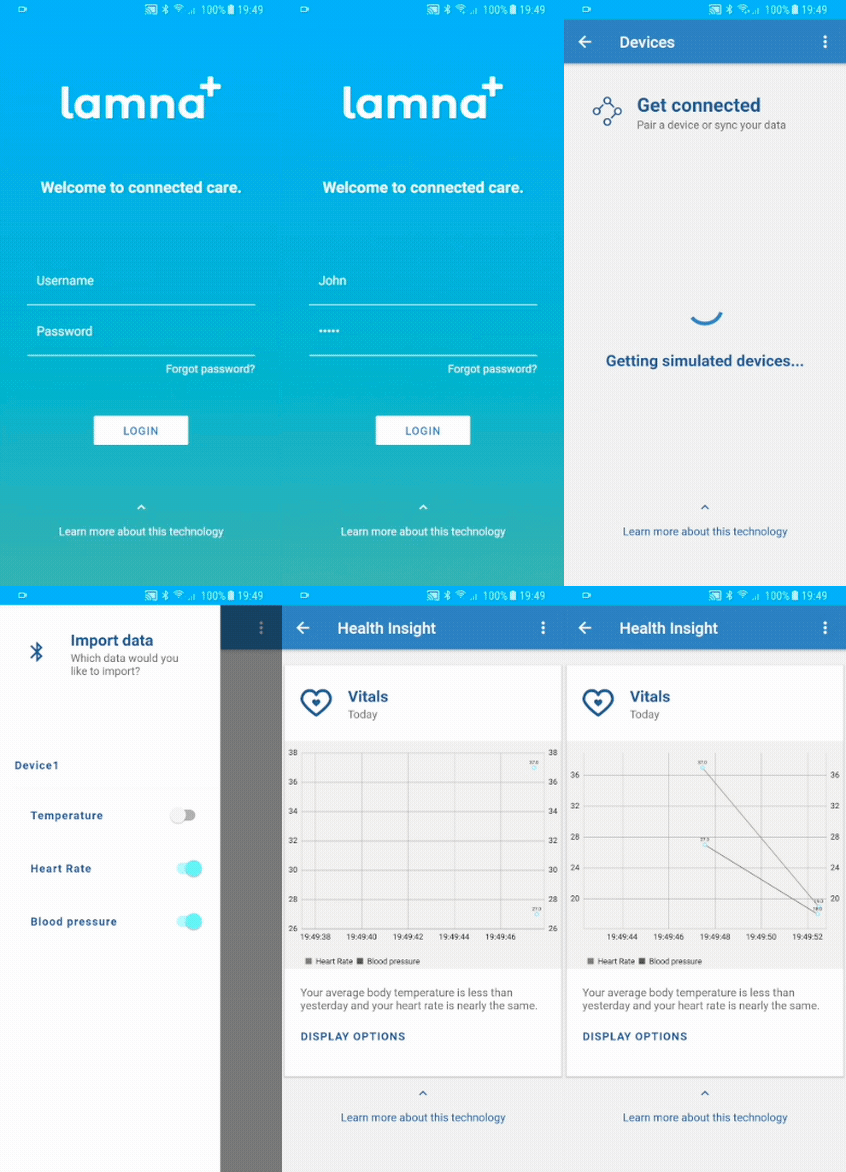
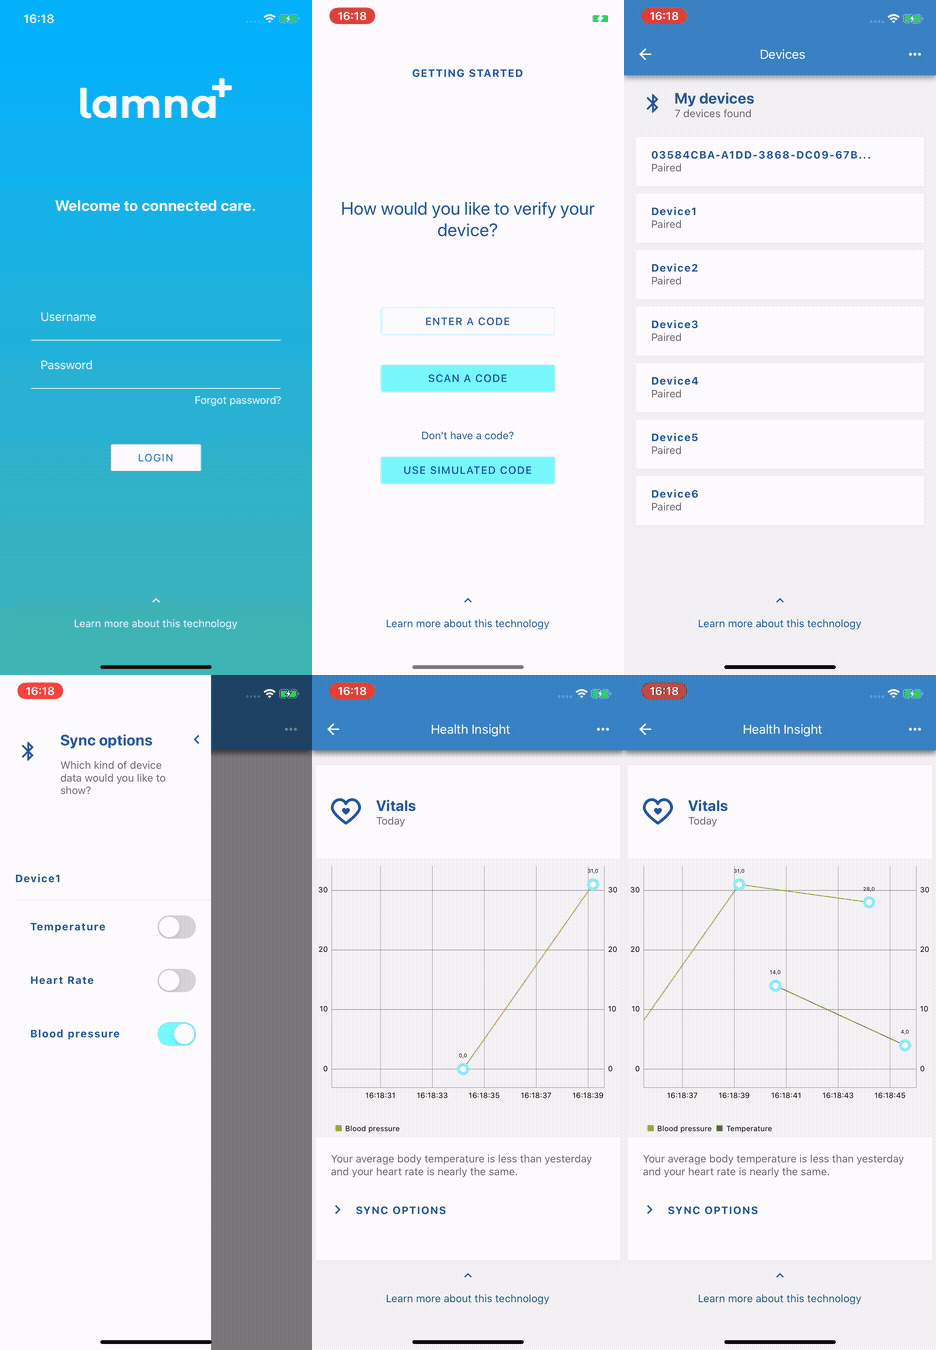
In Continuous Patient Monitoring (CPM) scenarios, most medical wearable devices are Bluetooth Low Energy (BLE) devices, which means they need a gateway in order to connect and send data to IoT Central. This phone app can act as that gateway, and would be used by a patient who has no access to or knowledge of Azure IoT Central.
| Android | iOS |
|---|---|
 |
 |
Features
The main features of the app are:
- Scan a QR code or a numeric code given to the patient by the provider, which contains the necessary credentials to provision their device into IoT Central (or use simulated mode that prevent sending data to Central)
- Scan for nearby BLE devices (or use simulated)
- Connect to a BLE device.
- Read value of selected telemetry items and show them on a line chart while sending to IoTCentral
Build and Run
The application is available for both Android and iOS. It can be run on emulators as well (Android Studio or Xcode required). The "simulated" options appearing during the application flow can be used to simulate the full experience since camera and bluetooth are not available in these environments.
See Running with simulation to get more details on the simulation feature.
Required tools
See React Native Getting Started and click on React Native CLI Quickstart for more detailed instructions. "Installing dependencies" is the section that explains developer setup. If you are developing on Windows for Android you will need:
- Node.JS (10+)
- Java SE Development Kit (JDK 8+)
- Python 2.7+/3.7+
- Android Studio
- React Native command line interface
- Yarn (optional)
To set up a real device for development, follow the instructions for device setup here.
Installation
git clone https://github.com/lucadruda/cpm-poc

cd cpm-poc

yarn install ( or 'npm install' if using npm)
Quickly run on device/simulator
This sample is ready to run to quickly have a demonstration of its features without any customizations. However some tweaks may be required to read data from particular devices (see Data Format).
From the Command Line
From the root folder, run yarn run android or yarn run ios.
NOTE: Application can also run directly with
react-nativecli commands.
From VSCode
- Install the React Native tools in Visual Studio Code.
- In the Debug section of VSCode, add a configuration for React Native: Debug Android or Debug iOS. You can also attach to a running metro packager by adding the relative configuration to launch.json
- Start Debug
Getting started
- Login with username and password. Login is just simulated and it's not doing any credentials processing. Use an easy password as it will be needed when generating credentials codes. (see Generate Credentials)
- Generate a QR Code or a numeric code for an IoT Central device using the credentials portal.
- Scan the obtained QR Code or insert the numeric code.
- Select operation (scan BLE devices, Google Fit or Apple Health).
- Data is available in the chart. Items can be enabled or disabled through the sync option menu. (see Insight docs)
More details available in the walkthrough documentation. (see Walkthrough)
Data Format
By default, the application only converts raw data to standard integers or floating point number using usual conversion from bytes.
e.g. Device sends 1 byte with value 0x32. This will result in a telemetry item with value 50.
However some manufacturers have custom data encoding mainly to include extra information when targeting propertary platforms.
e.g. Device sends 3 byte for an integer. The first 2 bytes represent a timestamp and the 3rd one is the real value.
More details and implementations suggestion here
Disable health providers
By default application car read data from health providers APIs (Google Fit for Android and Apple Health Kit for iOS).
If you want to disable this option, create (or update if it exists) a file called "env.json" under project root folder and restart metro packager (yarn run ...).
Create a release build
The application depends on native APIs and needs some changes in order to generate a production build to be released on stores. You can disable those services through configuration or follow below instructions for the available platforms:
Android
The Android version can read data from Google Fitness API. In order for your app to communicate properly with the Google Fitness API you need to enable Google Fit API in your Google API Console. Also you need to generate new client ID for your app and provide both debug and release SHA keys. Another step is to configure the consent screen, etc.
More detailed info available at https://developers.google.com/fit/android/get-api-key
1. In order for the library to work correctly, you'll need following SDK setups:

   Android Support Repository
   Android Support Library
   Google Play services
   Google Repository
   Google Play APK Expansion Library

2. In order for your app to communicate properly with the Google Fitness API,
   you need to provide the SHA1 sum of the certificate used for signing your
   application to Google. This will enable the GoogleFit plugin to communicate
   with the Fit application in each smartphone where the application is installed.
   https://developers.google.com/fit/android/get-api-key
iOS
The HealthKit entitlement is required and must be available in the provisioning profile to use when signing the release build.
The capability is enabled by default. If you want to disable Health Kit feature, first set "AppleHealth" flag to false in .env.json and then turn off the capability from application options in XCode:
Connect to Azure IoT Central
When not running in simulated mode, the mobile application connects to an Azure IoT Central application and sends telemetry message to specific device. After login you can choose to authenticate through a QR Code or a numeric code.
Connection to Azure IoT Central is implemented through the react-native-azure-iotcentral-client library.
Simulated devices available in this sample map to device models in the IoT Central Continous Patient Monitoring (CPM) template. CPM applications can be created from the IoT Central home page or directly from https://apps.azureiotcentral.com/build/new/continuous-patient-monitoring
If you need to define your own custom model read basic instructions at https://docs.microsoft.com/en-us/azure/iot-central/core/howto-set-up-template, and follow details below for preparing a compatible model.
Prepare a device model
A compatible device model must be created in the Azure IoT Central application in order to see real devices data in the dashboards. For each bluetooth item, the telemetry Id to use in model has the following syntax:
ble<ITEM_ID>
where ITEM_ID is the UUID of the bluetooth characteristic to read. It can't contain hyphens (-)or periods (.) The app code automatically "normalize" the UUID.
e.g.
UUID="00002A35-0000-1000-8000-00805f9b34fb"
IOTC_FIELD="ble00002A3500001000800000805f9b34fb"
A sample model definition is available here. You can directly import it into the IoT Central application and run with simulated BLE devices or use it as a reference.
Sample model definitions for AppleHealth and Google Fit are also available for testing purposes. These only includes items directly available on phone (e.g. steps) and not ones captured from external wearable devices like heart rate or blood pressure.
Generate credentials
User can generate both a QR Code and a numeric code to be used for connecting to IoT Central. Just go to http://cpm-cred-server.azurewebsites.net and generate codes by inserting IoT Central data in the form. The encryption key must be the equal to the password specified during login into the mobile app since it is used to secure QR Code data.
More details here.
Troubleshooting
If seeing issues with various NPM packages, often deleting the node_modules and rebuilding will fix the issue.
If running from VSCode and seeing error "Error while executing command 'react-native.cmd run-android --no-packager' (error code 101)", stop the current instance using button on the bottom bar (see image below) or killing adb and nodejs processes (from taskmanager or equivalent) and start debug again.
License
This samples is licensed with the MIT license. For more information, see LICENSE

