Red Hat Decision Manager Quick Loan Bank Demo
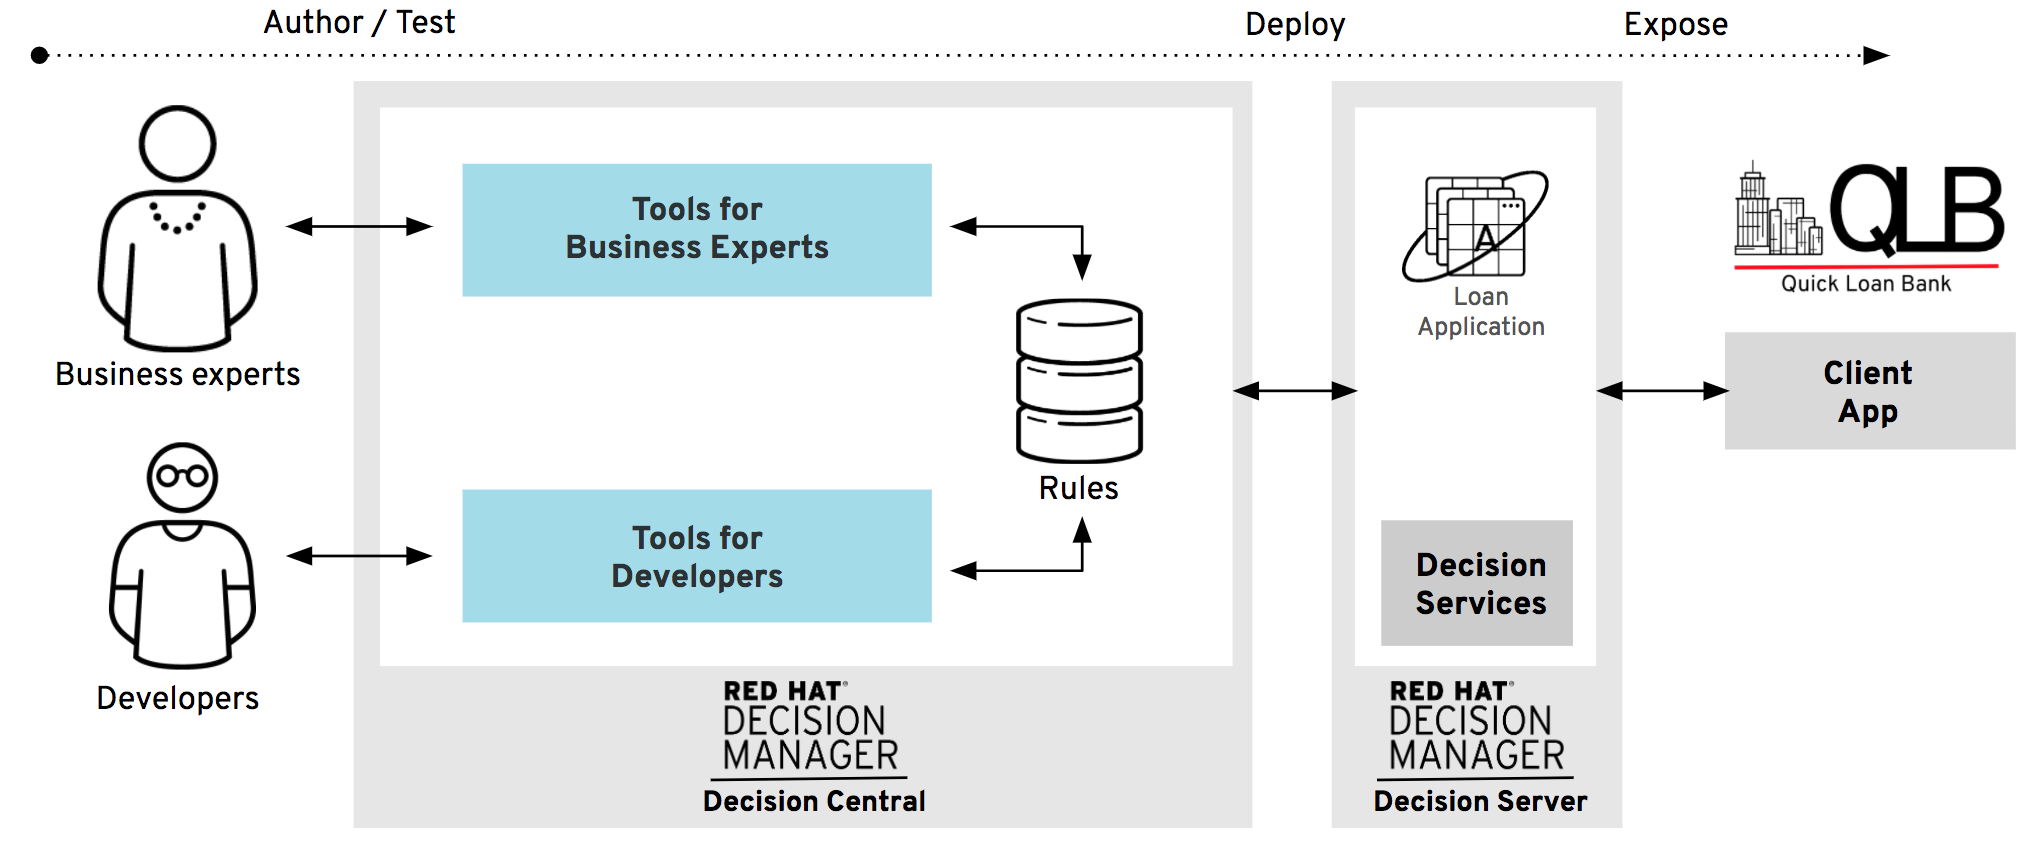
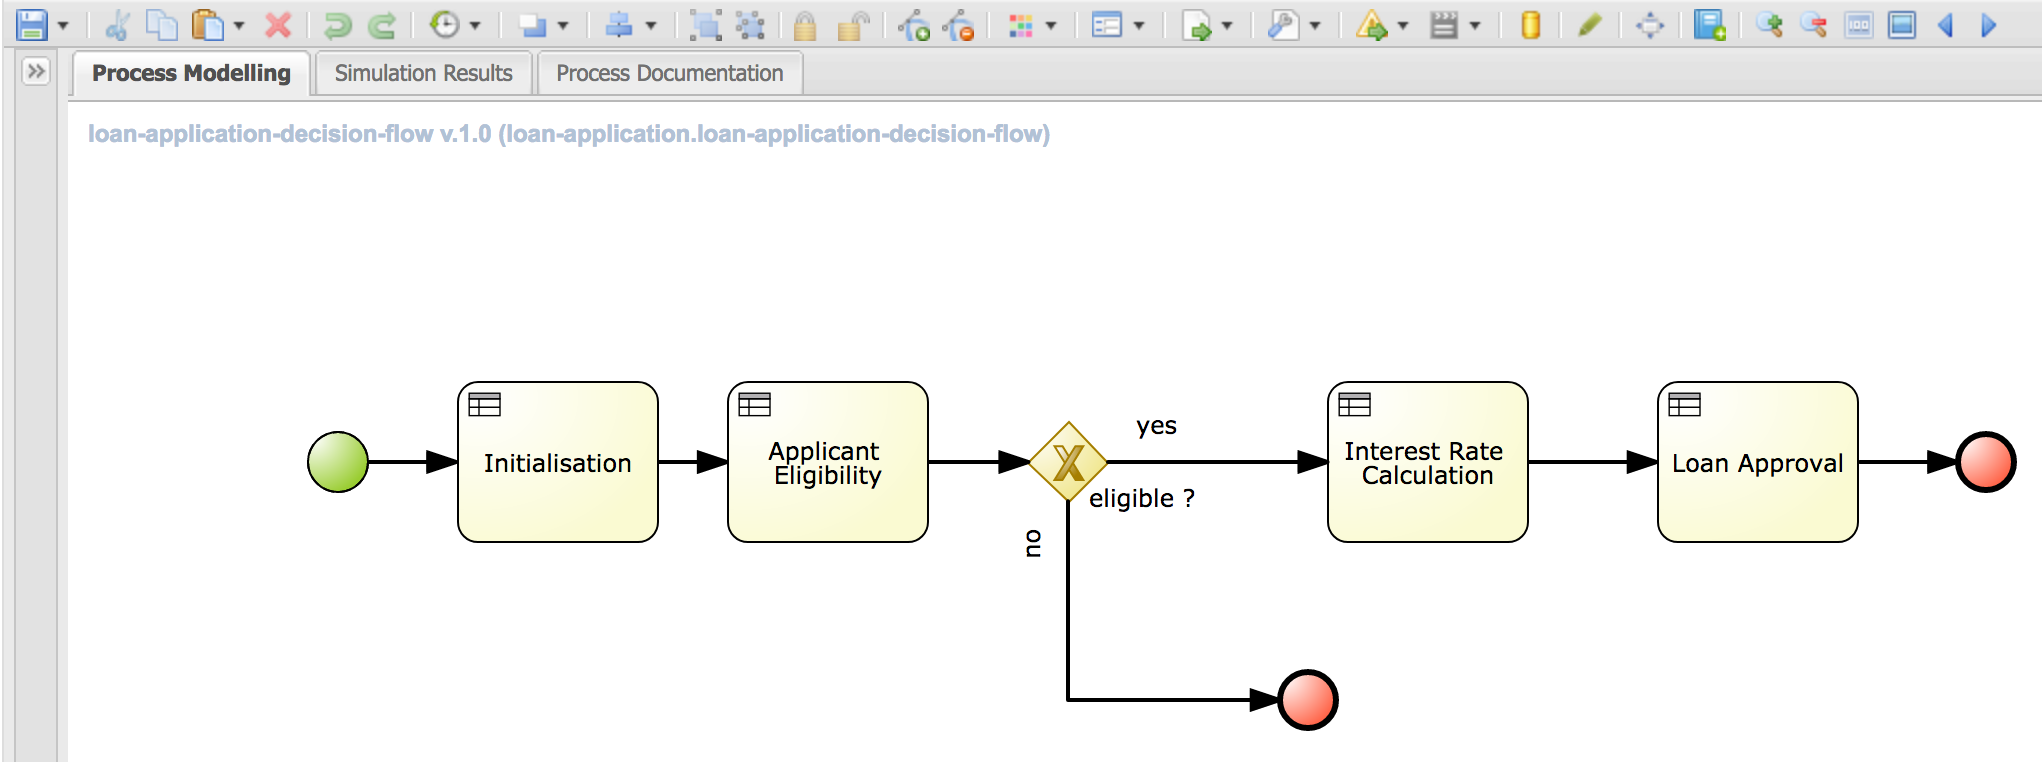
This demo project showcases the different rule authoring languages and tools available in Red Hat Decision Manager 7 to implement complex decision logic which can be exposed as a Decision Service. The Quick Loan Bank in this demo uses DRL rules, Decision Tables, Guided Rules with a Domain Specific Language and Excel Decision Tables to define its Loan calculation and approval system.
You will be given examples of calling the rules as if using them from an application through the REST API that is exposed by the server. Furthermore, this demo provides a NodeJS client application written in AngularJS and PatternFly that showcases how web applications can consume decision services deployed on the Decision Server.
A full walkthrough of this demo on an OpenShift environment is provided here.
There are three options for you to install this project: local, OpenShift and Docker.
Software
The following software is required to install and run this demo on your local machine or in Docker:
- JBoss EAP 7.1 zip
- Red Hat Decision Manager: Decision Central 7.1.0 deployable for EE7
- Red Hat Decision Manager: KIE-Server 7.1.0 deployable for EE7
- npm: The package manager of the Node JavaScript platform. Depending on your operating system, there are different ways to install nodejs (which includes npm), for example:
- Linux: use your platform's package manager to install 'nodejs'
- macOS: use brew to install 'nodejs', or use the macOS nodejs installer
- Windows: use the NodeJS installer to install 'npm'
- 7-Zip (Windows only): to overcome the Windows 260 character path length limit, we need 7-Zip to unzip the Decision Manager deployable.
Option 1 - Install on your machine
-
Add the product ZIP files to the installs directory.
-
Run the
init.sh(Linux/macOS) orinit.ps1(Windows) file. -
Start Red Hat Decision Manager by running
./target/jboss-eap-7.1/bin/standalone.sh(Linux/macOS) or.\target\jboss-eap-7.1\bin\standalone.ps1(Windows). -
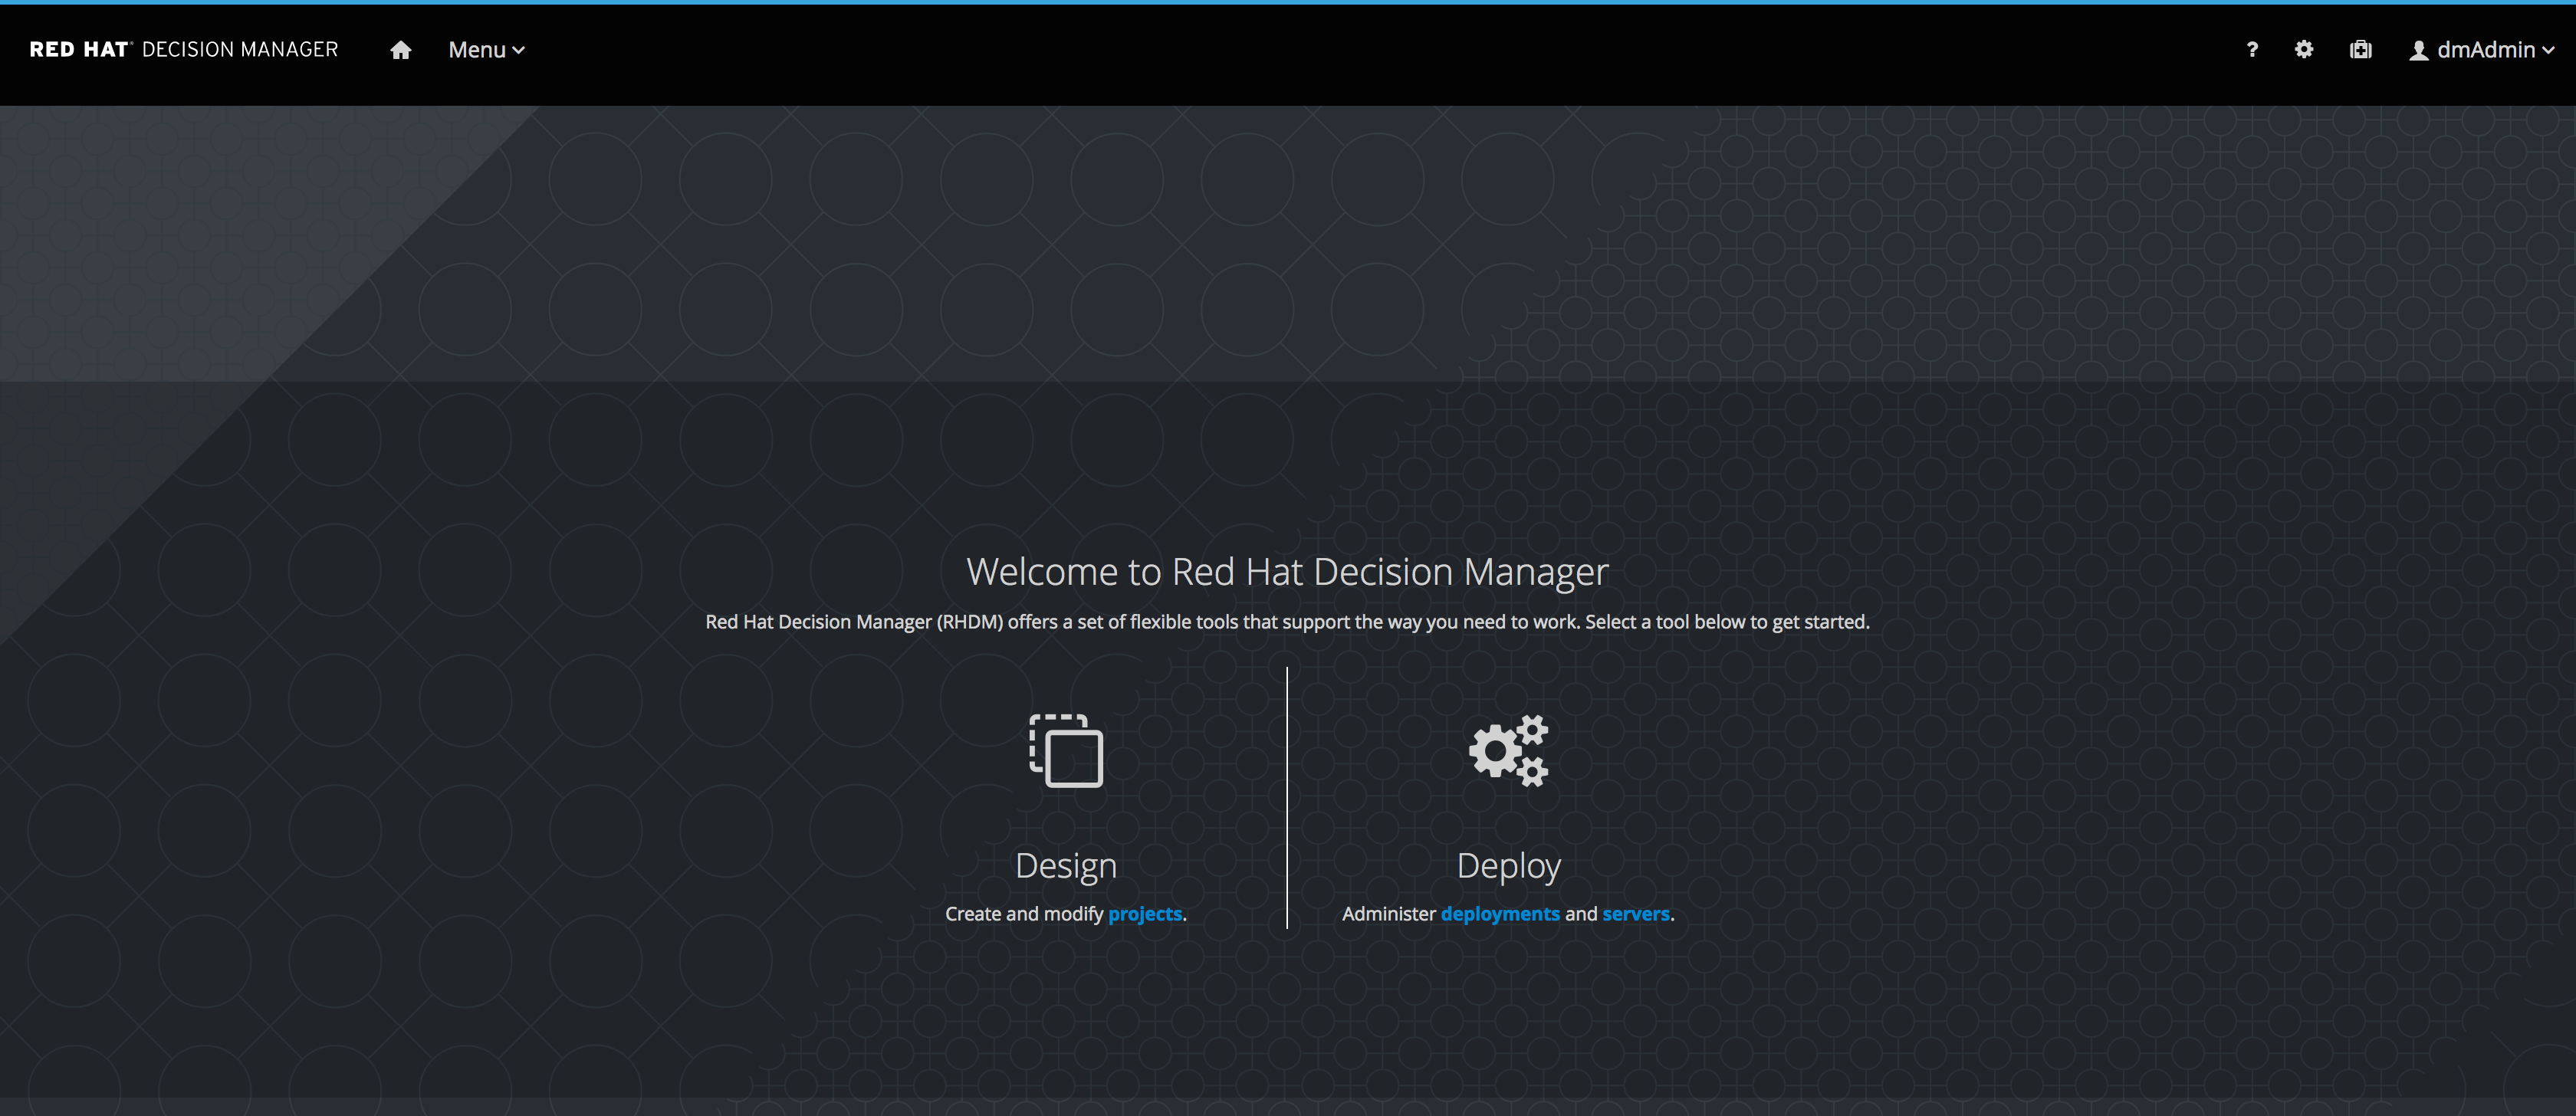
Login to http://localhost:8080/decision-central
- login for admin and analyst roles (u:dmAdmin / p:redhatdm1!) -
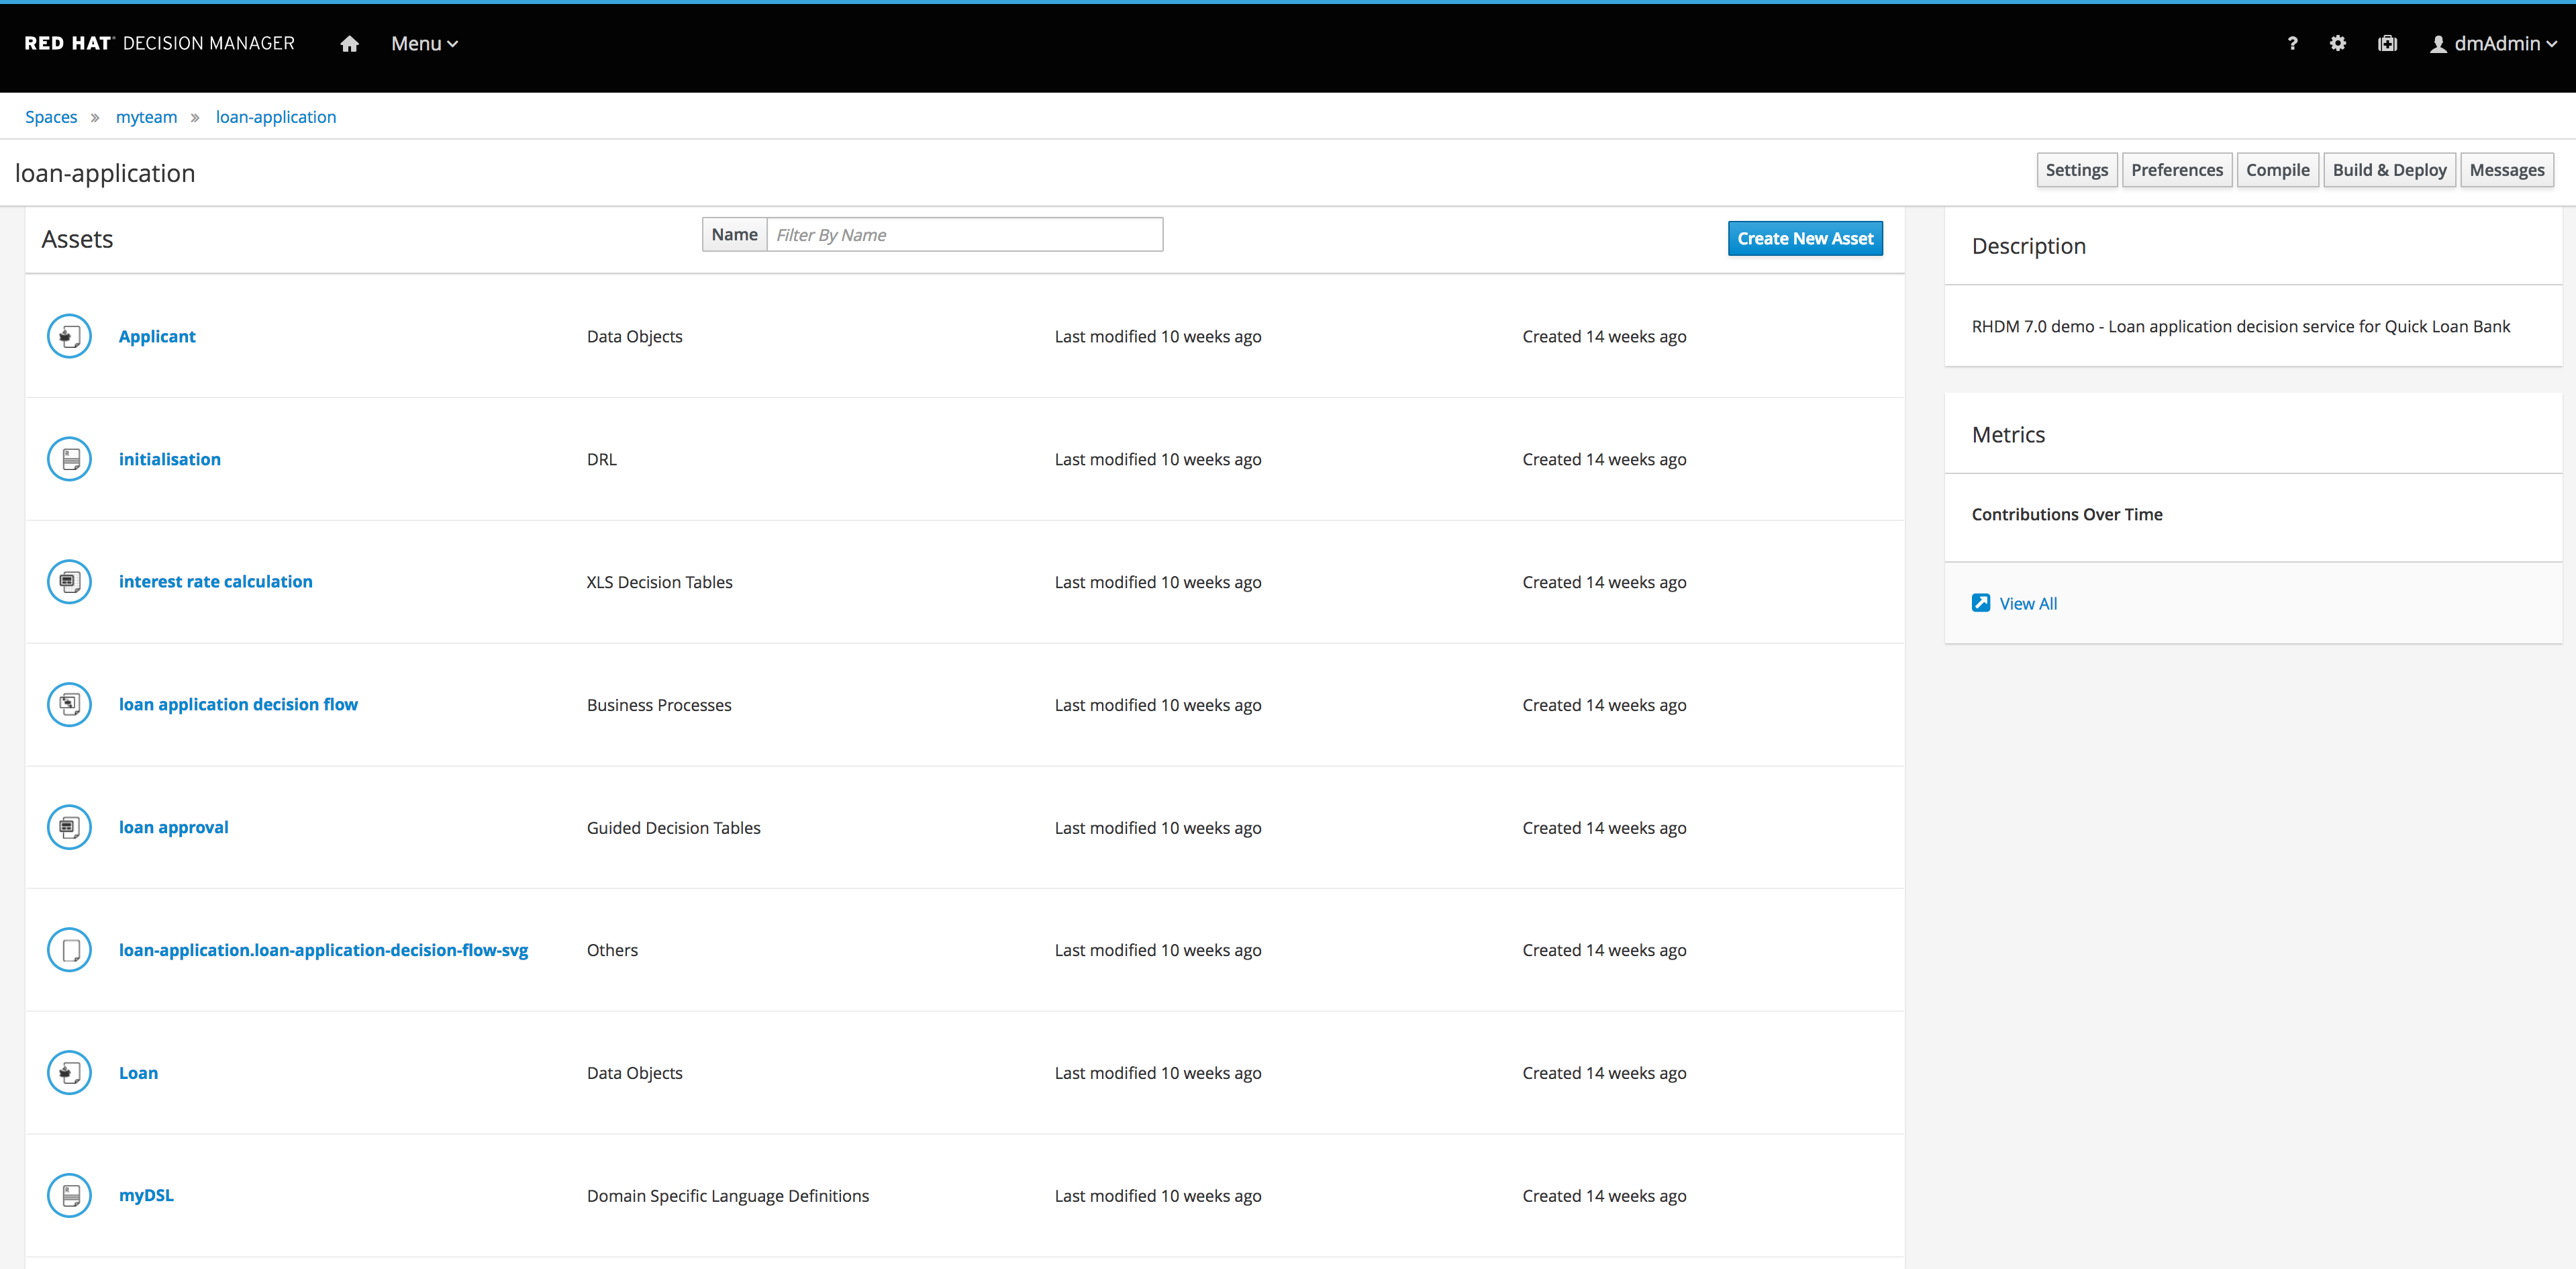
Click on the "loan-application" project to open the Loan Application Demo project.
-
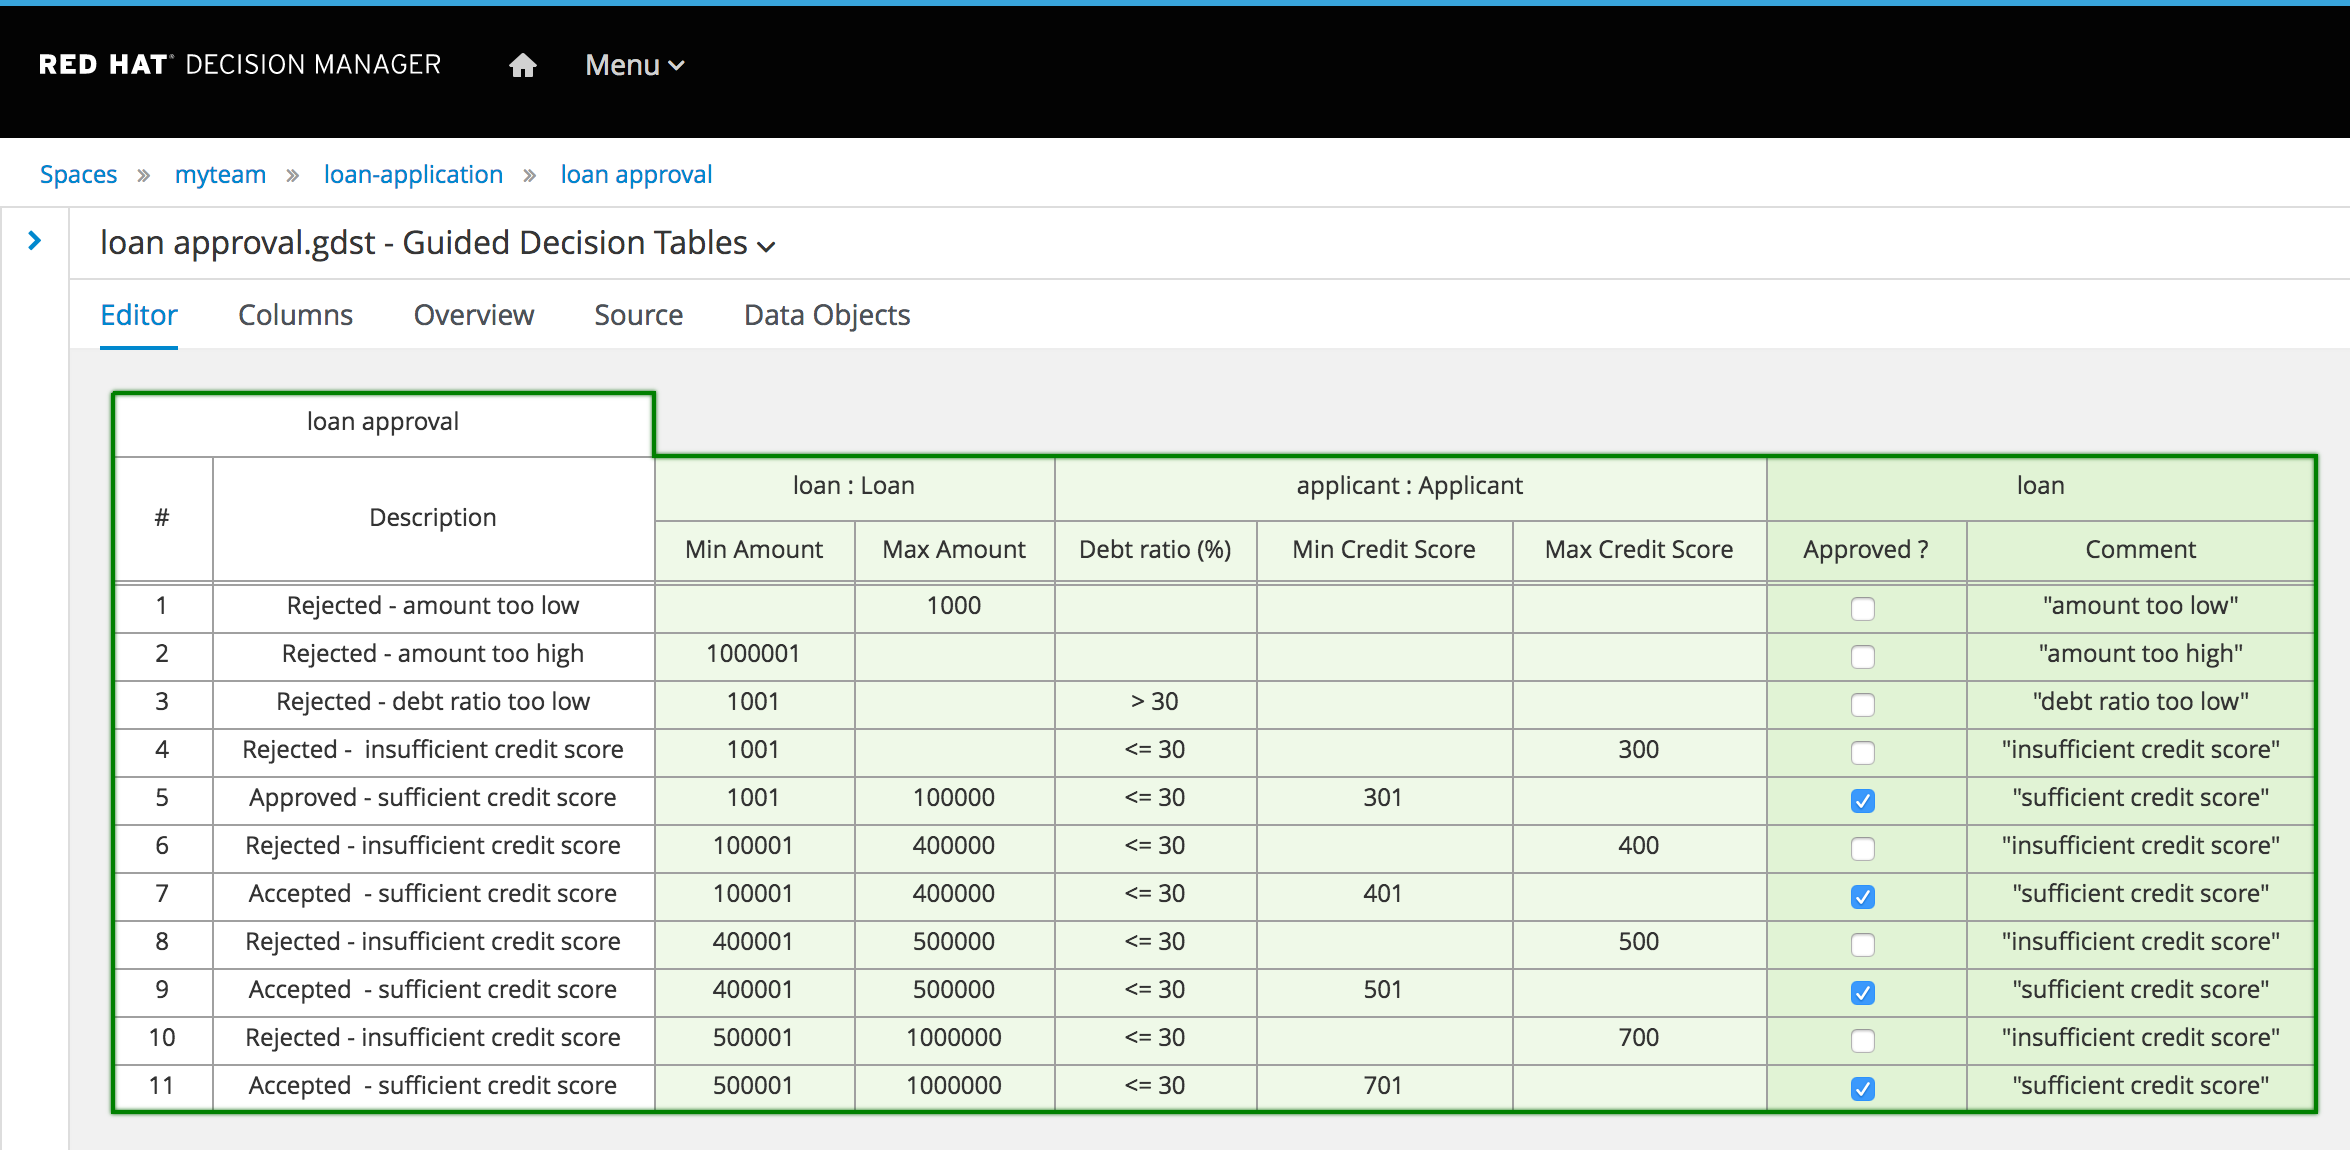
The project has simple data model (Loan & Applicant) and single decision table (loan-application) which contains the loan approval rule set.
-
Build and deploy version 1.0 of the project. Click on the "Build and Deploy" in the upper right corner.
-
Go to "Menu -> Deploy -> Execution Servers" repository to see the loan-application_1.0 KIE Container deployed on the Decision Server.
-
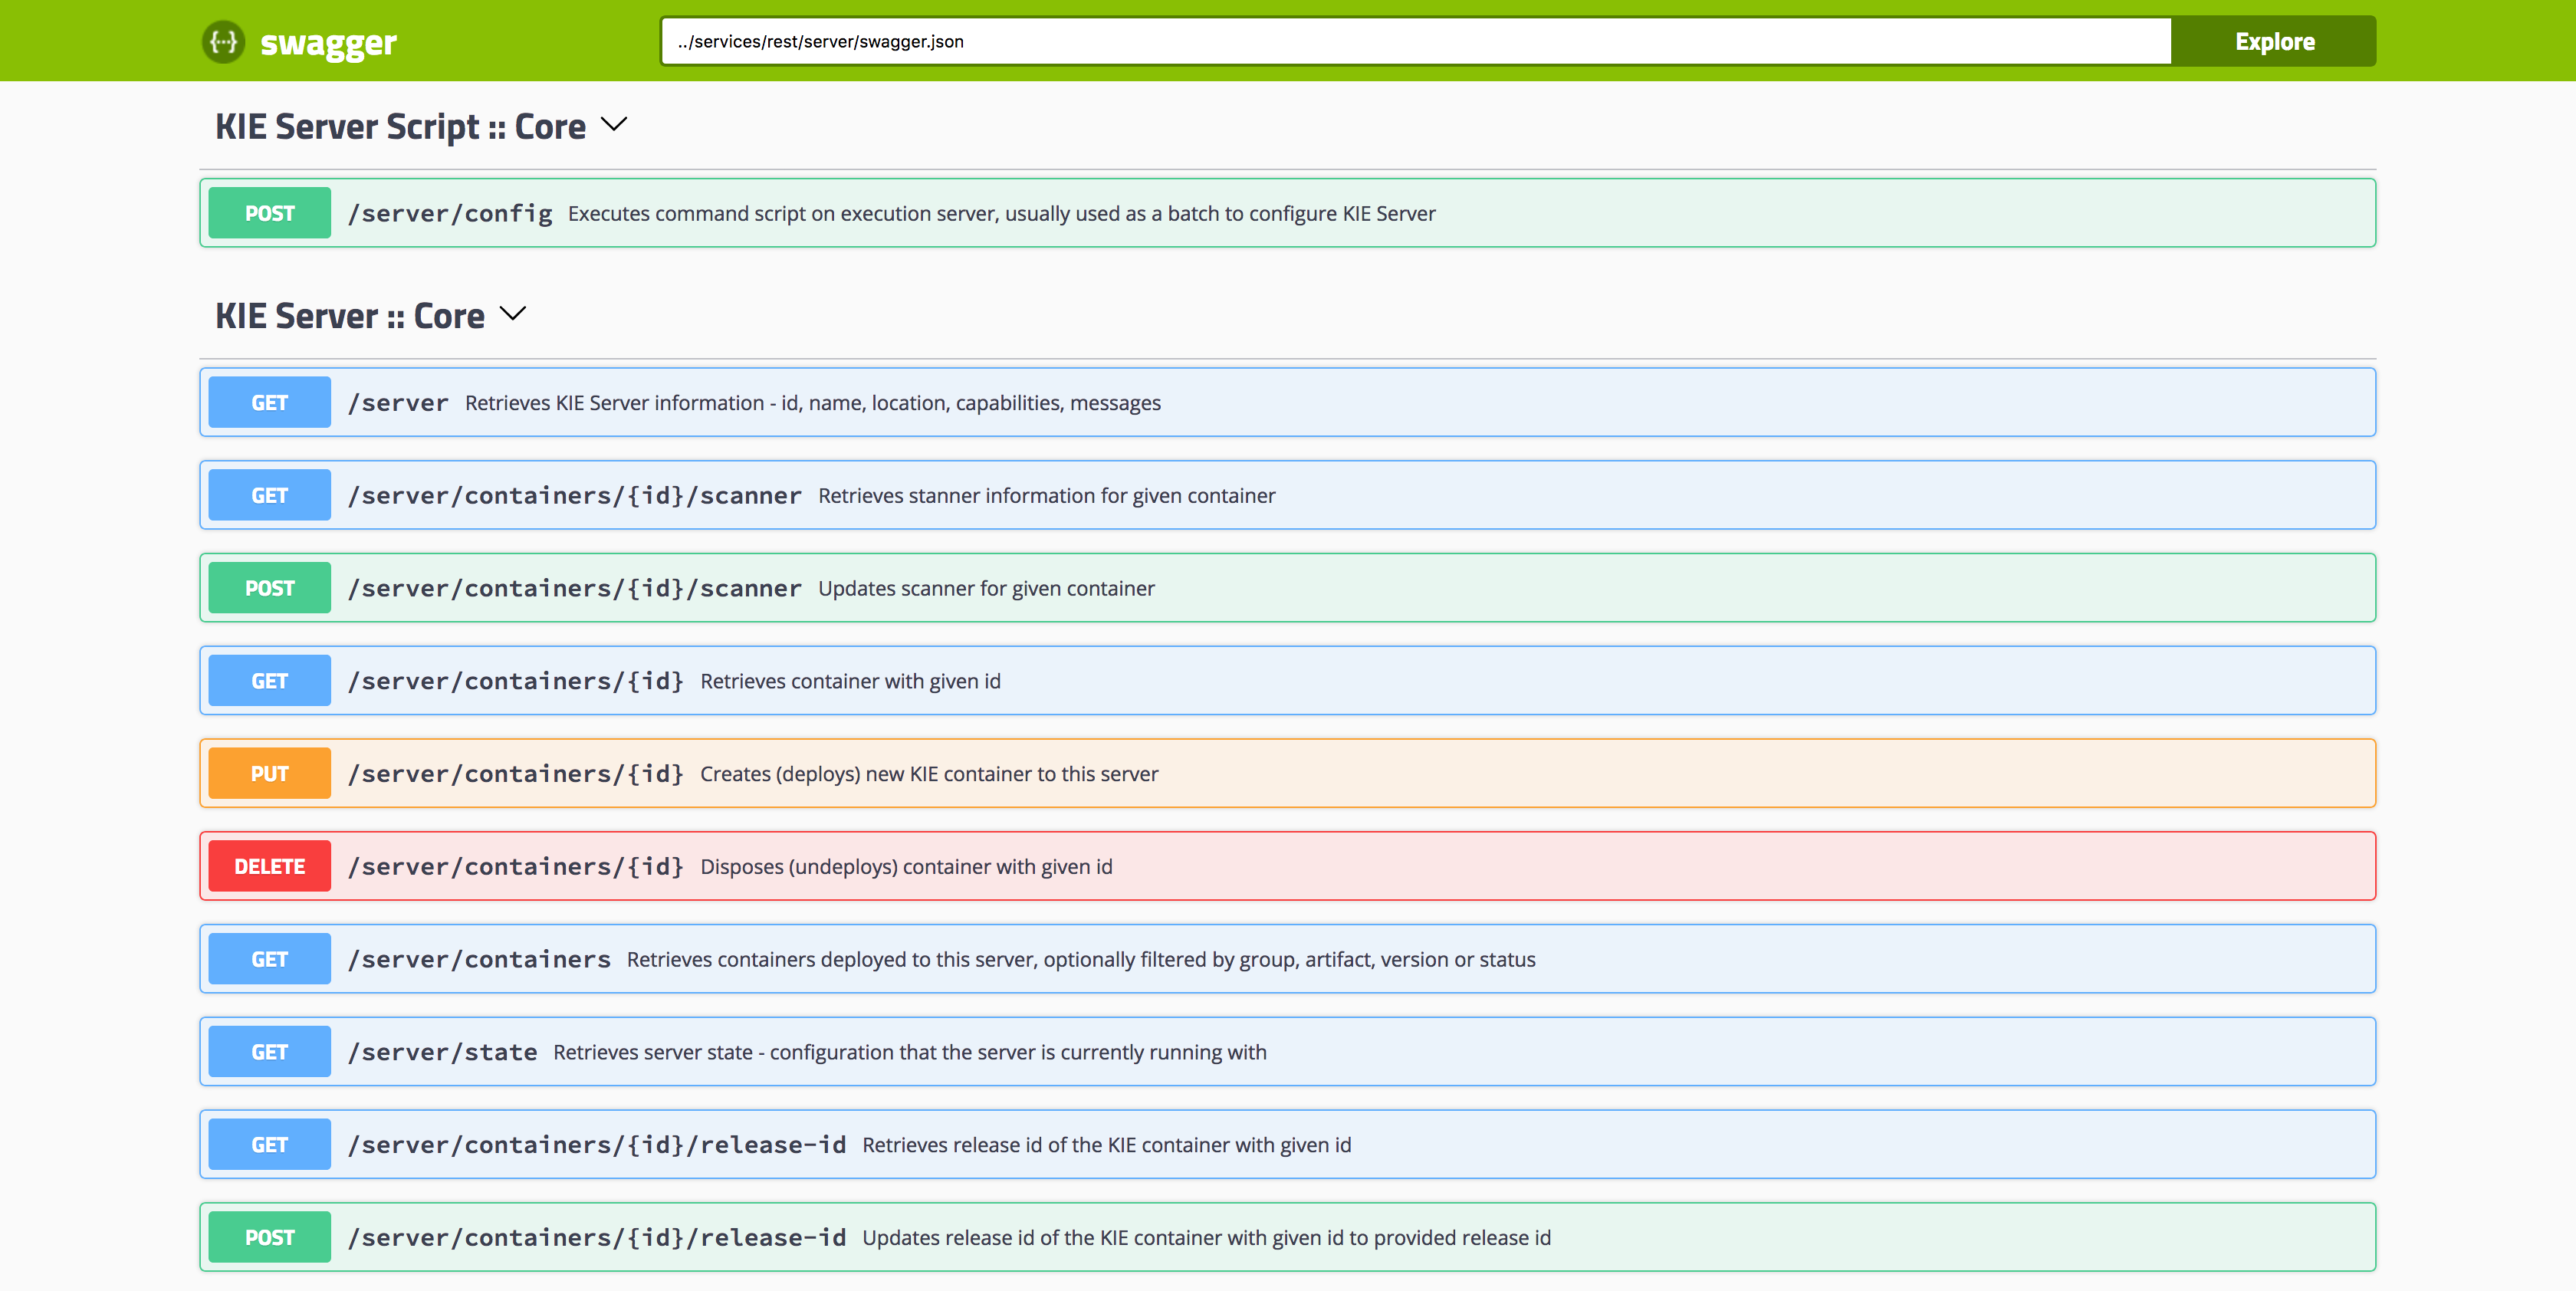
The Decision Server provides a Swagger UI that documents the full RESTful interface exposed by the server at: http://localhost:8080/kie-server/docs
-
In the Swagger UI:
- navigate to "KIE Server :: Core"
- expand the "GET" operation for resource "/server/containers"
- click on "Try it out"
- leave the parameters blank and click on "Execute"
- when asked for credentials use: Username: kieserver, Password: kieserver1!
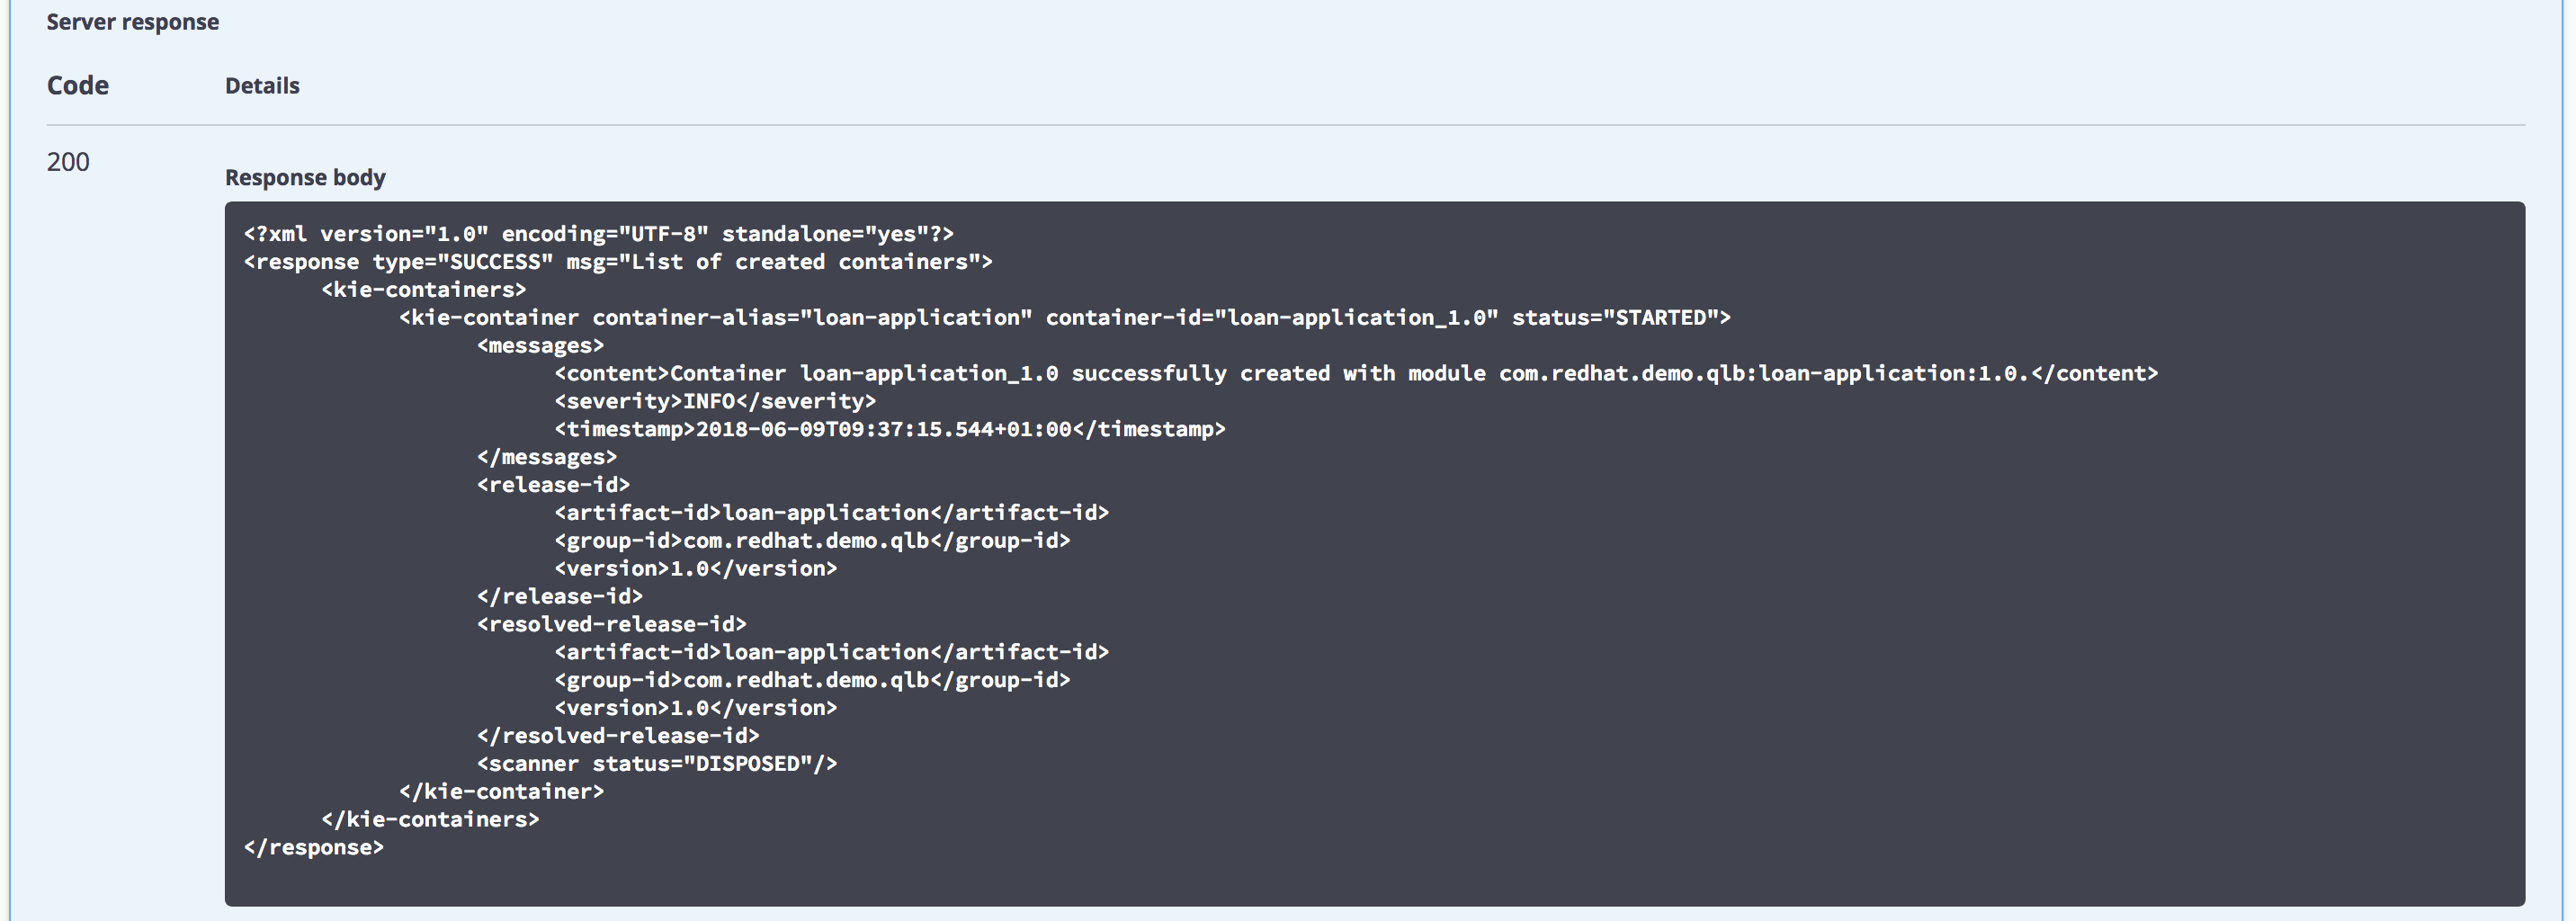
- observe the response, which lists the KIE Containers deployed on the server and their status (STARTED, STOPPED).
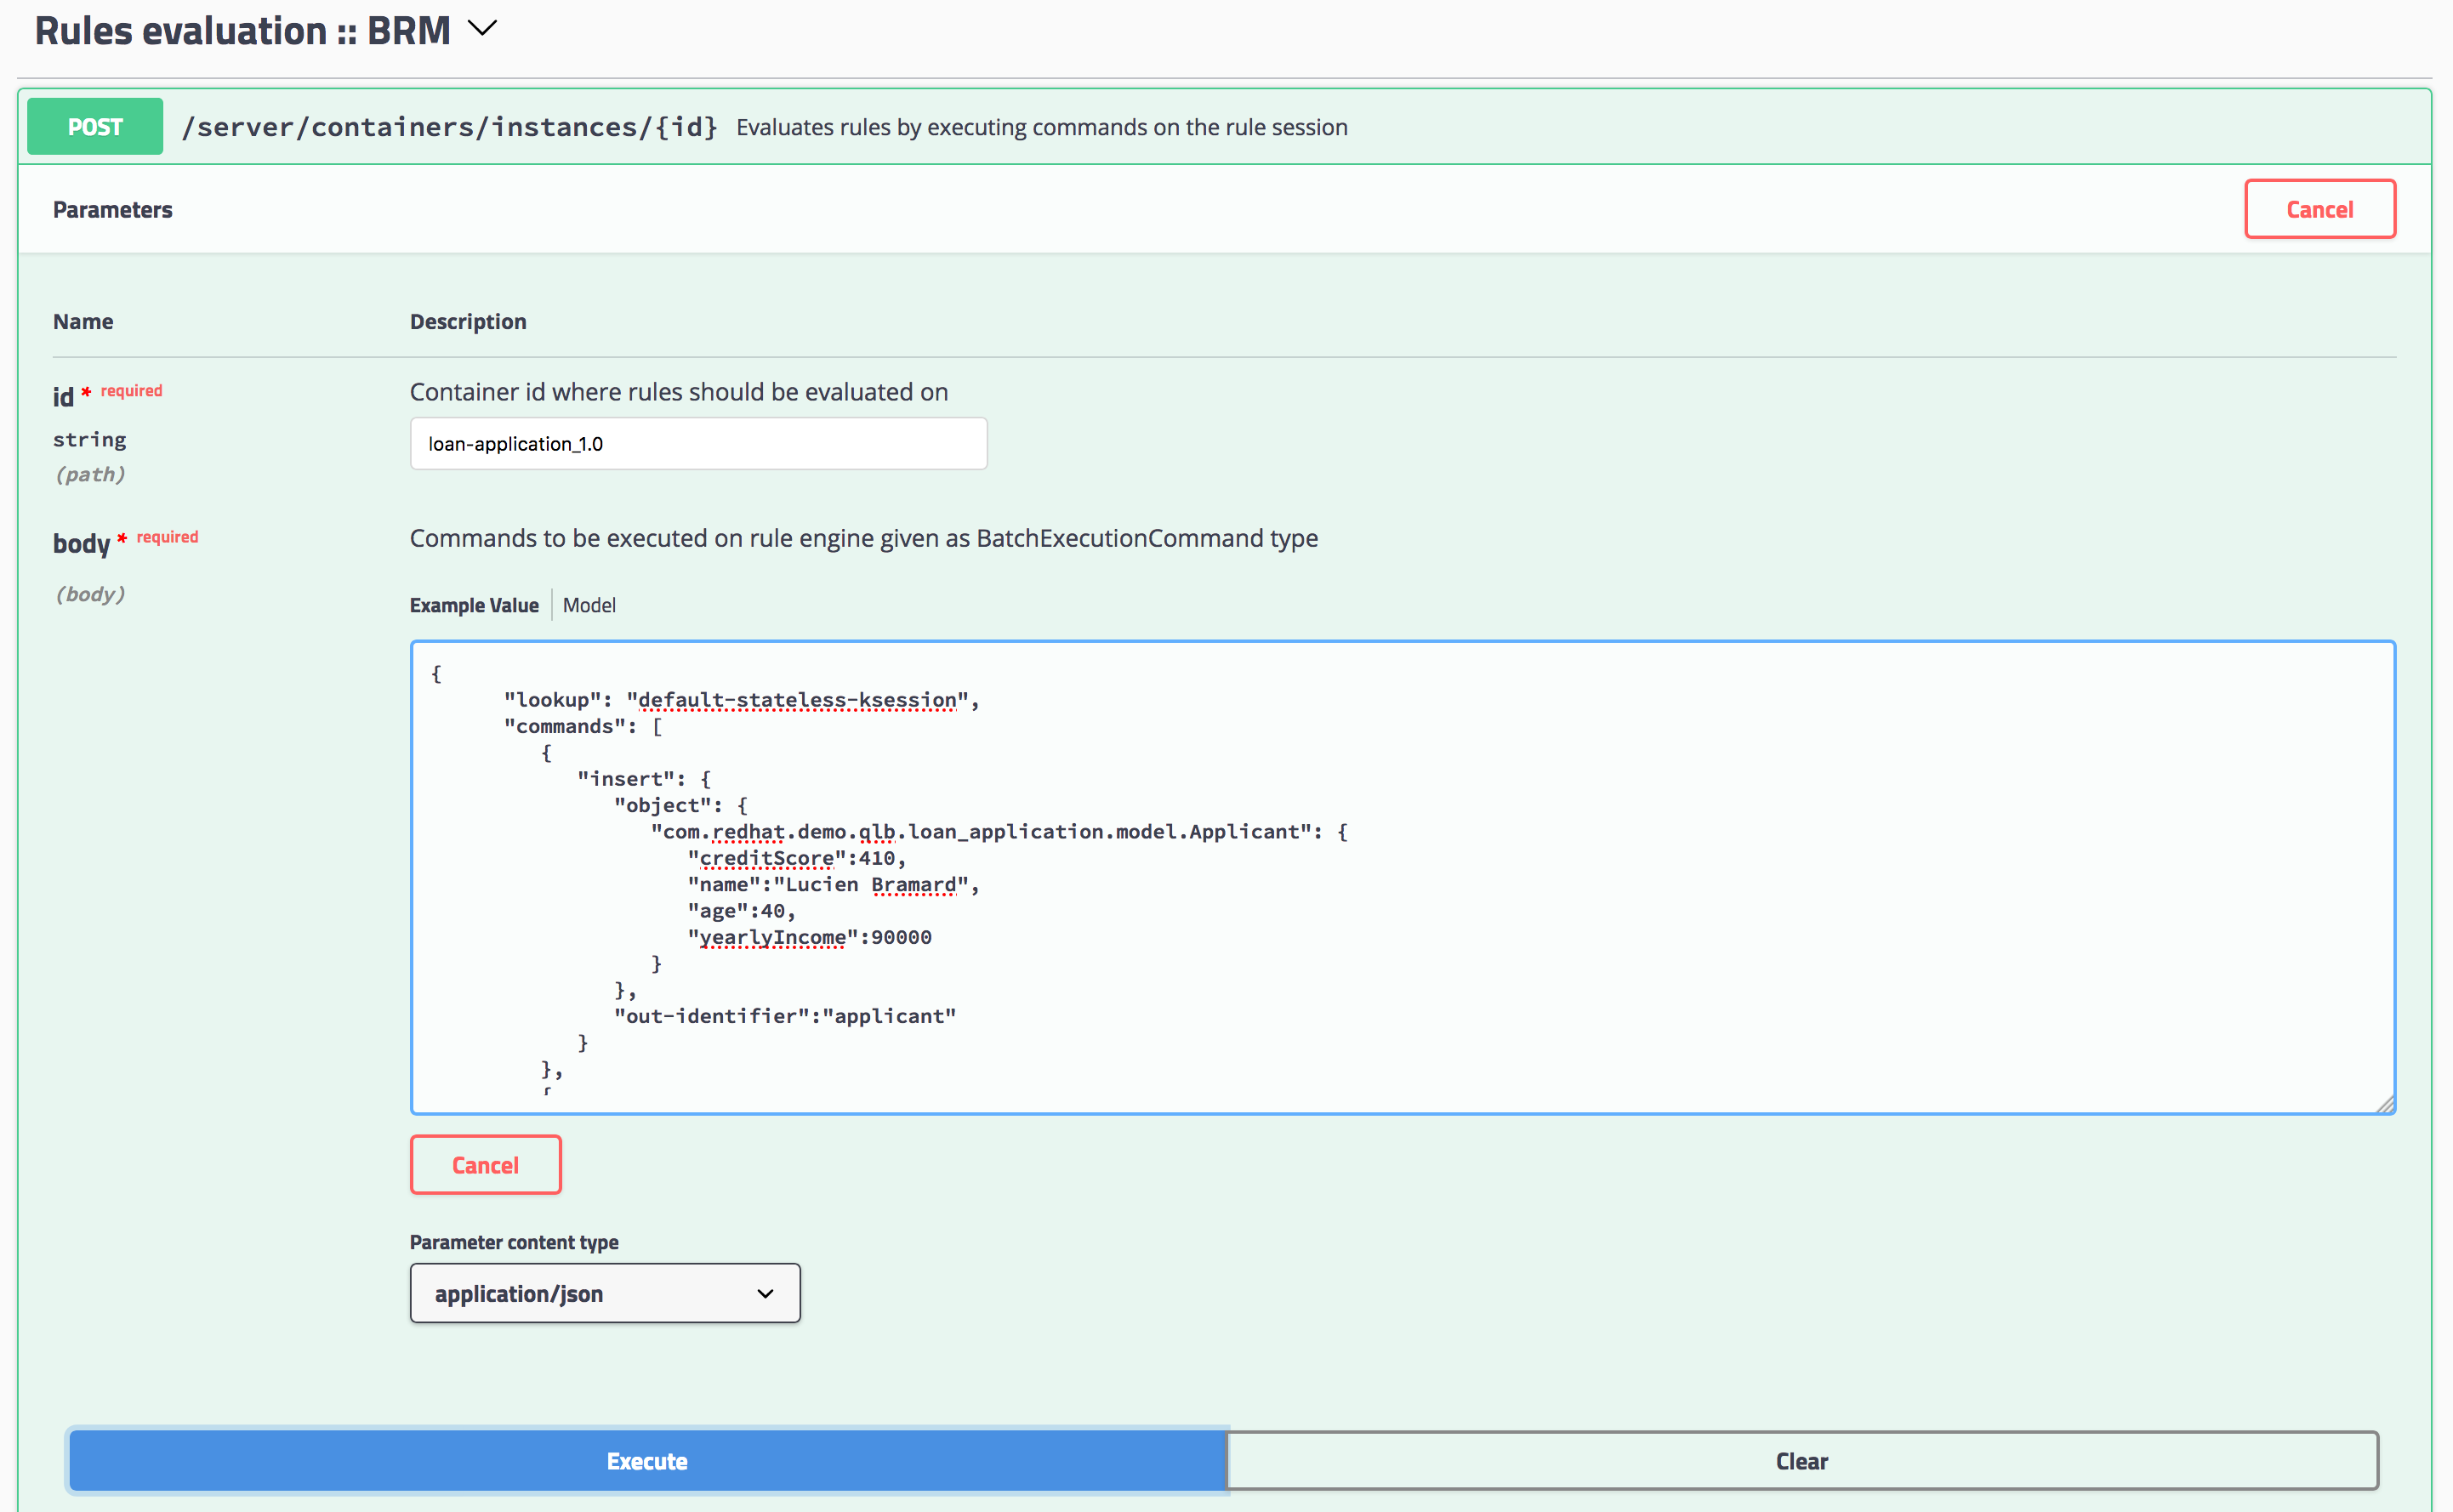
- We can use the Swagger UI to test our Loan Approval Decision Service. In the Swagger UI:
- navigate to "Rules evalutation :: BRM"
- expand the "POST" operation for resource "/server/containers/instances/{id}"
- click on "Try it out"
- set the "id" parameter to the name of the KIE Container that hosts our rules, in this case
loan-application_1.0. - set "Parameter content type" to
application/json. - set "Response content type" to
application/json - use the following request as the "body" parameter. Note that the
Loanobject has itsapprovedattribute set tofalse:
{
   "lookup": "default-stateless-ksession",
   "commands": [
      {
         "insert": {
            "object": {
               "com.redhat.demo.qlb.loan_application.model.Applicant": {
                  "creditScore":410,
                  "name":"Lucien Bramard",
                  "age":40,
                  "yearlyIncome":90000
               }
            },
            "out-identifier":"applicant"
         }
      },
      {
         "insert": {
            "object": {
               "com.redhat.demo.qlb.loan_application.model.Loan": {
                  "amount":250000,
                  "duration":10
               }
            },
            "out-identifier":"loan"
         }
      },
      {
         "start-process" : {
            "processId" : "loan-application.loan-application-decision-flow",
            "parameter" : [ ],
            "out-identifier" : null
         }
      }
   ]
}
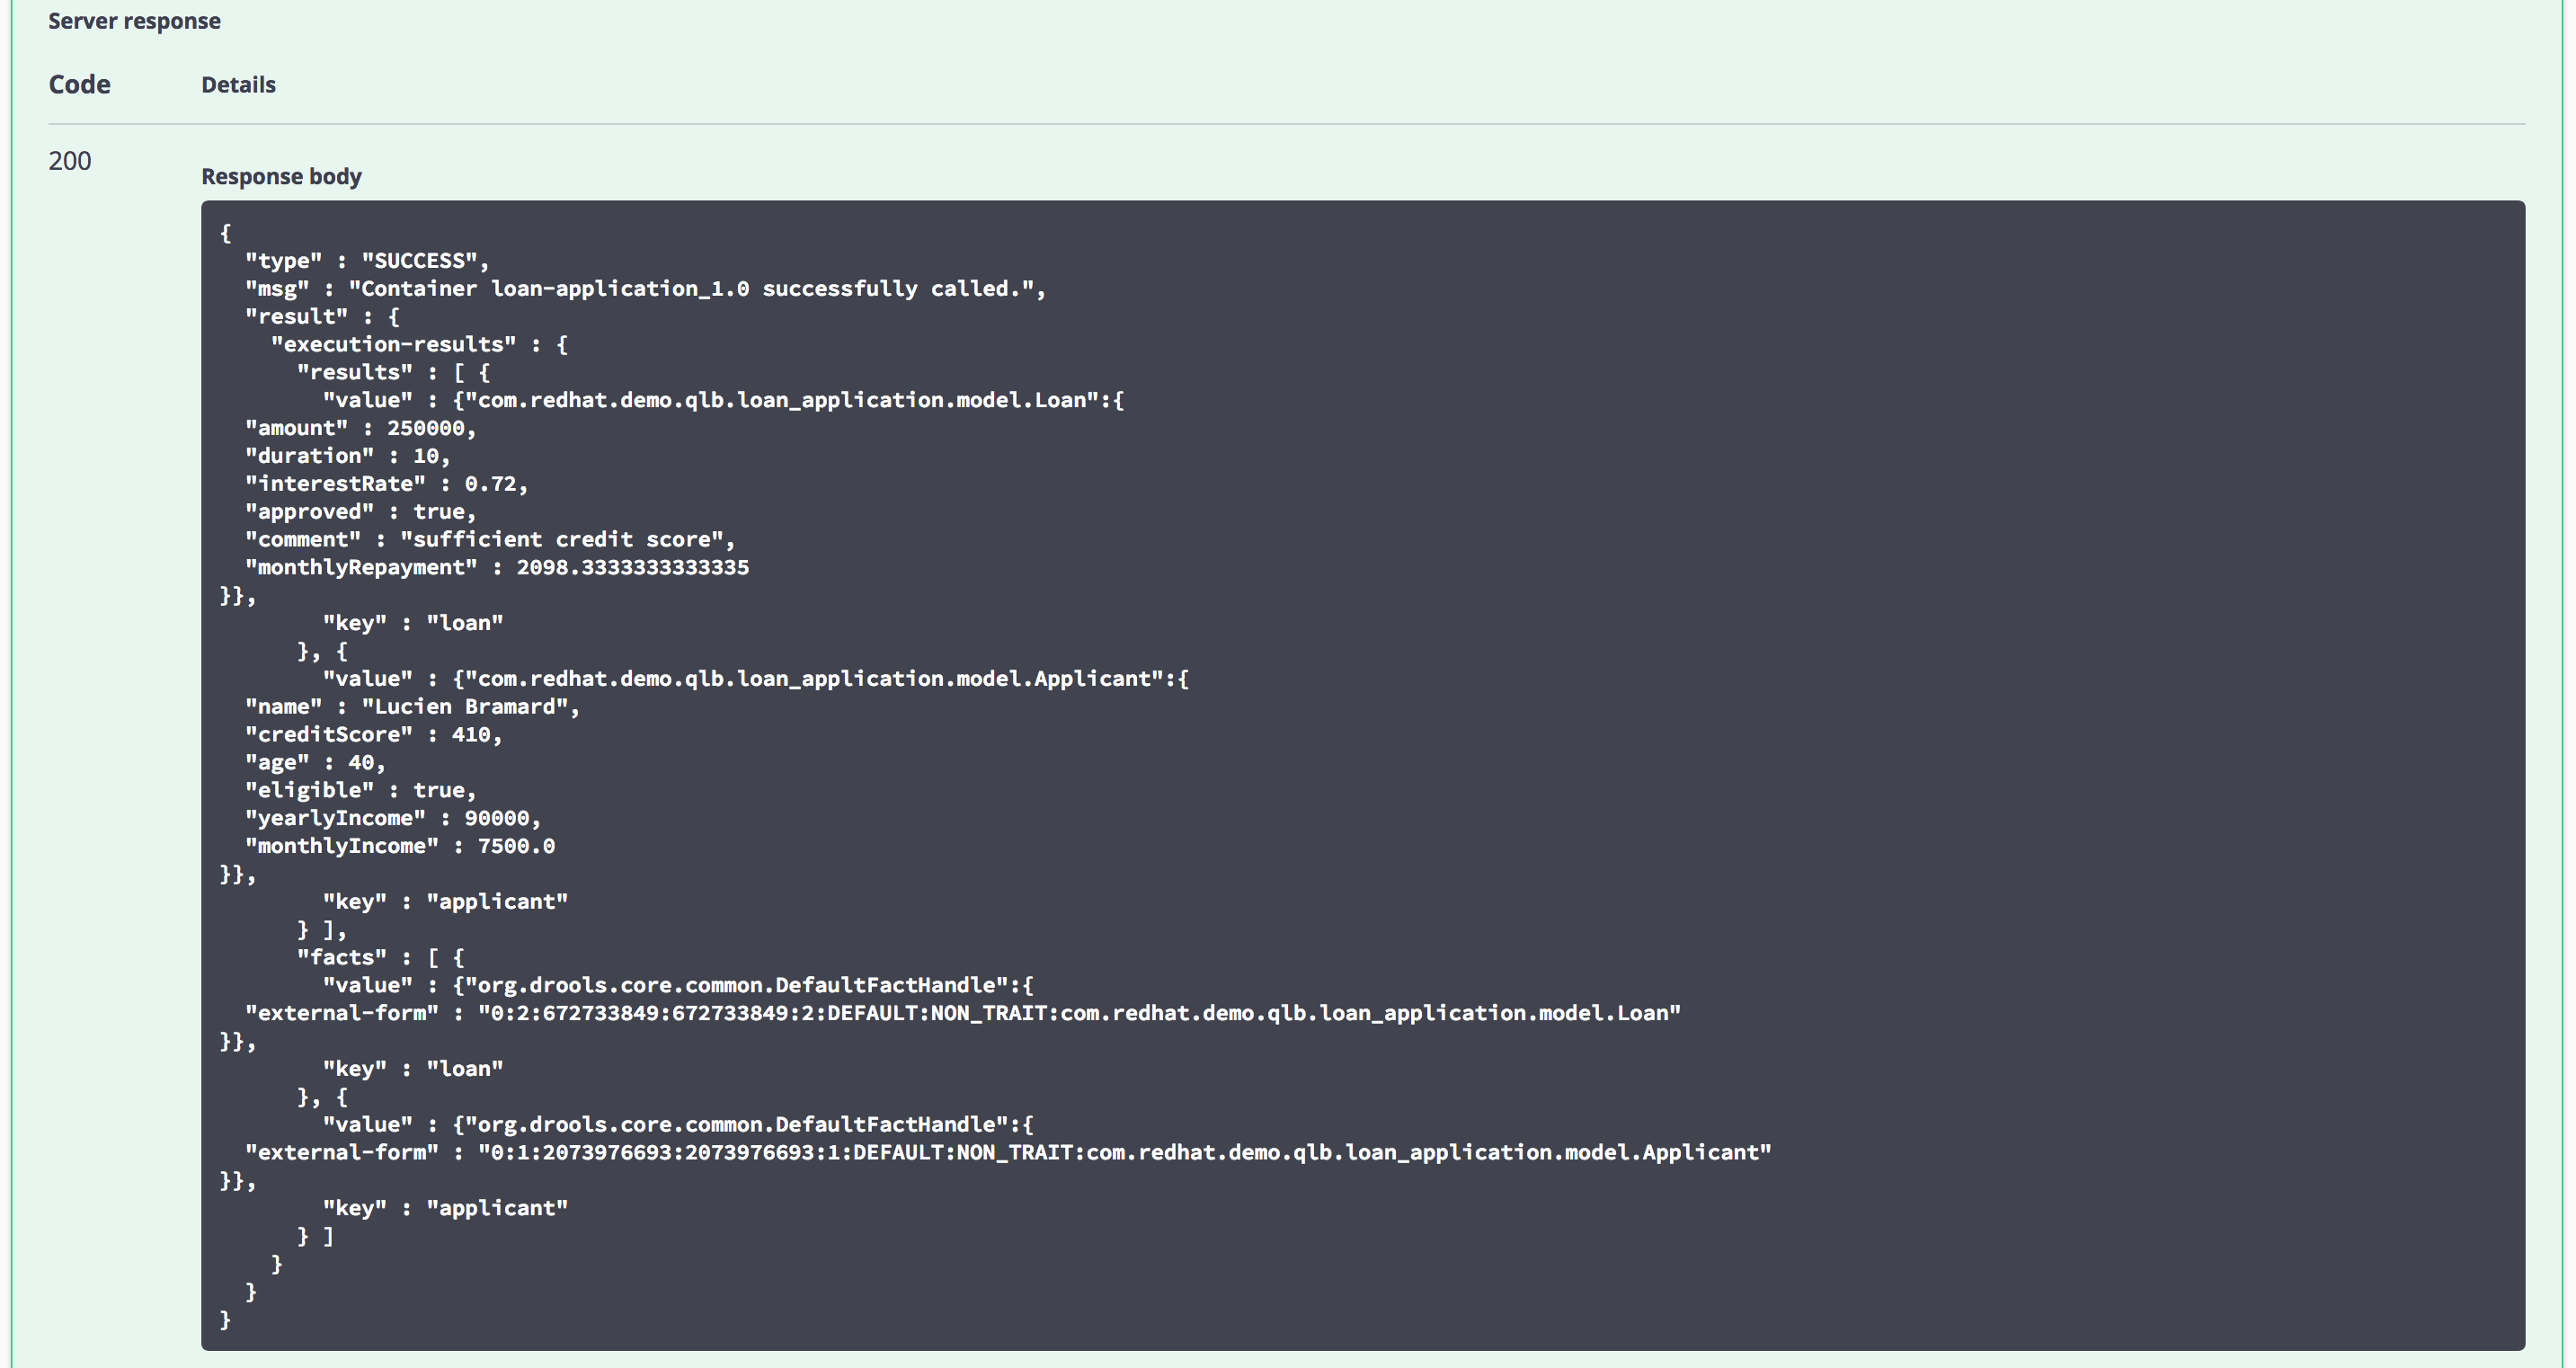
- observe the result. The Quick Loan Bank rules have fired and determined that, based on the credit score of the application, and the amount of the loan, the loan can be approved. The
approvedattribute of theLoanhas been set totrue.
-
Navigate to the support/application-ui/ directory. Run the command
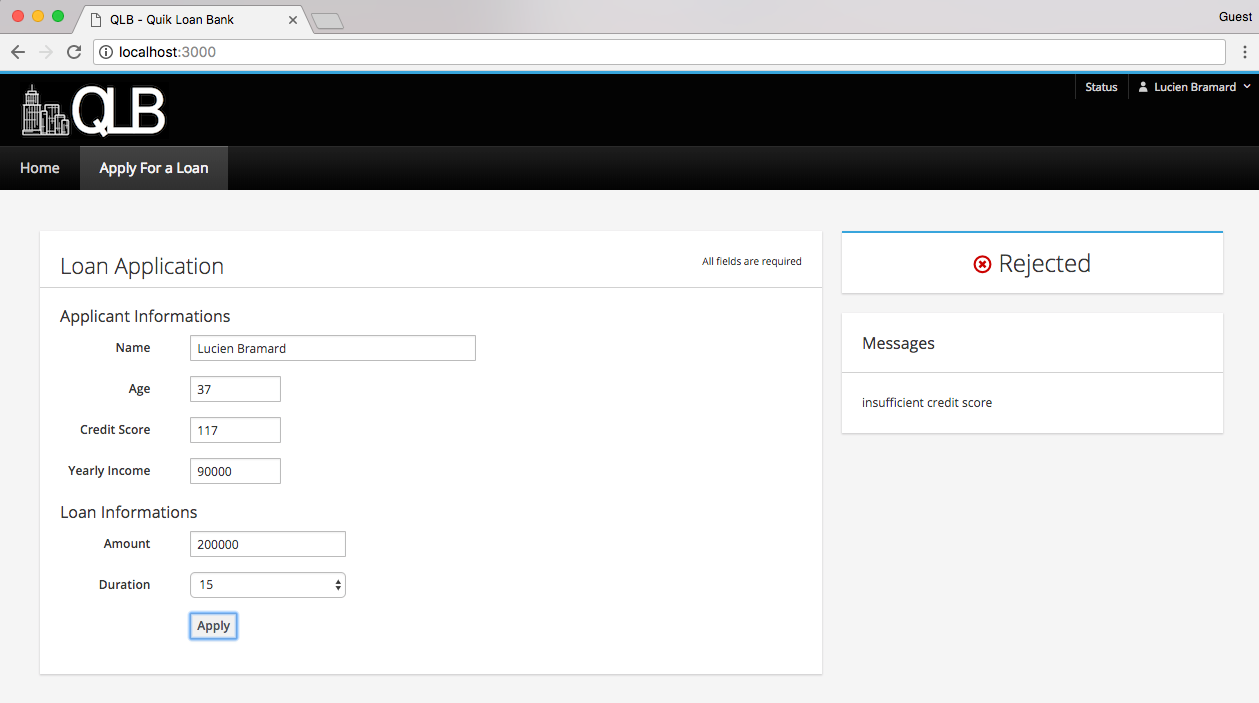
npm installto install the required modules. Start the client application by runningnpm start. This will start the NodeJS HTTP server and open the Quick Loan Bank client application in your browser. Try to submit a new loan request using the same data as shown the JSON file at step 12. Try to enter different values to see a loan get disapproved. -
You can change the various rules as desired, change the version of the project, and redeploy a new version to a new KIE Container (allowing you to serve multiple versions of the same rule set at the same time on the same Decision Server). You can also build a new version of the project and use the Version Configuration tab of the container definition (in the Execution Servers screen) to manage the container using the UPGRADE button to pull the new version.
Option 2 - Run on OpenShift
This demo can be installed on Red Hat OpenShift in various ways. We'll explain the different options provided.
All installation options require an oc client installation that is connected to a running OpenShift instance. More information on OpenShift and how to setup a local OpenShift development environment based on the Red Hat Container Development Kit can be found here.
NOTE
The Red Hat Decision Manager 7 - Decision Central image requires a Persistent Volume which has both ReadWriteOnce (RWO) and ReadWriteMany (RWX) Access Types. If no PVs matching this description are available, deployment of that image will fail until a PV of that type is available.
Automated installation, manual project import
This installation option will install the Decision Manager 7 and Decision Service in OpenShift using a single script, after which the demo project needs to be manually imported.
-
Run the "init-openshift.sh" (for Linux and macOS) or "init-openshift.ps1" (Windows) file. This will create a new project and application in OpenShift.
-
Login to your OpenShift console. For a local OpenShift installation this is usually: https://{host}:8443/console
-
Open the project "RHDM7 Quick Loan Bank Demo". Open the "Overview". Wait until the 2 pods, "rhdm7-loan-rhdmcentr" and "rhdm7-loan-kieserver" have been deployed.
-
Open the "Applications -> Routes" screen. Click on the "Hostname" value next to "rhdm7-loan-rhdmcentr". This opens the Decision Central console.
-
Login to Decision Central:
- login for admin and analyst roles (u:dmAdmin / p:redhatdm1!) -
Click on "Design" to open the design perspective.
-
Click on "Import project". Enter the following as the repository URL: https://github.com/jbossdemocentral/rhdm7-qlb-loan-demo-repo.git , and click on "Import".
-
Select "loan-application" and click on the "Ok" button on the right-hand side of the screen.
-
The project has simple data model (Loan & Applicant) and single decision table (loan-application) which contains the loan approval rule set.
-
Build and deploy version 1.0 of the project. Click on the "Build and Deploy" in the upper right corner.
-
Go to "Menu -> Deploy -> Execution Servers" repository to see the loan-application_1.0 KIE Container deployed on the Decision Server.
-
The Decision Server provides a Swagger UI that documents the full RESTful interface exposed by the server at. To open the Swagger UI, go back to the OpenShift console, and go to the "Applications - Routes" screen. Copy the "Hostname" value next to "rhdm7-loan-kieserver". Paste the URL in a browser tab and add "/docs" to the URL. This will show the Swagger UI.
-
Follow instructions 11 and 12 from above "Option 1- Install on your machine".
-
The AngularJS client application can also be accessed via an OpenShift route. Go back to the OpenShift console, and go to the "Applications - Routes" screen. Click on the hostname of the "qlb-client-application", this will direct you to the client application. Try to submit a new loan request using the same data as shown the JSON file at step 12 of "Option 1 - Install on your machine". Try to enter different values to see a loan get disapproved.
-
You can change the various rules as desired, change the version of the project, and redeploy a new version to a new KIE Container (allowing you to serve multiple versions of the same rule set at the same time on the same Decision Server). You can also build a new version of the project and use the Version Configuration tab of the container definition (in the Execution Servers screen) to manage the container using the UPGRADE button to pull the new version.
Scripted installation
This installation option will install the Decision Manager 7 and Decision Service in OpenShift using a the provided provision.sh script, which gives
the user a bit more control how to provision to OpenShift.
-
In the demo directory, go to
./support/openshift. In that directory you will find aprovision.shscript. (Windows support will be introduced at a later time). -
Run
./provision.sh -hto inspect the installation options. -
To provision the demo, with the OpenShift ImageStreams in the project's namespace, run
./provision.sh setup rhdm7-loan --with-imagestreams.
NOTE
The
--with-imagestreamsparameter installs the Decision Manager 7 image streams and templates into the project namespace instead of theopenshiftnamespace (for which you need admin rights). If you already have the required image-streams and templates installed in your OpenShift environment in theopenshiftnamespace, you can omit the--with-imagestreamsfrom the setup command.
-
A second useful option is the
--pv-capacityoption, which allows you to set the capacity of the Persistent Volume used by the Decision Central component. This is for example required when installing this demo in OpenShift Online, as the Persistent Volume Claim needs to be set to1Giinstead of the default512Mi. So, to install this demo in OpenShift Online, you can use the following command:./provision.sh setup rhdm7-loan --pv-capacity 1Gi --with-imagestreams -
To delete an already provisioned demo, run
./provision.sh delete rhdm7-loan. -
After provisioning, follow the instructions from above "Option 2 - Automated installation, manual project import", starting at step 3.
Option 3 - Run in Docker
The following steps can be used to configure and run the demo in a container
-
Add the product ZIP files to installs directory.
-
Run the 'init-docker.sh' (Linux/macOS) or 'init-docker.ps1' (Windows) file.
-
This demo uses 2 containers, one for Decision Manager and one for the Quick Loan Bank client application. We use docker-compose to start both containers. Use the command:
docker-compose up -
Follow instructions from above "Option 1- Install on your machine", starting at step 5 replacing localhost with <CONTAINER_HOST> when applicable. The Quick Loan Bank application can be accessed at: http://<CONTAINER_HOST>:3000
Additional information can be found in the jbossdemocentral container developer repository
Supporting Articles & Videos
Released versions
See the tagged releases for the following versions of the product:
- v1.1 - Red Hat Decision Manager 7.1.0.GA
- v1.0 - Red Hat Decision Manager 7.0.0.GA
