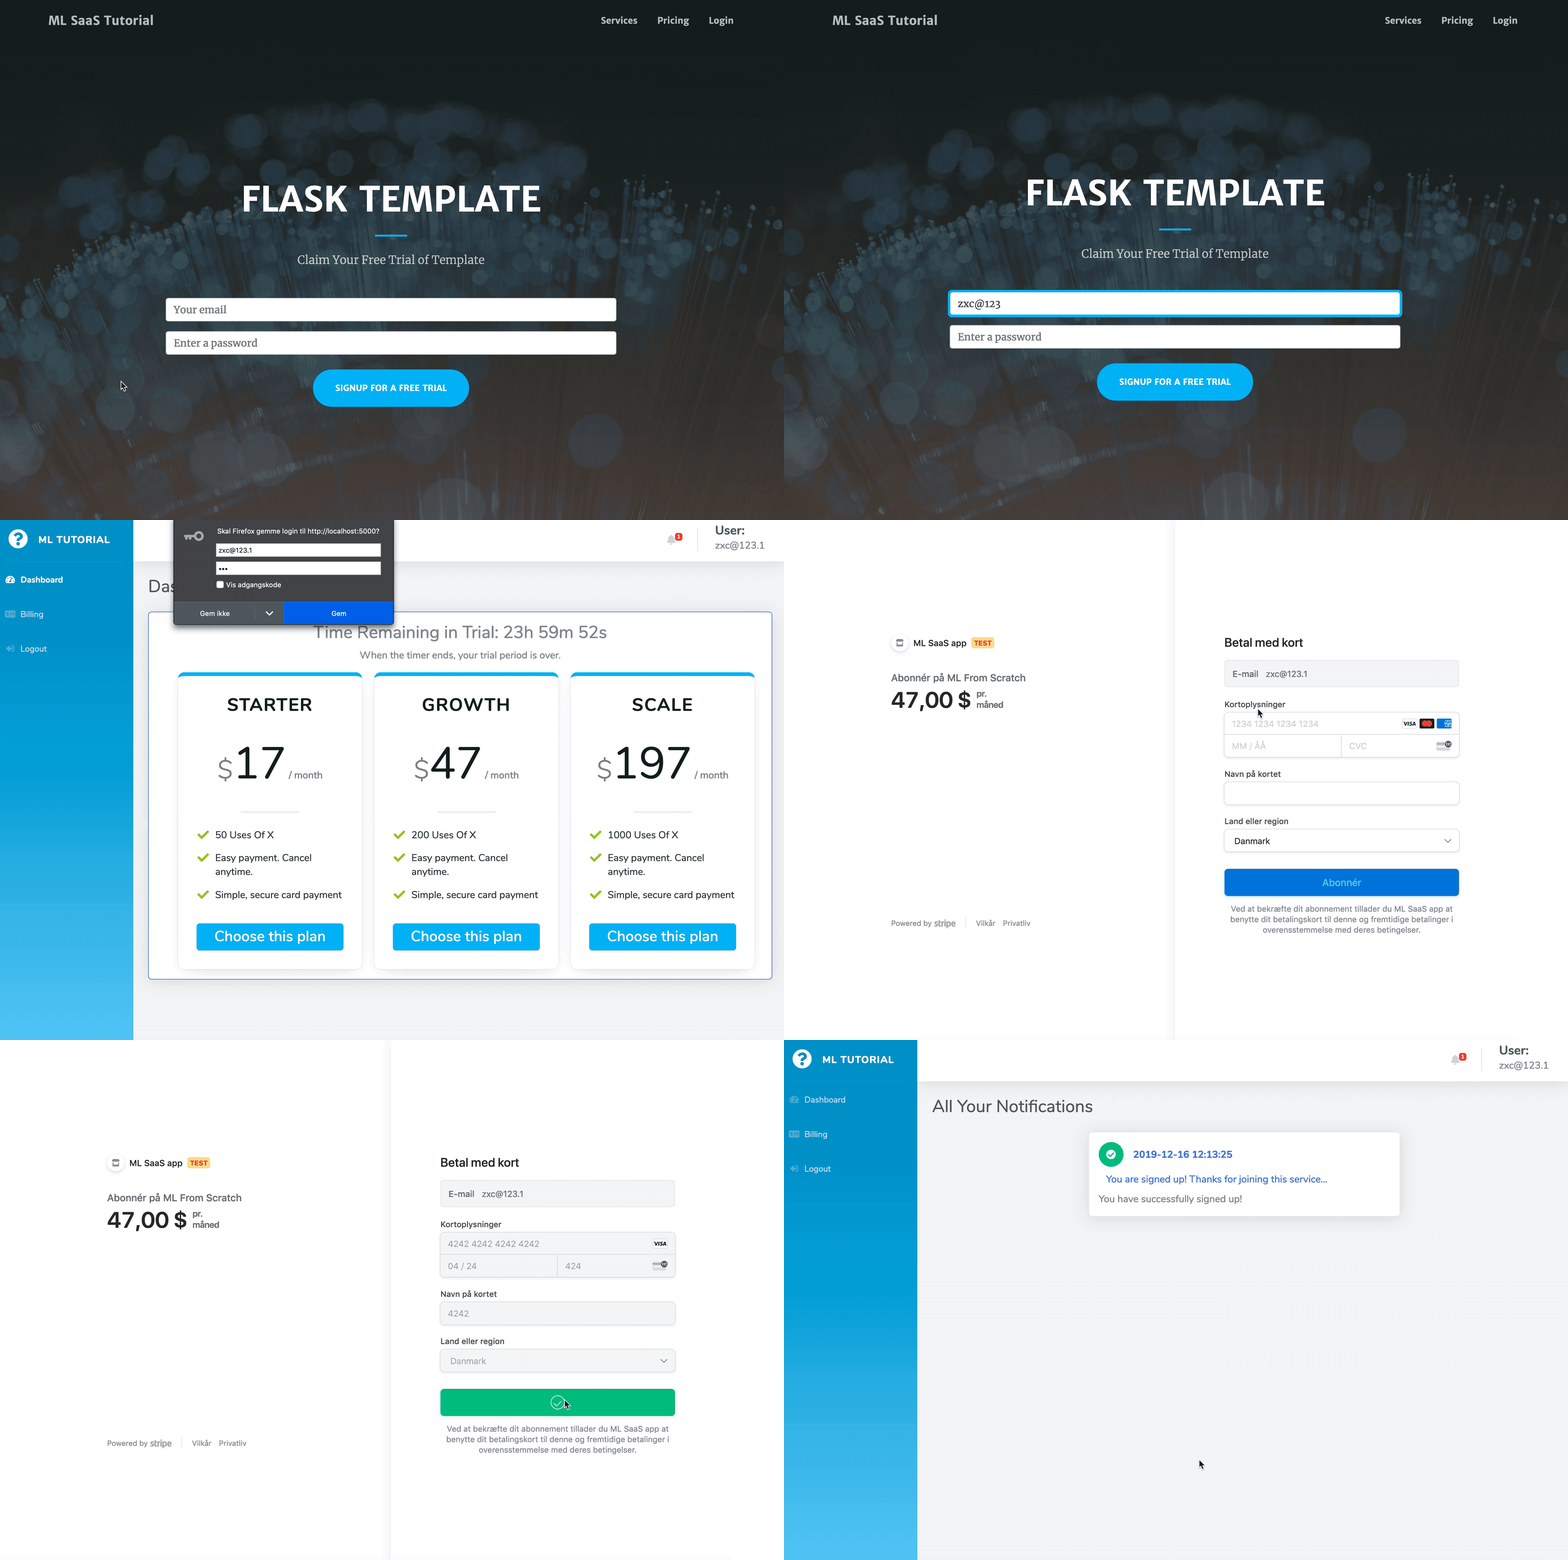
This template is ready for scaling and is easy to deploy.
- Python & Flask & MySQL Database
- Stripe Subscriptions (Create, Cancel, Reactivate, Update supported)
- Bootstrapped theme Creative and SB Admin 2
- Docker: Fully split into microservices. Runs with Docker Compose, but can easily be translated to Kubernetes
- User sign up and login (Facebook & Google integration in progress)
- 3 Pricing Tiers included (Starter, Growth, Scale)
- Base templates: Index, Dashboard and Pages
- Secure app: Protection against XSS, X-XSS, CSRF, clickjacking (iframe) attacks
- Trial Period (defaults to 24 hours)
- Notifications for users (upselling, credit card expiring soon, etc.)
- Feedback button: Easily gather feedback from users
- Email validation
- Multiprocessing with Gunicorn, for SQLAlchemy and MySQL
- Admin account: View feedback, logs, errors, etc.
- Scaling the frontend.
Check out Martin Fowler's website with this great article by Cam Jackson on splitting your frontend into microservices. Probably not necessary for most (99%), but consider it.
- Scaling the databases
Start separating into databases instead of tables; right now, there exists one table for each service. You should definitely think about scaling the database, a cloud option is a great option here.
- Less coupling
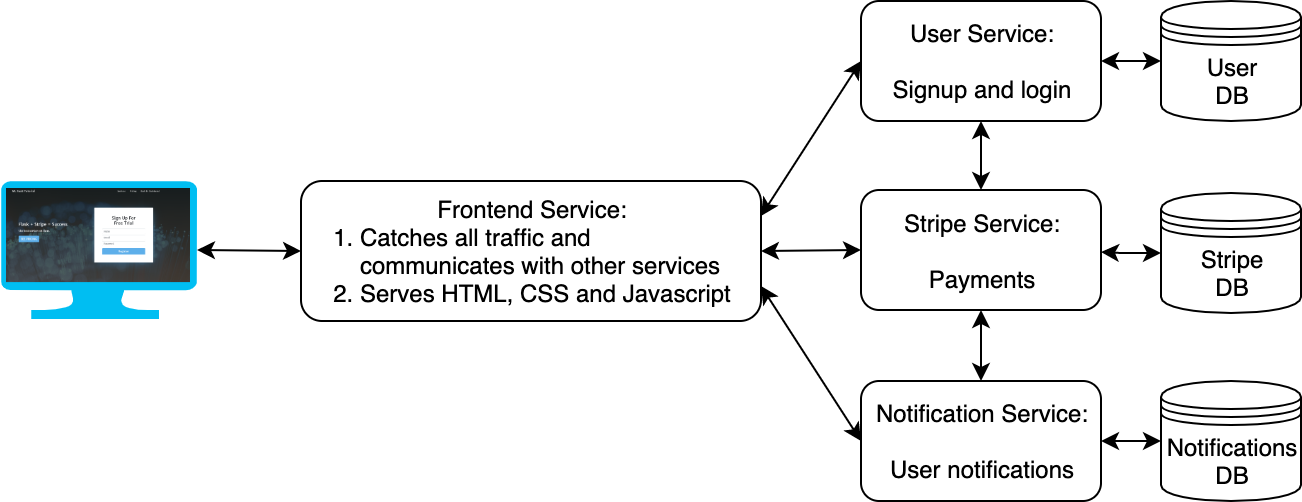
Currently, the different services knows about eachother (which means higher coupling). To remove this, we would want a centralized service that knows all the services, but the rest of the services don't know about eachother. All communication would go through this centralized service.
Most of the work is done, and it would just be changing some endpoints, but if you want truly low coupling, this needs a migration.
This is a simple overview of the system. Go to the app folder and see the technical README for a more detailed overview.
- Move on to upgrading/downgrading monthly and yearly plans
- Add billing information (invoice date, description, amount, was it paid)
- Variable builder
You should make sure that your database is running first and foremost, else the following will fail. Look under installation for Windows or Mac/Linux for how to run the database locally. It just needs to be running in the background, all the databases and tables are created programmatically.
- Simply navigate (in a terminal) into the ~/app folder.
- Run
docker-compose buildfor your first build and when you have made changes. - Run
docker-compose upto run all the services.
Please configure ~/app/setup_app/config.py as needed. I recommend making a mode for development and production (staging if necessary) with all the needed credentials. The file is very easy to extend with new config secrets.
Note that scaling is very easy, you can just convert your docker-compose.yml file to Kubernetes files, and you can easily get set up and running in Google Cloud Platform or Amazon Web Services. Read this tutorial for more.
For payments, Stripe needs to be able to send you webhooks. You can enable Stripe's test mode to make sure your setup is correct. I have used ngrok (free) to do this. It's really simple, you just navigate to the folder and run ./ngrok http 5004 or whichever port the Stripe service is running on.
Other choices are:
https://localtunnel.github.io/www/
- Install Python (3.7 was used for this project)
- Install the package requirements
pip install -r requirements.txt - Download and install MySQL server and run it
- Windows: See Windows section below
- Mac/Linux: See Mac and Linux section below
- Configure your connector in
app/setup_app/config.py. I configured MySQL to run on port 5001, but the default port is 3306, which you can easily switch the port to in the code. - Install Docker
Download MySQL server and start it.
**IMPORTANT: Make sure to check "Configure MySQL Server as a Windows Service" and "Start the MySQL server at System Startup".
Check the service is configured by pressing windows key or WINDOWS KEY+R and typing services.msc and find MySQL (e.g. MySQL80). It should be running, also after you have restarted your computer. Always check back here if something is not running.
A tip that makes your life easier:
- Press the windows key and search for 'edit environment variables'
- In the upper section, double click path. Then click new. Then find your installation folder for mysql, e.g. mine was under
C:\Program Files\MySQL\MySQL Server 8.0\bin. Add it as your path and click ok. - Now you can use mysql, mysqld and mysqladmin commands which will be helpful for debugging.
Open MySQL vXX Command Line Prompt (e.g. MySQL 8.0 Command Line Prompt) and enter your password, e.g. rootpw is used in this repo.
Use Homebrew to install mysql. Installing homebrew is the first step:
- Install homebrew:
/usr/bin/ruby -e "$(curl -fsSL https://raw.githubusercontent.com/Homebrew/install/master/install)" - Install mysql
brew install mysql - Check it's installed
mysql -V - Locate your mysql config file. Mine was under
/usr/local/etc/my.cnf, but check/etc/my.cnfor/etc/mysql/my.cnfor~/.my.cnfif you can't find it. For Ubuntu 18.04, I found it under/etc/mysql/mysql.conf.d/mysqld.cnf - (you can skip this, but I prefer it) Change your default port from 3306 by opening
my.cnformysqld.conf.d. Add or find the line withport=5001, and optionallybind-address=0.0.0.0. - Start mysql
brew services start mysql(starts every time you boot computer) - Configure your password
mysqladmin -u root password 'yourpassword'. This password should be strong if used in production.
You can always restart or stop the service, e.g. if the service is running and you edit your config file, you need to restart the service for it to pick it up:
brew services restart mysqlbrew services stop mysql
Type in mysql -u root -p and press enter. It will ask for your password, then you are in.

