Dockerized Homebridge


This Docker image helps you to easily setup Homebridge on your Synology, but also runs on QNAP devices or Raspberry Pies. If you're using a Synology, please make sure to run at least DSM 6, otherwise you might have to go the harder way via SSH/shell scripts.
Installation (via Synology DSM)
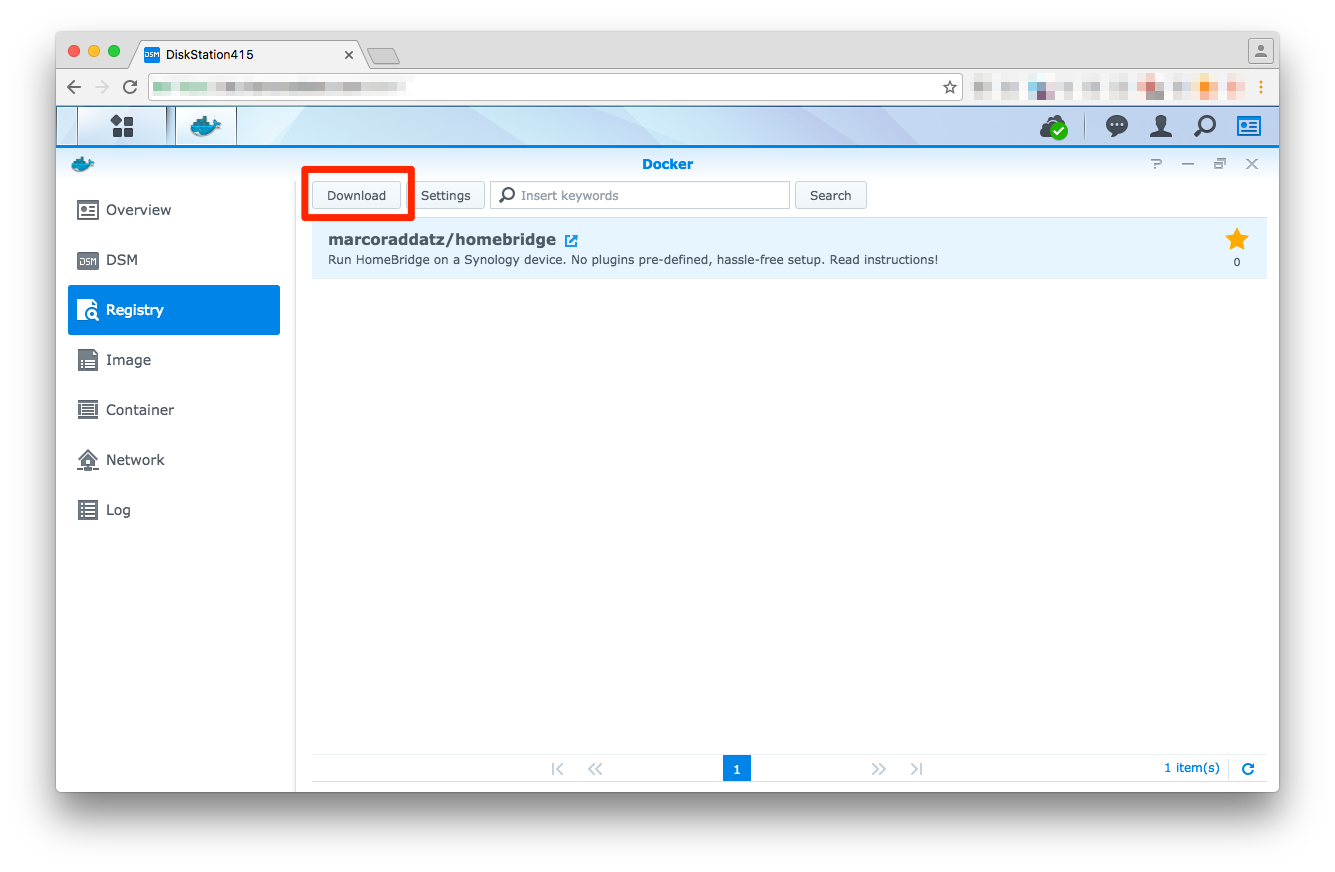
1. Download Image
First of all, login to your Synology DSM, open Docker and download marcoraddatz/homebridge from within the registry.
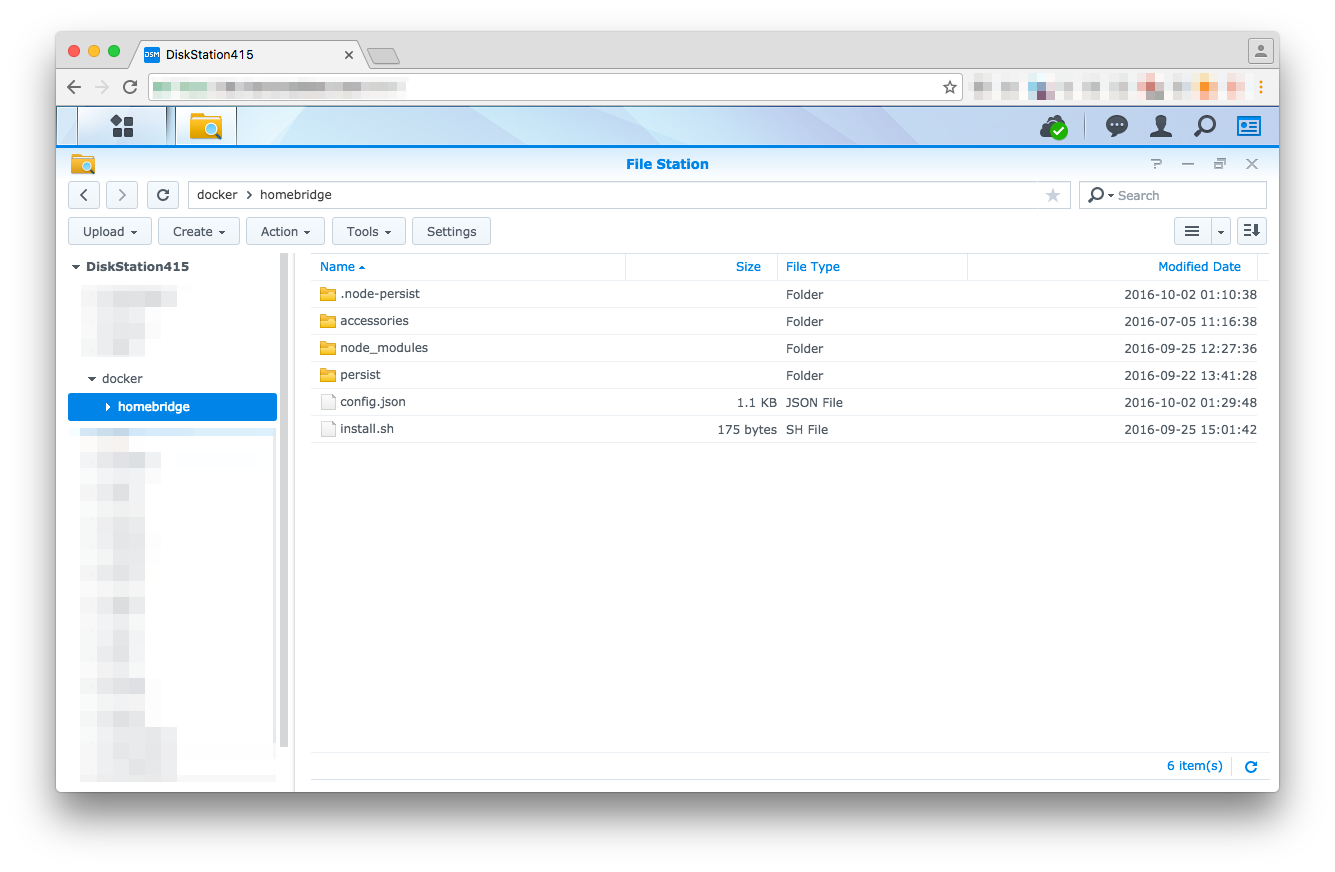
2. Prepare your scripts
Create a folder via DSM File Station at /volume1/docker/homebridge and put your config.json and either your package.json or install.sh (recommended) in there. If you'd like to develop an own plugin or debug Homebridge, also copy the .env file.
Here are two examples of how your setup files may look like:
package.json
{
  "name": "DiskStationHomeBridge",
  "description": "HomeKit support for the impatient.",
  "version": "0.1.1",
  "license": "ISC",
  "dependencies": {
    "homebridge-harmonyhub": "0.2.0-alpha",
    "homebridge-netatmo": "^0.0.4",
    "homebridge-nukiio": "^0.0.3",
    "homebridge-synology": "^0.1.0"
  }
}
install.sh
Note that you can also use this file to install server dependencies!
#!/bin/bash

npm install -gs homebridge-harmonyhub
npm install -gs homebridge-netatmo
npm install -gs homebridge-nukiio
npm install -gs homebridge-synology
Since version 2.1 all commands get executed as root, so this is a good place to install missing dependencies.
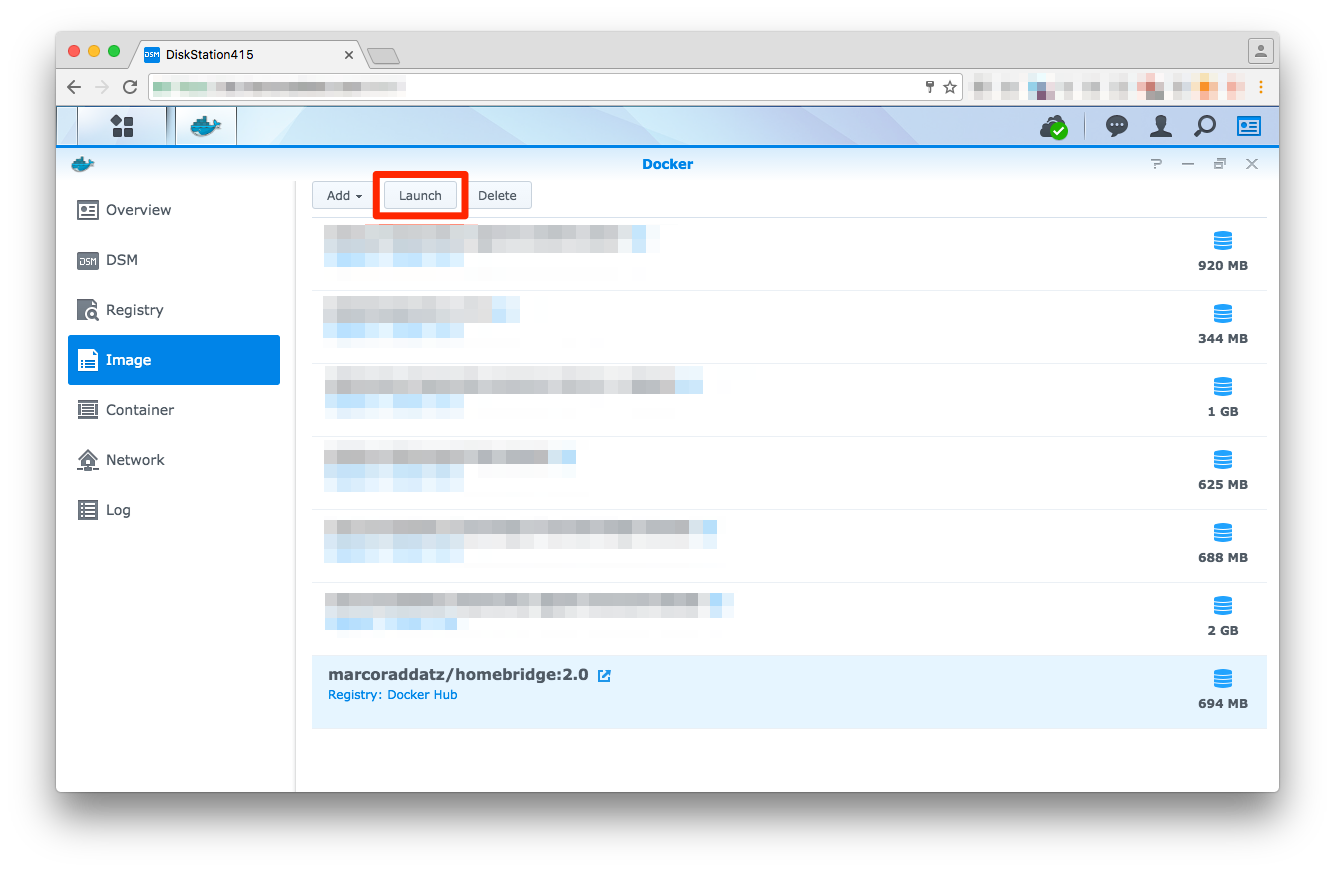
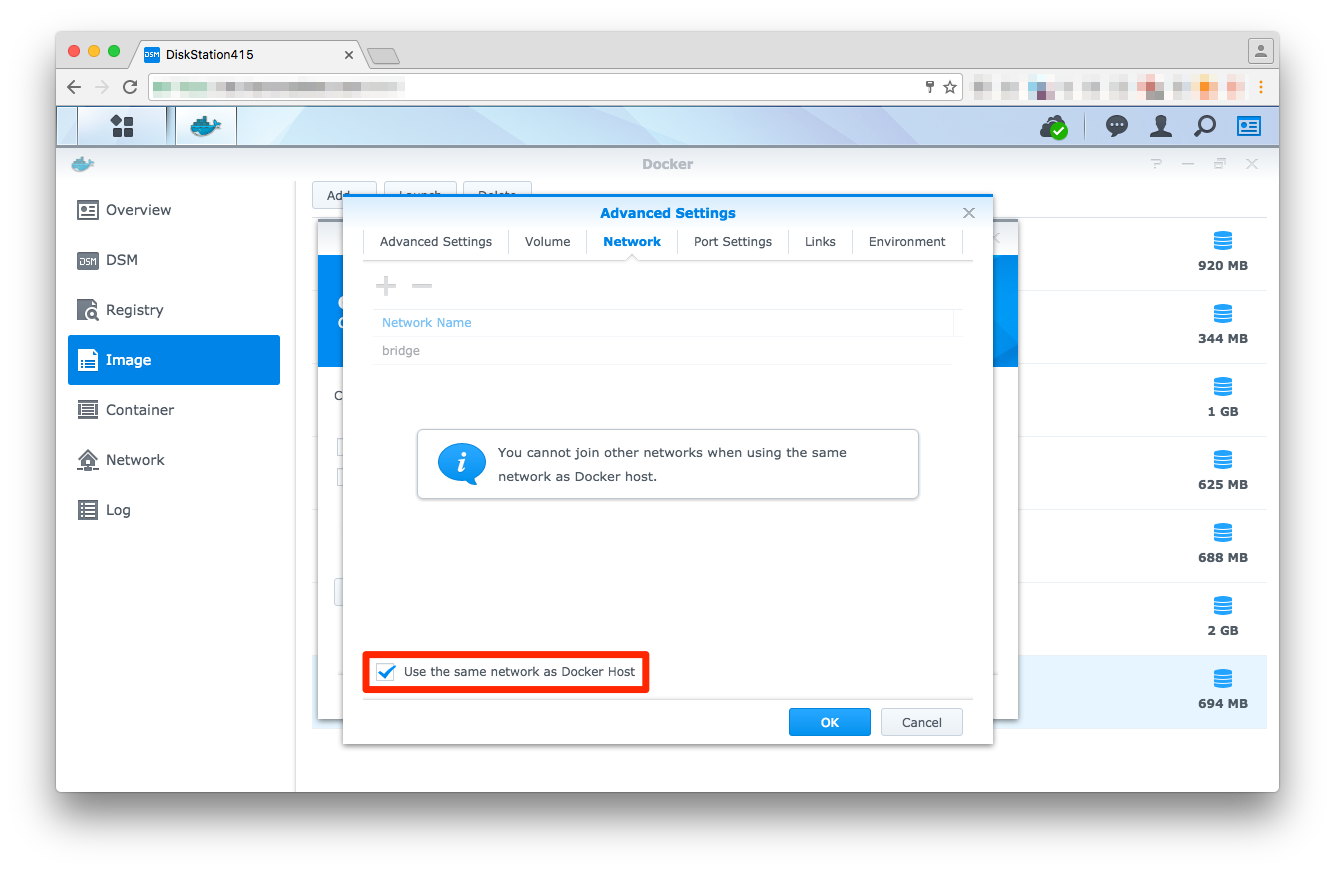
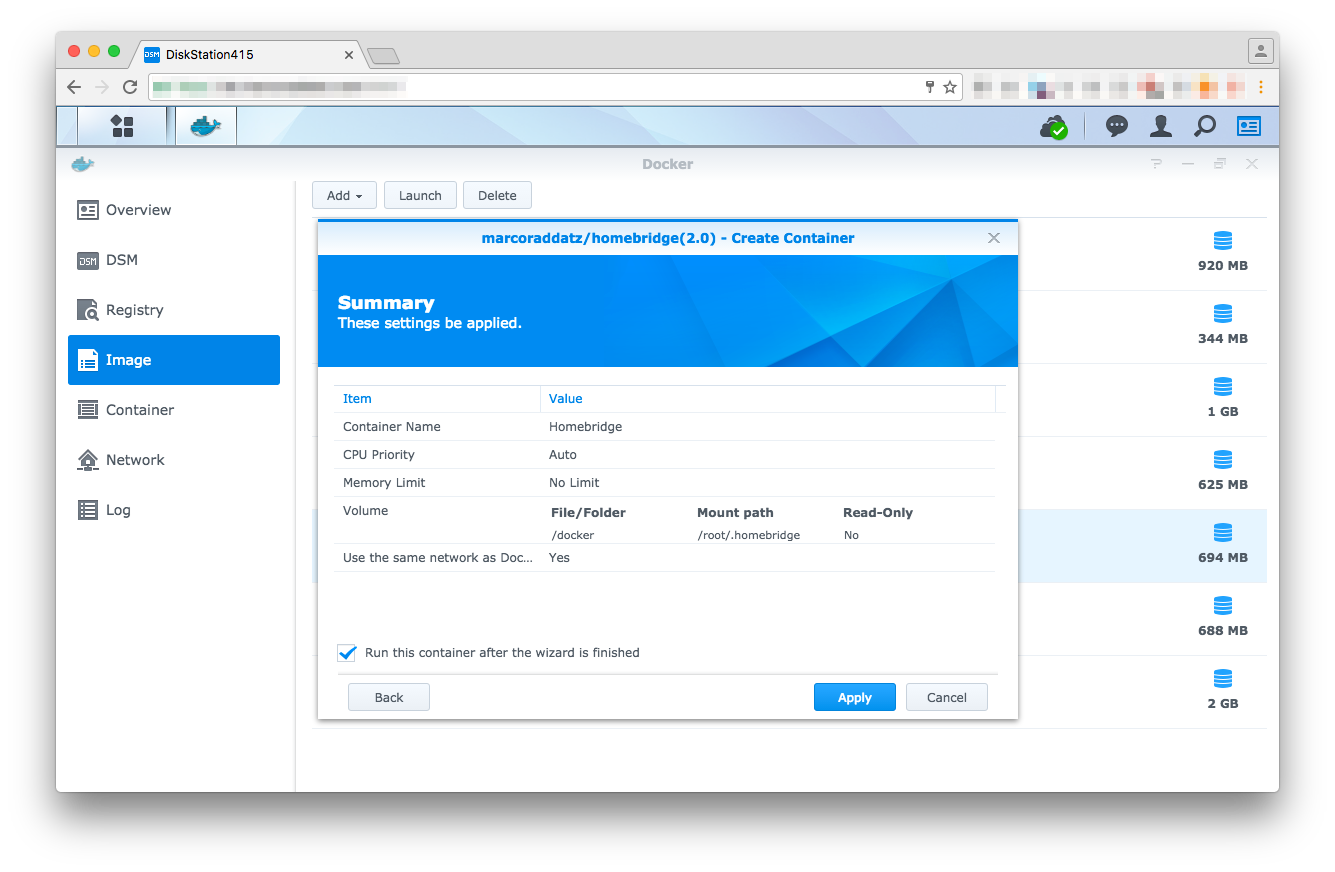
3. Start Container
Once the plugins have been set up, the Docker container is ready to launch.
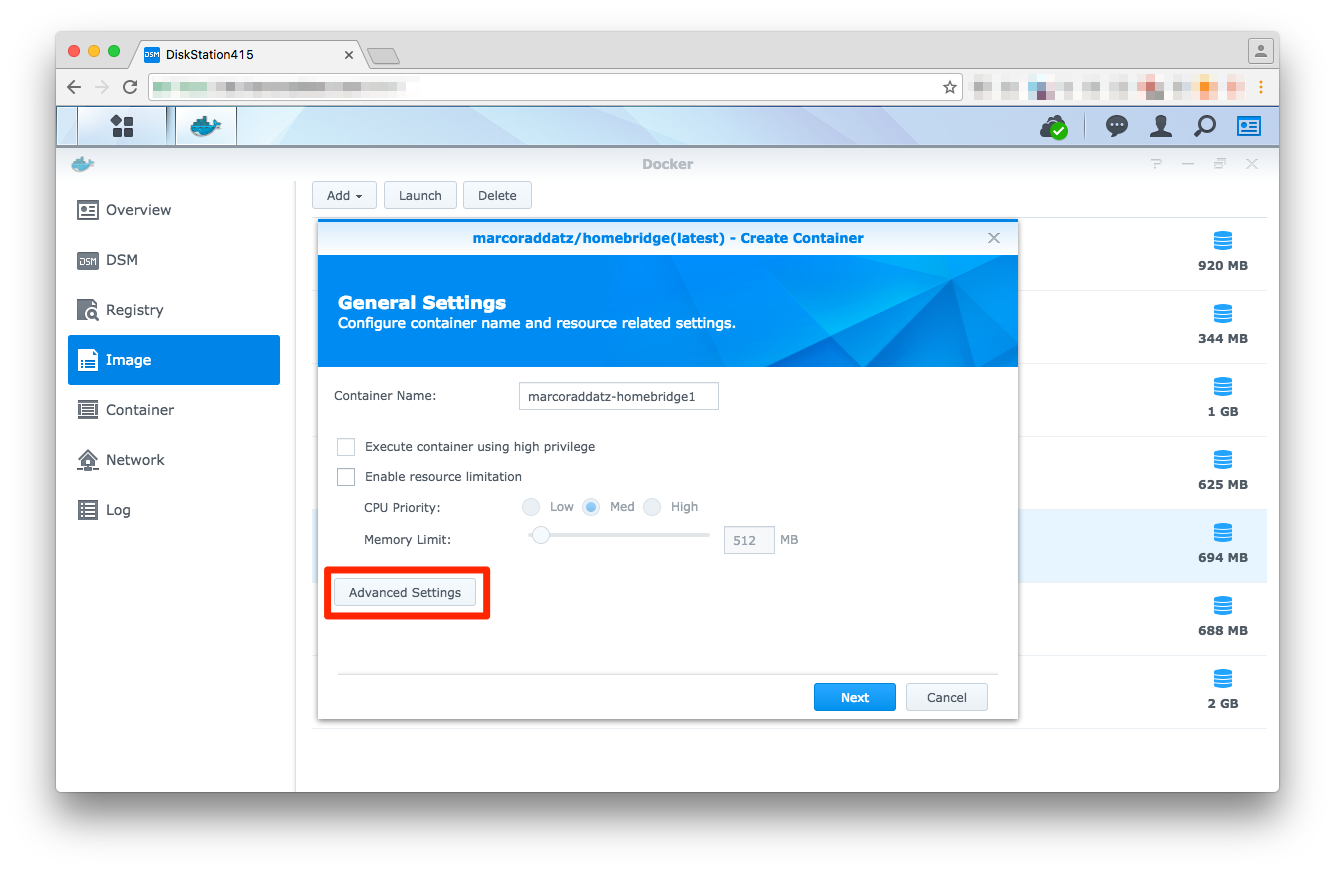
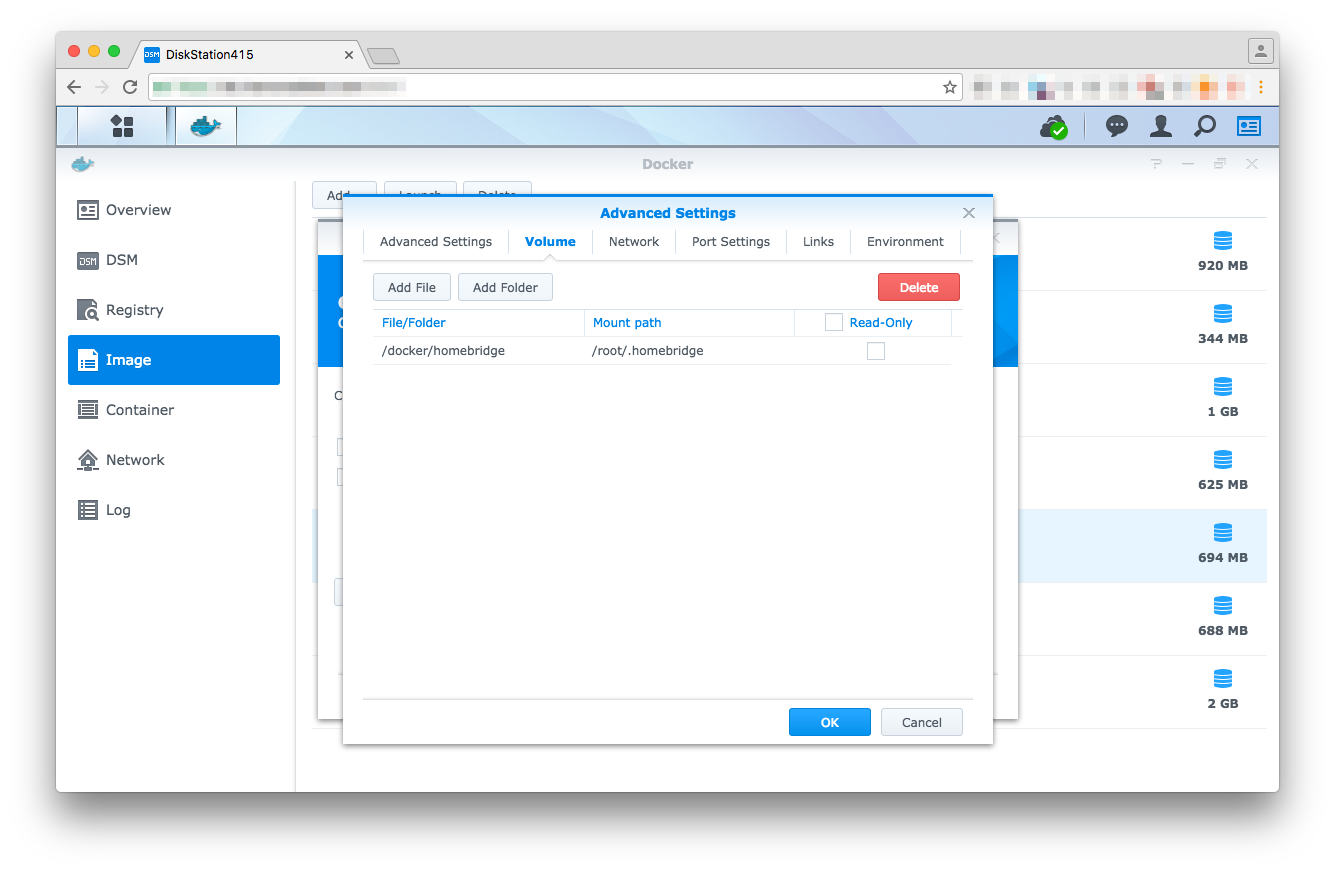
Link the /volume1/docker/homebridge to /root/.homebridge, otherwise, the configuration files won’t be loaded (within DSM the path is only shown as /docker/homebridge.
Once you launch (or restart) the container, Homebridge and all its dependencies will get installed. To verify that Homebridge is running or if an error occurs, you can use the container's log (Container → Details → Log) to receive further information on the process.
Command line
There are many Docker commands that can be run via the homebridge.sh script. Please have a look at the file, it should be self-explaining.
Plugin development
If you intend to develop a plugin or Homebridge is not running as it's supposed to, you might want to start Homebridge with debugging options. To do so, copy the sample .env file to /volume1/docker/homebridge and set the desired environment. Don't forget to place your plugins manually under /volume1/docker/homebridge/plugins and (re-) start the container. See the Homebridge docs for details.
.env options
All .env variables are optional.
HOMEBRIDGE_ENV
- production (default)
Starts Homebridge without any options. - development
Starts Homebridge with plugin support. - debug
Starts Homebridge with plugin support and maximum debugging info. - production-insecure
Starts Homebridge with HTTP support. - development-insecure
Starts Homebridge with plugin support and HTTP support. - debug-insecure
Starts Homebridge with plugin support, HTTP support and maximum debugging info.
HOMEBRIDGE_TIMEZONE
Manually set a timezone. (This environment variable is equal to Linux' TZ variable.) See https://en.wikipedia.org/wiki/List_of_tz_database_time_zones for valid options. If no timezone is set, UTC will be used.
HOMEBRIDGE_VERSION
To avoid breaks with either new Homebridge releases or iOS updates, you can force the installation of a specific Homebridge version. HOMEBRIDGE_VERSION accepts any release tag (f.e "0.4.17") or valid NPM version range.
Troubleshooting
In case, that Homebridge doesn't run as expected, please follow these steps for debugging:
1. Avoid multiple Homebridge instances
A lot of issues come through multiple Homebridge instances. Conflicts might require you to completely re-setup Homekit on your iOS devices! Always make sure, there's only one Homebridge instance running on your network at once!
2. Verify your config.json
Many issues appear because of invalid JSON. Before you open a ticket, please make sure that the syntax is ok. A good way to verify your config is to use the jsonlint.com validator.
3. Disable Plugins
Most issues aren't related to this package, nor to Homebridge -- they are created by outdated plugins or wrong configuration. This package focuses on making Homebridge run as easy as possible. So if Homebridge runs without any plugins, enable them step by step until you find out, which plugin creates the error. You should then contact the plugin's creator.
4. Open ports
Make sure that ports 5353 and 51826 (both TCP) aren't blocked by your firewall.
5. Set a hostname (Synology only)
To avoid conflicts with other devices, set the DS_HOSTNAME variable in the .env file to your DiskStation's server name (uncomment it first!). The value should exactly match the server name as shown under Synology DSM Control Panel -> Info Centre -> Server name. It should contain no spaces or special characters.
6. Adjust paths (Non-Synology only)
If you're using a non-Synology device, you might need to adjust the paths to your config (/volume1/docker/homebridge).
7. Search the GitHub issues
Before opening a new issue on GitHub, please use the search function to avoid duplicates.
License
This project is licensed under Apache License V2 (see LICENSE).
Changelog
Changes can be found in the CHANGELOG.md.
Thanks
- Chris Brandlehner
- Parker Smith
- Christian Haugen