React Native in-app subscriptions made easy
What is react-native-purchases?
React Native Purchases is a client for the RevenueCat subscription and purchase tracking system. It is an open source framework that provides a wrapper around StoreKit, Google Play Billing and the RevenueCat backend to make implementing in-app purchases in React Native easy.
Features
| RevenueCat | |
|---|---|
| Server-side receipt validation | |
| Webhooks - enhanced server-to-server communication with events for purchases, renewals, cancellations, and more | |
| Subscription status tracking - know whether a user is subscribed whether they're on iOS, Android or web | |
| Analytics - automatic calculation of metrics like conversion, mrr, and churn | |
| Online documentation up to date | |
| Integrations - over a dozen integrations to easily send purchase data where you need it | |
| Well maintained - frequent releases | |
| Great support - Help Center |
Requirements
The minimum React Native version this SDK requires is 0.58.
Installation
ExpoKit projects of version 33 or higher can successfully use react-native-purchases. If you haven't upgraded, you can follow the instructions here to upgrade.
If you're planning on ejecting from Expo, upgrade your expo version first, THEN eject. It'll save you a whole lot of hassle.
Add the library to the project
$ npm install react-native-purchases --save
or
$ yarn add react-native-purchases
Link library to the project
$ react-native link react-native-purchases
Additional iOS Setup
If your project uses Cocoapods
If your project already uses Cocoapods to install iOS dependencies, common in ExpoKit projects, linking the library should have added it to the podfile. If it hasn't, add the following to your project's podfile to reference the library from your node_modules folder:
pod 'RNPurchases', :path => '../node_modules/react-native-purchases'
    :inhibit_warnings => true
In your ios folder, run pod install. If you've just upgraded ExpoKit, you might need to upgrade cocoapods to the newest version: sudo gem install cocoapods.
Manual installation (if your project doesn't use CocoapodsCreate)
Make a Framework Reference in your project
- Drag
Purchases.frameworkandPurchasesHybridCommon.frameworkfrom theRNPurchasessub-project under the libraries section to the outer project and create a reference.
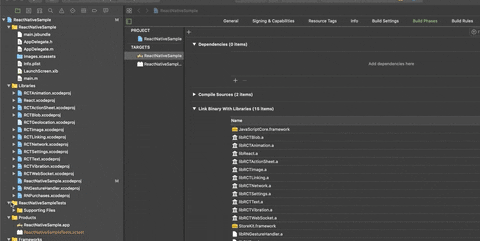
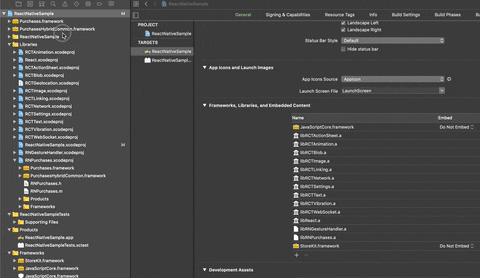
Add iOS Frameworks to Embedded Binaries
- In Xcode, in project manager, select your app target.
- Select the general tab
- Drag
Purchases.frameworkandPurchasesHybridCommon.frameworkfrom your project to the Embedded Binaries section
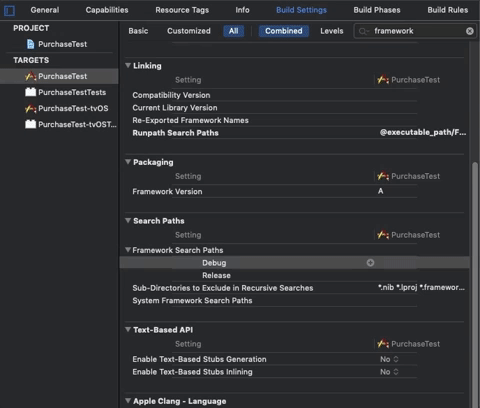
Add $(PROJECT_DIR)/../node_modules/react-native-purchases/ios to Framework Search paths in build settings
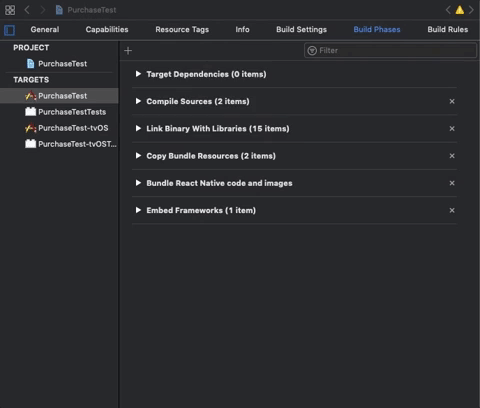
Add Strip Frameworks Phase
The App Store, in it's infinite wisdom, still rejects fat frameworks, so we need to strip our framework before it is deployed. To do this, add the following script phase to your build.
- In Xcode, in project manager, select your app target.
- Open the
Build Phasestab - Add a new
Run Script, name itStrip Frameworks - Add the following command
"${PROJECT_DIR}/../node_modules/react-native-purchases/ios/strip-frameworks.sh"(quotes included)
Link static library
The react-native link command should have added the libRNPurchases.a library to the Linked Frameworks and Libraries section of your app target. If it hasn't add it like this:

Getting Started
Please follow the Quickstart Guide for more information on how to use the SDK