- Features
- Example Pipeline
- Demo Video
- Before you start
- Configure the CICD-Server
- Start the CICD-Server
- Quick Start
- Configure ServiceNow to 'build' a scoped application
- Prerequisites
- Contribute
- Dependencies
This is an example implementation of the CICD-Server for ServiceNow. It allows to send changes, captured in Update-Sets in ServiceNow, to a CICD pipeline including running ATF test cases in ServiceNow.
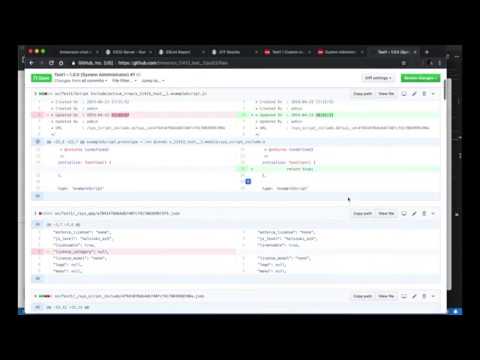
Example build results:
More information about the core module can be found here https://github.com/bmoers/sn-cicd#cicd-server-for-service-now-v3
A video recording from the K18 session, where CICD-Server version 1 was presented, can be found here.
In this example you're going to:
- extract an scoped app into a GIT repository
- run a CICD pipeline to test the code quality, document the code and run ATF tests
- do code review
- raise a pull request against master (the status of the code in the production environment)
- deploy the scoped app
As the code is stored in a GIT repo, one can also hook in other standard CICD build tools to trigger further actions like performance or UAT.
The process requires two environment. One acts as 'source' (the development environment) - one acts as 'master' and 'target' environment. This is just to simplify the demo setup.
A recording of this how-to can be found on YouTube:
- Minimum 2 ServiceNow instances. 1 as DEV, 1 as PROD.
- The Dev instance has a running and validated MID server.
- The host of the CICD-Server (in this demo this is your PC) can be reached by the MID server.
- A GitHub account.
- A Access token for your this GitHub account with the privileges repo, admin:repo_hook, admin:org_hook. (Goto https://github.com/settings/tokens to configure one)
- Git client installed and configured to connect to Github via SSH
- The CICD Integration app installed on all ServiceNow instances.
- ATF Test Suite Execution is enabled on all environment under 'Automated Test Framework > Administration > Properties'
- Install the latest version of the CICD-Integration app from GitHub on all ServiceNow environments (source and target). Alternatively you can clone the CICD-Integration repo and install the update-set from ./update_set/CICD Integration.xml.
- On all instances configure following users: (for testing purpose you can also skip below and use the 'admin' user later in the configuration)
- Create a CI-User account in ServiceNow and assign it to the
cicd_integration_usergroup. - Create a ATF-User account in ServiceNow and assign it to the
atf_test_*andimpersonatorgroups. - Create a CD-User account in ServiceNow and assign it to the
admin! group
- Create a CI-User account in ServiceNow and assign it to the
Navigate to 'CICD Integration > Properties' and enable at least following:
- CICD Integration enabled
- Show CICD UI action in scoped apps
- Trigger CICD process on update set 'complete'
- Enter the CICD-Server Host Name (the host / IP of your PC). If you use Docker or have a MID server running on your PC this can be https://localhost:8443
- Connect to CICD-Server via MID Server
- Show JSDoc button in UI to support developer to comment code correctly
- Pull Request Proxy switch
- Get a copy of this repo:
git clone git@github.com:bmoers/sn-cicd-example-v3.git

cd sn-cicd-example-v3- Rename
example.envto.env
This file contains all credentials and necessary information to run the CICD-Server. Make sure you never commit it to a GIT repo.
Assuming two ServiceNow environments
- dev12345.service-now.com The Dev instance (<dev12345-dev-instance;>)
- dev23456.service-now.com The Prod instance (<dev23456-prod-instance;>)
Add following information to the .env file:
# ----- !! REQUIRED !! -----
# github credentials
CICD_PR_USER_NAME=<github-user-id>
# the github token (or password)
CICD_PR_USER_PASSWORD=<******************************>
# ServiceNow host name - this host acts as proxy to route the web hooks to the CICD-Server (via MID)
CICD_WEBHOOK_PROXY_SERVER=<dev12345-dev-instance>
# Secret (see cicd-integration properties in ServiceNow)
CICD_WEBHOOK_SECRET=5VCSj9SPRH3EbNHrBSTf
#GitHub project information
CICD_GIT_HOST=git@github.com:<github-user-id>/
CICD_GIT_URL=https://github.com/<github-user-id>/

# default git master source - let this point to production environment
CICD_GIT_MASTER_SOURCE=<dev23456-prod-instance>.service-now.com

# user to run the ATF test cases
CICD_ATF_TEST_USER_NAME=admin
CICD_ATF_TEST_USER_PASSWORD=<***********>

# user to load update-set form 'source' and 'master'
CICD_CI_USER_NAME=admin
CICD_CI_USER_PASSWORD=<***********>

# user to deploy update-set to 'target'
CICD_CD_USER_NAME=admin
CICD_CD_USER_PASSWORD=<***********>

# deployment target definition
CICD_CD_DEPLOYMENT_TARGET=<dev23456-prod-instance>.service-now.com

# ----- ** OPTIONAL ** -----
# toggle slack integration
CICD_SLACK_ENABLED=true
# webhook url
CICD_SLACK_WEBHOOK=https://hooks.slack.com/services/<********>/<********>/<*****************************>
In sn-cicd-example-v3 run:
npm installand:
npm startThe web-UI is available under http://localhost:8080/ (depending of your server-options settings).
If HTTPS is enabled you might see a "page not secure" warning. This is due to self signed certificates in this example project.
It requires a run at least one build to display any information.
If you'd like to run the CICD-Server as a Docker container please have a look at the Dockerfile. Use Docker Compose to also start a MID server.
TL;DR:
- Install the example application
- open the App (/sys_app.do?sys_id=CICD%20Test%20Application)
- click on "Build this Application [CICD]"
Or create the app manually:
- Logon to a ServiceNow instance dev12345.service-now.com (get a personal developer instance on https://developer.servicenow.com/).
- Create a Scoped App.
Navigate to "System Applications > Applications" and select "New > Start from scratch". Name it "CICD Global Test App". - Add some files to it like e.g business rule or script include. Use the the UI Action with the 'Box' icon to automatically comment the code.
- In the left navigation, open this Application definition again. "System Applications > Applications", click on "CICD Global Test App".
- Trigger the CICD Pipeline by just clicking on the "Build this Application [CICD]" UI Action.
- This will now :
- extract the code from 'master'
- create an 'update set' branch and extract the update set into it
- build the app (EsLint, JsDoc, Mocha [ATF])
- Once all test are 'green' a pull request will be raised against master.
- If you have Slack enabled in the configuration above you'll see corresponding messages
- Navigate now to GitHub, open the pull request and review the code.
- If you're happy with it, approve the pull request.
- The 'update set' branch will be merged with the 'master' branch.
- The application (update set) is now automatically deployed.
If you want to contribute to this project, please fork the core project https://github.com/bmoers/sn-cicd
The project is designed to use extensions. The core project (bmoers/sn-cicd) contains all 'shared' features. Customization which are dedicated to your ServiceNow environment or CICD pipeline shall be added to the 'extending' project (like this one.)
https://github.com/bmoers/sn-cicd-example-v3
--> extends
https://github.com/bmoers/sn-cicd
--> uses
https://github.com/bmoers/sn-project
https://github.com/bmoers/sn-rest-client