This repo is a demo to implement a logging system.
The origin article is on Medium: Implementing a Centralized Logging System: A Journey at Gogoout.
This demo is to show how to implement a logging system.
- Demo1: Fluent Bit simply collects loggings and output to stdout
- Demo2: Fluent Bit collects loggings and output to Elasticsearch and Kibana
- Demo3: Fluent Bit collects loggings and output to AWS OpenSearch
- Trace Analytics: traces demo and append
trace-idandspan-idto loggings by OpenTelemetry. - Frontend Logging: Demo showing the logging process Frontend -> Nginx -> Fluent Bit
test-app-stdoutprints log ondocker logsfluent-bitcollects logs and prints onstdout
# Deploy container (Ctrl-C to exit)
docker compose up

# Test for frontend log
curl -d '{"log_name": "myapp-click","click_text": "action.goBack","uid": "1", "time": "2023-04-07T06:58:28.123456"}' -XPOST -H "content-type: application/json" http://localhost:9880/frontendTag# Delete all containers and relevant images
docker compose down --rmi alltest-app-stdoutprints log ondocker logsfluent-bitcollects logs and sends toelasticsearch
# Deploy container (Ctrl-C to exit)
docker compose -f docker-compose-es.yaml up

# Test for frontend log
curl -d '{"log_name": "myapp-click","click_text": "action.goBack","uid": "1", "time": "2023-04-07T06:58:28.123456"}' -XPOST -H "content-type: application/json" http://localhost:9880/frontendTag# pattern: 'myapp-order-*'
curl -X POST "localhost:5601/api/index_patterns/index_pattern" -H 'kbn-xsrf: true' -H 'Content-Type: application/json' -d'
{
"index_pattern": {
"title": "myapp-order-*",
"timeFieldName": "@timestamp"
}
}
'
# pattern: 'myapp-login-*'
curl -X POST "localhost:5601/api/index_patterns/index_pattern" -H 'kbn-xsrf: true' -H 'Content-Type: application/json' -d'
{
"index_pattern": {
"title": "myapp-login-*",
"timeFieldName": "@timestamp"
}
}
'
# pattern: 'myapp-click-*'
curl -X POST "localhost:5601/api/index_patterns/index_pattern" -H 'kbn-xsrf: true' -H 'Content-Type: application/json' -d'
{
"index_pattern": {
"title": "myapp-click-*",
"timeFieldName": "@timestamp"
}
}
'- Visit
Kibanato see data: http://localhost:5601/app/discover#/
# Delete all containers and relevant images
docker compose -f docker-compose-es.yaml down --rmi alltest-app-stdoutprints log ondocker logsfluent-bitcollects logs and sends toAWS OpenSearch
- Terraform
- AWS CLI: will be used in dashboard-index-pattern.tf and terraform provisioners for
aws cognito-identity set-identity-pool-roles.
# Terraform (AWS OpenSearch)
cd tf
cp terraform.tfvars.example terraform.tfvars
terraform init- Manually configure
terraform.tfvars:cognito_master_email: As a default master user, with full access permission in OpenSearch.cognito_limited_email: As a default limited user, with only dashboard and readall permission in OpenSearch.- You will receive password via email.
- Use email and password to login
OpenSearch Dashboardwhen instance is ready.
- Setup AWS env variables
cat <<EOF >> ~/.zshrc

# AWS variables for Terraform and aws-cli
export AWS_ACCESS_KEY_ID="<YOUR_ACCESS_KEY>"
export AWS_SECRET_ACCESS_KEY="<YOUR_SECRET_ACCESS_KEY>"
export AWS_DEFAULT_REGION="us-west-1"
export TF_VAR_access_key=${AWS_ACCESS_KEY_ID}
export TF_VAR_secret_key=${AWS_SECRET_ACCESS_KEY}
export TF_VAR_region=${AWS_DEFAULT_REGION}
EOF
source ~/.zshrc
- Apply Terraform
# If there is an error related to service_linked_role, just comment all "aws_iam_service_linked_role" in `tf/main.tf`.
# Note: It takes about 30 minutes to complete
terraform apply -auto-approve
# Config for fluent-bit (only for demo)
terraform output > tf_output.log
cd ..
- If you face an error
Domain already associated with another user pool, which means someone has already used this cognito custom domain as his authentication domain. This domain needs to be globally unique, as the pattern ishttps://{domain}.auth.{region}.amazoncognito.com. - To address this issues, either one of options is available:
- Set another OpenSearch domain:
- Modify your domain in
terraform.tfvarsto use another domain name. (in our terraform, cognito custom domain is the same as your OpenSearch domain) - If so, remember to edit
log_nameprefix in all logs, including test-app-stdout/MyAppLogging.py, andcurlin the next section.- e.g.
"log_name": "myapp-click"->"log_name": "YOUR_DOMAIN_NAME-click"
- e.g.
- Modify your domain in
- Set another user pool domain:
- Modify tf/modules/opensearch/cognito.tf -> resource
aws_cognito_user_pool_domain->domain.
- Modify tf/modules/opensearch/cognito.tf -> resource
- Set another OpenSearch domain:
- If you face an error
# Deploy container (Ctrl-C to exit)
docker compose -f docker-compose-aws.yaml --env-file ./tf/tf_output.log up

# Test for frontend log
curl -d '{"log_name": "myapp-click","click_text": "action.goBack","uid": "1", "time": "2023-04-07T06:58:28.123456"}' -XPOST -H "content-type: application/json" http://localhost:9880/frontendTag- Go to AWS OpenSearch Dashboard (two options).
- URL
cat ./tf/tf_output.log- check
AWS_OPENSEARCH_DASHBOARDvalue, visit as a url (withhttps://prefix)
- AWS Console
- AWS
OpenSearch->YOUR_OPENSEARCH_DOMAIN_NAME->OpenSearch Dashboards URL
- AWS
- URL
- Login with either
masterorlimitedemail and password (password is sent to the email). - Go to
Discoverto view the results.
- New cognito user without a user group has no permissions to enter the dashboard.
- Go to AWS OpenSearch Dashboard (See Discover Data).
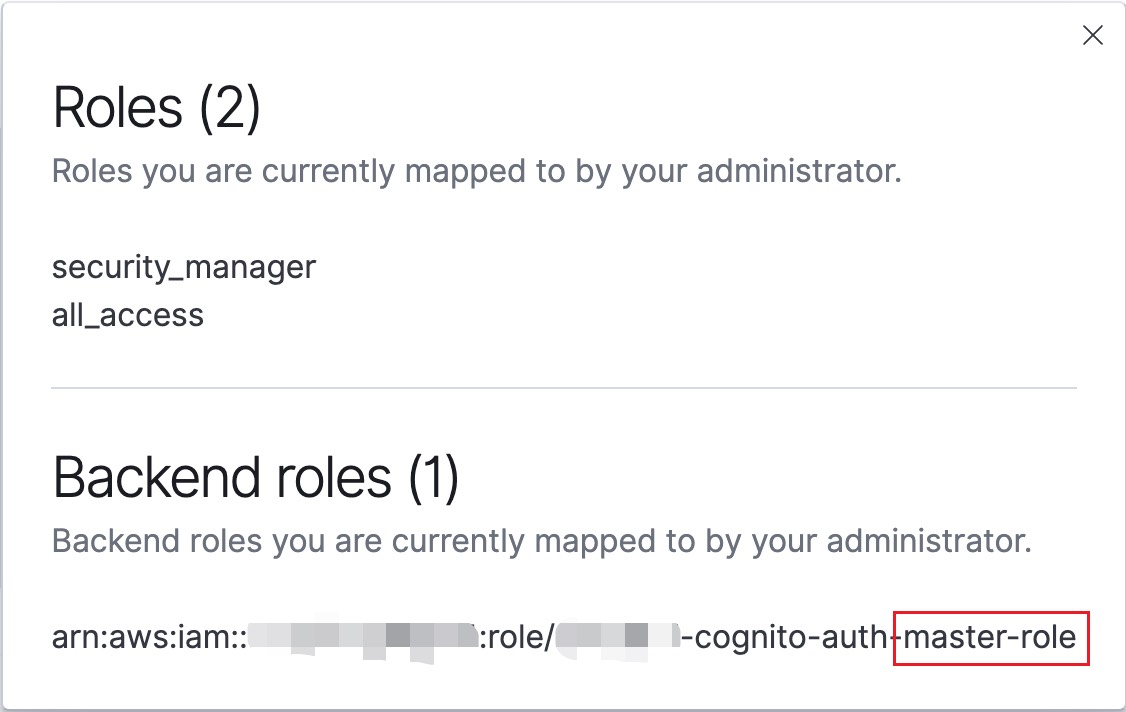
- Login with master email and password (password is sent to the email).
- Check out permissions (upper-right icon ->
View roles and identities).
- Go to AWS OpenSearch Dashboard (See Discover Data).
- Login with limited email and password (password is sent to the email).
- Check out permissions (upper-right icon ->
View roles and identities).
# Delete all containers and relevant images
docker compose -f docker-compose-aws.yaml --env-file ./tf/tf_output.log down --rmi all
# Delete AWS resources
## Note: It takes about 30 minutes to complete
cd tf
terraform destroy -auto-approveSee trace-analytics
See frontend-logging


