This are the configurations I need to setup a new MacOS development environment in a new machine.
Full Guide - https://dev.to/bloodf/macos-environment-setup-guide-developer-edition-56i
After finishing your MacOS initial setup, you will face that default screen with many default Apple apps on the docker, and nothing configured.
Now let's configure the MacOS with the basic settings.
These are configurations done in the MacOs settings.
- Remove most applications from Dock
- Automatic Hide
- Medium Dock
- Gennie Effect (Gives me that nostalgic feeling)
- "Double-click a window's title bar to"
zoom - Minimize windows into application icon
- Animate opening applications
- "Show recent applications in Dock" off
- "Show indicators for open applications" on
- "Automatically hide and show the menu bar on desktop" off
- "Automatically hide and show the menu bar in full screen" on

- Nightshift

- Touch ID
- FileVault Enabled
- Disable
- Text
- Disable "Add full stop with double-space"
- Disable "Use smart quotes and dashes"
- Use
"for double quotes - use
'for single quotes

- Hot Corners: disable all

-
Create a
Developerfolder inside your home folder~(It adds a custom icon to the folder) -
Sidebar:
-
activate all Favorites
-
move Library to Favorites
-
Add Drive and Dropbox to Favorites
-
Add
Developerfolder to Favorites -
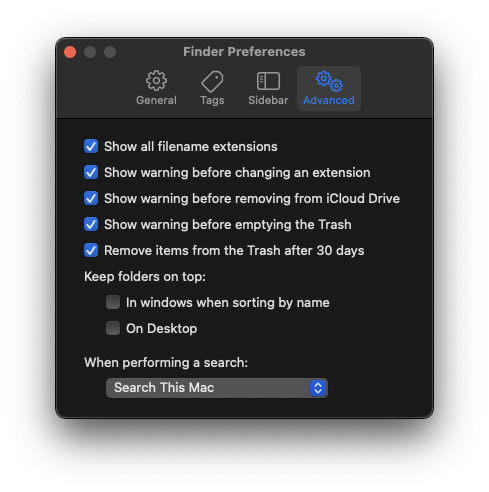
Hide all Tags
-
Show all Filename Extensions
-
Remove Items from Bin after 30 Days


(Affects Finder and other Applications)
- Show Hidden Files
defaults write com.apple.finder AppleShowAllFiles YES; killall Finder;- Clear .DS_Store files
sudo find / -name .DS_Store -delete; killall Finder- Take screenshots as jpg (usually smaller size) and not png
defaults write com.apple.screencapture type jpg; killall Finder;- Show Library folder
chflags nohidden ~/Library; killall Finder;- Show path bar
defaults write com.apple.finder ShowPathbar -bool true; killall Finder;- Show status bar
defaults write com.apple.finder ShowStatusBar -bool true; killall Finder;First you need to setup your apple account to be able to use the AppStore, then you will need to download some applications.
After installing the Xcode, you need to open it for the first time accept some licenses to use it fully.
- Install xCode Terminal Tools
xcode-select --install- Accept xCode License
sudo xcodebuild -license acceptFirst we need to disable Gatekeeper in order to use non-Apple signed applications.
sudo spctl --master-disable- Homebrew
/usr/bin/ruby -e "$(curl -fsSL https://raw.githubusercontent.com/Homebrew/install/master/install)"Now we need to update everything in Homebrew, after the first installation.
brew updateHere the list is divided into categories so you can know what kind of application you are installing.
brew install --cask \
  firefox \
  google-chrome  \
  brave-browser \
tor \brew install --cask \
calibre \
spotify \
handbreak \
vlc \
imagemagickbrew install --cask \
github \
sourcetree \
visual-studio-code \
docker \
sequel-pro \
postman \
insomnia \brew install --cask \
skype \
telegram \
whatsapp \
slack \
discord \brew install --cask \
hyperswitch \
rectangle \
keka \
kekaexternalhelper \
caffeine \
maccy \For the applications that don't have an install cask present in Homebrew
curl -s 'https://api.macapps.link/pt/firefoxdev-dropbox-filezilla-istatmenus' | shFor the touchbar MacBook only
brew install mtmrAfter installation, copy the content from the file
/mtmr/profile.json, click in the MTMR icon in the menu bar, and click inPreferences, there paste the content, save and restart the application.
brew install jesseduffield/lazydocker/lazydocker- Install
brew install git-lfs git-flow- Set the configuration file
ln -s $(pwd)/git/gitconfig ~/.gitconfigAfter executing this commands, configure your Git user settings
git config --global user.name "Your Name"
git config --global email "you@your-domain.com"You can add more colors to your git log output by executing this command.
git config --global alias.lg "log --color --graph --pretty=format:'%Cred%h%Creset -%C(yellow)%d%Creset %s %Cgreen(%cr) %C(bold blue)<%an>%Creset' --abbrev-commit"ln -s $(pwd)/ssh/config ~/.ssh/configThe first step is to install the basic fonts needed in our terminal.
# Nerd Fonts
brew tap homebrew/cask-fonts
brew install font-hack-nerd-font- Copy Fonts
cp -r "$(pwd)/fonts/"* ~/Library/FontsThe oh my Zsh project is a good terminal add-on to be added in our development environment.
- Install
# Oh My ZSH
sh -c "$(curl -fsSL https://raw.githubusercontent.com/robbyrussell/oh-my-zsh/master/tools/install.sh)"- Set the configuration file
ln -s $(pwd)/zsh/zshrc ~/.zshrcHere are some plugins that can be used alognside with Oh My Zsh, and make your experience much better.
- zsh-autosuggestions
git clone https://github.com/zsh-users/zsh-autosuggestions ~/.oh-my-zsh/custom/plugins/zsh-autosuggestions- zsh-syntax-highlighting
git clone https://github.com/zsh-users/zsh-syntax-highlighting.git ~/.oh-my-zsh/custom/plugins/zsh-syntax-highlighting- zsh-async
git clone https://github.com/mafredri/zsh-async ~/.oh-my-zsh/plugins/async- zsh-nvm
git clone https://github.com/lukechilds/zsh-nvm ~/.oh-my-zsh/custom/plugins/zsh-nvm- powerlevel10k
git clone --depth=1 https://github.com/romkatv/powerlevel10k.git $ZSH_CUSTOM/themes/powerlevel10kln -s $(pwd)/zsh/p10k ~/.p10k.zsh- yarn-auto-complete
git clone https://github.com/g-plane/zsh-yarn-autocompletions ~/.oh-my-zsh/custom/plugins/zsh-yarn-autocompletionsTo add some new configurations and special tools to the terminal, you can execute the following command to import those.
- Set the configuration file
ln -s $(pwd)/bash/bash_alias ~/.bash_alias
ln -s $(pwd)/bash/bash_profile ~/.bash_profile
ln -s $(pwd)/bash/bashrc ~/.bashrc
ln -s $(pwd)/bash/android ~/.android
ln -s $(pwd)/bash/brew ~/.brew
ln -s $(pwd)/bash/flutter ~/.flutter
ln -s $(pwd)/bash/nvm-load ~/.nvm-load
ln -s $(pwd)/bash/yarn-autocompletions.yml ~/.yarn-autocompletions.yml
Attention, because inside the files
.android, .flutter, .nvm-loadthere are specific configurations, with version based, please edit the file with the appropriate version before loading those.
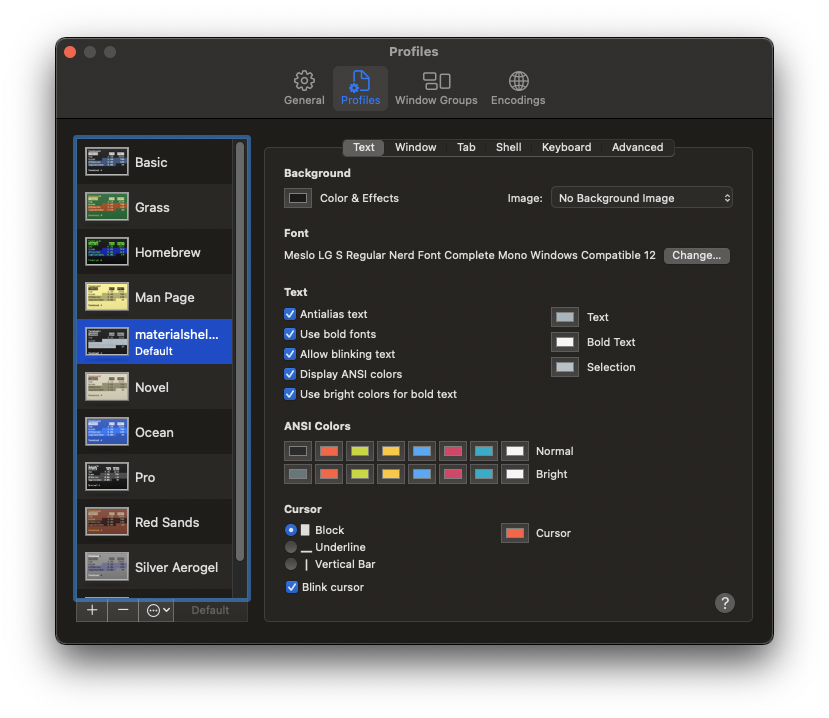
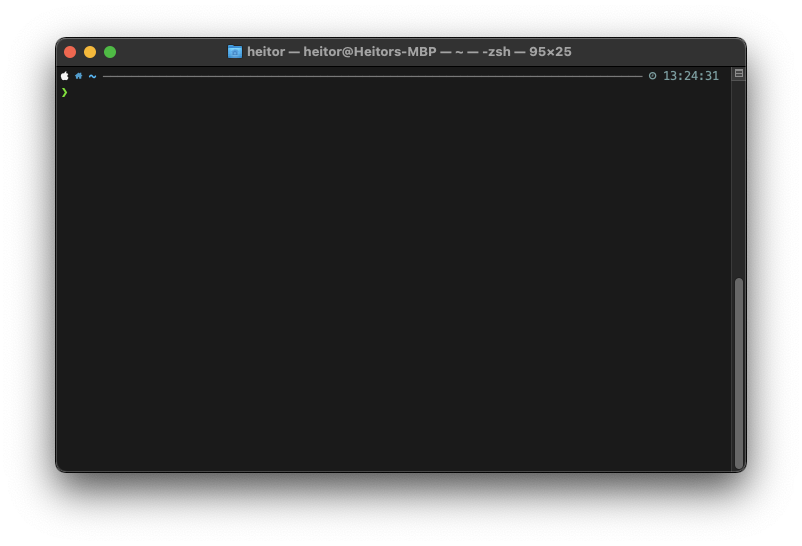
You can change the Mac Terminal application appearance with some quick steps.
- Terminal > Settings Tab
- Click "Gear" icon
- Click Import...
- Select the
materialshell-dark.terminalfile - Click Default
There is no better way to manage node than using NVM
# NVM
curl -o- https://raw.githubusercontent.com/nvm-sh/nvm/master/install.sh | bashTo update NVM to a newer version, you can use this command without losing your globals. Remember to change <version> to the version you want installed.
nvm install <version> --reinstall-packages-from=$(nvm current)
nvm use <version>
nvm alias default <version>I prefer to use Yarn as the package manager, but this is a personal selection.
# Yarn
curl -o- -L https://yarnpkg.com/install.sh | bashSet the defaults value for your NPM user
npm set init.author.name "your name"
npm set init.author.email "you@example.com"
npm set init.author.url "example.com"
Then login into NPM with
npm adduser- Instal JDK
Visit Oracle JDK Download and download the latest JDK
- Install Gradle
brew install gradle- Install
brew install flutter
brew install cocoapods- Check for errors with Flutter doctor
flutter doctor- Install
brew install awscli aws-keychain aws-elasticbeanstalk